How to choose furniture for a bath?
Bath - a great place to relax. When its construction ends, it remains the case for small - to choose the right furniture. How to do it and how to build it with your own hands - below there are answers to these and other questions you are interested in ..
Special features
A selection of furniture for the bath - an important part of the arrangement. Furniture should be chosen based on your financial range and design preferences. However, as in any other case, there is some basic set of furniture.
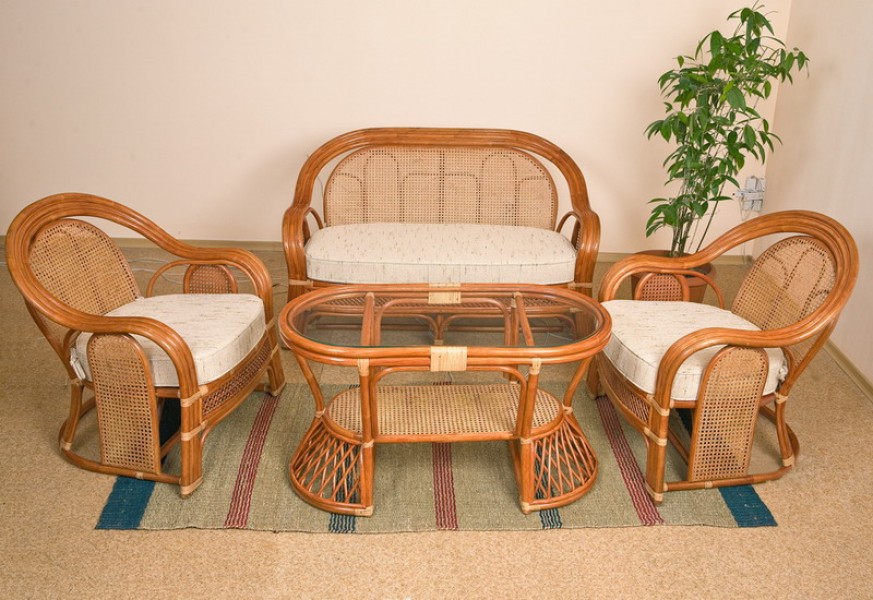
Now quite popular furniture for the bath and to give rattan. You can also pick up a set of antique. Such a self-made washing house will certainly be exclusive.
Before you create an environment, you must complete all the necessary drawings.
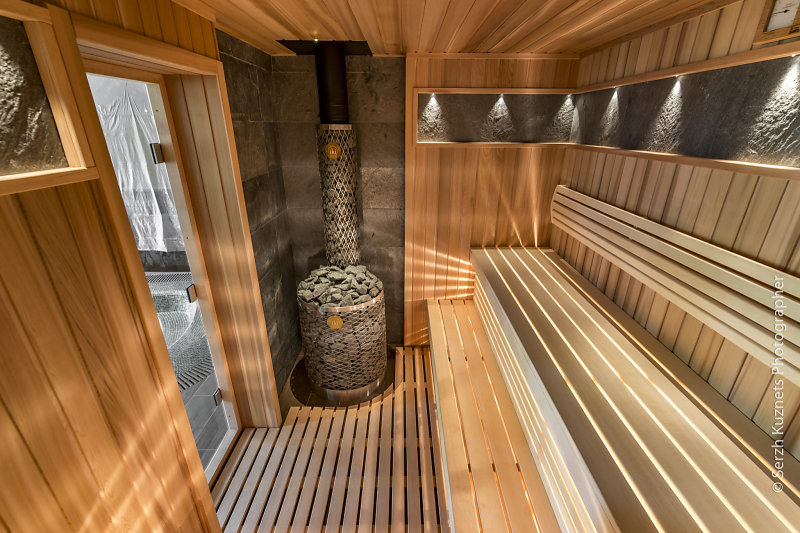
Steam room
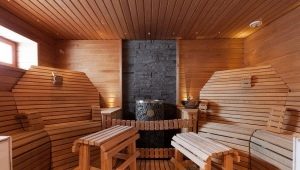
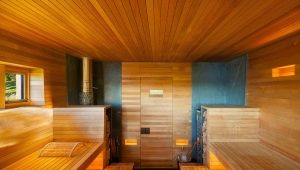
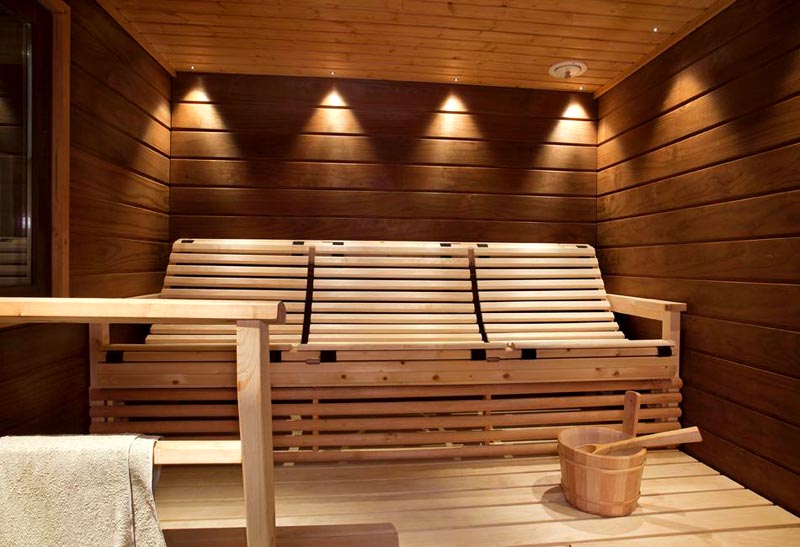
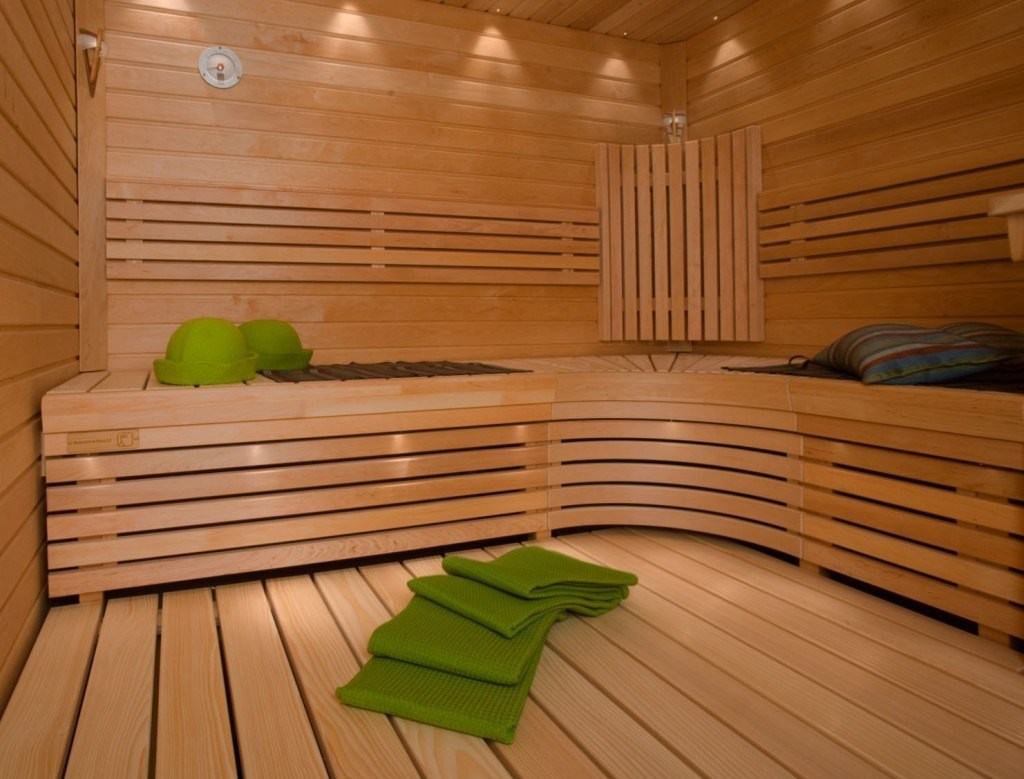
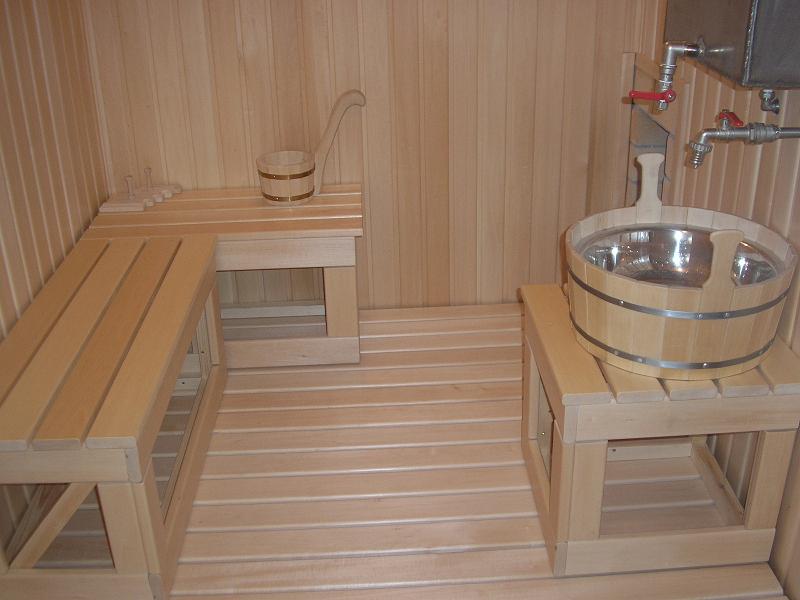
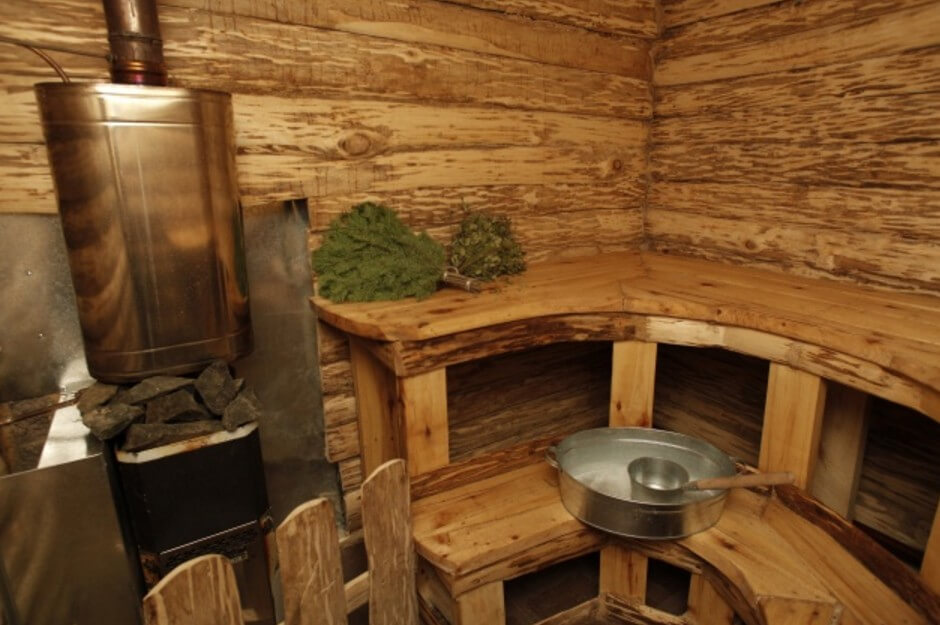
In the steam room you need to install shelves, and then without this steam room is not a steam room at all. Model and size should be selected based on your preferences and requirements. You can make the shelves in several rows, you can leave it single-stage. You can place it against one wall, or you can place it along two or three walls, forming the letters “G” or “P”. Also in the steam room you can place furniture such as wooden headrests and footrests. but experts do not advise much to clutter the steam roombecause you need proper air circulation, and unnecessary items of the headset can break it.
The shelves should be about a meter wide, and at least two meters in length (or better, because a person 180–190 centimeters in height will be more comfortable if the length exceeds two meters). The height of the shelf on average is eighty centimeters.
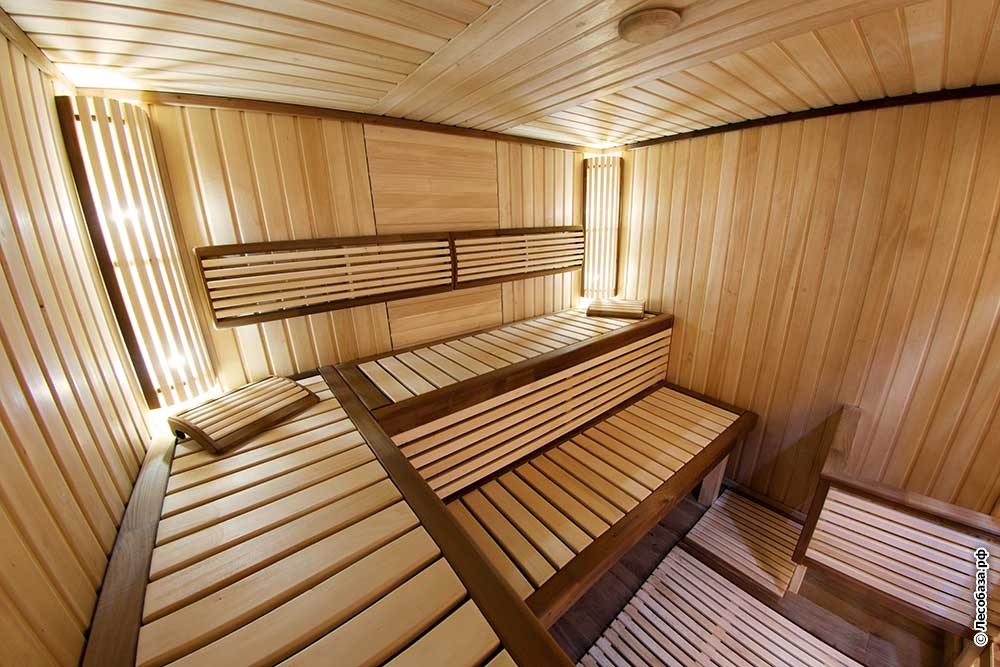
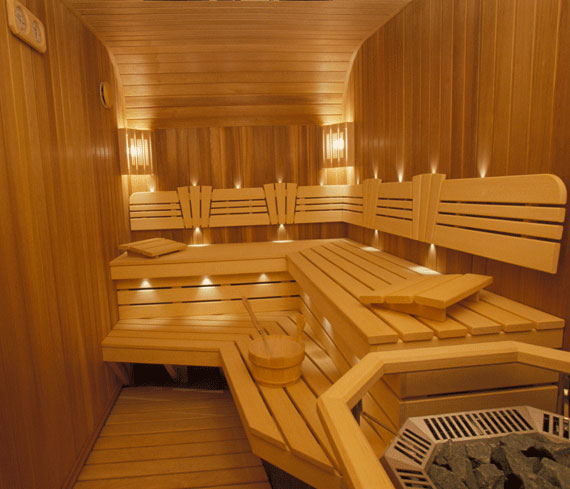
If among the users of your bath there are people with small stature, in order to climb on the shelves, you must have side benches.
The width of this headset should be approximately forty centimeters. This bench can be used as a seat.
Washing
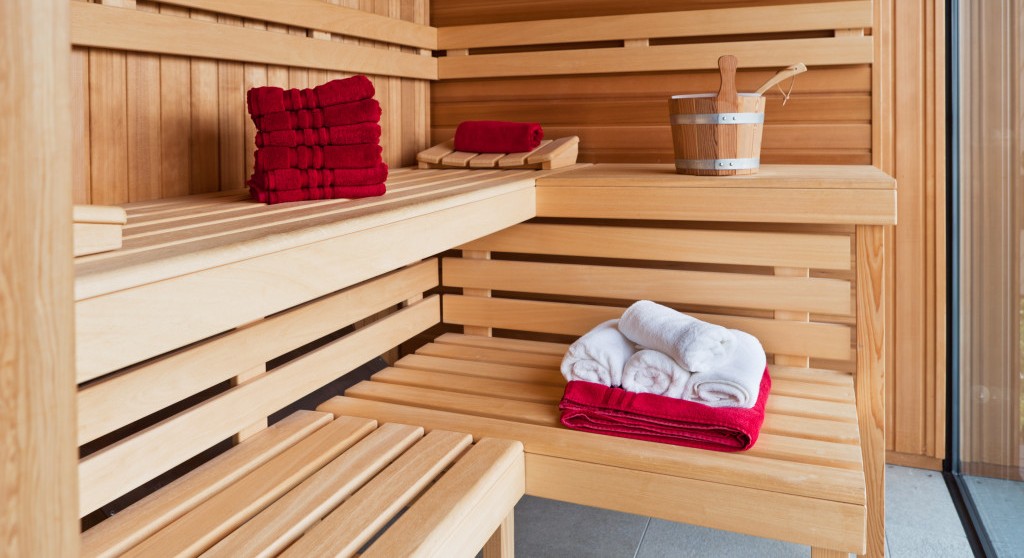
As a rule, instead of shelves, benches for seats and stools are installed in the sink as supports for basins and other bath accessories.
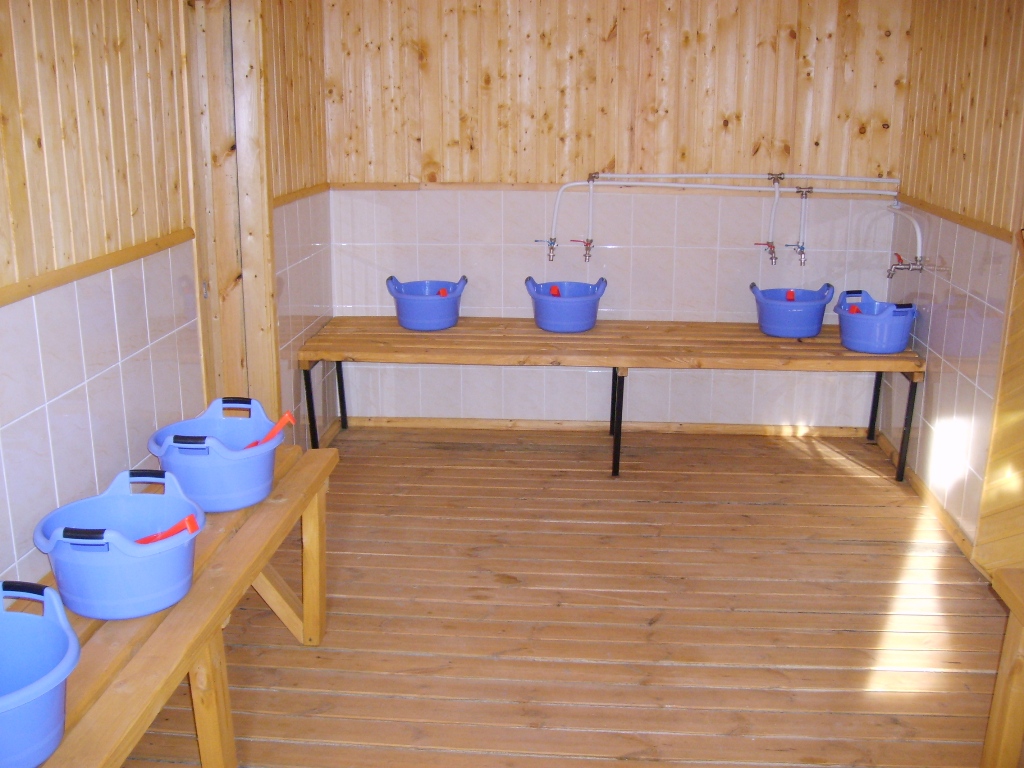
It is also necessary to install the hanger in a place inaccessible to water.
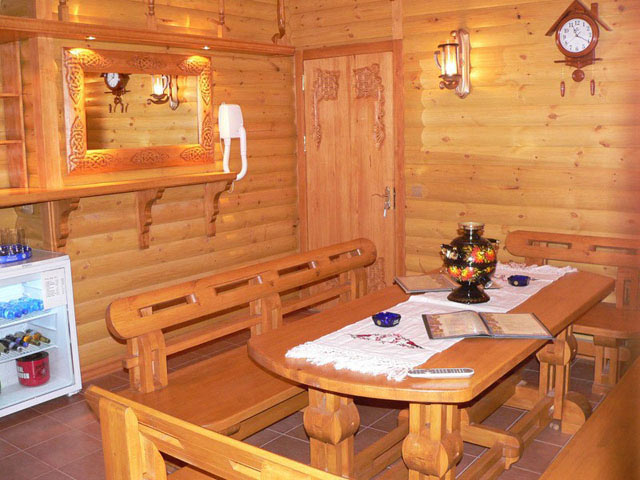
Restroom
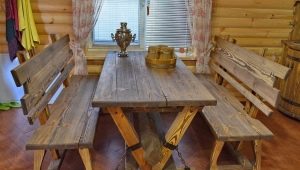
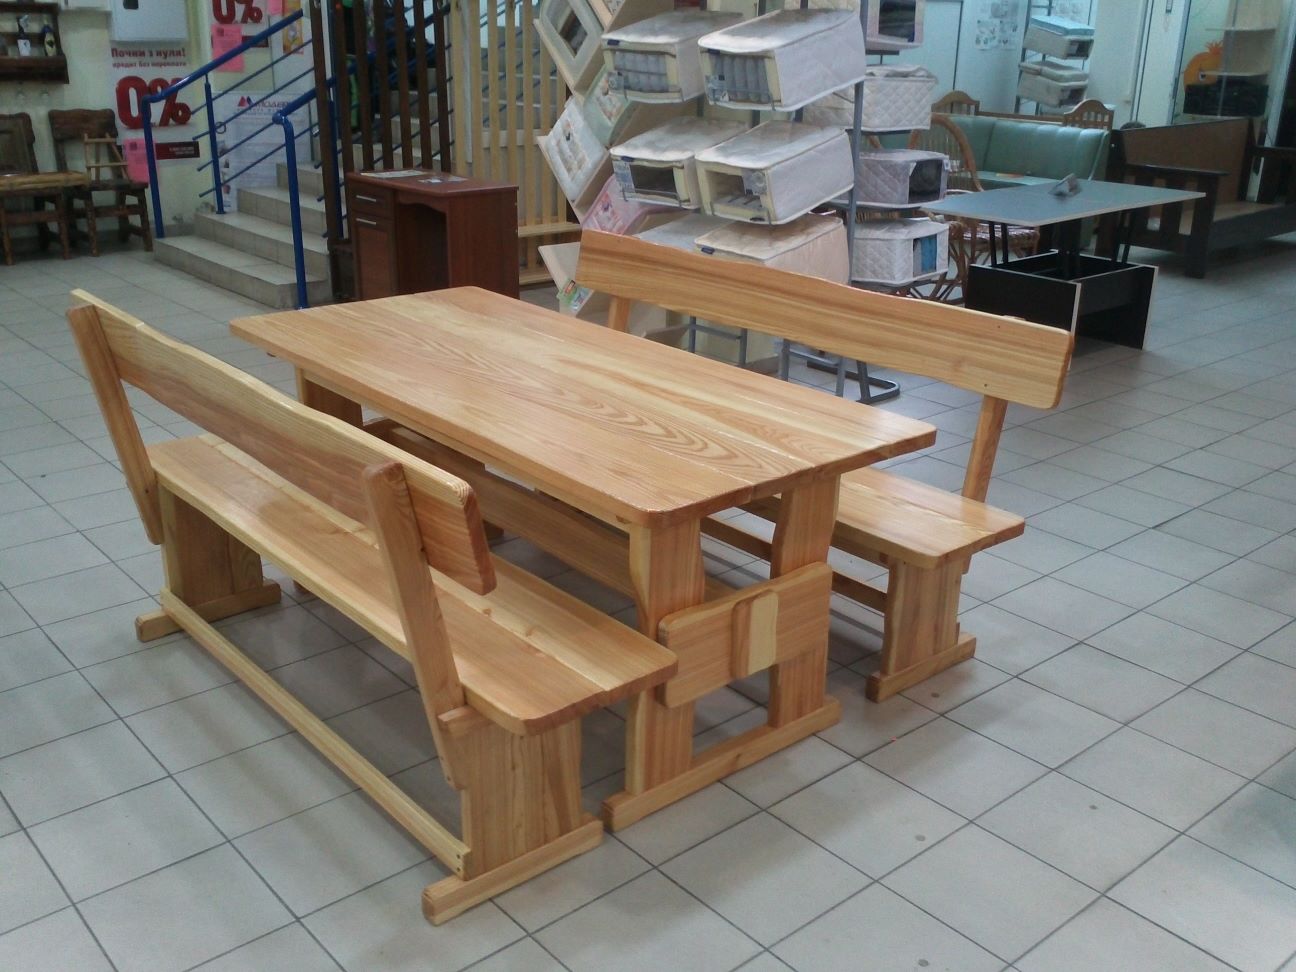
In general, the furniture in the lounge is selected based on the number of people who will use it. Here, of course, you need a table, benches, chairs or stools - depending on your preferences.

Materials
Wood species that can be used in creating the interior, a lot. However, not all of them are suitable for a bath or sauna.
Terms of use of wood in the bath:
- thermal conductivity must be small;
- the material should be easily processed;
- the material should not be any damage and defects in the form of cracks or resin pockets;
- The density of the tree should be high.
Coniferous trees for furniture in the bath, you can only use in rooms where there is not such high temperatures, that is, in the steam room they can not be used.
Only Canadian cedar among conifers can be used in a room with a high temperature, because its resin content is low. Hardwoods are well suited for placing the steam room.
The parameters of frequently used wood species are very diverse.
You should read them:
- Pine. It has a light shade, different strength and good density. Easy to handle. Moreover, it is a cheap material. The only negative - when heated will allocate resin (can not be used in the steam room).
- Spruce. It has a reddish tinge. It has a pleasant structure, easy workability and has a low and pleasant price. However, it also has a number of drawbacks: it is highly susceptible to rotting, contains a lot of resin and has a large number of knots, which is not good when used in a bath.
- Larch. It has a yellow color. It has a pleasant structure and high density. Resistant to the environment. Of the minuses: heavy in processing and can easily be damaged.
- Oak. It has gray and brown shades. The advantages of this breed include a pleasant texture, and high resistance to environmental adverse effects. Among the shortcomings: it has a large mass and it is rather difficult to process it.
- Ash. It has light shades. Of the positive qualities: will last for many years, flexible and has a pleasant texture. Of the negative characteristics: sudden changes in temperature can be detrimental to ash.
- Poplar. It has a sand tint. Of the positive characteristics can be called easy handling and possession of a small mass. Of the negative qualities can be noted a high susceptibility to rotting.
- Aspen. It has a light yellow tint. Of the positive characteristics can be noted high moisture resistance, which is important for use in the bath and easy processing. Of the negative qualities can be called short-lived. Also, over time, aspen is prone to darkening.
- Alder. It has pink and brown shades. Alder has a lot of positive qualities: it is a very soft, light and flexible material that is resistant to moisture, will not deform over time and will not dry out. Moreover, the alder has healing properties. And the negative sides are completely absent.
- Linden. Another great material. It has a light beige color. Of the positive qualities can be noted a pleasant smell, which is important in the bath, linden is easily processed, heat resistant, not prone to decay and also has healing properties, like alder. Negative qualities are also absent.
- Canadian cedar. It has a reddish-brown tint.Of the positive qualities, a pleasant texture is especially noted, the strength of this material that is not subject to rotting. Canadian cedar has a pleasant smell and also has healing properties for the human body. And he has only one negative aspect: the cost. This is an expensive type of wood.

It is necessary that the selected material is dry, dense and does not have any flaws. Raw materials are harder to process, and after drying, wood can change its shape. The surface of the tree should be smooth and level. The more responsible you go to the choice of wood, the longer your furniture will serve you.
Design
If you want to create a country style in your bath, you can and should use aged furniture. To give the headset a solid age, you just need to clean it from the old coating. After that, it is worthwhile to cover the “cleaned” furniture with paint or glaze. Using a sponge, we randomly remove a layer of paint to create a feeling of wear.
After all the above actions we cover the headsets with varnish to protect it from external influences.
To create a "native Russian bath", use linden.Choose tables with carved stands, make wicker chairs.
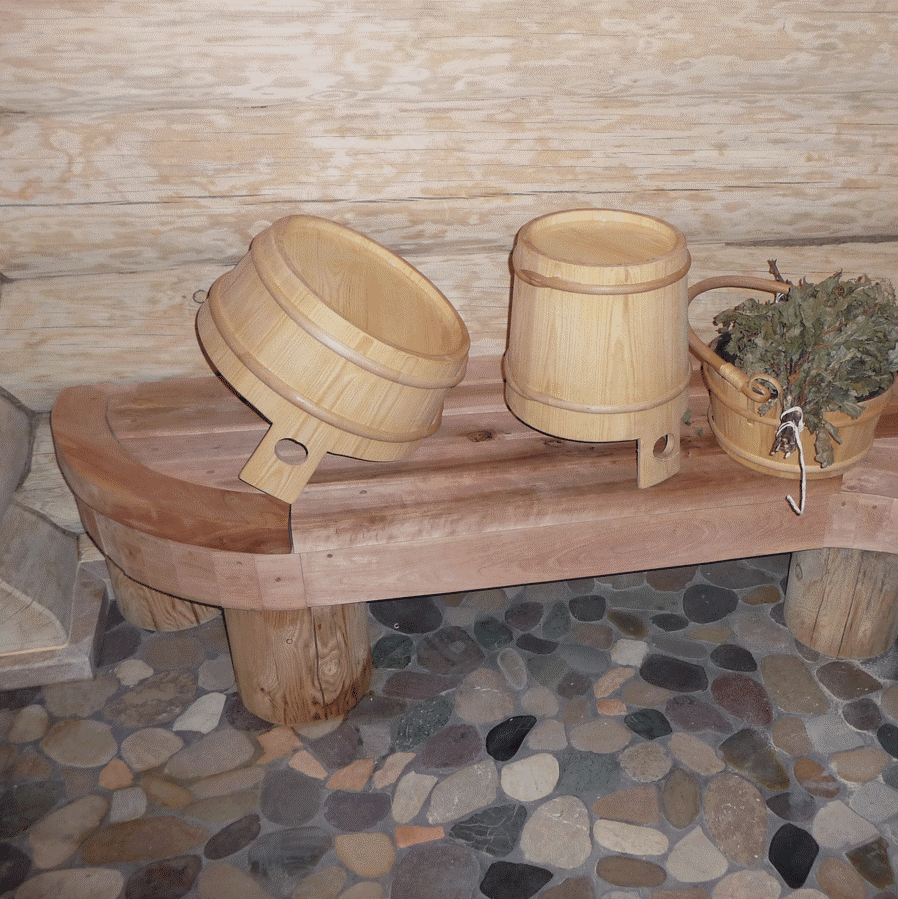
Add a designer zest: scatter around the bath area some elements in the form of birch brooms for the steam room and bunches of dry herbs.
At the peak of popularity is now a minimalist style. Wooden furniture and a minimum number of accessories will give the bath an ascetic style. This design is well suited for small baths, because with minimal headset availability, the space will visually expand.
How to do it yourself?
Even with not very much experience, you can make your own hands the simplest furniture for a bath.
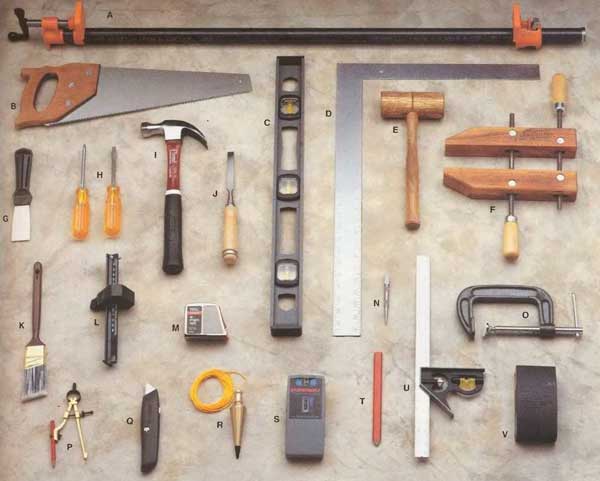
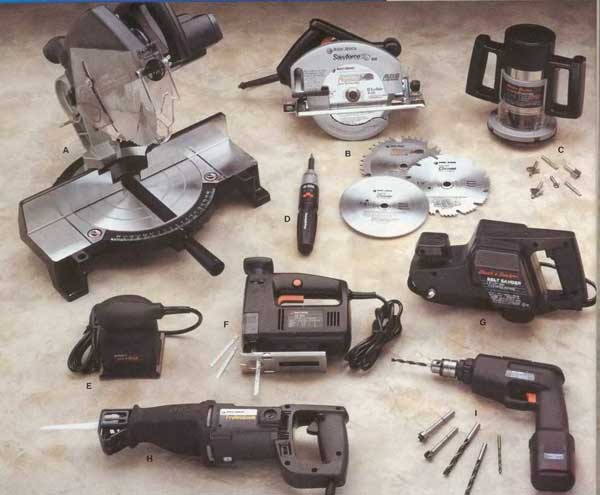
Tools that will be needed in the course of work:
- hammer;
- plane;
- drill;
- a circular saw;
- pliers;
- roulette;
- gon;
- sanding machine;
- clamps;
- set of cutters;
- hacksaw.
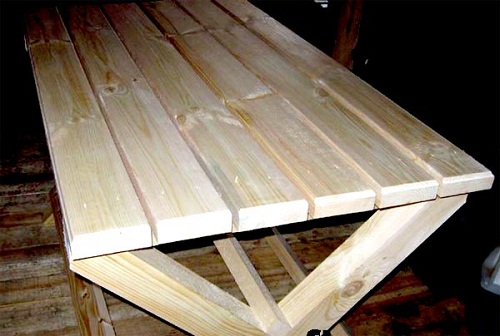
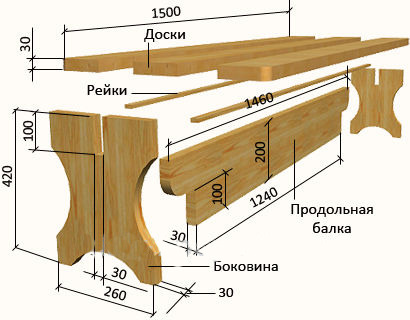
First you need to make a table. You will need:
- boards of 30 x 145 mm and 40 x 250 mm;
- wooden slats 40 x 40;
- bolts and "curly nails";
- antiseptic primer.

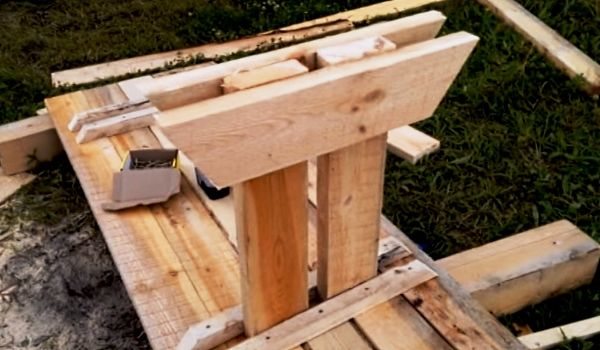
The assembly is carried out in a simple sequence:
- Saw boards of size 30 x 145 mm into four parts 1.2 m each. Make flanks on the right and left at an angle of 45 degrees.Stepping back 10 cm from the end of the blanks, cut off the excess material.
- Grind well as a workpiece. Smear all with antiseptic and let the boards dry out.
- Fold the blank crosswise.

When using clamps, mark where the fastening bolts will be. On each side there will be two bolts. Under fasteners also need to drill holes.
- Attach with the bolts our blanks. At a distance of a meter, install the legs. Make and attach two spacers from the remaining boards.
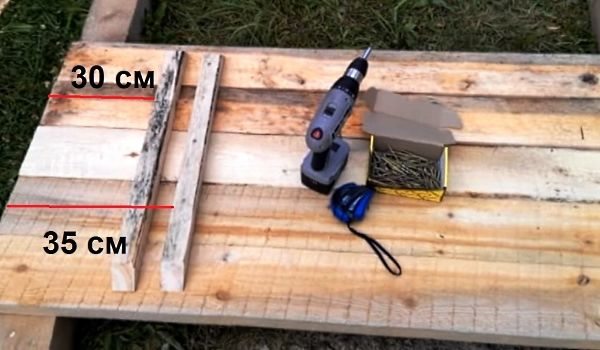
- From boards of a different size, cut or cut three lengths with a dimension of 1.75 m. Process the prepared lengths for the tabletop with a grinding machine. Smear the antiseptic and allow to dry.
- Reiki should be divided into two parts, measuring 77 cm. Treat with an antiseptic primer. Connect all the boards of the tabletop.
- Turn the finished worktop. Put it on the legs of the future table. Using screws, fix the result.
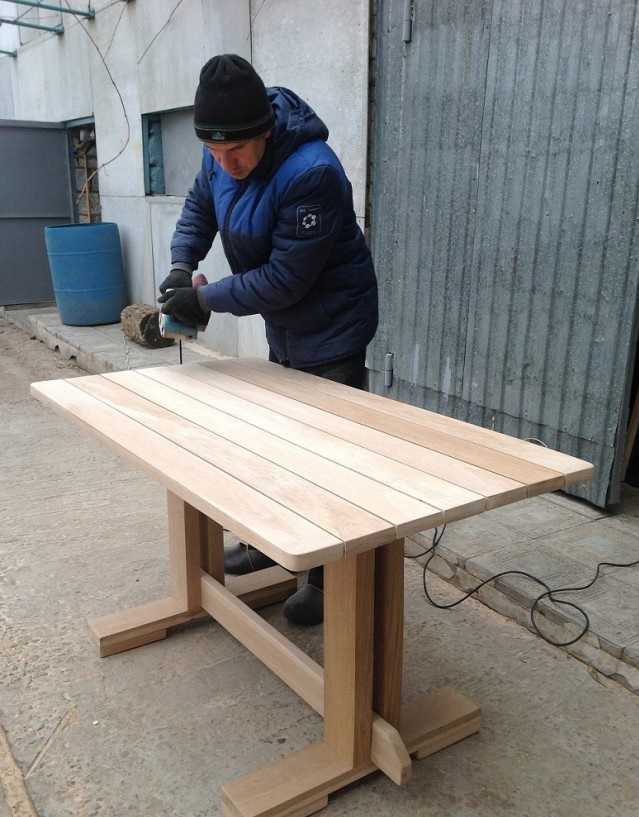
Now you can safely use your handmade work in the bathhouse.
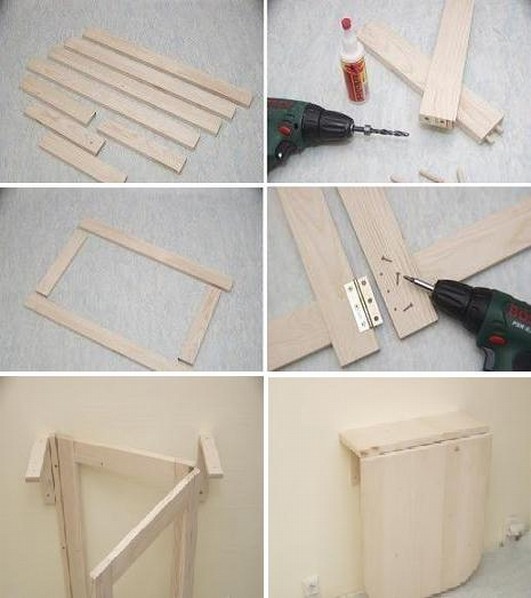
Console table
Materials required for work:
- five planks 30 x 200 mm, length 0.8 m;
- Bar 40 x 50 mm, length should be 1 m;
- two bars 40 x 50 mm, length 0.75 m;
- self-tapping screws.
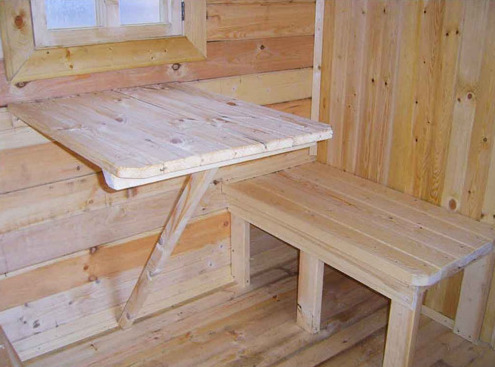
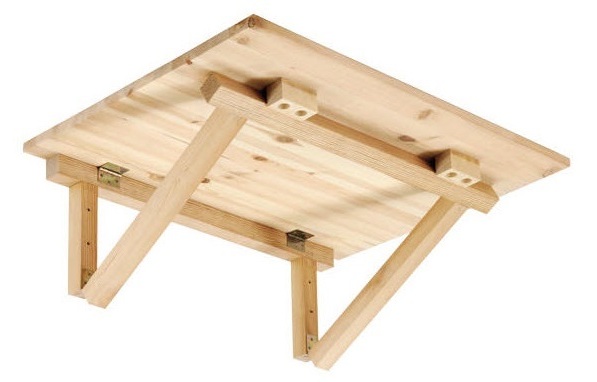
The assembly must be carried out in the following order:
- Choose a place where you place your future table. About 0.7–0.8 m from the floor level, make a mark. According to it, when using the level, the width of the table surface is determined and measured.
- Grind the bars with a grinder as they should, without missing a detail. Cover the boards with an antiseptic primer. Dry the materials properly.
- From the existing boards you need to create a tabletop. Fasten the boards using 0.75 m long bars. One of them should be attached to the table top with a distance of 7 cm from the end. The other should be attached exactly along the edge.
- Try on the assembled countertop to the mark on the wall. The crossbar should be as close as possible to the wall surface. Attach the countertop screws.
- We make installation. Substitute the bar under the surface of the table. Mark the places of future cuts and make notches at an angle of forty-five degrees. This is necessary to fully press the bar against the wall. We install support on the planned place, having fixed it with self-tapping screws.

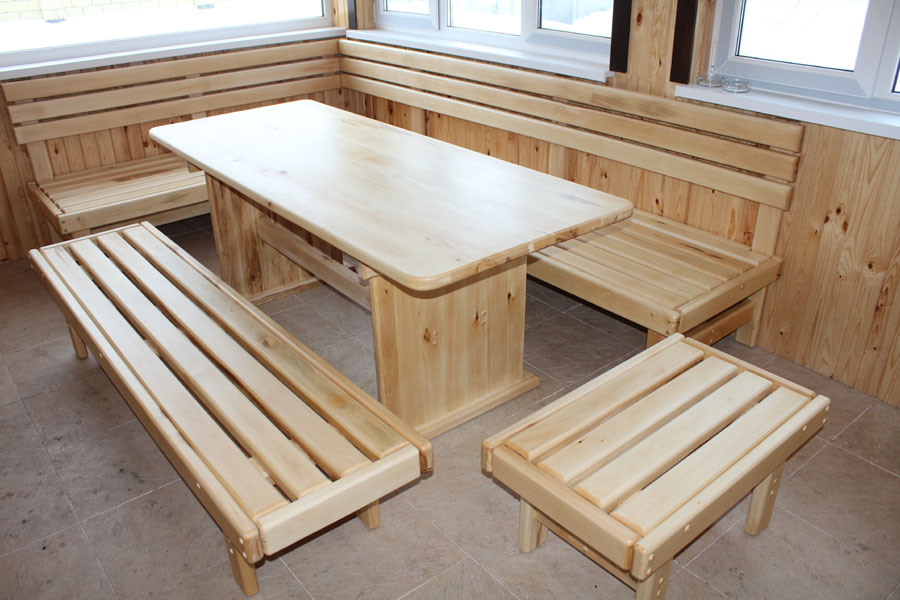
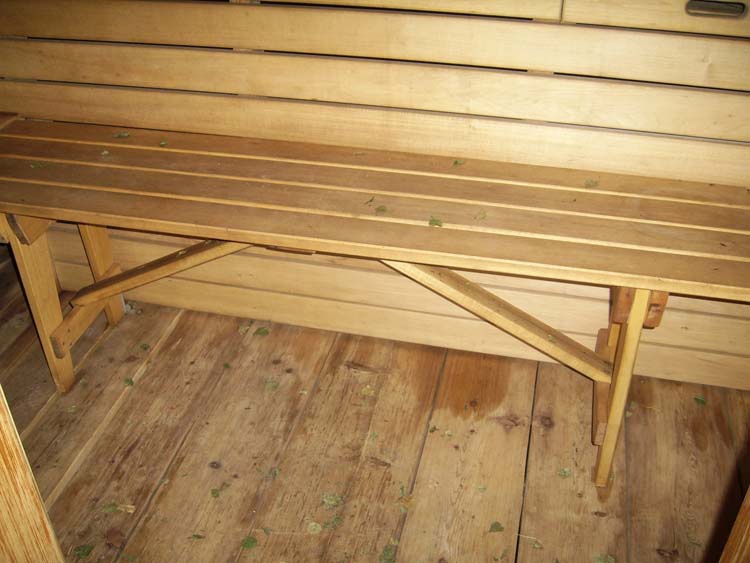
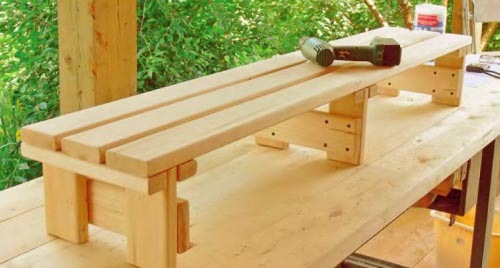
Comfortable bench
Naturally, in the bath need sessile seats.Therefore, the next thing you should learn to do is a bench for a bath.
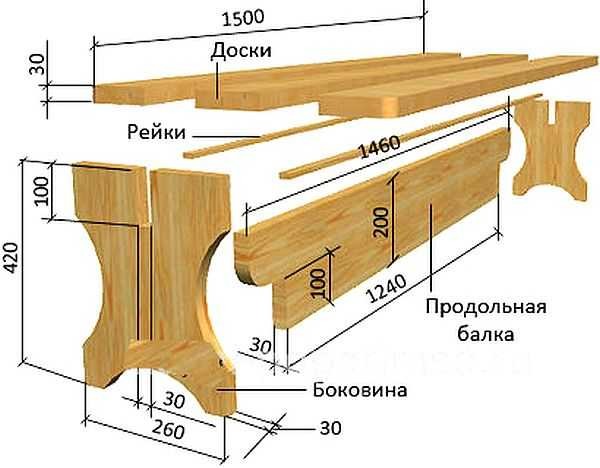
Materials for production:
- three boards 30 x 45 x 1500 mm;
- two planks of wood 1460 x 10 x 20 mm;
- two wooden boards 420 x 260 x 30 mm;
- one board made of wood 1240 x 30 x 200 mm;
- glue for working with wood;
- self-tapping screws.
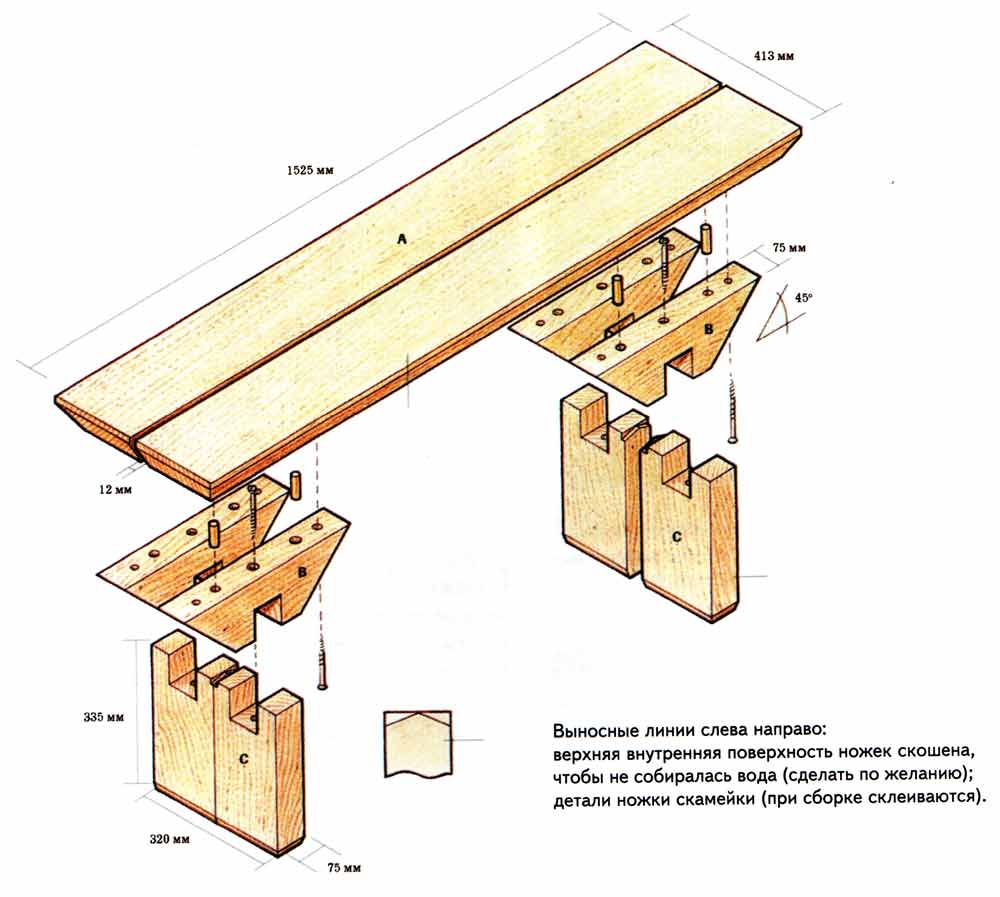
Working process:
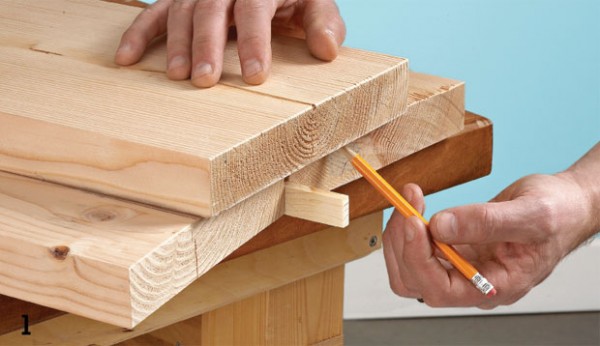
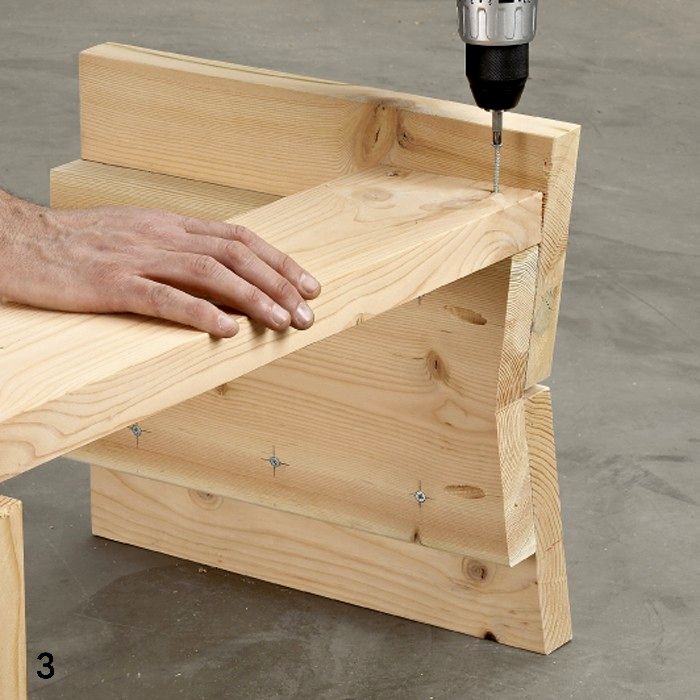
- In the first board from the list, use a cutter on the side to make a groove 10 mm deep. Do this work with all the boards. On one of them grooves need to be done from two sides.
- Lay in a row already milled boards, placing in the middle of the board with two recesses. Coat all available tongs and slats with glue. Put them in each other. Press the boards tightly against each other, fix the received “shield” with clamps.
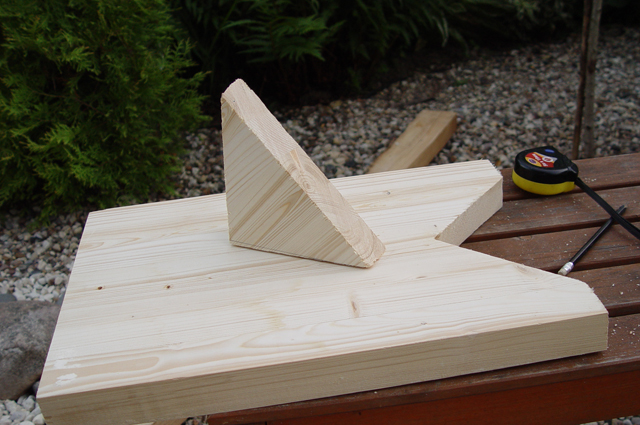
- When using a jigsaw, we make semicircular cuts fifty millimeters deep. With the second stand doing the same job.
- On a board with a length of 1240 mm, departing from the edges of ten centimeters, we draw two parallel lines across. From the middle of the lines, draw a perpendicular. We get a square. It must be cut out with a hacksaw.
- Sand stand and the resulting beam. Treat them with antiseptic and allow to dry.
- Collect all the elements and fasten them with self-tapping screws.

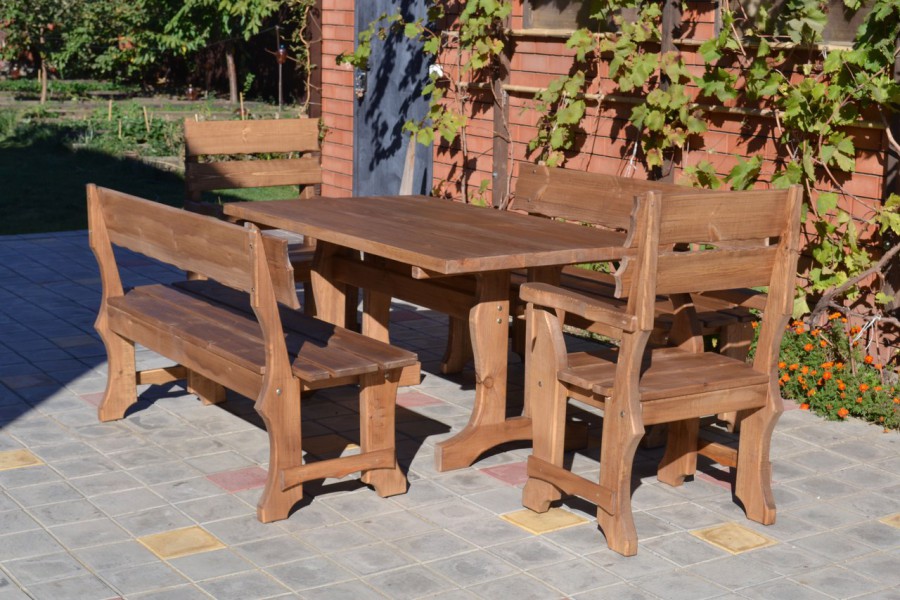
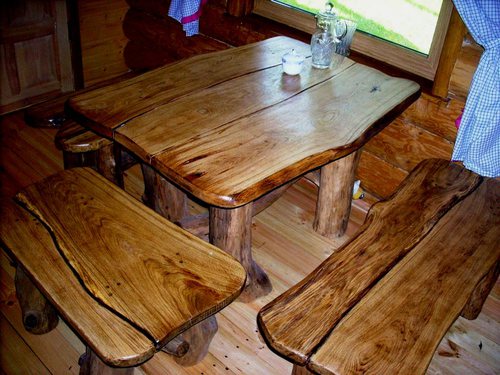
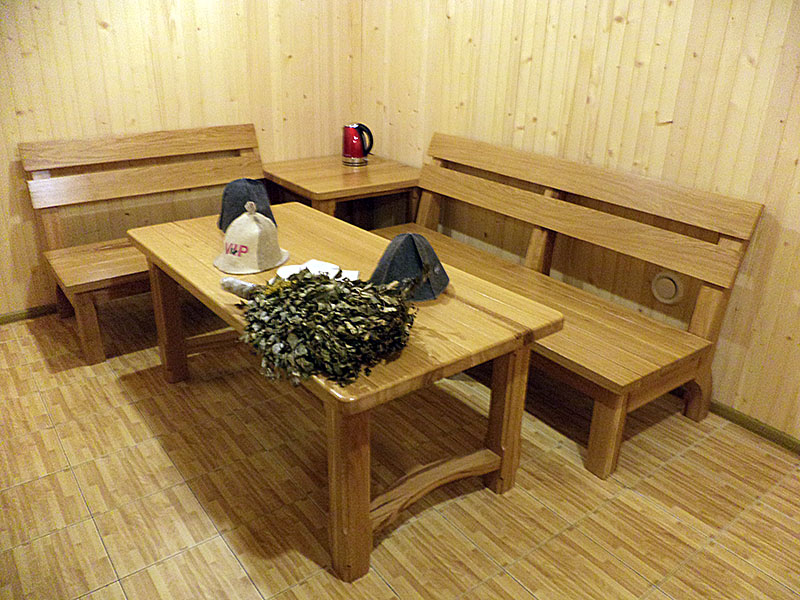
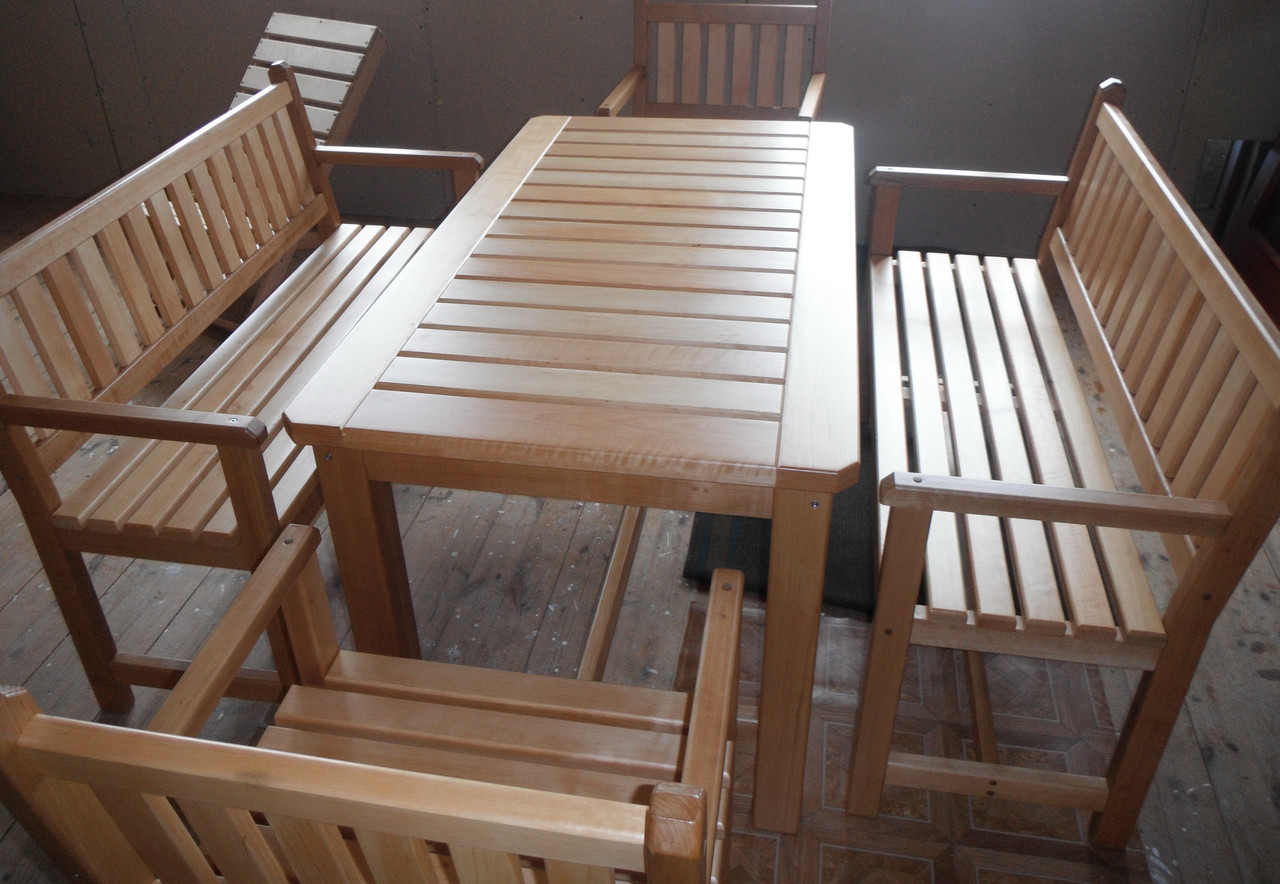
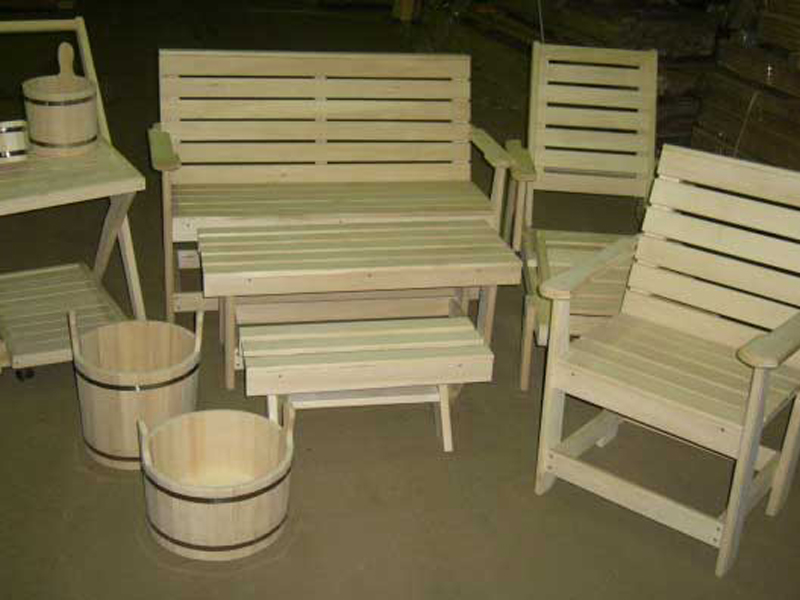
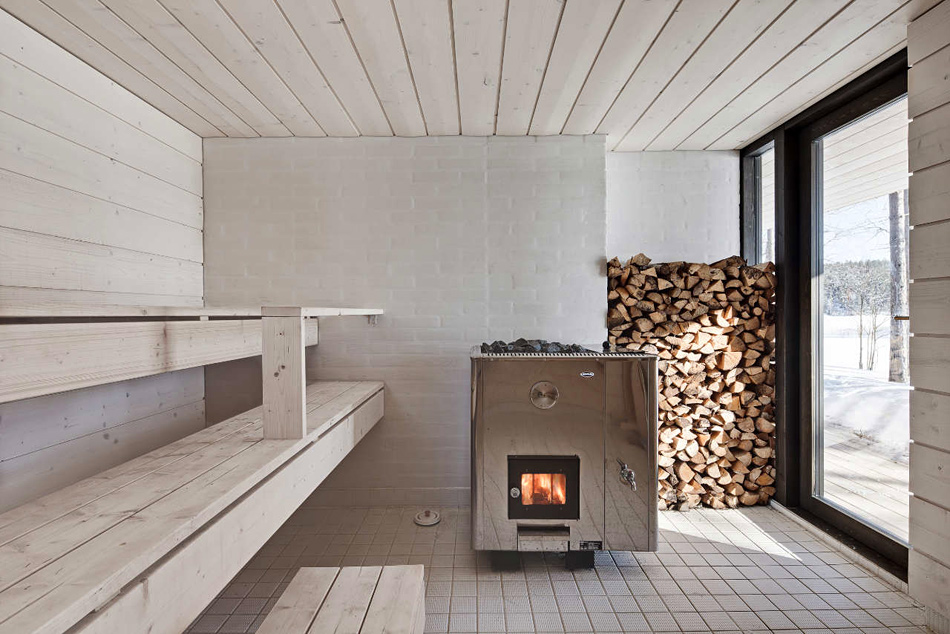
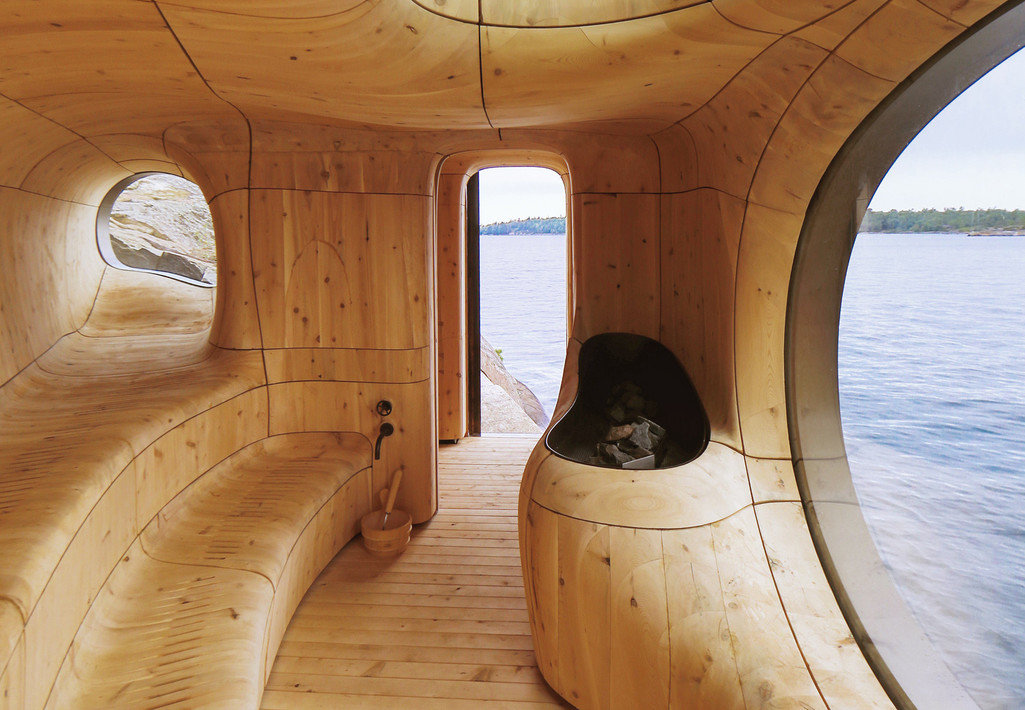
Beautiful examples in the interior
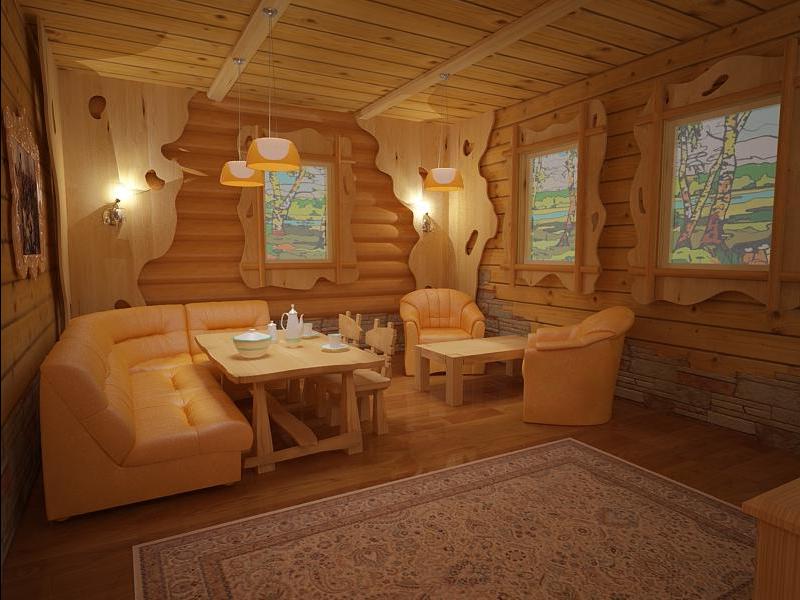
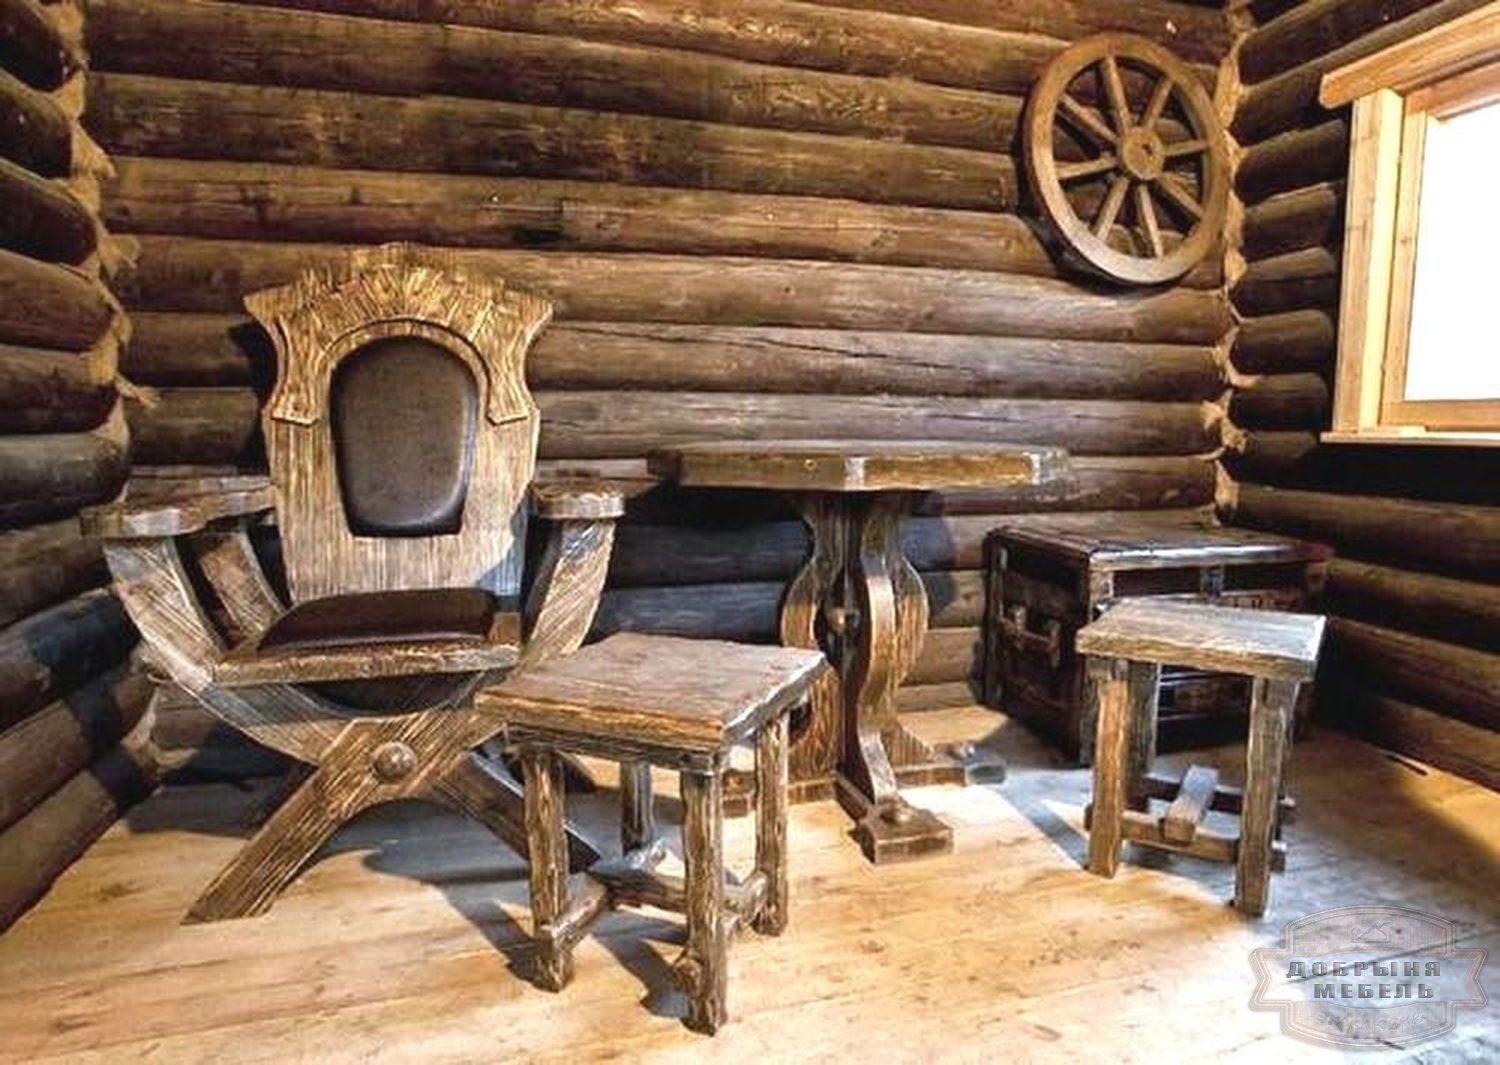
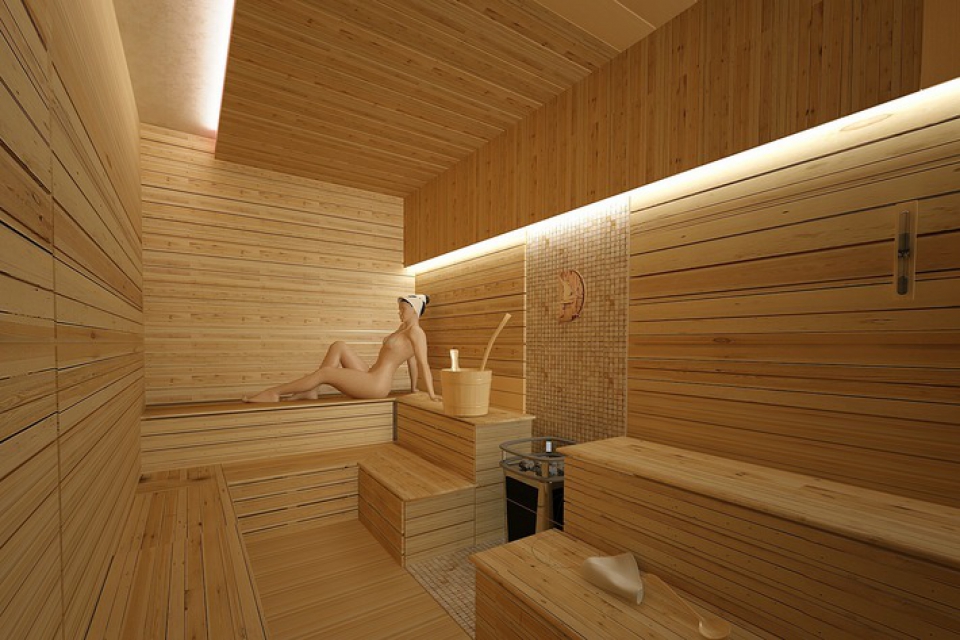
Modern unusual design for your bath. Everything is minimalist, but the appearance is pleasing to the eye.
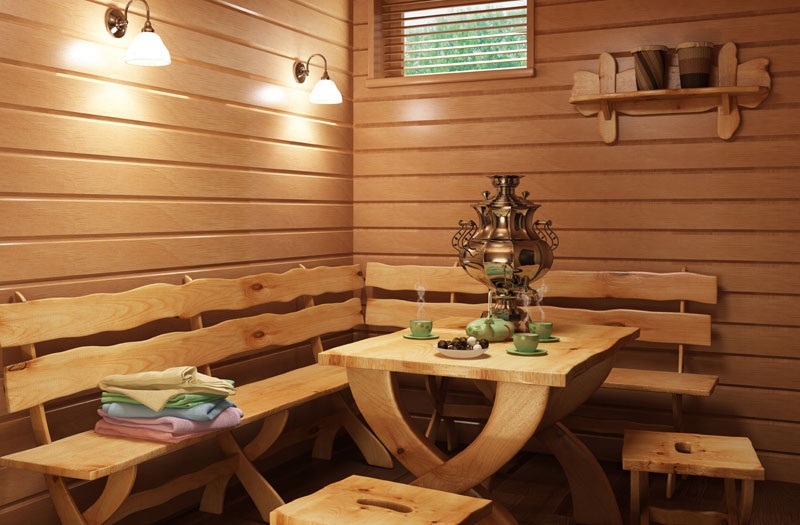
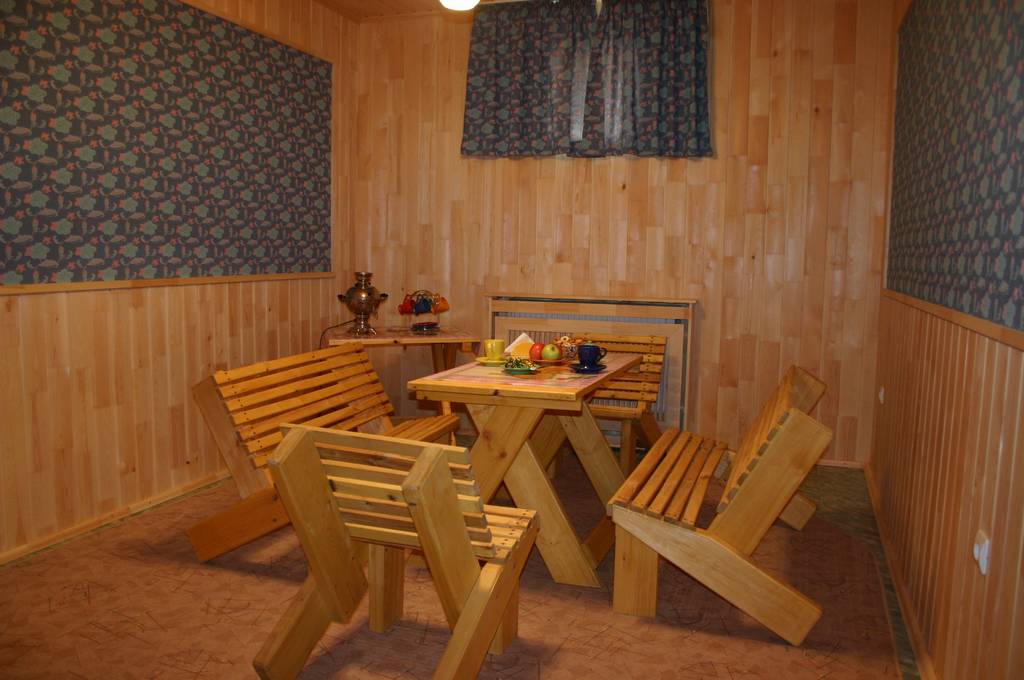
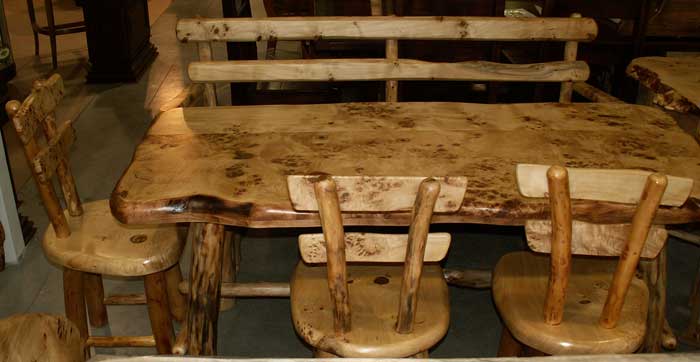
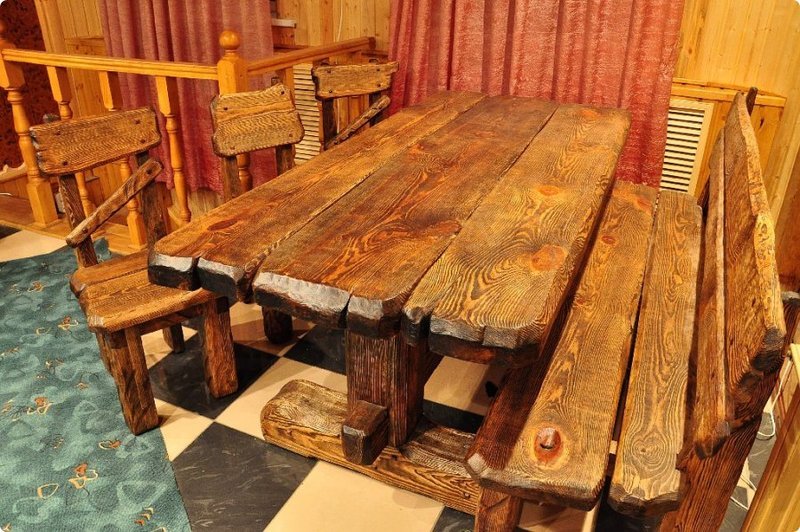
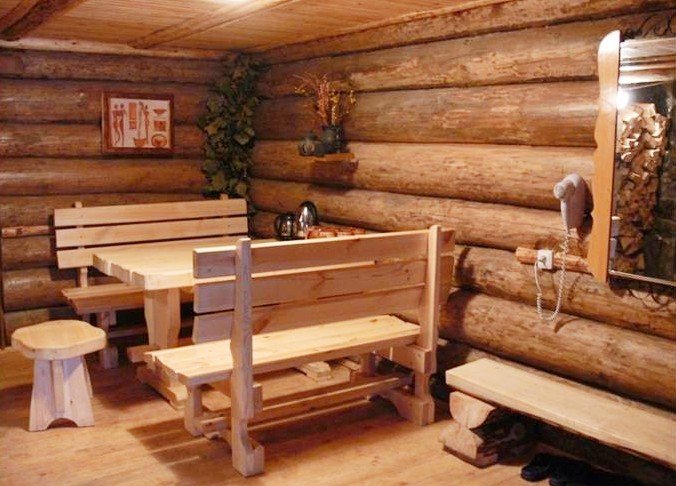
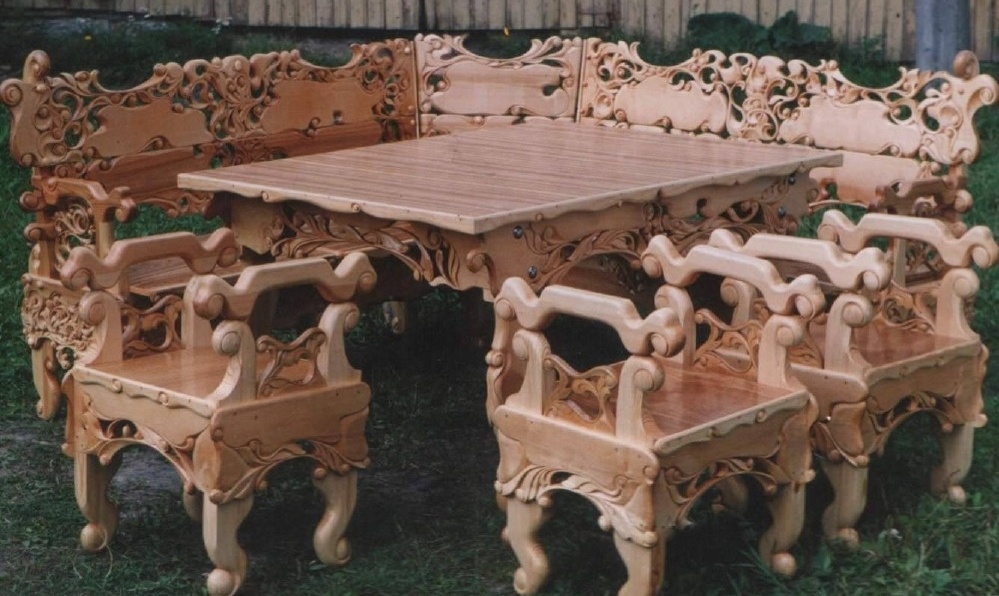
Carved table and bench will please the eye. And the stools will surprise any of your guests.
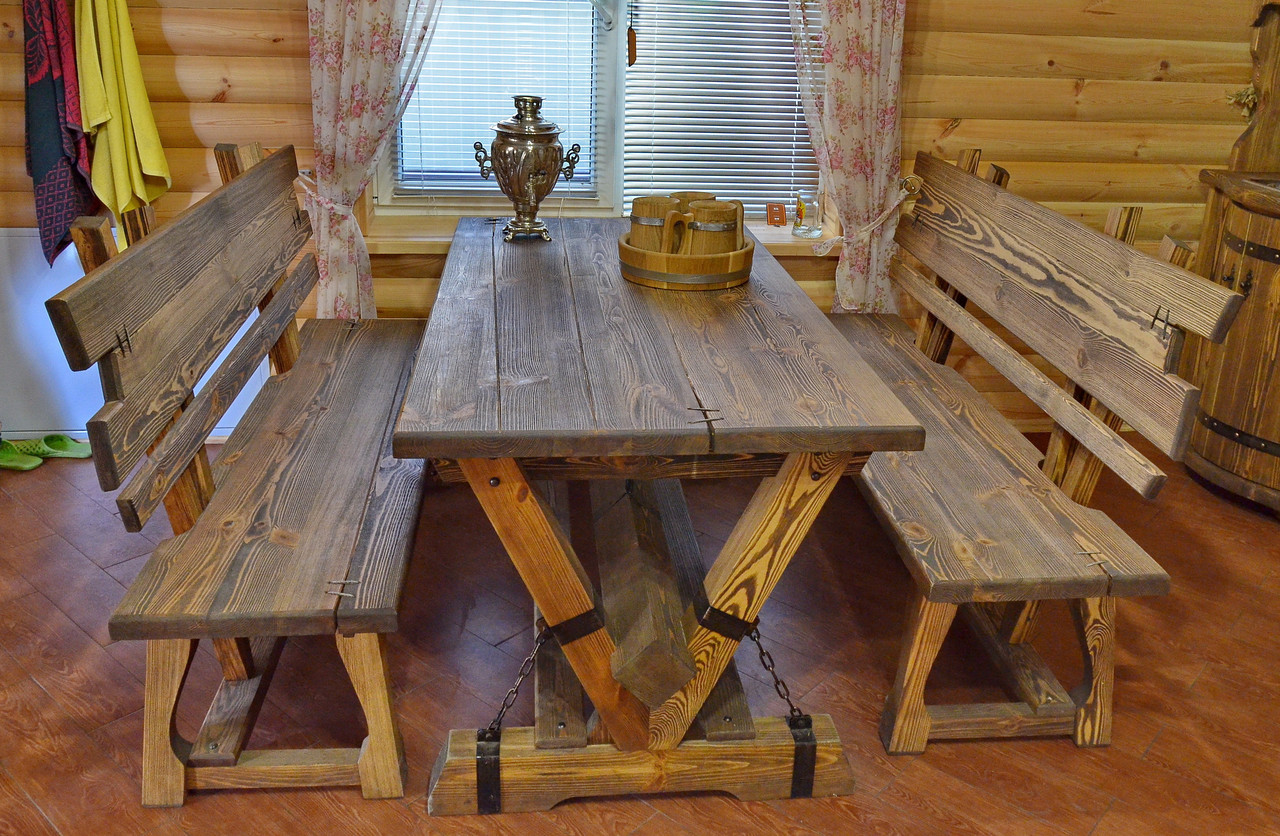
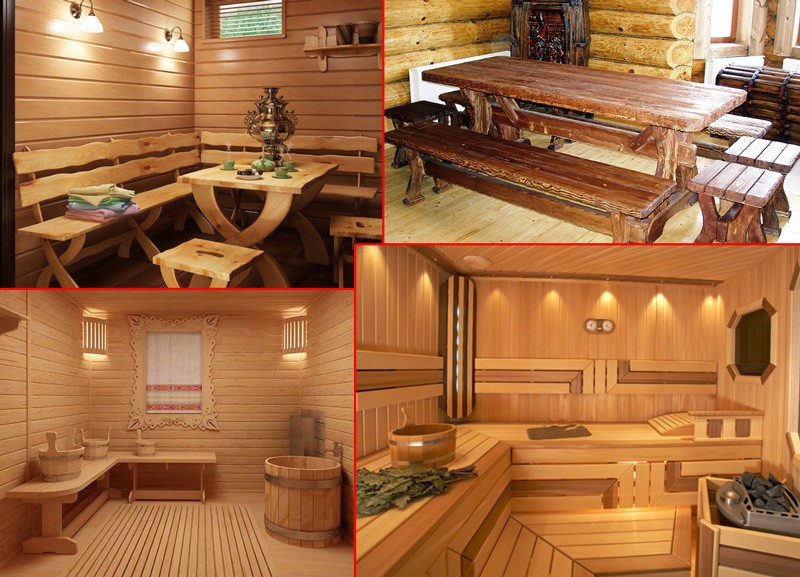
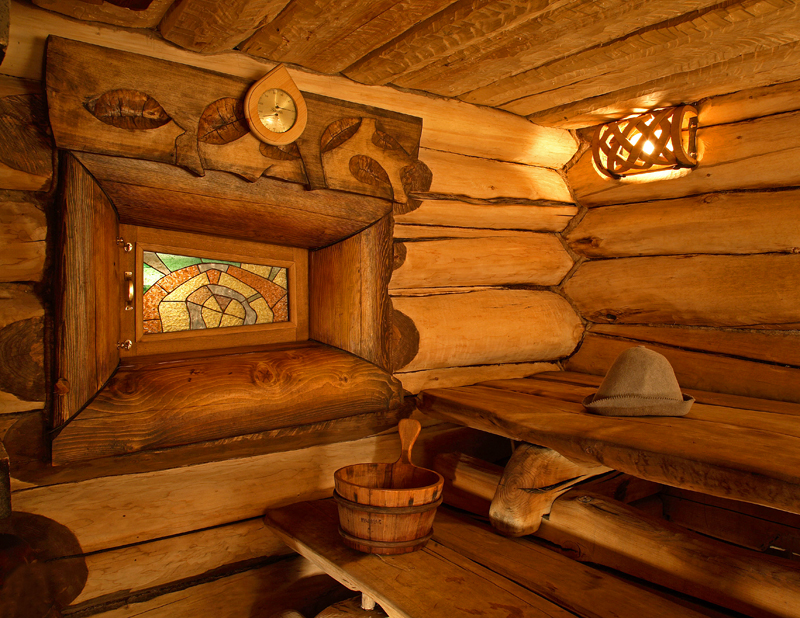
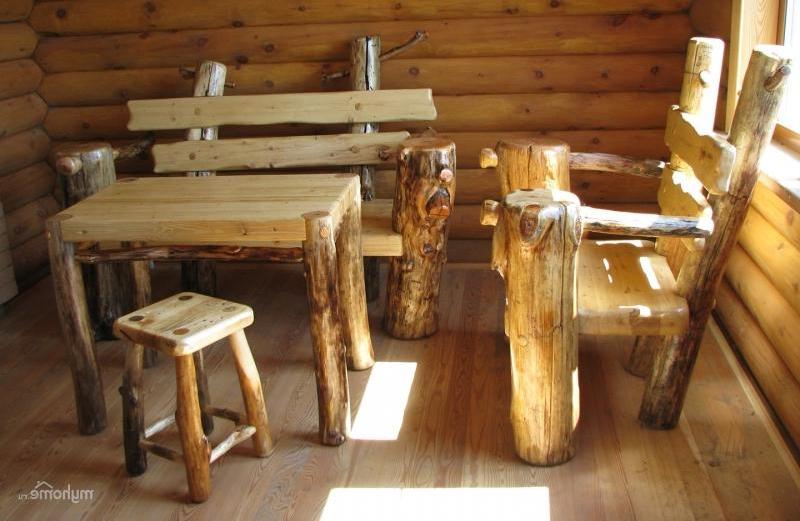
The same "native Russian style." As if in a fairy tale.
To learn how to make furniture for a bath, in the waiting room with your own hands, see the next video.