Bath from timber: features of construction
Having your own bath at a country site is always pleasant and convenient. When planning its construction, it is necessary to decide on the materials to be used.
This article will consider the bath from a bar: the features of its construction, the types of projects and recommendations for the construction.
Advantages and disadvantages
A separate bath at a country site can be built from several materials: bricks, foam blocks, planed logs, solid or glued timber. A block or brick building will be harder and more expensive to build, it will not have all those charms, health benefits and a cozy look, like wooden baths. In addition, smudges and condensation will accumulate on the stone surface, and the tree absorbs moisture into itself.
In addition, baths from different types of timber have other advantages:
- like any other wood materialThe bar is natural, environmentally friendly, does not emit harmful substances when heated, and often retains the pleasant and useful smell of wood;
- baths are obtained with high thermal insulation;
- inside it maintains the most suitable microclimate for such structures;
- the building looks great both outside and inside, so it does not require decorative trim;
- with proper design and construction of such baths can serve for a long time.
Separately, it is worth highlighting the advantages associated with the construction of baths from a bar:
- parts fit easier than a log, especially if a bar is profiled;
- the lightness of the material does not require the installation of a massive strip foundation;
- the construction process takes root due to the fact that the bars have low shrinkage.
At cost - this is one of the most profitable options for the construction of its own bath.
Reviews of the owners of such baths indicate some of their shortcomings:
- like any other wood material, solid or glued laminated timber is a combustible material: given that there is an open fire inside, the building will be fire hazardous;
- due to constant temperature differences in the tree over time, cracks are formed;
- in the bath is constantly maintained a humid environment, and this is the cause of the formation of mold, fungi and rot.
All of these disadvantages can be effectively addressed.: for fire safety, treat wood with a fire retardant, to prevent cracks, conduct regular maintenance of the timber, and against the formation of mold and fungi, cover it with an antiseptic and build a reliable drainage system that will remove excess water.
In addition, the baths from the rounded timber or with the decor under natural logs look like real village buildings.
The result is: a well-designed and constructed bath from a bar has practically no flaws, but there are plenty of advantages, especially since it is an affordable option for a middle-income family.
If a decision has been made to build such a steam room, then first of all it is necessary to determine the choice of materials.
Types of materials
The bath from an unprocessed log, with all its advantages, has one significant drawback: round tins are deformed under the influence of moisture and temperatures, therefore the whole structure will not be stable.In a log wall, especially if a profiled version is selected, this is not the case.
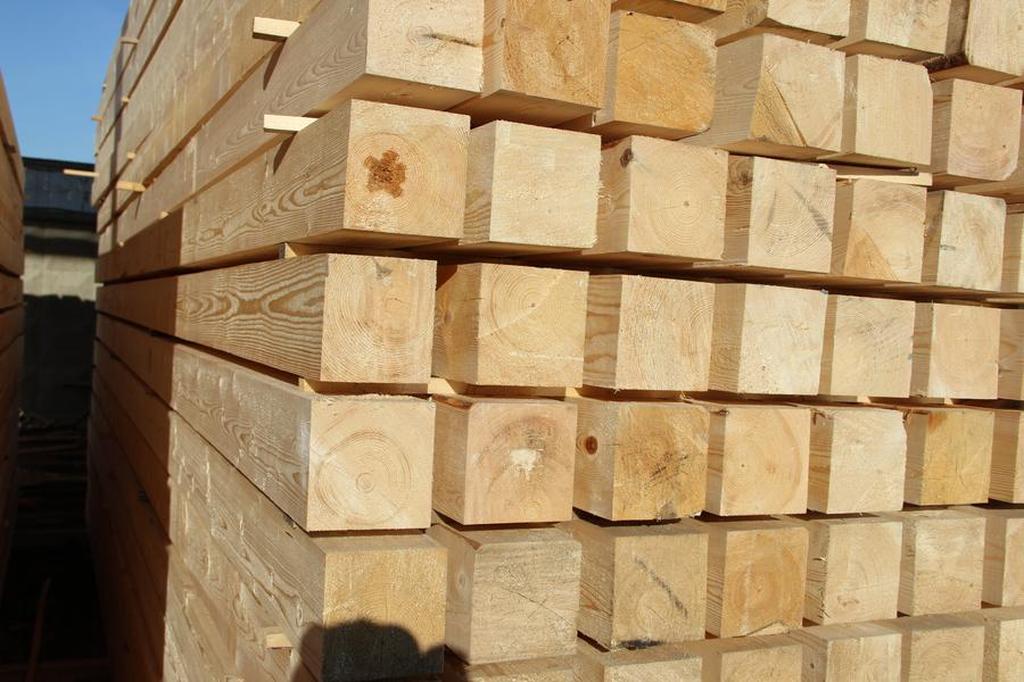
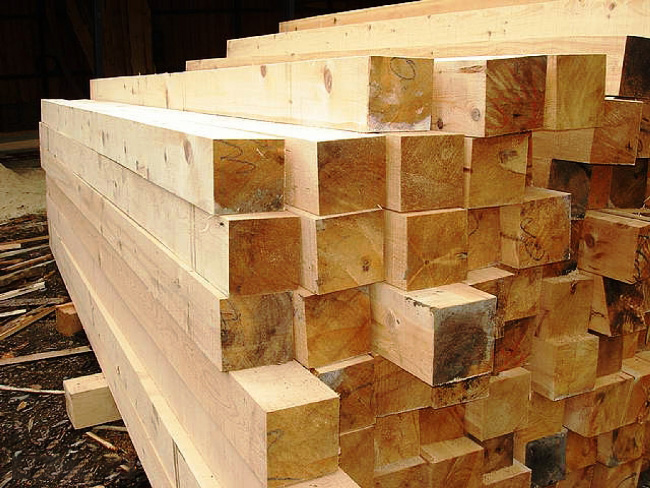
Bar for the construction of baths are of several types:
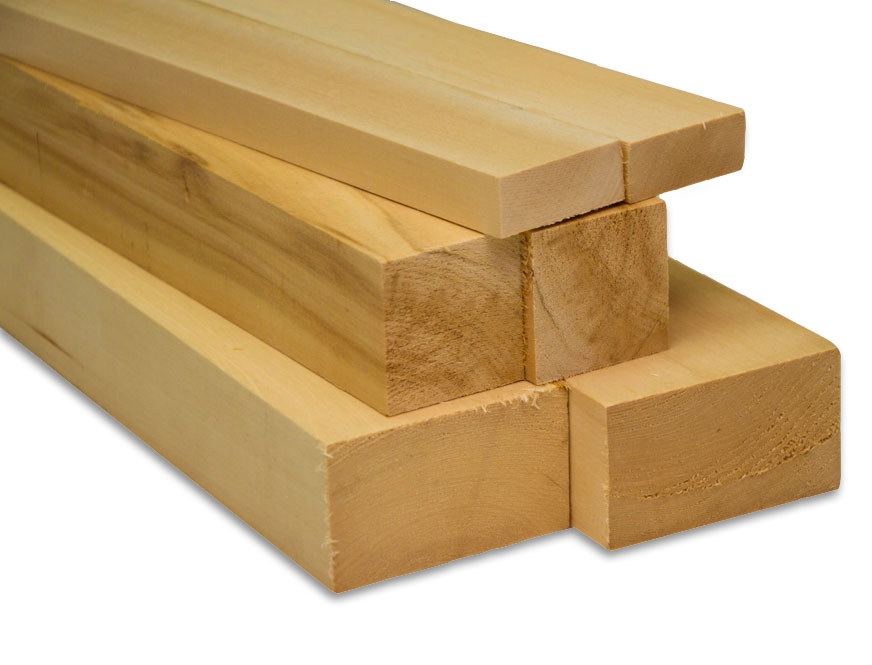
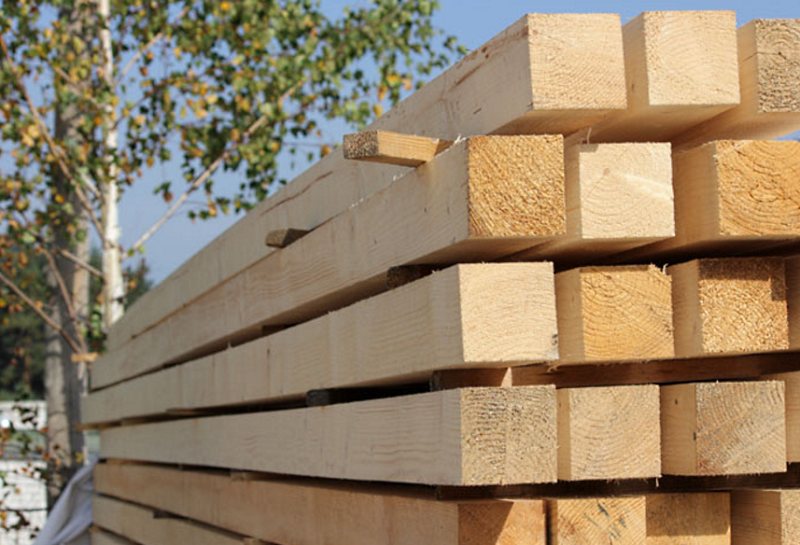
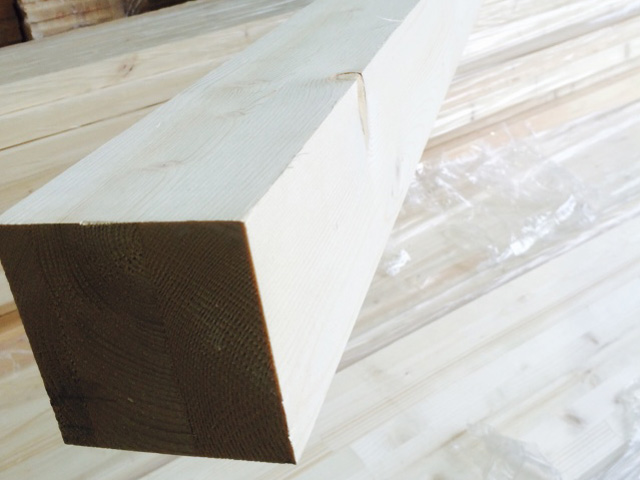
- Solid non-profiledThis timber is the cheapest material. This is ordinary processed wood, rectangular or square in profile. After some time, in a humid environment, a fungus appears on such material, and shrinkage occurs.
Therefore, to build a bath from such a bar is not recommended.
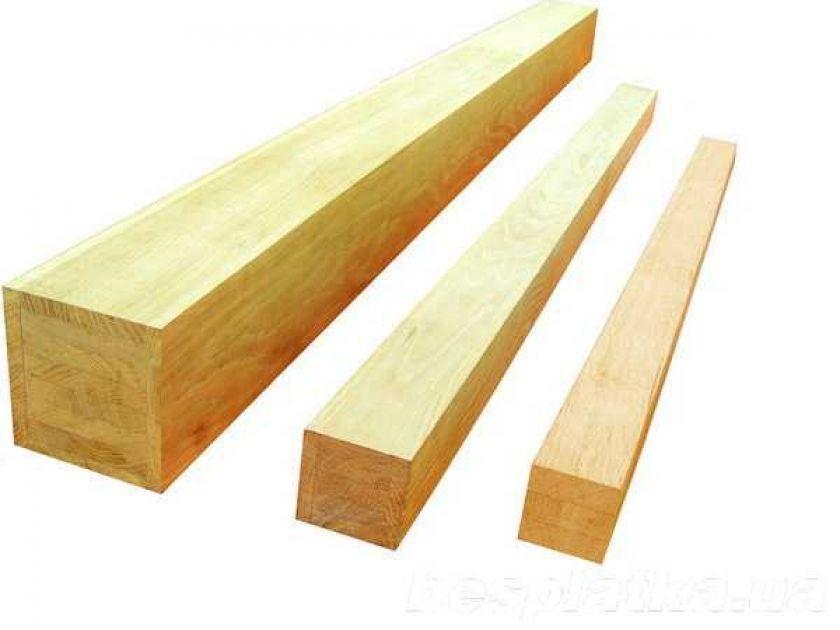
- Planed timber It is a kind of solid non-profiled, only its surface is well-treated: after grinding, it has dried for about a year. Before costing a bath from a dry planed bar, it must be primed with breathing paints. For the price, it is inferior to the profiled and glued types, but it is difficult to avoid a flat surface without cracks with further shrinkage.
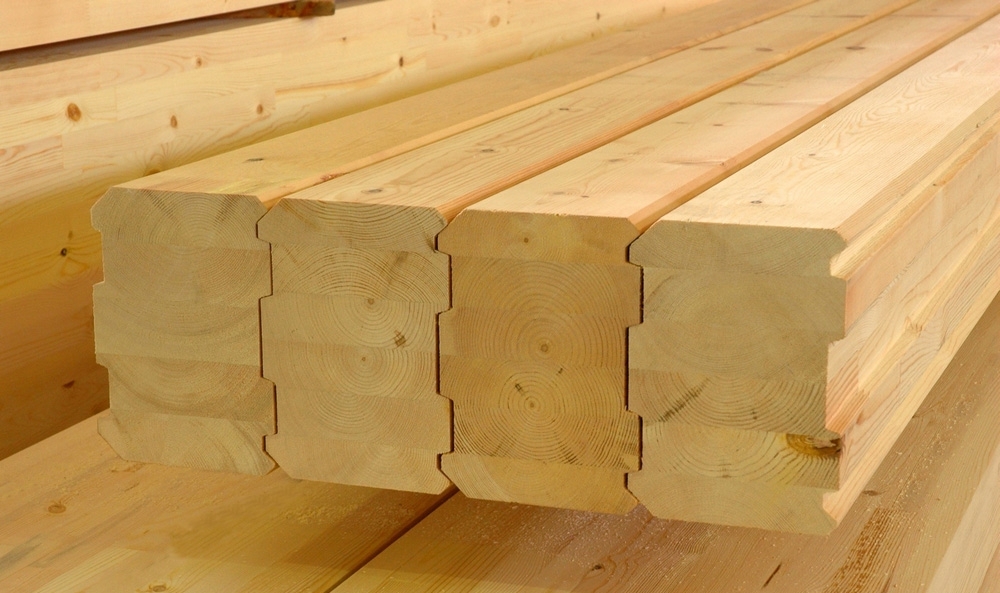
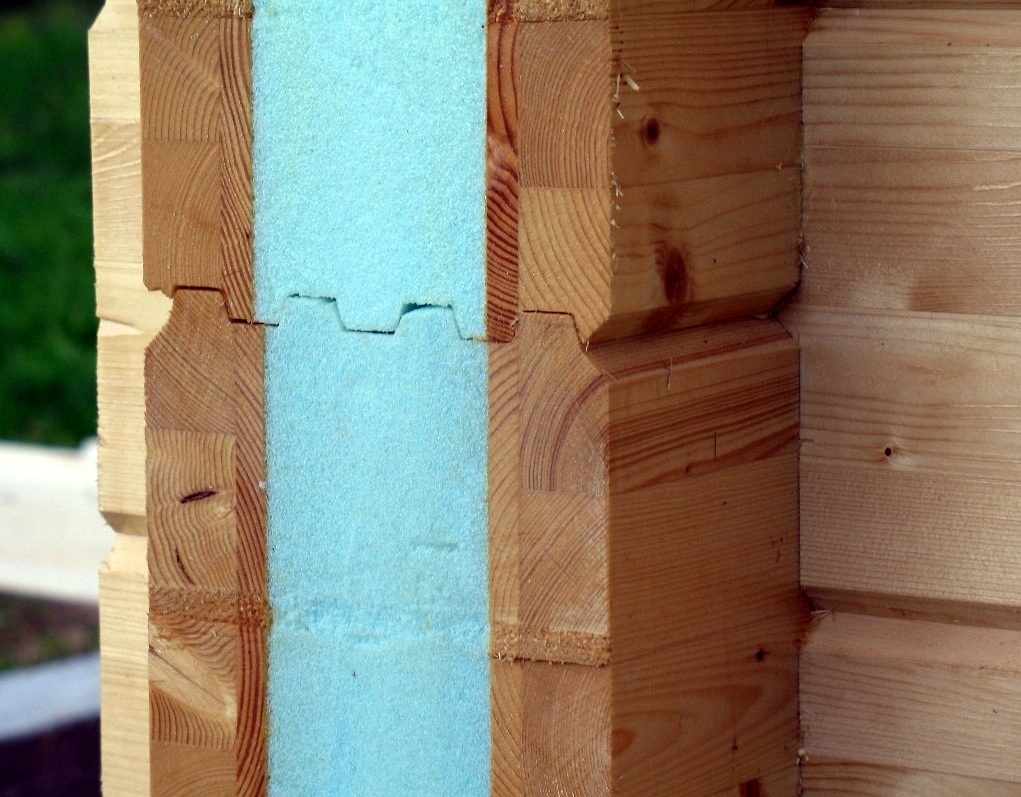
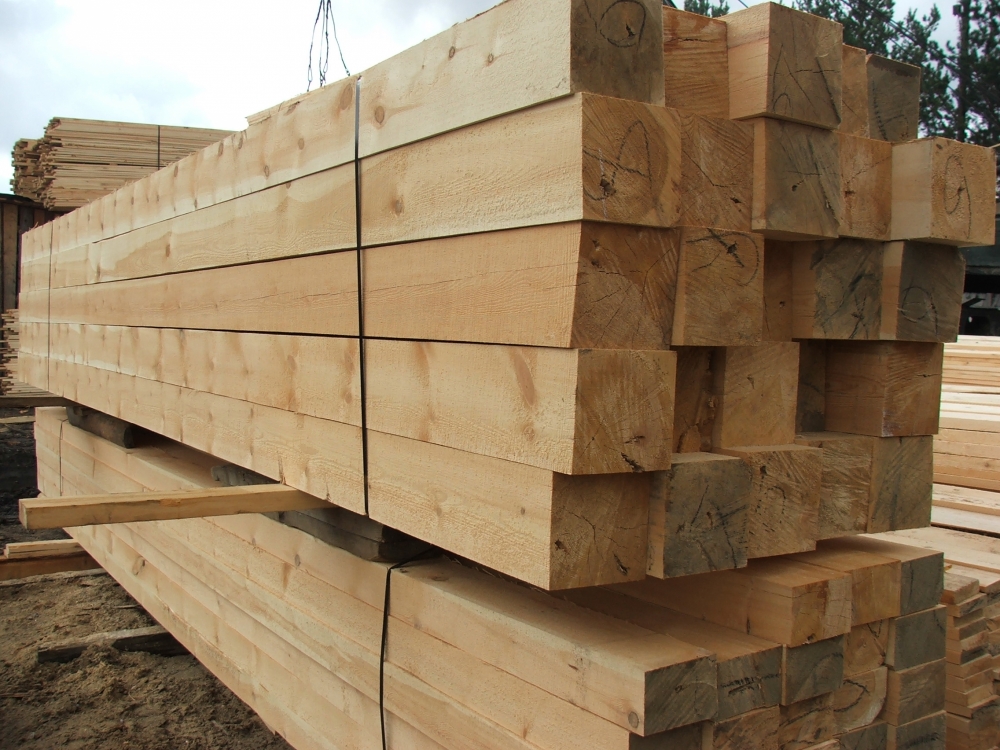
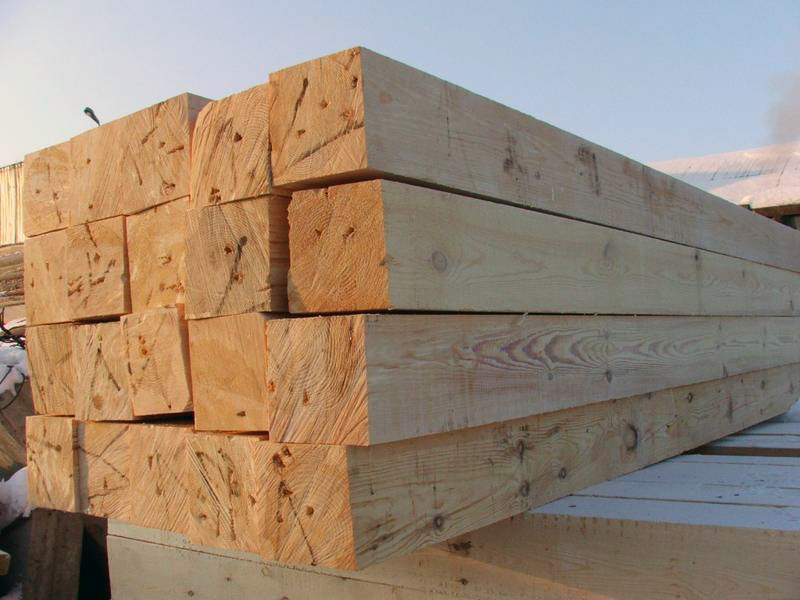
- Constructions from profiled timber tighter and more stable thanks to grooves and grooves that are cut to their full length. It is in these elements that the bars and fasten together, ensuring maximum strength and the absence of cracks.There may be several grooves and notches, their forms are also different.
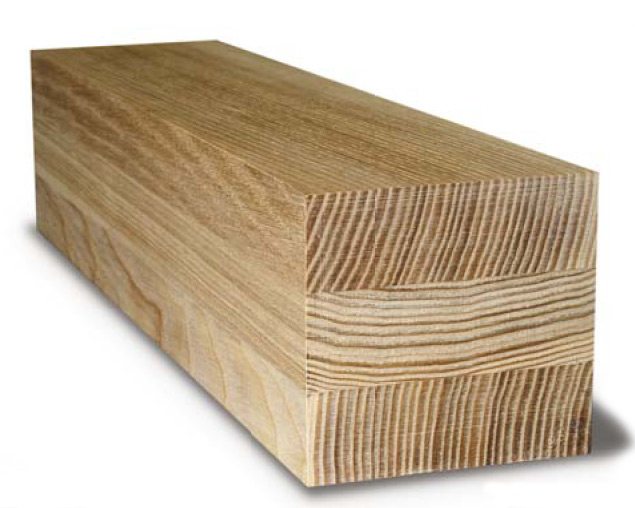
- Baths from laminated veneer lumber possess the greatest durability and heat insulation. Such material is obtained by gluing several lamellae, each of which is pre-polished, dried and treated with an antiseptic and fire retardant. It is possible to build walls of double or triple timber, sometimes glued lamellae and more.
Some fear that the adhesive composition in this form of material contains harmful impurities and does not make wood environmentally friendly. But in quality bars, harmless and safe glue is usually used.
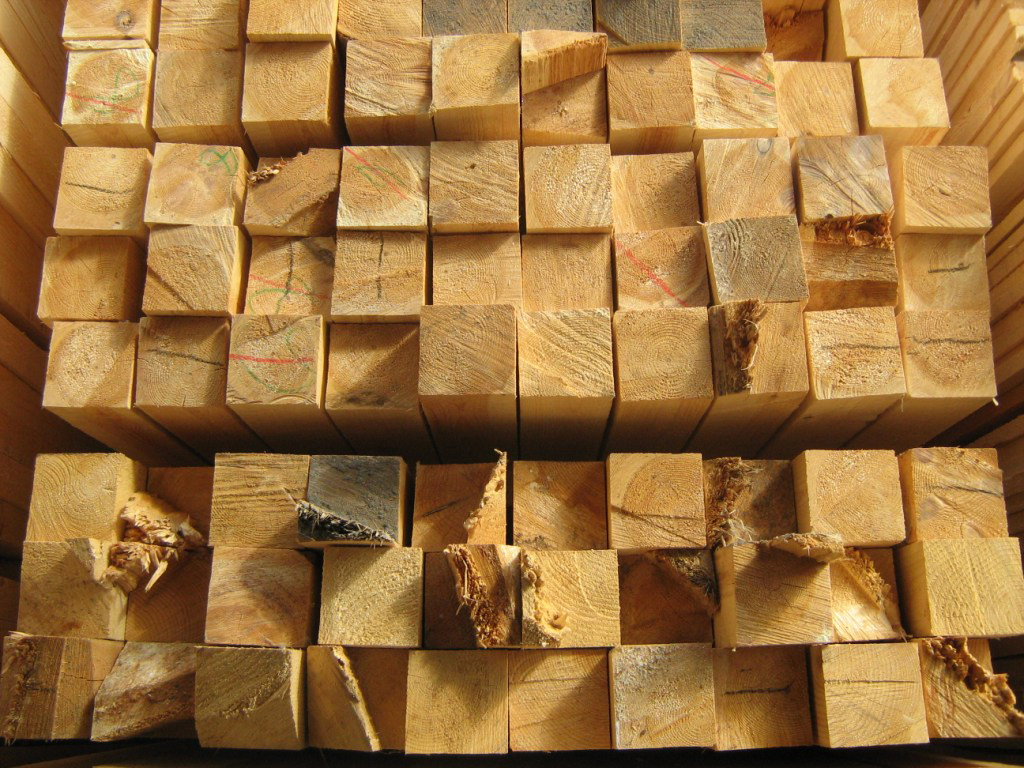
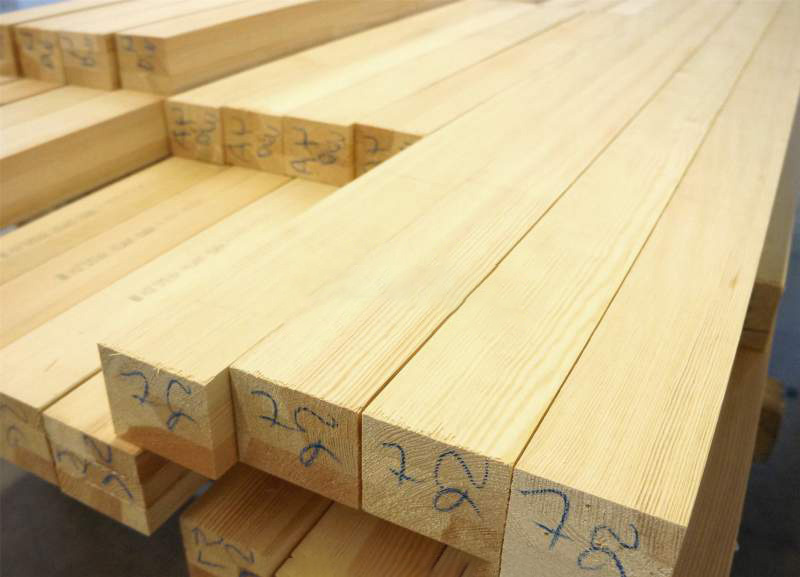
- Frame system of profiled and calibrated timber most durable, and build it the easiest. Thanks to the calibration, you can simply adjust the size and create any project. The thickness of the calibrated bar for baths can be from 45 to 275 mm. From it there is an opportunity to construct different units of the building. The cross section of such material is rectangular or square, its standard size is more than ten.
- Baths look great from the rounded barwhich is specially processed on machines, giving it a round profile resembling natural logs. However, it may have grooves that provide a reliable bond between the elements.
The wall of the rounded timber can be covered with any kind of transparent lacquer for exterior work, and it will really resemble a log cabin.

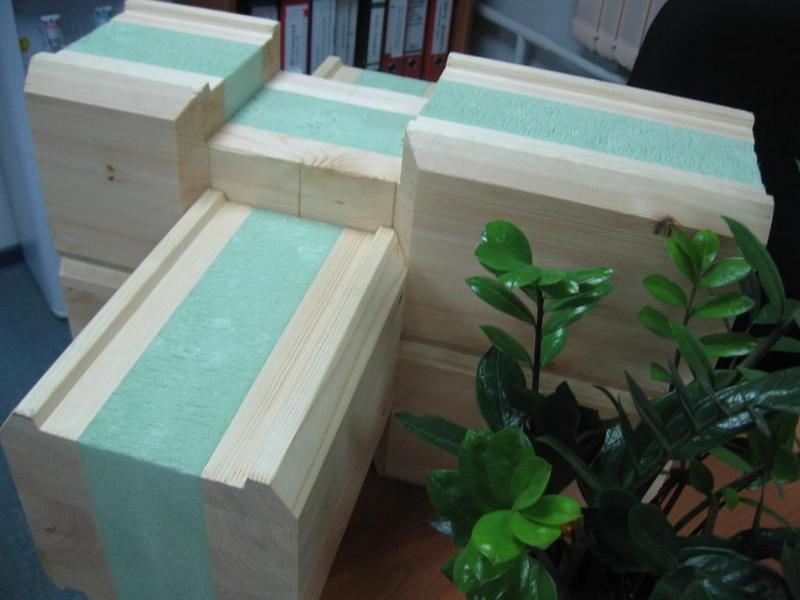
- Combined timber is a kind of glued, only inside between two lamellae it is insulated with heat insulating material, therefore this type is also called a thermal bar. It is very good for frosts, especially in the regions of the far north, while it contains almost no harmful impurities.
Expanded polystyrene is most often used as a heat insulator of a combined beam. The disadvantage is the price - it costs 2 - 2.5 times more expensive than the usual glued version.
Now it is worth considering the types of wood from which such baths can be built.
We first describe the properties of deciduous trees:
- Aspen This is a traditional tree from which Russian baths have been built for centuries in a row. It is undemanding to climatic conditions,it is used both in the extreme north and in the southern regions; it is relatively easy to process and is practically not subject to the formation of cracks. Its wood has a light white shade, the surface of an aspen bar is easily painted, can be treated with varnishes, mastic, stain. Among the minuses of aspen, it is possible to note a rapid darkening and a peculiar specific smell.
- Linden It has a light shade, a pleasant smell with useful properties and a healing effect, therefore it is also preferable in the construction of baths. Bars from it practically do not shrink, perfectly keep heat inside.
Loose wood is subject to decay. To prevent it, the lower rims of the bath should be replaced periodically, and the room should be aired regularly.

- Oak It has excellent strength, exudes a peculiar pleasant and healing aroma. In addition, this wood is very dense and durable. There are different varieties of oak, for example, white or Caucasian, having a variety of shades: from light to dark brown. The only drawback of wood is its high cost, so at present, oak baths are practically not built.
- Larch almost as strong as an oak, its wood of a reddish hue, which does not change even after many years, has a pleasant healing smell. The baths of this tree are durable and not exposed to moisture. The disadvantages are the complexity of processing, low thermal insulation and high cost.
- Alder Beam It has a reddish tint and a special aroma, which over time will become more intense, practically does not emit tar, perfectly retains heat and is not afraid of moisture. A remarkable property of this wood is that it does not overheat, that is, it is impossible to get burned by leaning against a wall in an alder bath. The disadvantages are the high cost and poor plasticity, that is, it is difficult to get even alder bars.
- Birch tree not as strong and durable as the above-described types of wood, but it is easier to process. The material with a light shade is durable, uniform and light. Washing in a birch bath promotes a surge of strength and prevents colds.
The wood surface must be treated with antiseptic, as it is prone to decay and does not tolerate contact with moisture.
Coniferous wood, unlike hardwood, is not so protected from moisture, and when heated, emit resin. But on the other hand, most varieties are cheap, they are well processed and have a positive effect on the body.
- Pine - it is the most affordable material that is very easy to saw, grind and fasten. Wood is not afraid of moisture and high temperatures, has a pleasant, specific smell. To protect against rotting pine bars need to be treated with antiseptic.
- Spruce - This is the second most popular conifer tree, which is used in construction. Baths of spruce timber have good thermal insulation and moisture resistance. This wood also has a relatively low cost and is easy to process. From it you can get even bars that remain so for a long time.
- Cedar has a beautiful and noble texture, it is well processed, it is not afraid of moisture and temperature changes. In addition, he is not afraid of mold, rot, fungi and insects. It incorporates essential oils that smell good and have a healing effect.
Projects
You can consider several interesting projects of the baths of the beam, which have an original layout and are easily built on the plot with their own hands:
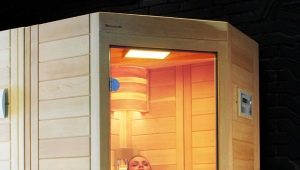
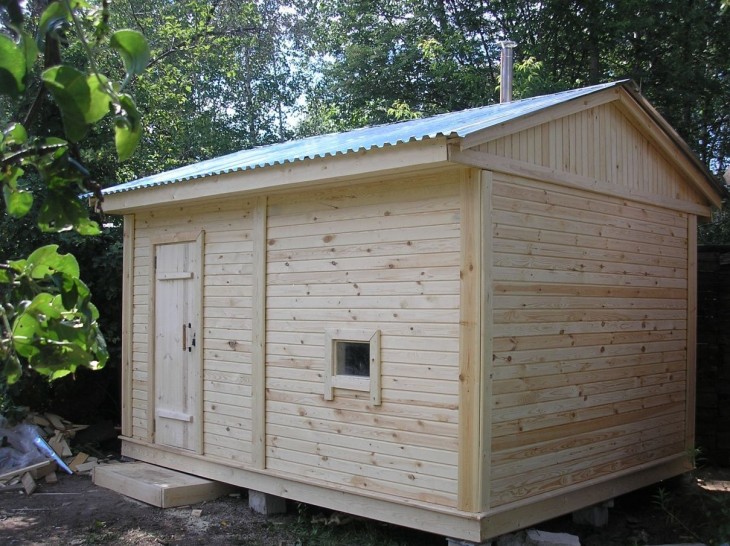
- Mobile baths from a bar in shape, size and construction they resemble construction trailers or cabins, which can be easily transported using an average truck and a truck crane. They may have several windows and an ordinary wooden door. It is quite simple to create transportable baths from profiled timber with insulation. As the furnace is optimal to use electric. Dimensions can be very different: from miniature (100x100 cm) to standard for construction change houses (2x5 m).

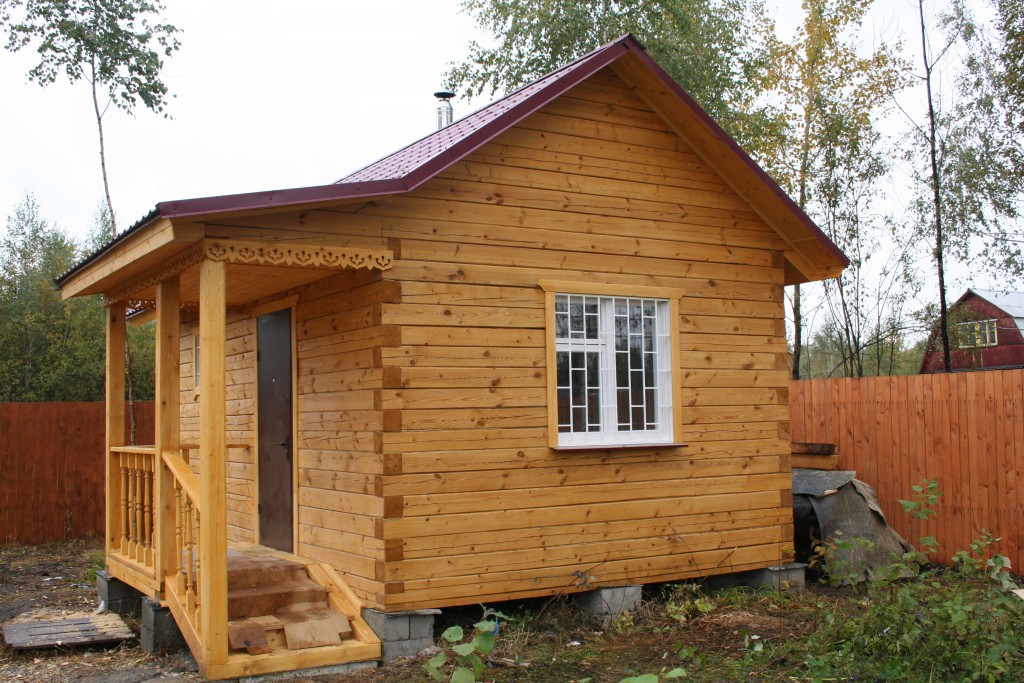
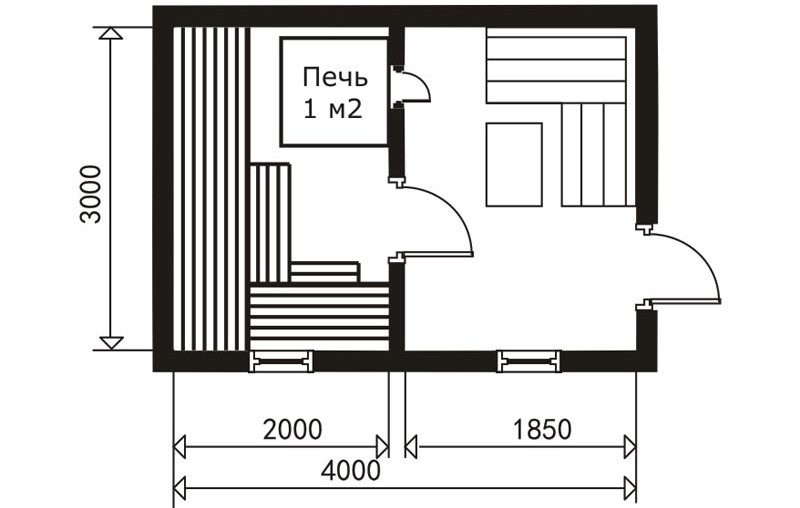
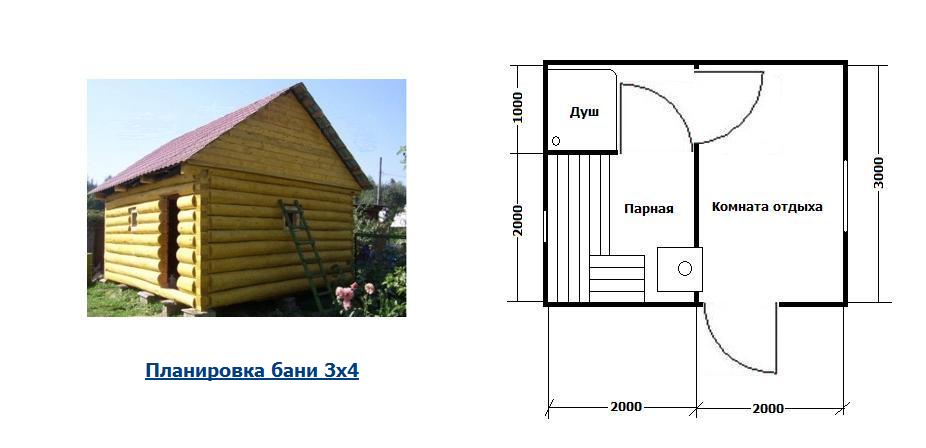
- Bath 4x3 m may have 2 compartments: a spacious dressing room, where you can comfortably undress and place clothes and other accessories, a steam room with shelves and a stove. It is easy to mount such a building on your own in a few days. For the foundation, you can use a simpler tape type: it will cope with the load without any problems.
Such stationary baths with a waiting room are well suited for a small family of 3 to 6 people on the backyard.
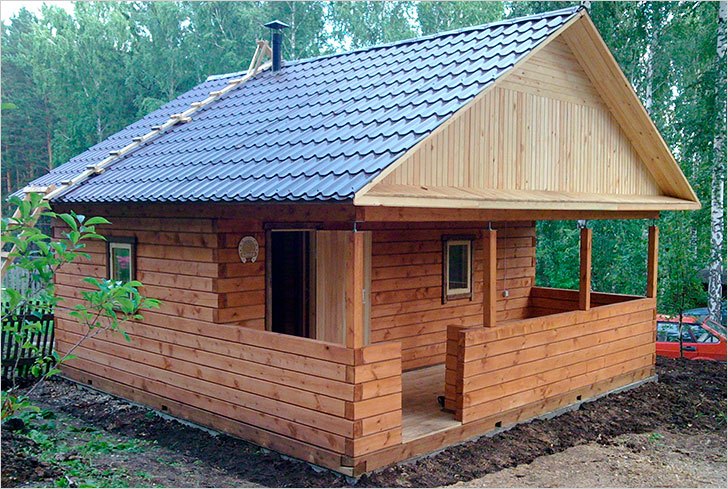
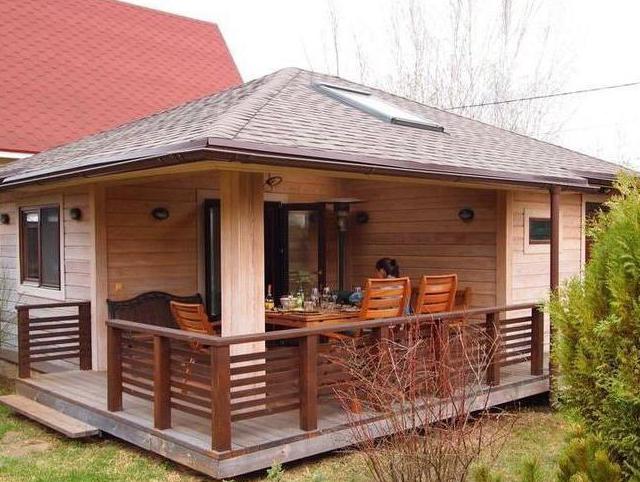
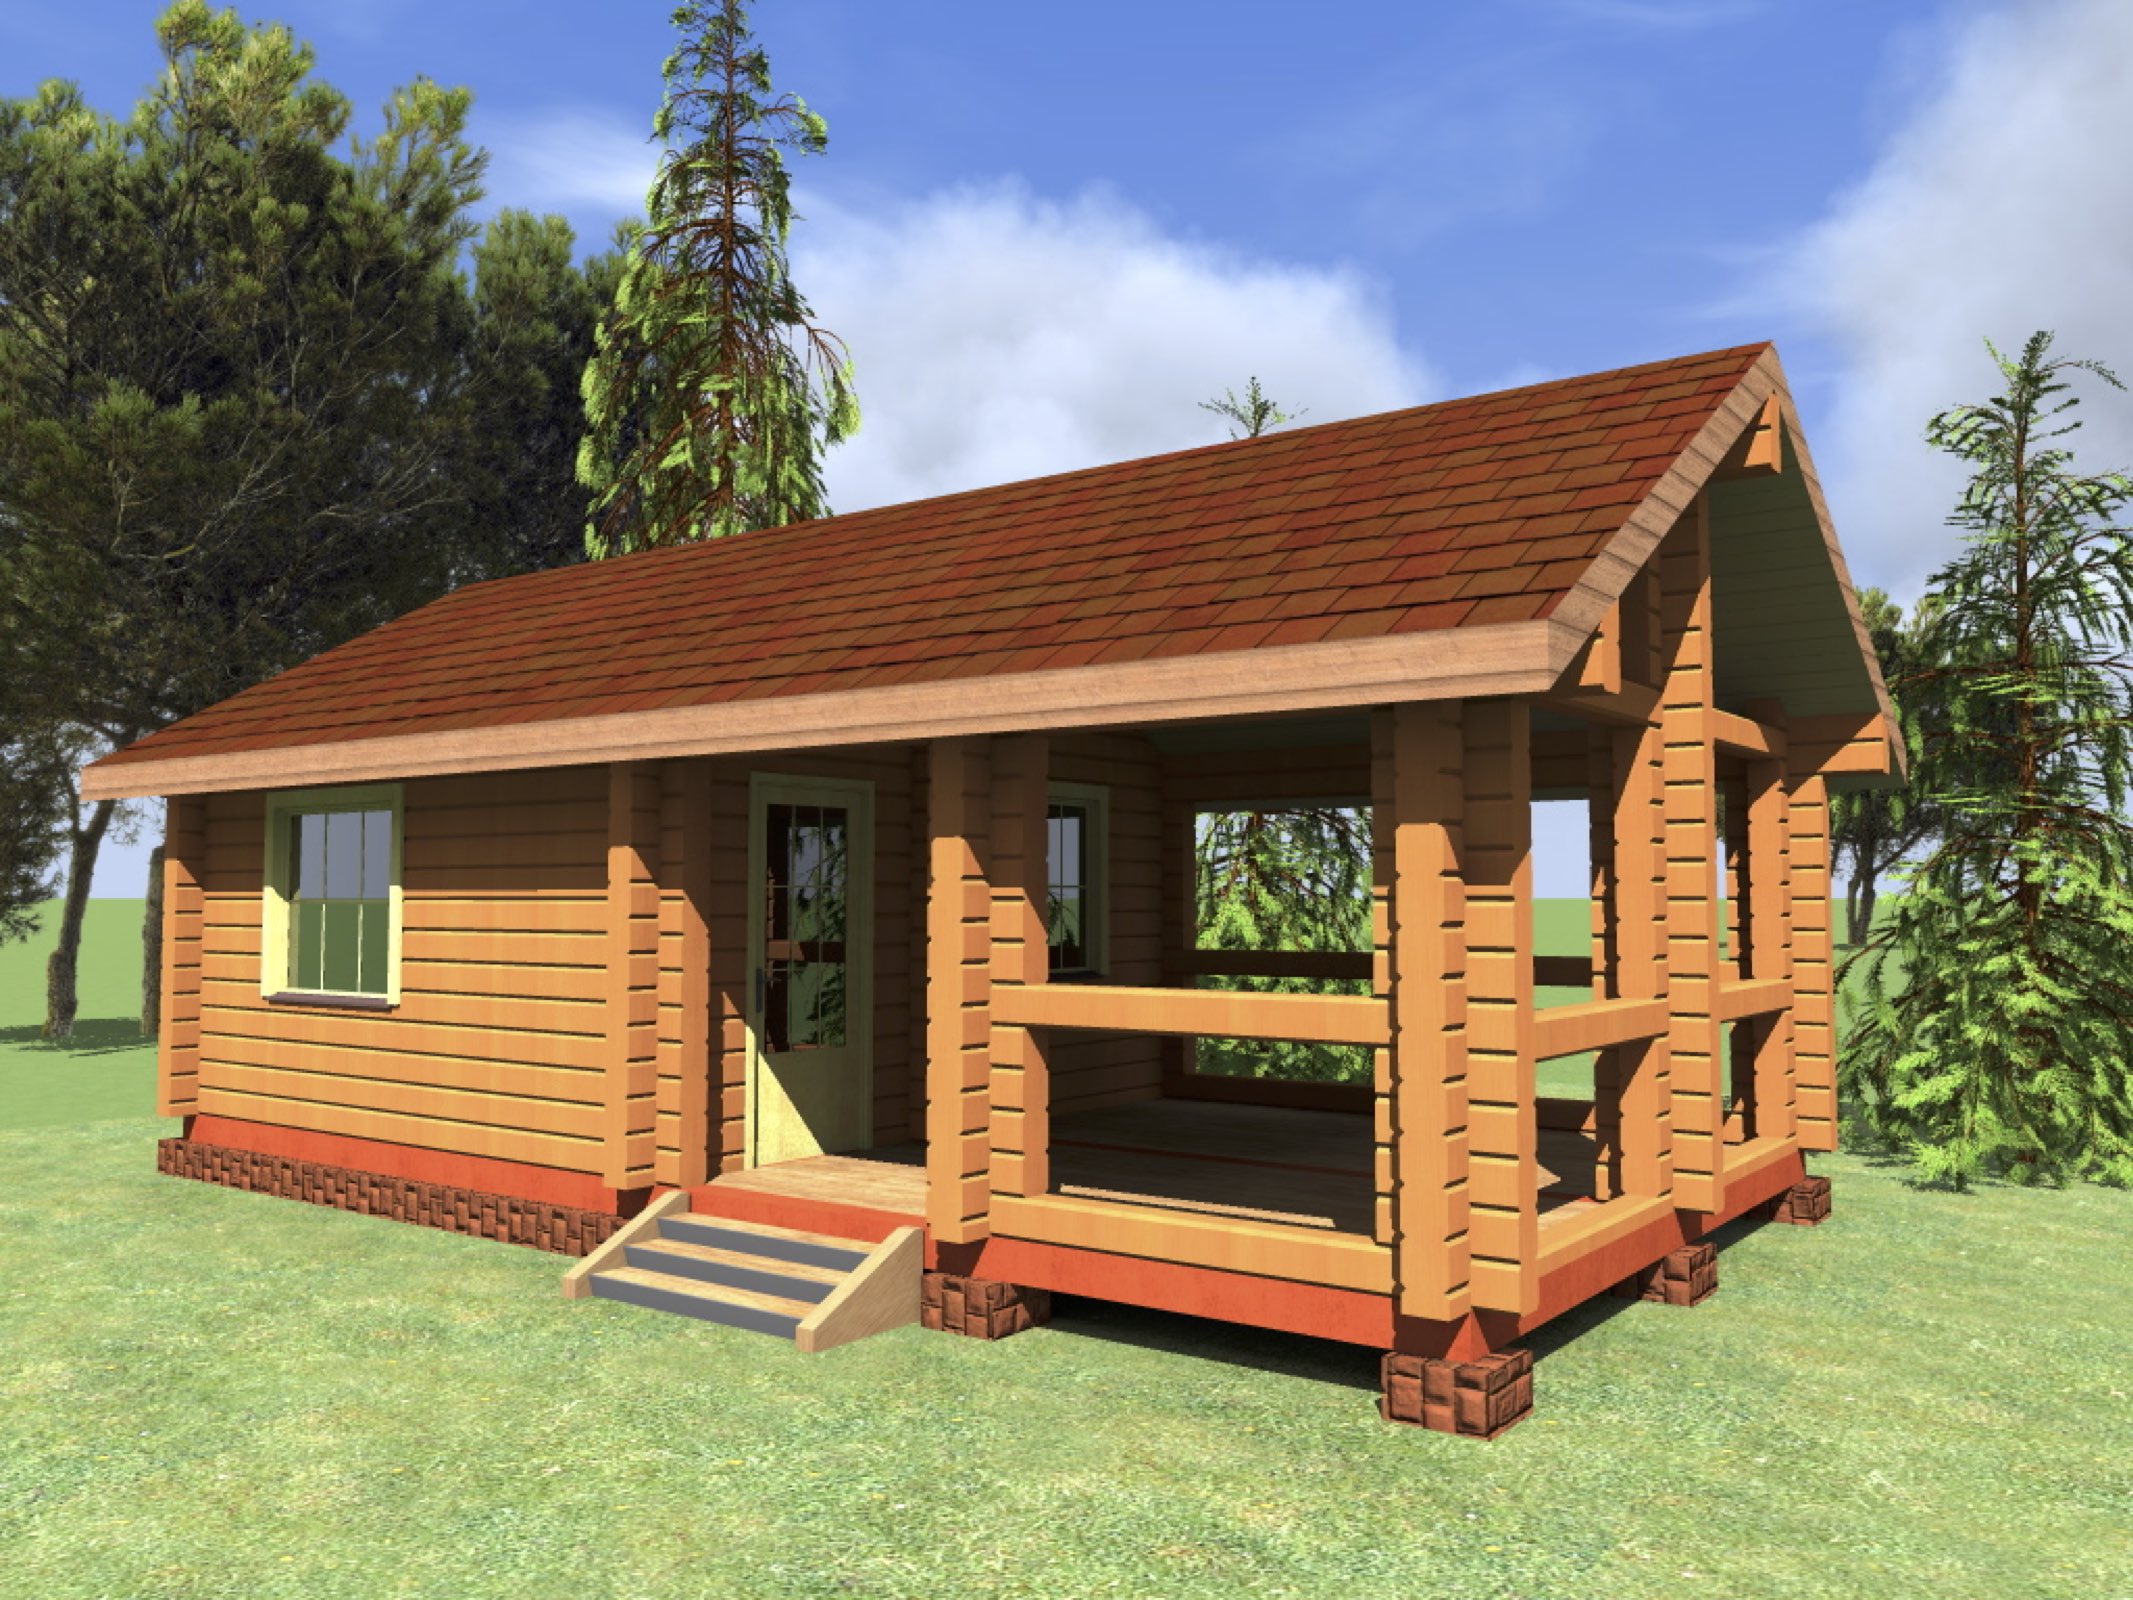
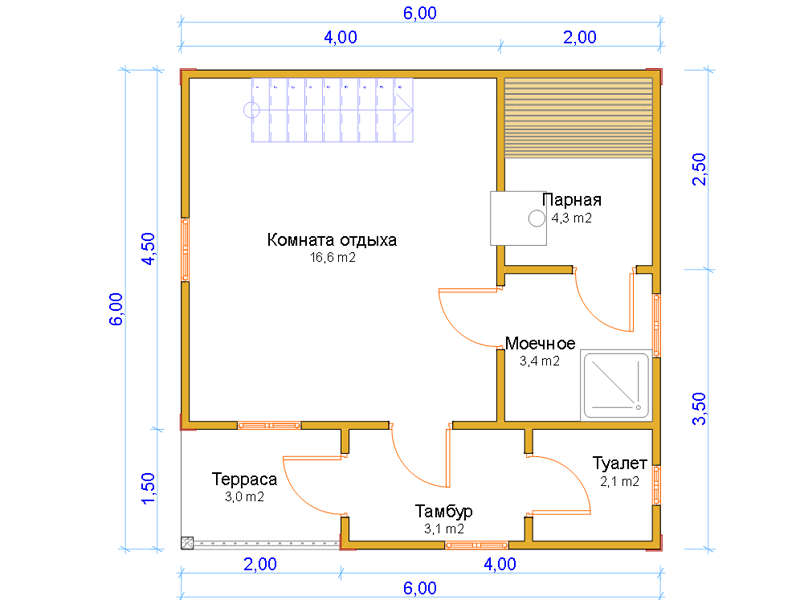
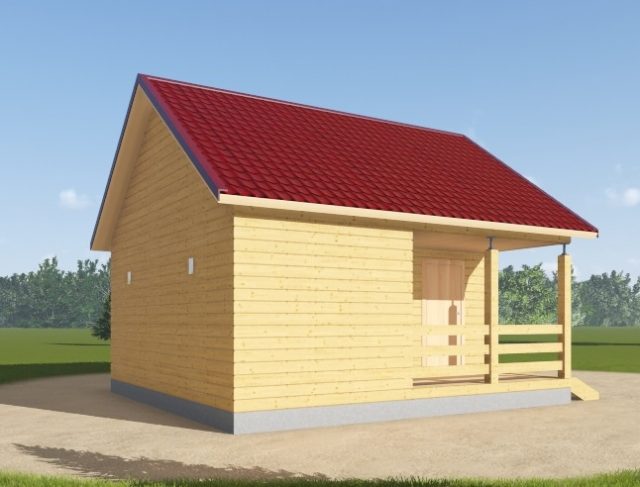
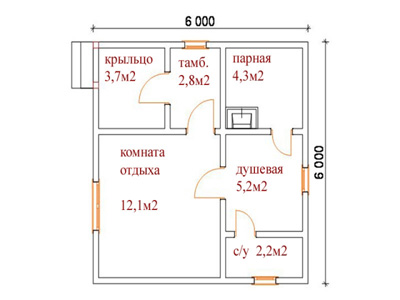
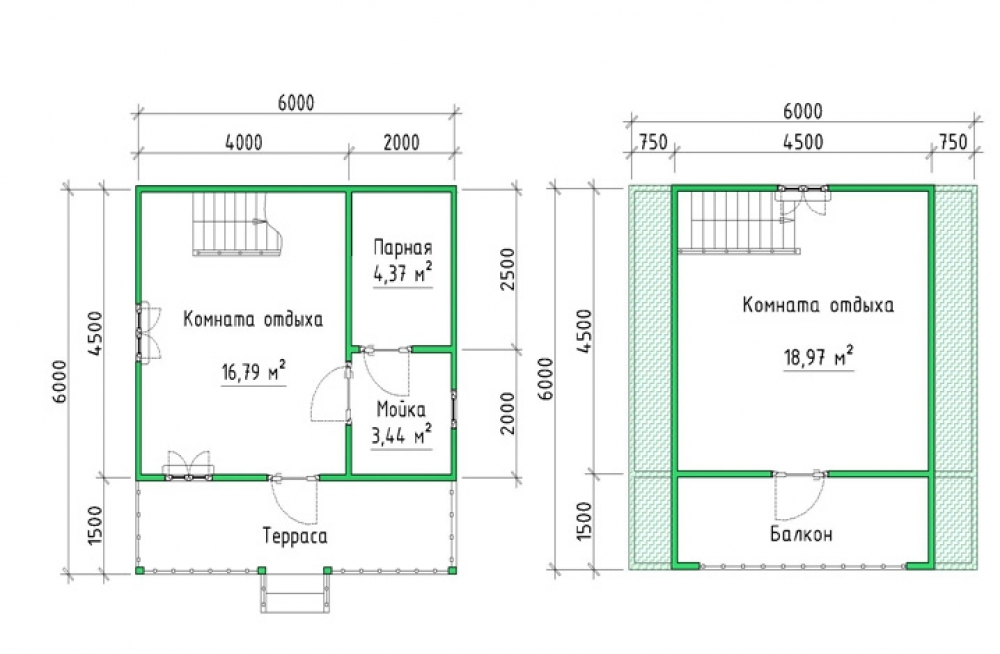
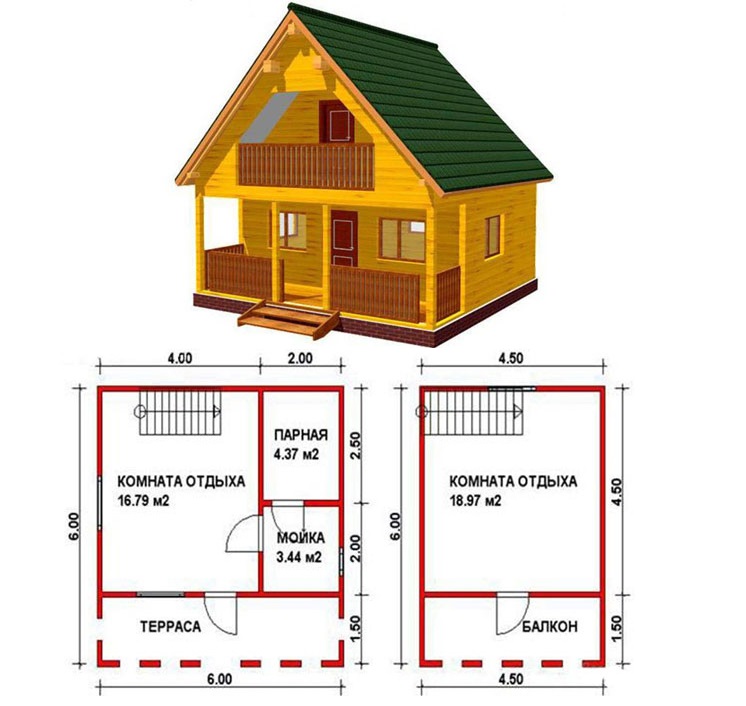
- Project baths 6x6 with a veranda is more difficult to install, but this is a truly multifunctional unit, in which you can not only bathe and bathe, but also relax comfortably. Inside the one-story building there is an opportunity to break from 3 to 5 rooms with different purposes. For this design it is necessary to use a reliable strip foundation.
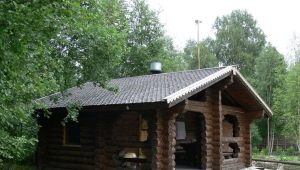
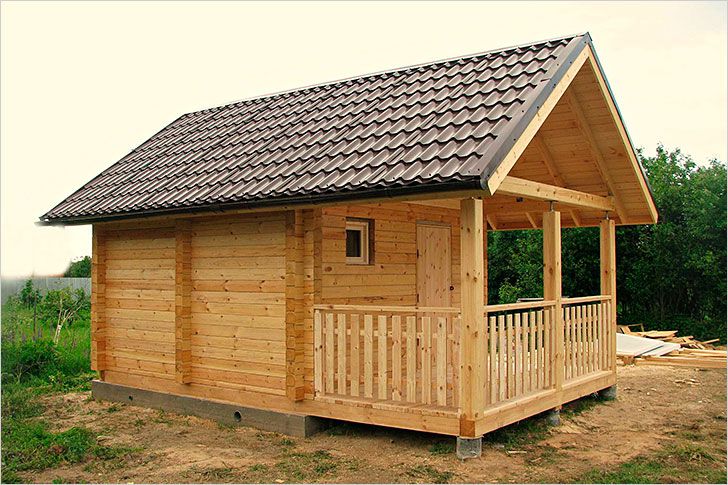
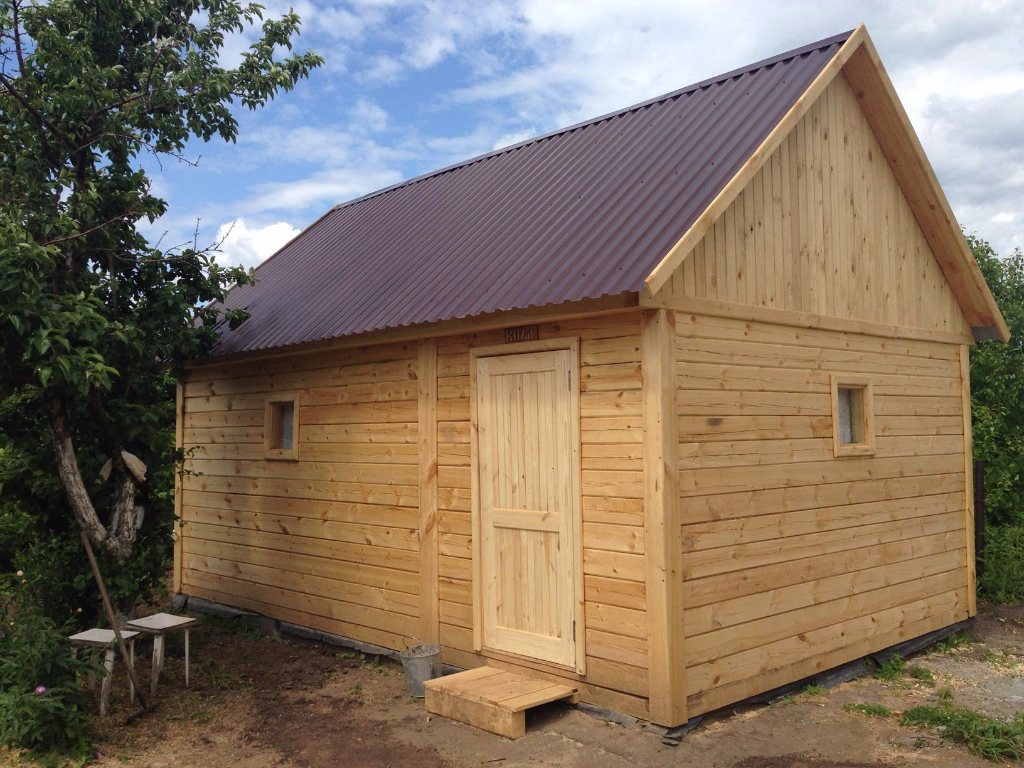
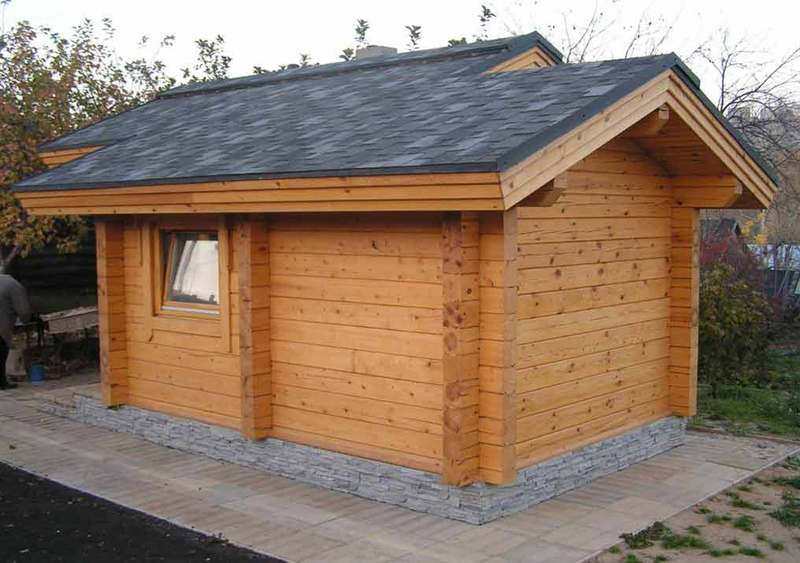
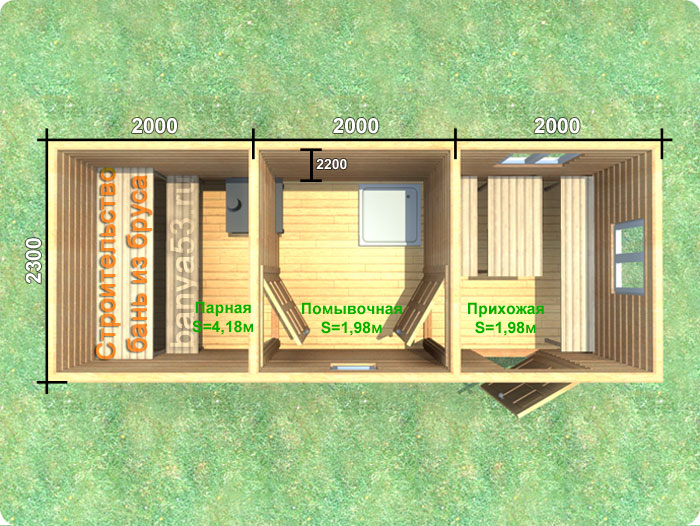
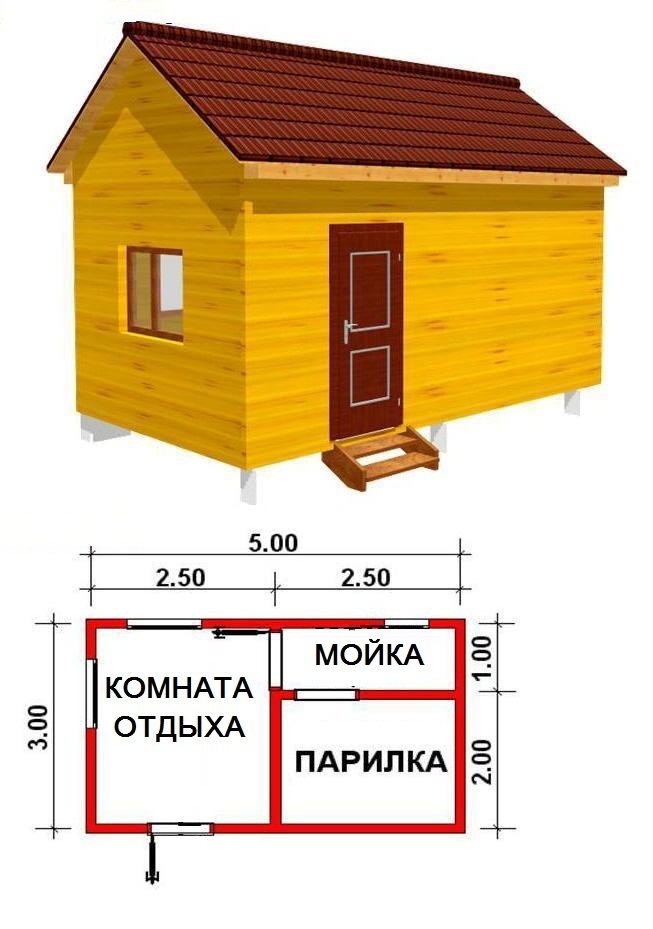
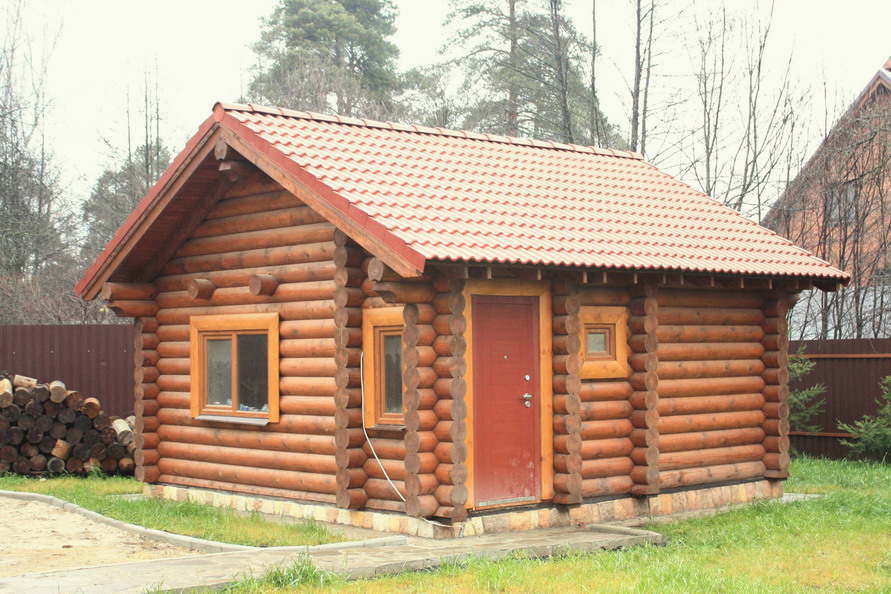
- Small wooden bath with dimensions of 3 by 5 m may have three rooms: a rest room and a dressing room, a spacious steam room and a sink. Such a project can be implemented independently, using a minimum of tools and materials, as well as your personal skills. Under the pitched roof there is an opportunity to organize a place for storing brooms and other household items.
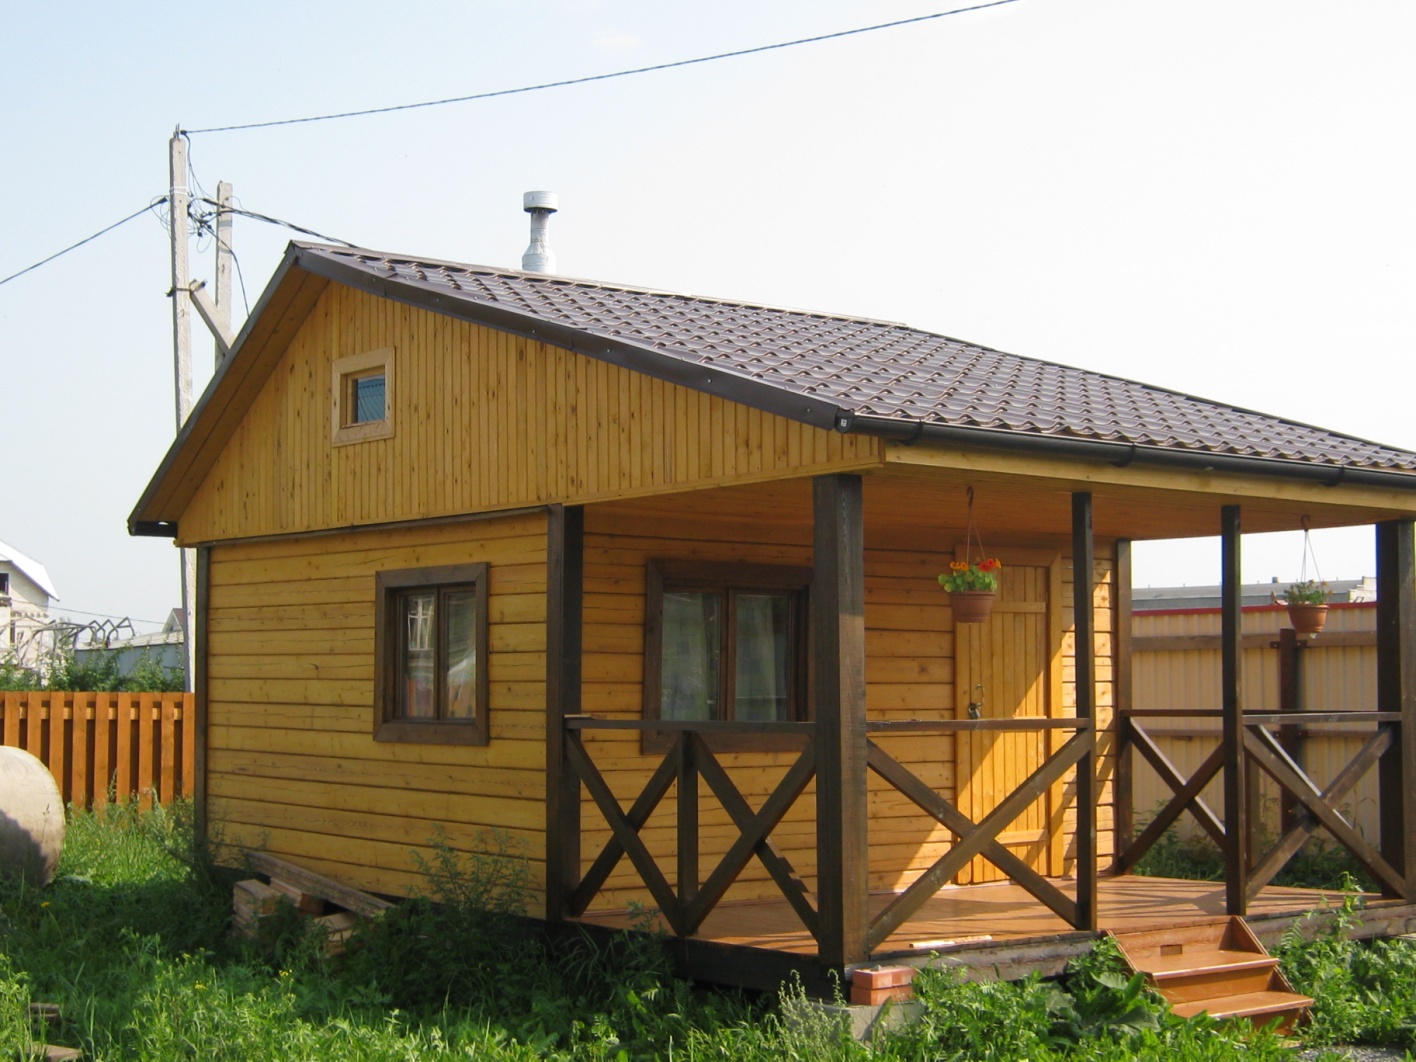
- Two-storey sauna with attic - this is a really chic project that can be built on your country site. As with any single-storey species, it will contain all the necessary functional units, namely, a waiting room, a steam room, a sink, and also have rooms for rest, a comfortable balcony, a storage room, or even a hall. Such a construction, because of its massiveness, requires the construction of a solid strip foundation.
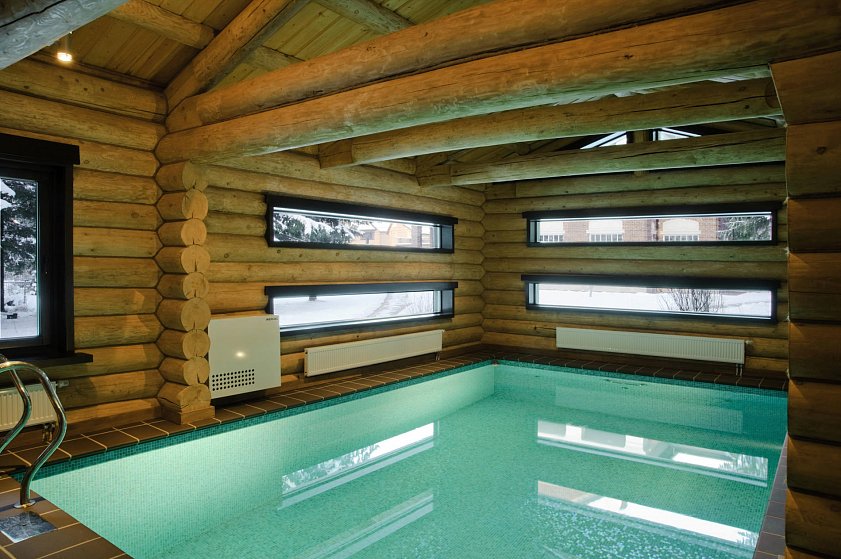
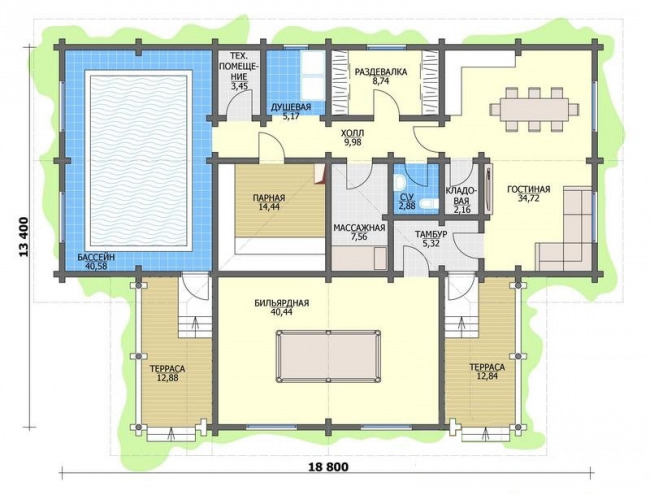
- Bathhouse with pool design and build is not as difficult as it seems initially. It is enough to build a spacious room out of a bar, dig a recess for the bowl, provide it with waterproofing and tile it. But the interior will be just gorgeous and will make a huge impression on the guests.
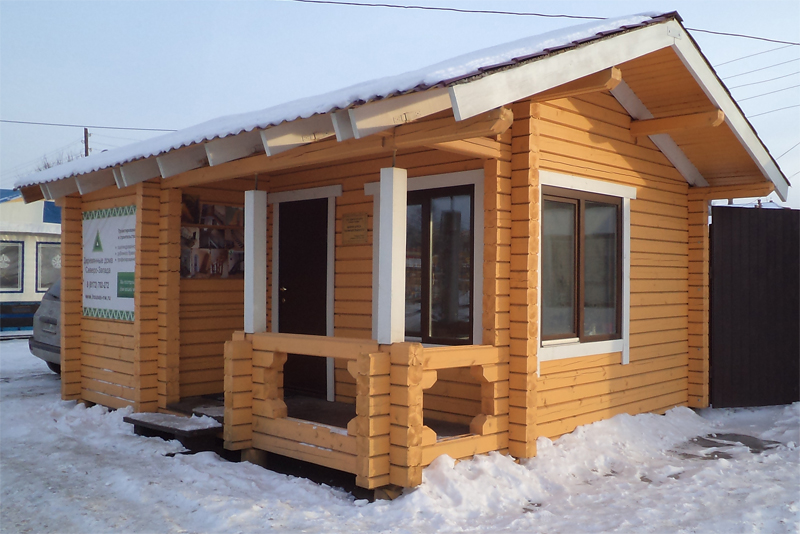
- Posh project on a strip foundation with a terrace it is possible to build independently using available finishing and heat insulating materials. Inside there may be several rooms: hall, steam room, sink, small storeroom and others. An extension in the form of a pretty terrace can be equipped with a fence of wooden slats.

Quantity calculation
Standard calibrated timber is usually sold in cubic meters. To calculate the required number of cubes for a future bath, you need to make drawings with sizes. Based on them, the calculation of the necessary materials.
When planning purchases, it is necessary to take into account the volumes of the mortar for pouring the foundation, the number of insulating and decorative materials, and additional elements.
How to build?
It is necessary to begin construction of a bath from a bar with hands with a choice of a place of its location, construction materials and creation of the project with drawings. The varieties of wood have already been discussed in detail.As for the place for future construction, it should be relatively flat, without an abundance of groundwater, convenient for supplying water and creating a drainage system. Besides It is necessary to take into account the direction of the smoke from the bath pipe: it must be mounted in such a way that the smoke coming out of it does not interfere with either your own or your neighbor’s housing.
A drawing or sketch should be correctly made in two projections with an indication of the size and location of the steam room, the dressing room and other rooms, door and window openings. This method will help to correctly calculate the amount of materials. Next, you need to prepare and clear a place for the bath itself, storage and processing of materials. After that, proceed to the installation of the base.
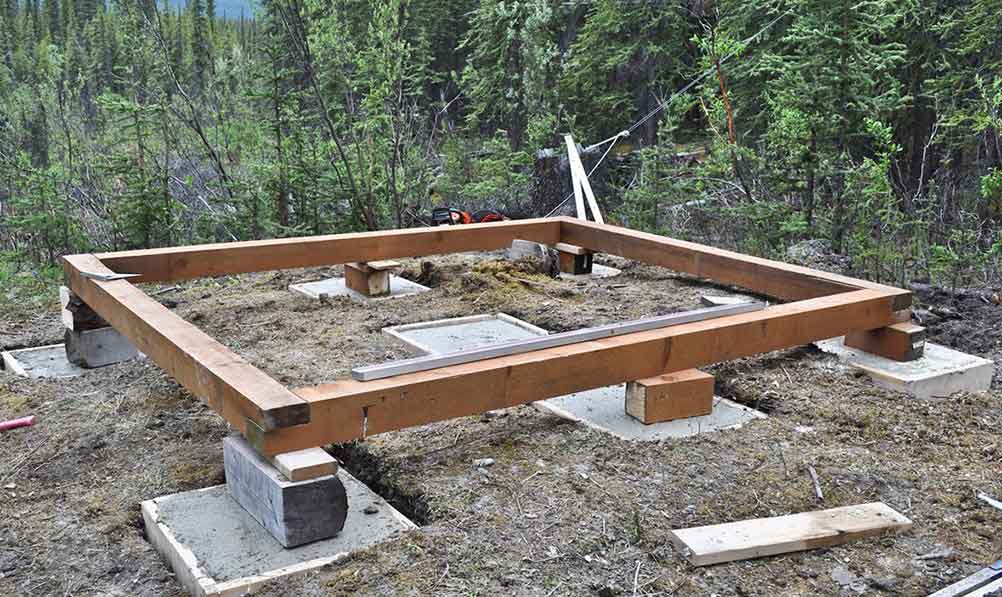
The foundation for a bath can be columnar or tape - the choice depends on the weight of the future structure. Often, the first option is chosen for wooden boards, as it is faster and more economical, but the second method is the most reliable. For the columnar foundation, pits are dug under supports by 15–20 cm wider.than they themselves, fall to the bottom of the gravel or gravel and make a pillow of concrete. The pillars themselves are most often made of brickwork or blocks.First, mark the perimeter and install the supports in the corners, then mount the rest so that the distance between them is not more than 2 m.
Strip foundation is poured under the formwork, in which pre-installed framework of reinforcement. For pouring, it is best to use concrete based on Portland cement with the addition of stones and gravel.
The depth of the strip foundation depends on the indicators of soil freezing: for areas with a temperate climate, it can vary from 50 to 70 cm. The thickness of the concrete base should exceed the width of the beam by at least 10 cm. The foundation should project 15 cm above the ground.
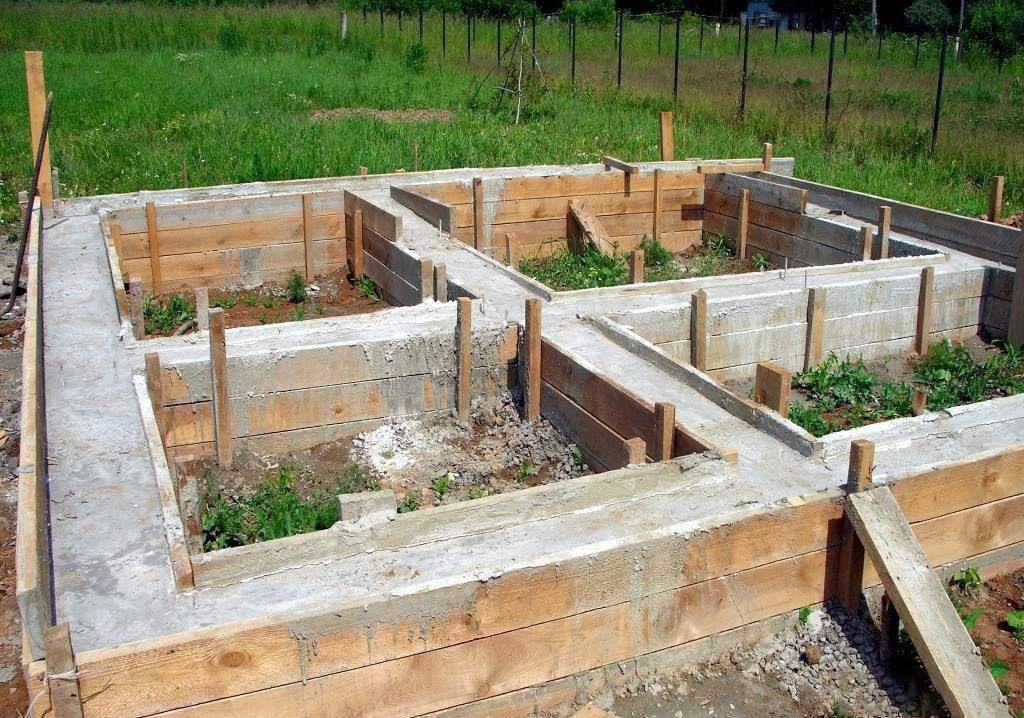
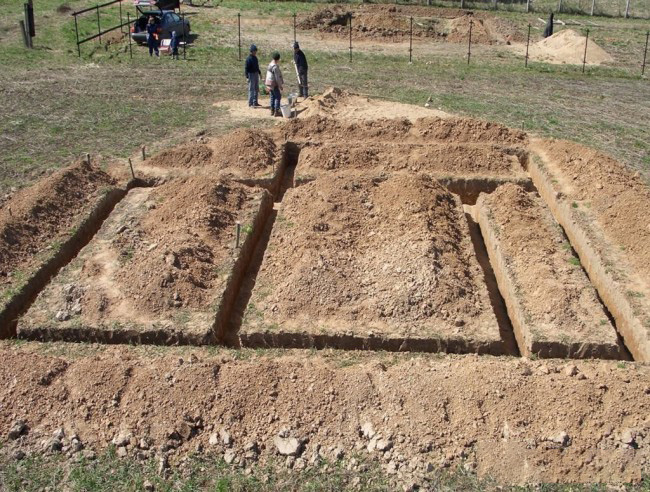
The foundation pit for the strip foundation is manually pulled using shovels. First you need to mark the perimeter and install the beacons on its sides with the help of pegs and fishing line. After the excavation has been dug, the formwork is knocked inside the boards according to the dimensions.
Instead of boards, you can take a special formwork plywood with a smooth surface of chipboard: it is easier to remove after pouring. All work must be carried out in warm and dry weather.
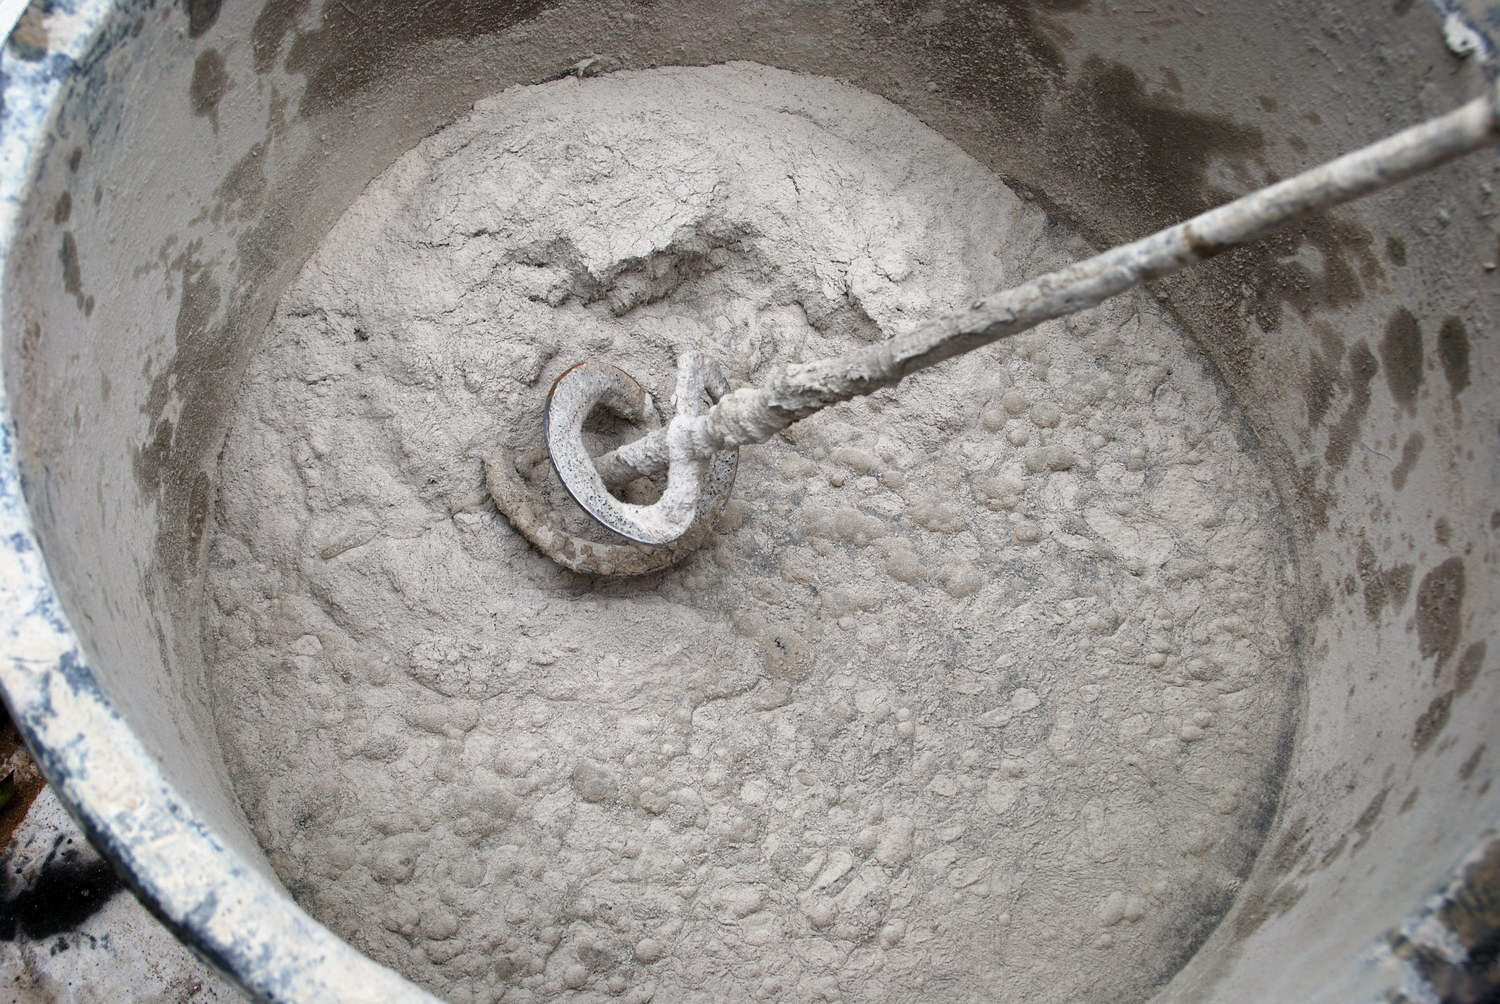
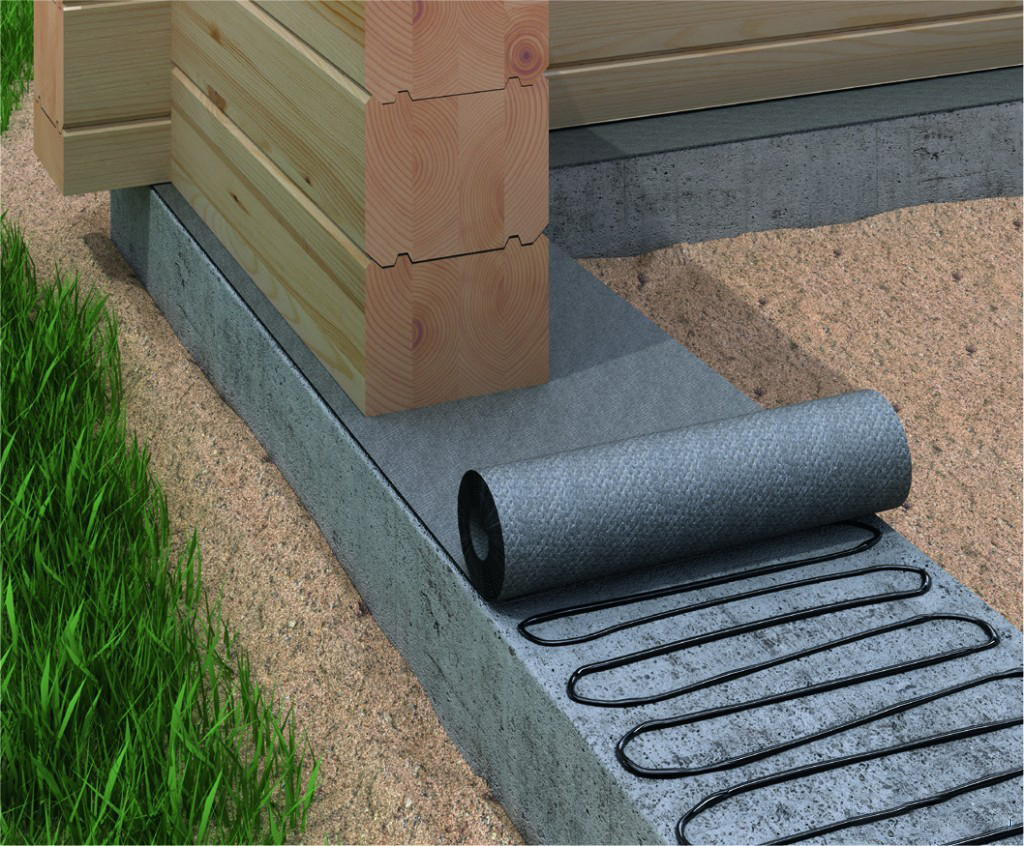
For the preparation of the solution is to choose high-quality varieties of Portland cement, for example, M400.Mixing should be done immediately before pouring with a mixer or a portable concrete mixer. When the foundation is completely poured, it is necessary to wait for it to dry out, after removing the formwork, and start laying the crowns from the bars only after the base has shrunk. From above, the foundation is covered with layers of insulation from rolled roofing material.
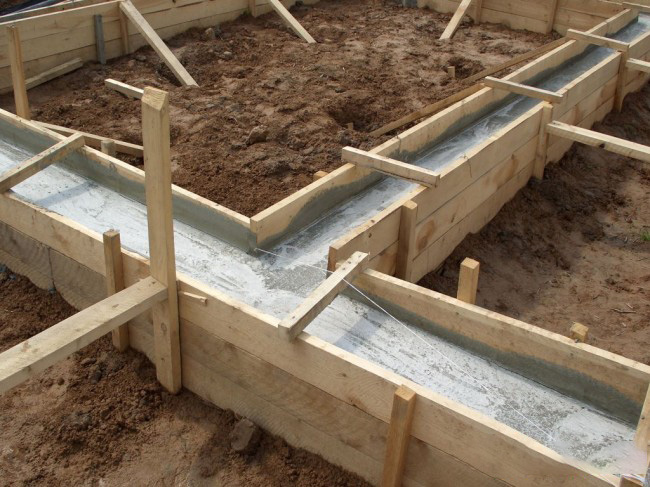
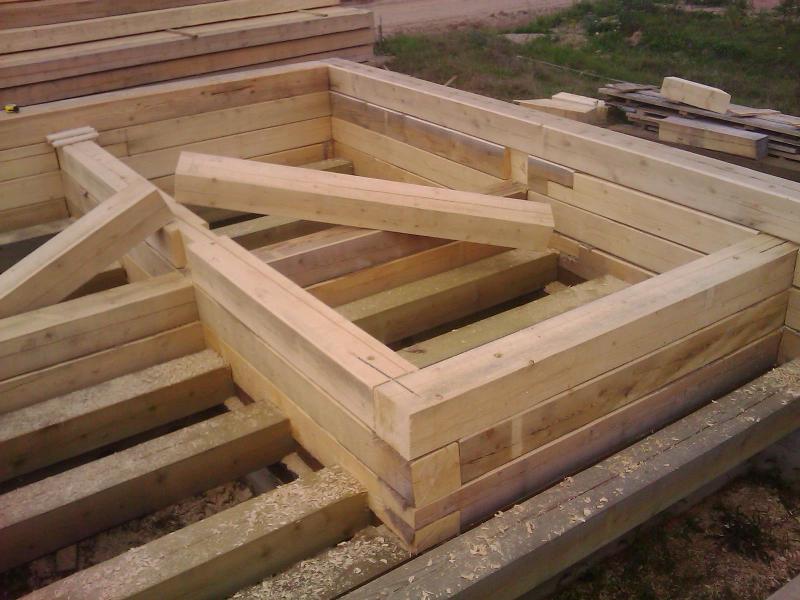
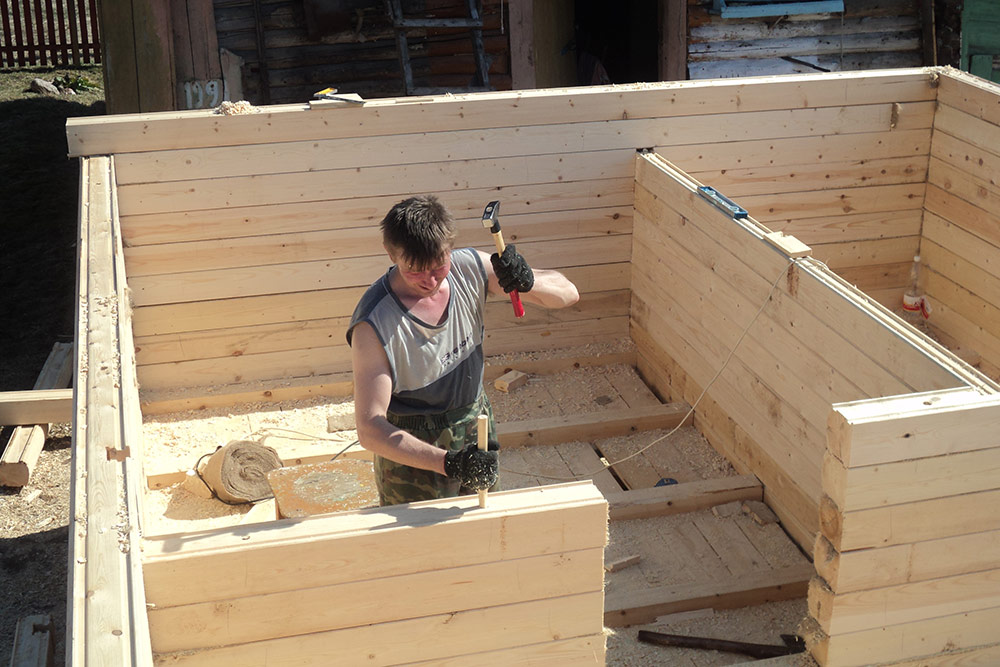
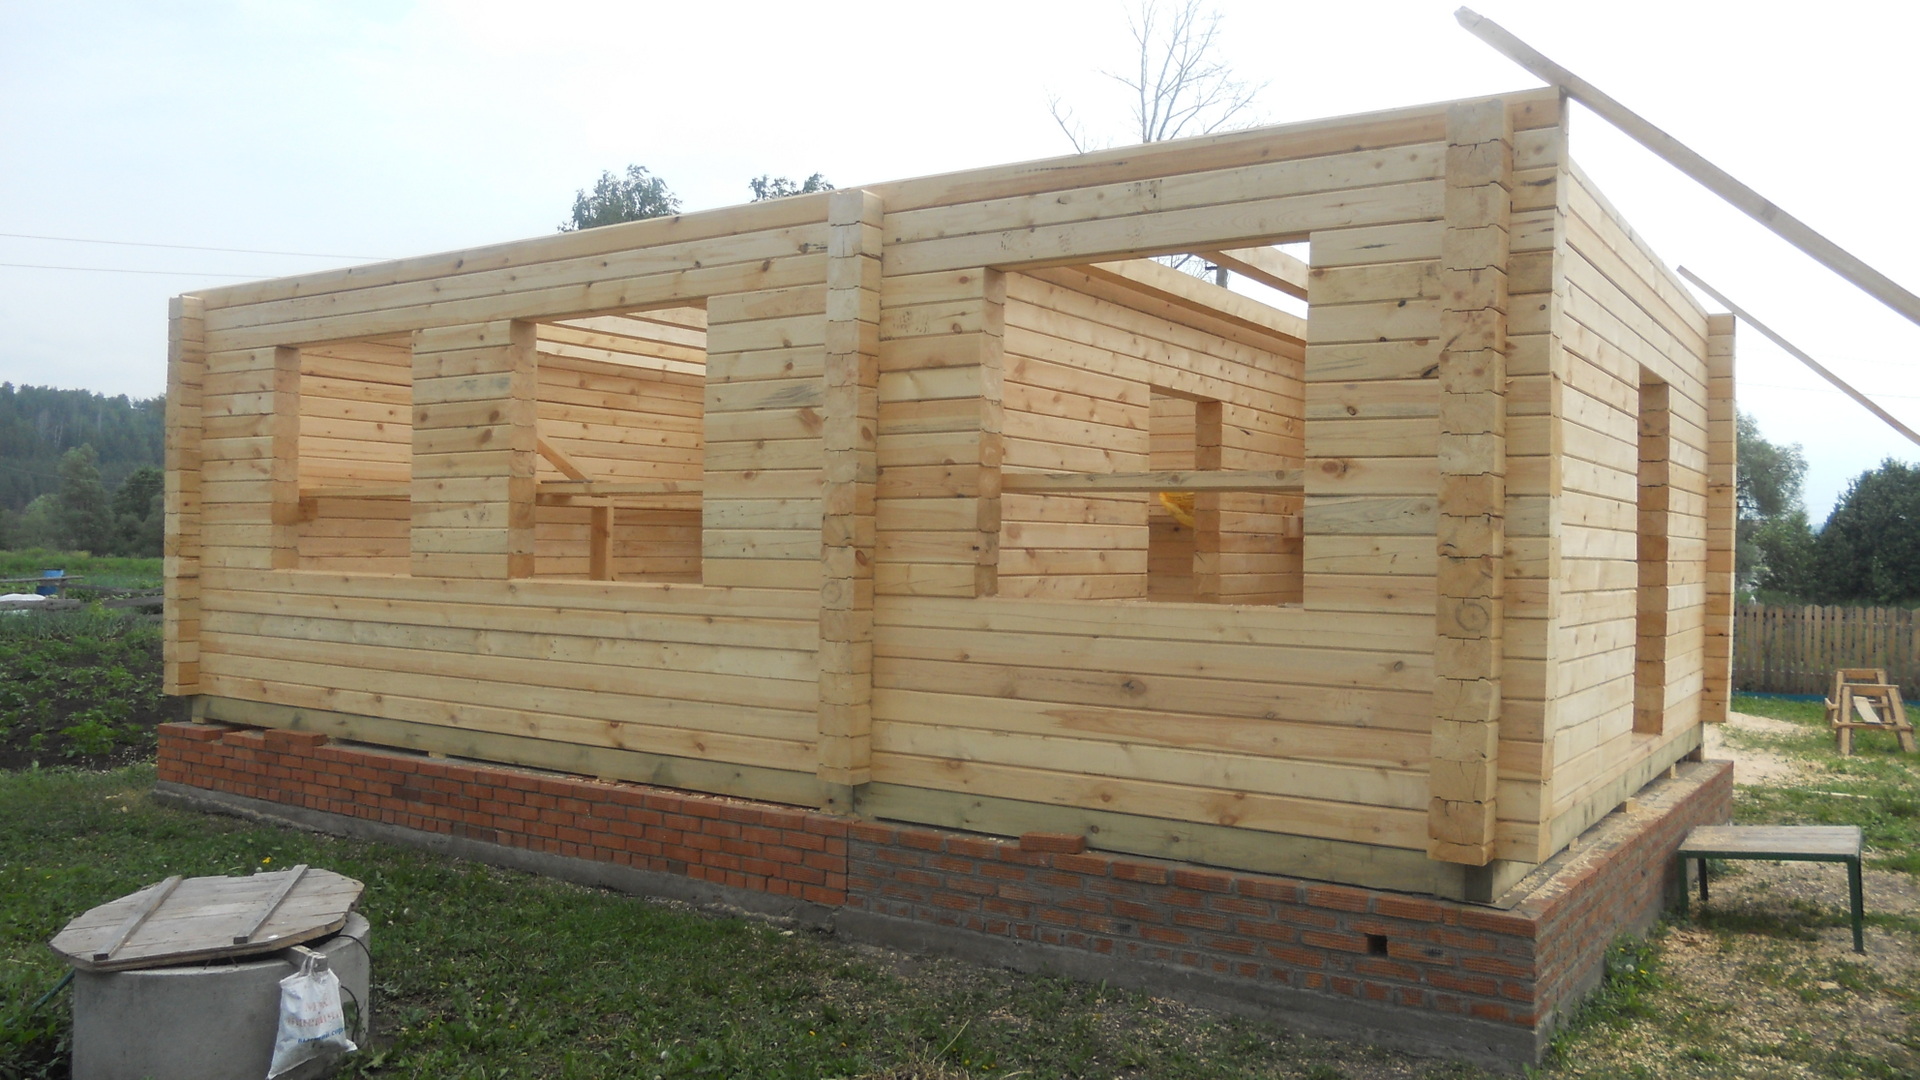
Walls and floors are installed after preparing and cutting materials. The bars treated with antiseptics and fire retardant are sawn to size, and then crowns are laid from them. Do not forget about waterproofing - the first crown must be laid on 2 layers of roofing material. It must be the fattest, because it bears the brunt of the walls and roof. The space between the bars additionally insulated with mounting foam or sealant.
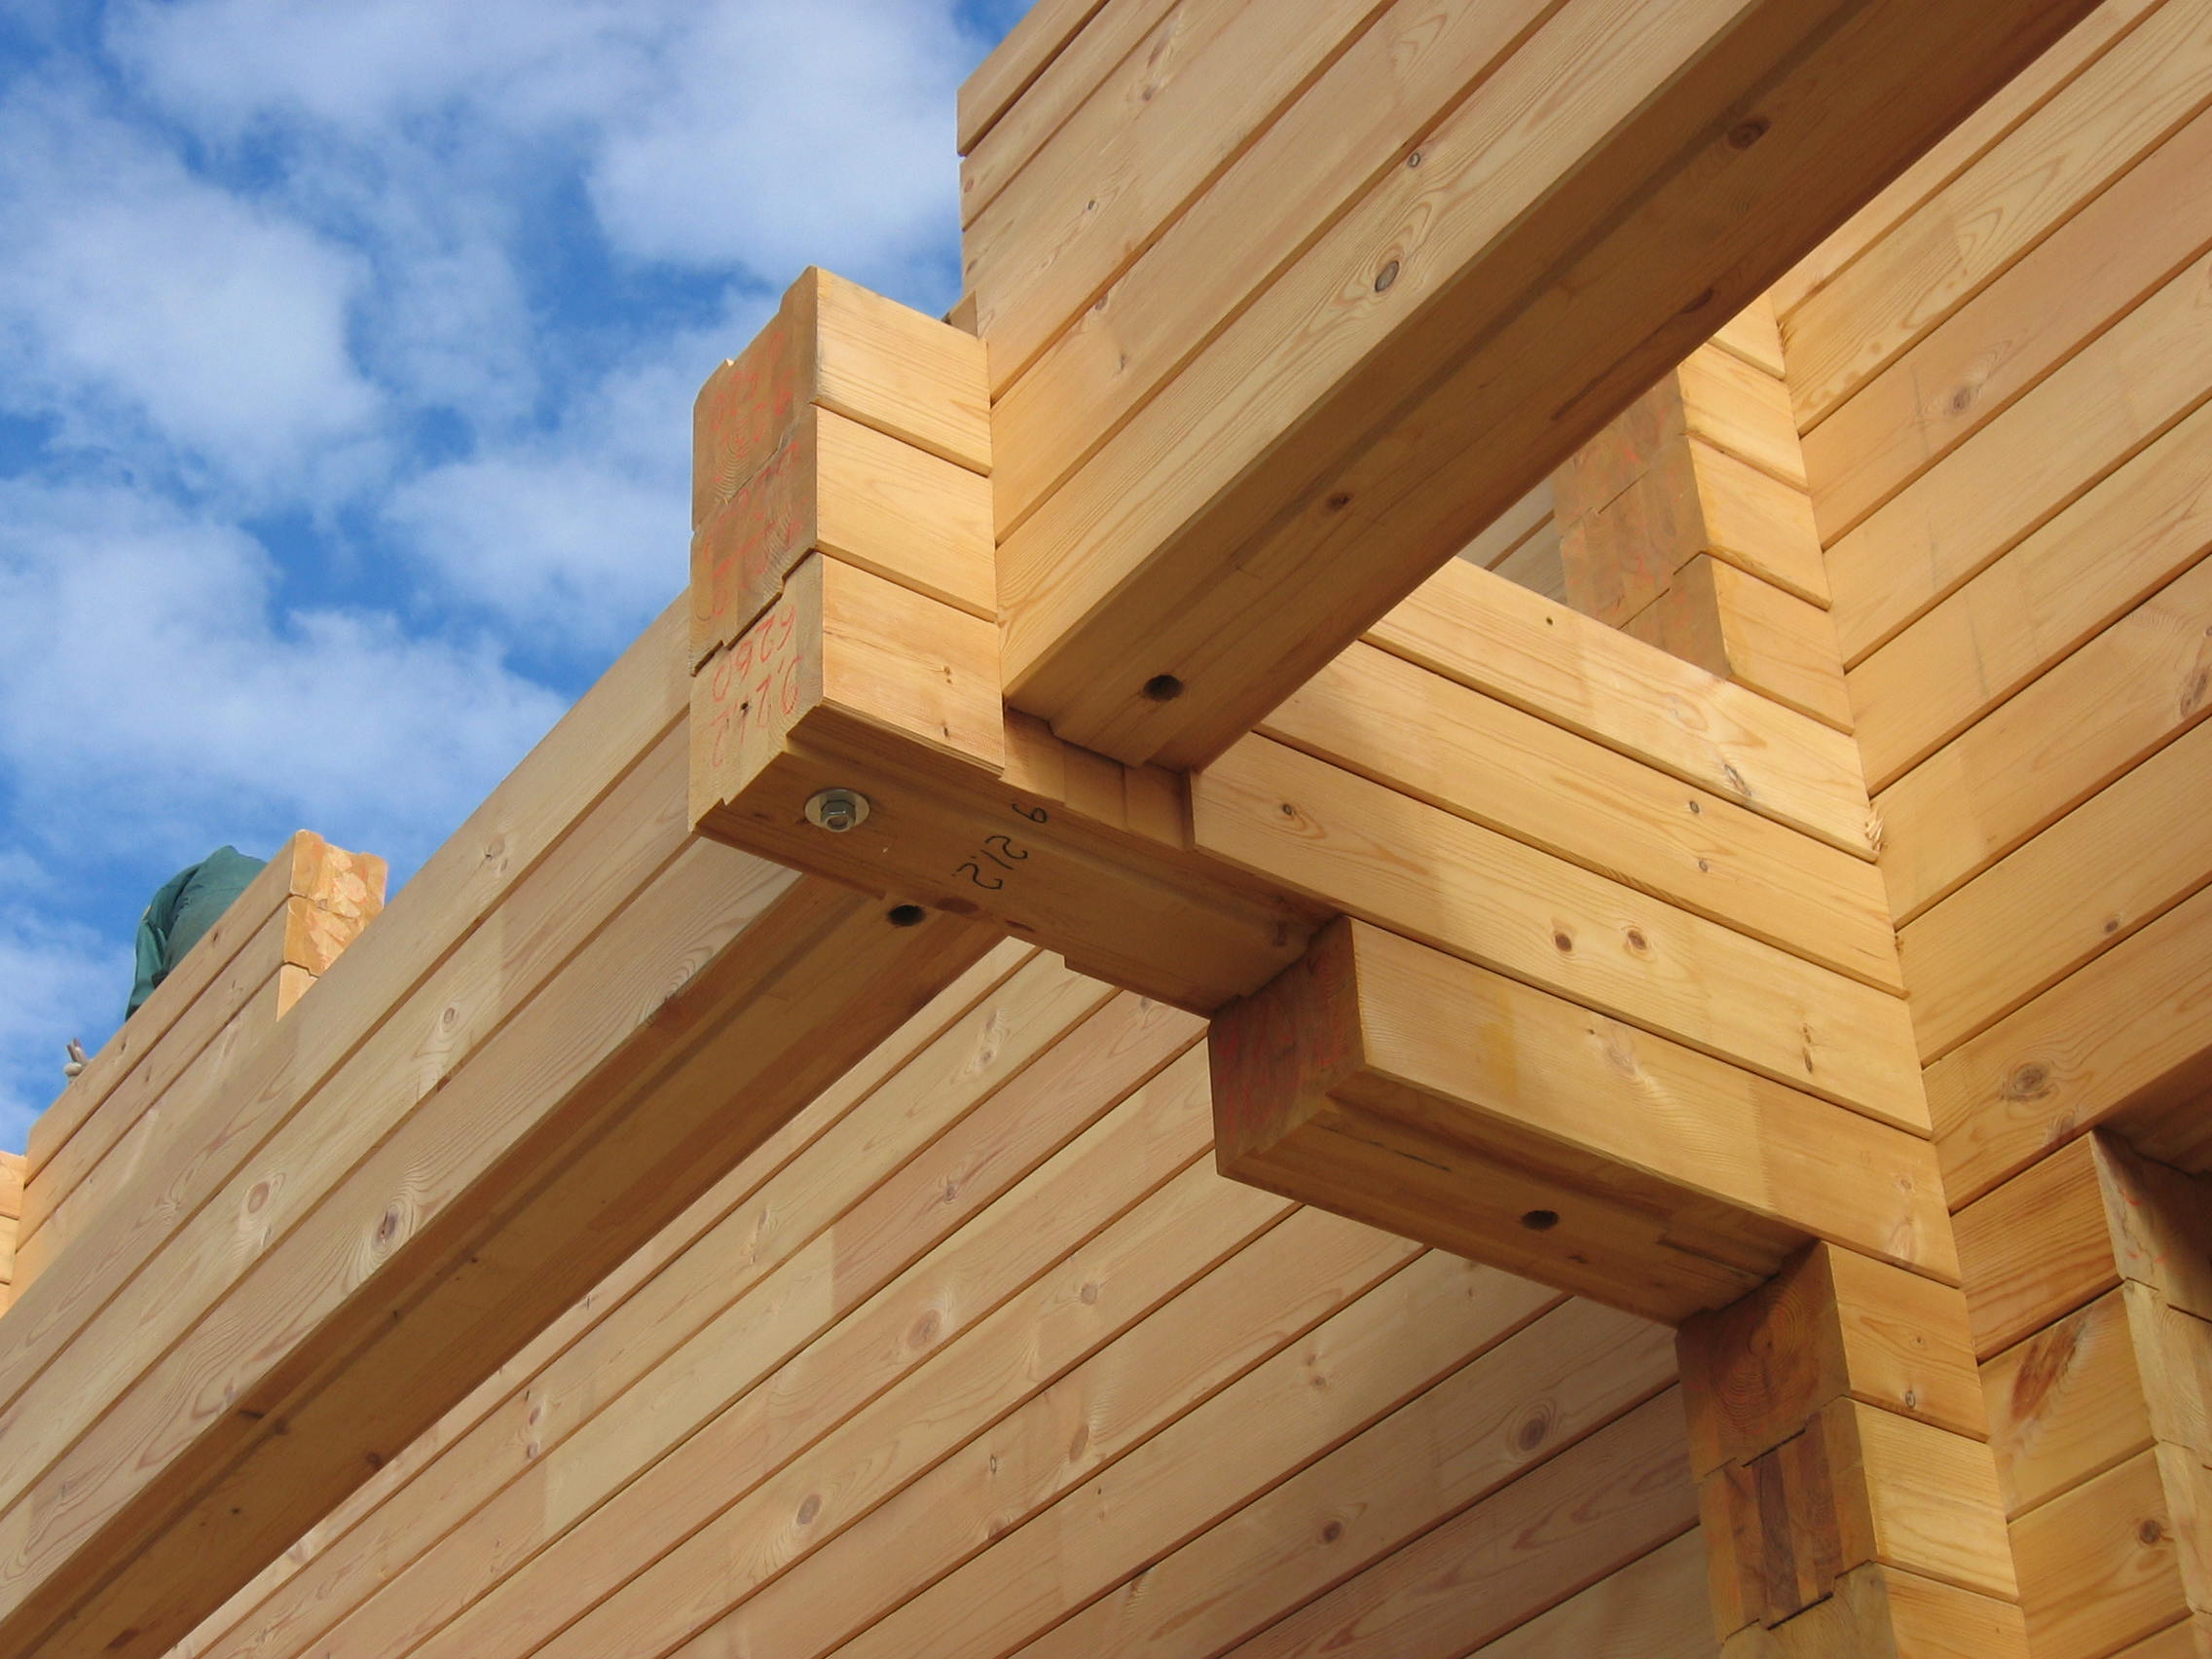
The crowns of the bath are fastened together with pins or metal pins. To do this, the already laid bars are drilled, while the fastening element must completely pass the upper beam and half in the lower one. The distance between the attachment points should be no more than 1.5 m. In this way, all the crowns are assembled with the exception of the last two: they must be removed to secure the truss system.
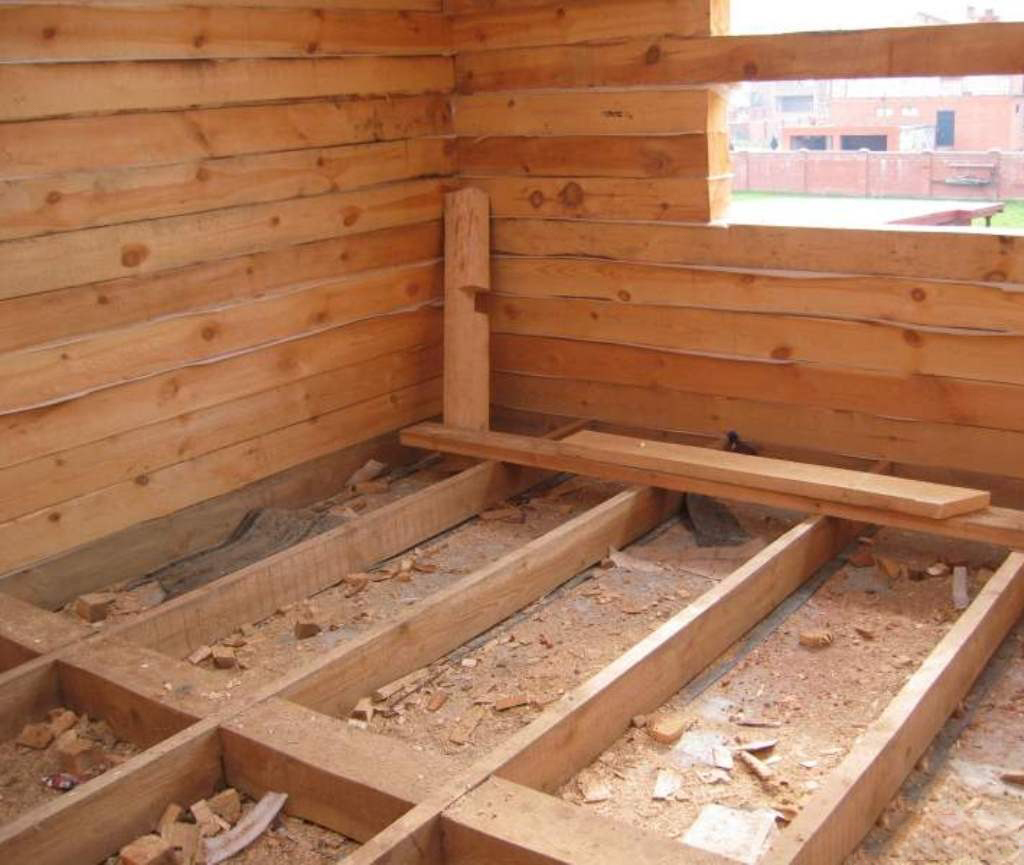
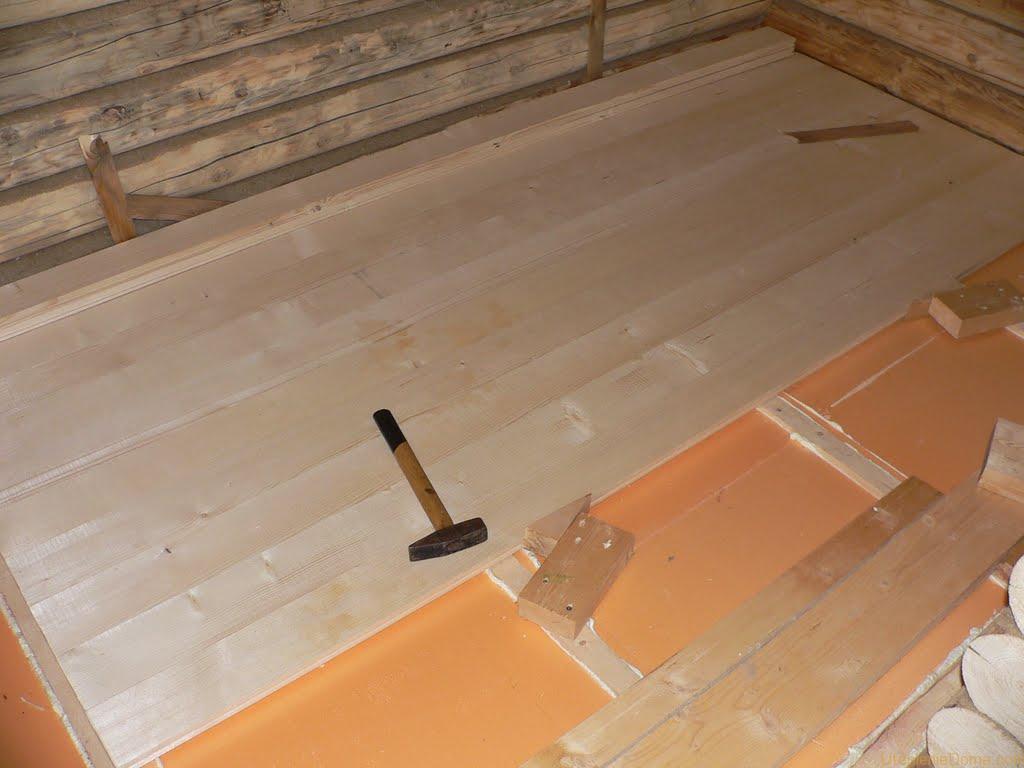
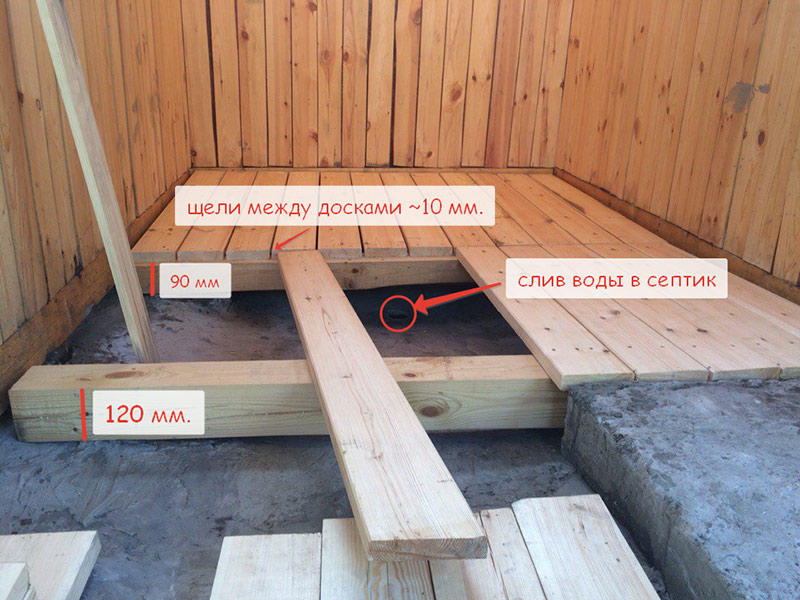
The floor for the bath is optimal to choose wooden: it is simpler to install, retains heat well, it will be more convenient to wash. First, a crate is created from bars, pre-treated with an antiseptic. Then placed inside the insulation and waterproofing. Last planed are planed and polished boards. The floor in the bath is the most moisture-suffering part, so you should take into account that the boards will eventually swell and deform.
For a wooden floor it is worth choosing polished boards with a thickness of 1–2 cm, well dried, treated with a protective agent against moisture.
They are attached to the crate on nails or screws. After installing the flooring in the corners of the room, you can make wooden or plastic plinths.
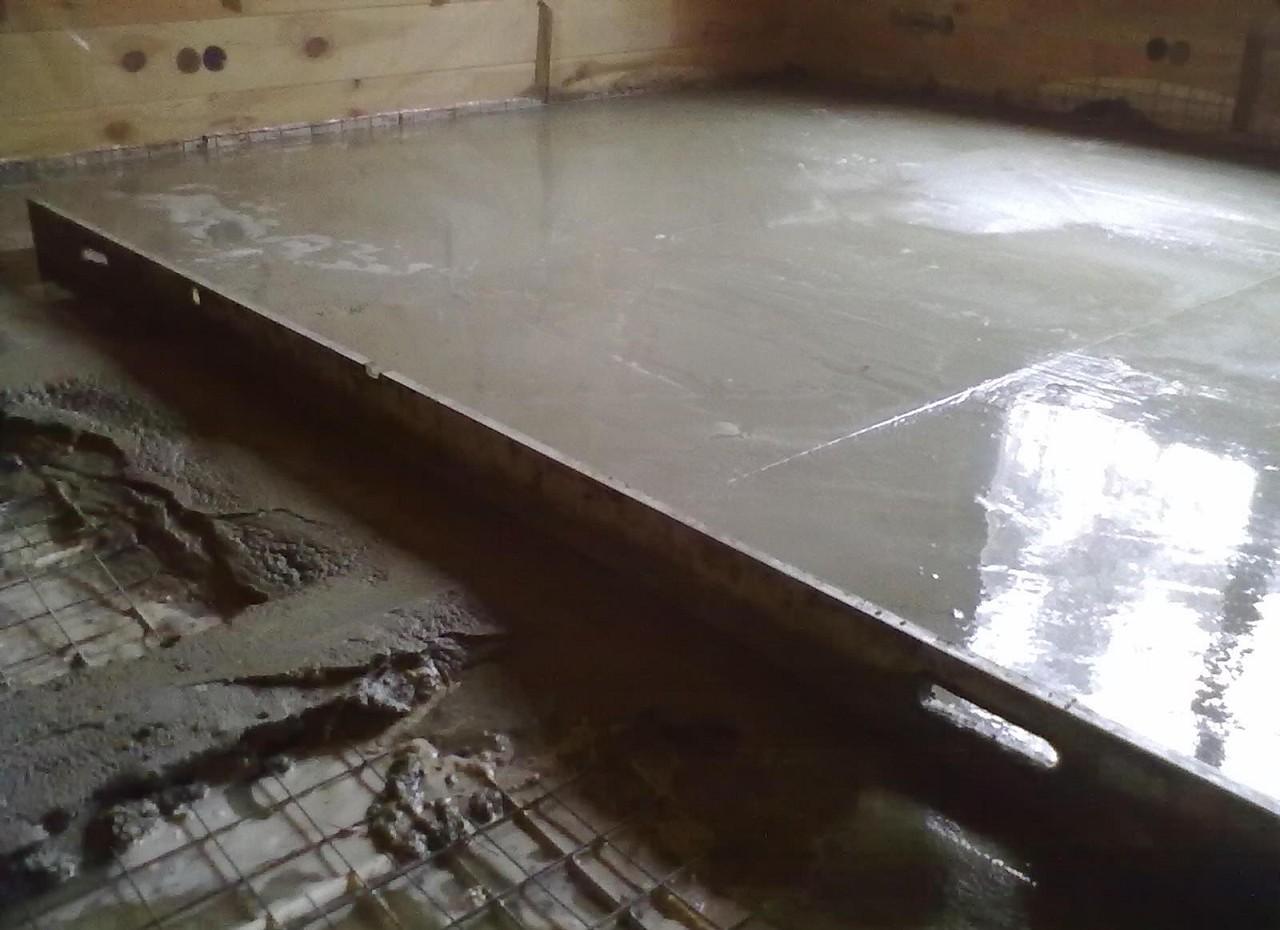
Can be used for bath floor and cement-based screed. Before pouring the base, it is necessary to warm, then mount the batten or guides, then mix and pour the solution.
Regardless of the choice of material for the floor, you need to equip it with a drain and make some tilt so that the water goes away.
Window and doorways in the walls can be made even before the assembly of crowns (immediately on the ground) or after it with the help of a chainsaw. They set the casing of the boards, which coincide in thickness with the width of the beam.At the top, a sediment gap of about 2–3 cm is left, which is then filled with insulation or mounting foam.
After the openings are made, you should not hurry with the installation of window packages and door frames - it is worth waiting for some time to shrink.
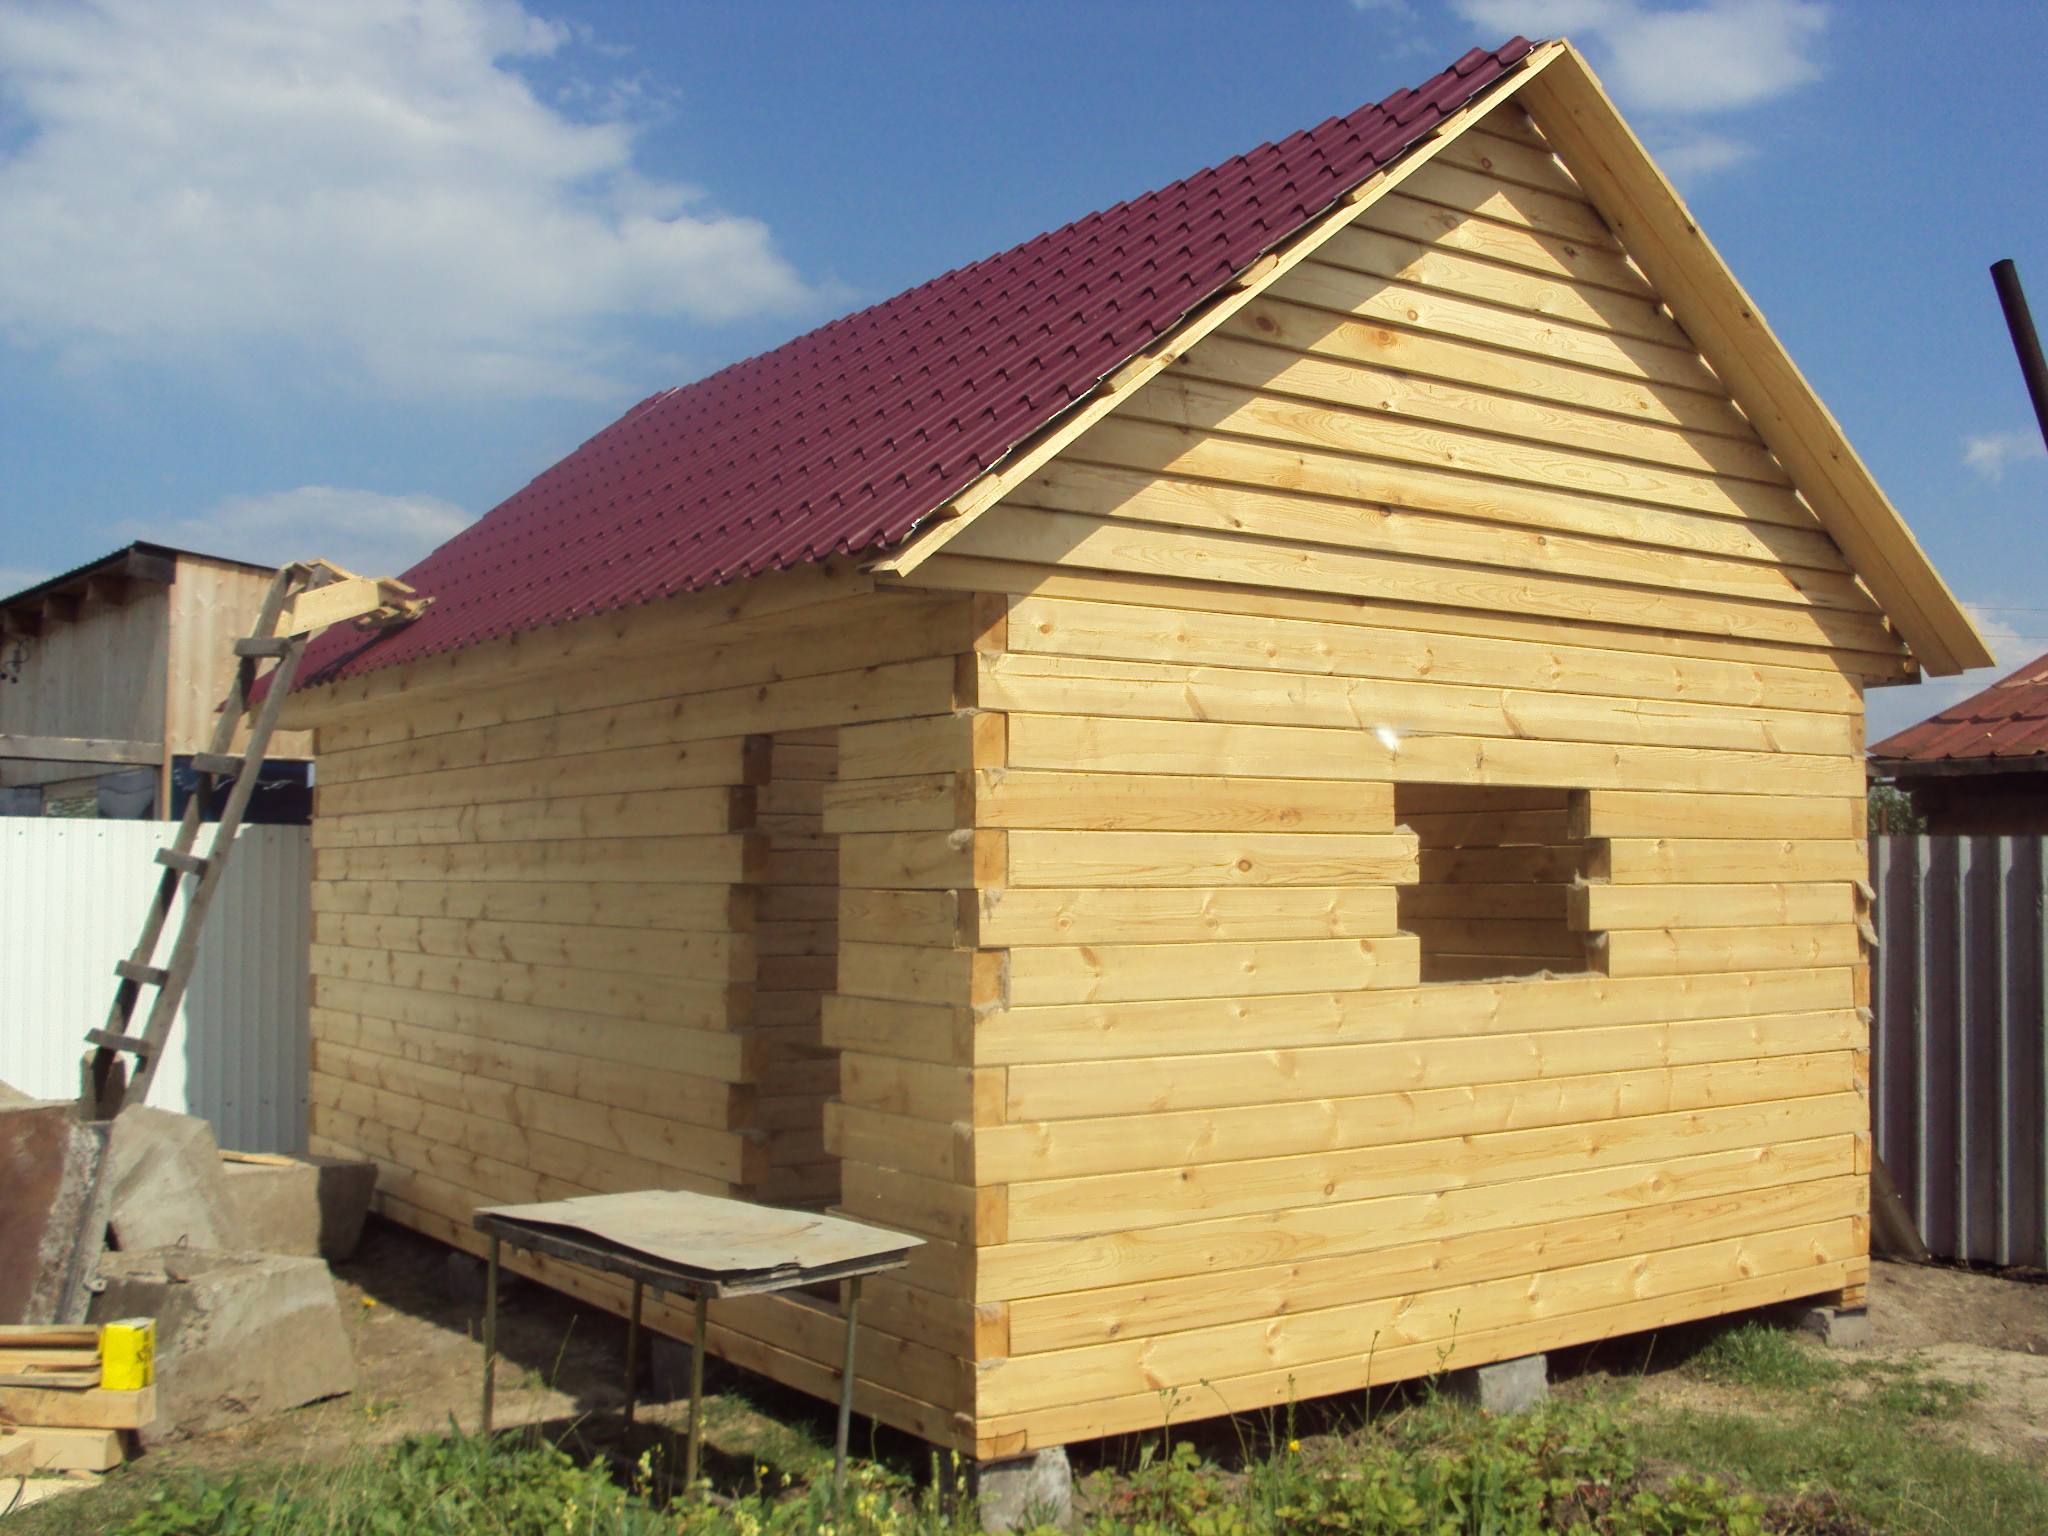
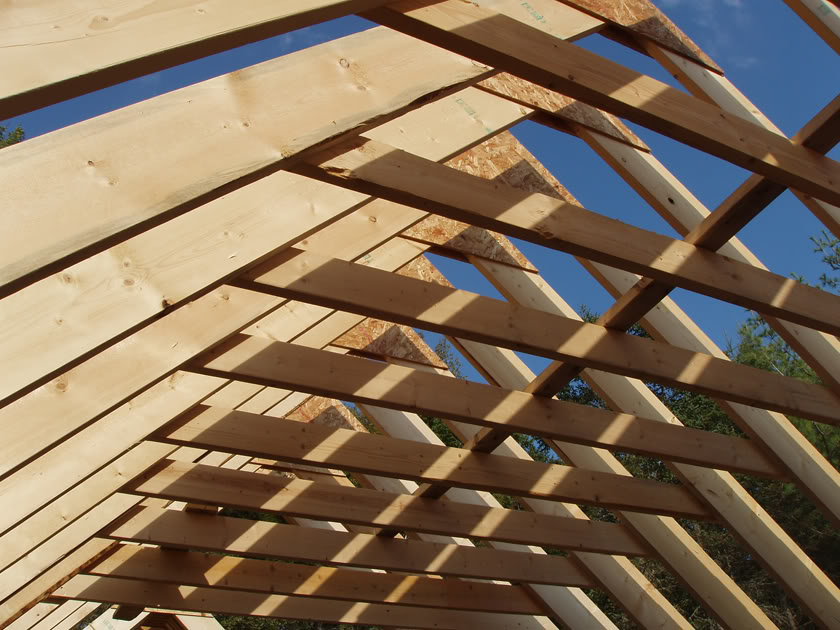
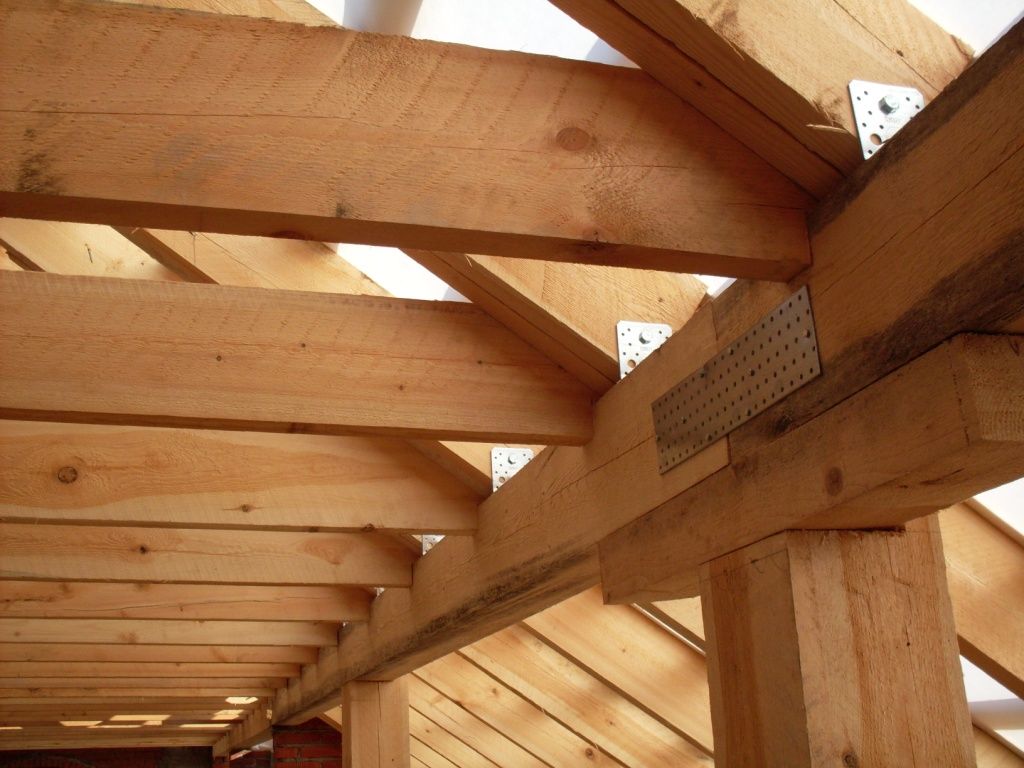
The roof for the bath of the bars is often chosen dvuhskatnaya and symmetrical: it is the easiest to install and is able to reliably protect from snow cover and storm water. To make the truss system for the roof itself is not difficult because of the small dimensions of such a building. Roof bars are also made on the ground, treated with fire retardant and antiseptic, then dried.
The assembly of the truss system begins with the installation of a power plate - the base around the perimeter, on which all other elements will be supported. A central beam with vertical posts is fastened on the mauerlat, then the transverse bars with vertical braces are fastened. At the end it is necessary to fold the ramps, which are connected in the center of the frame with a ridge beam. All elements of the truss system are attached to nails, metal screws or anchors for wood, their size depends on the thickness of the timber.
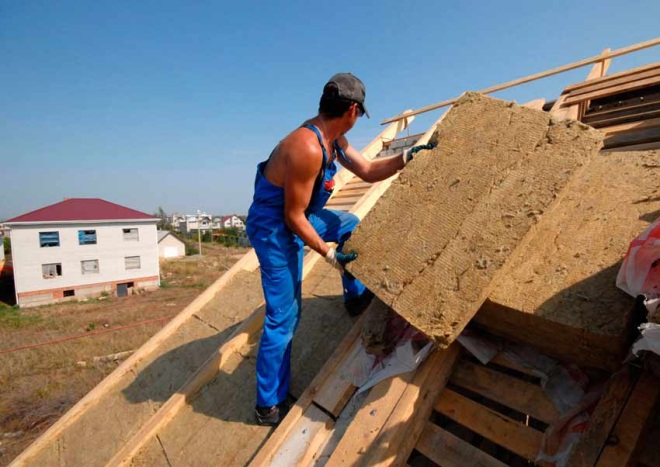
When the wooden frame is ready, you need to take care of the insulation and the flooring of the roof. As its insulation, you can take non-combustible mineral wool, penoplex or polystyrene foam.
It is possible to cover the roof with different materials: a light and durable metal tile of various colors, impermeable roofing material or ondulin available and easy to install will be successful. Installation of additional elements (ridge, eaves, rain drains) and pipe insulation completes the installation of the roof for a wooden bath.
Windows and doors for the bath is best to choose from ordinary wood and mineral glass. You should not trick with double-glazed windows, especially since the building over time gives a strong shrinkage, and the climate inside is unfavorable for plastic.
Before installing window bags and door frames, it is worth making a gap, which is subsequently plugged with assembly foam.
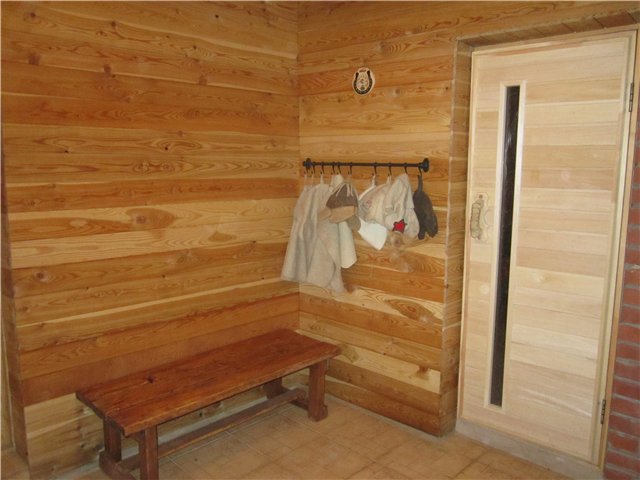
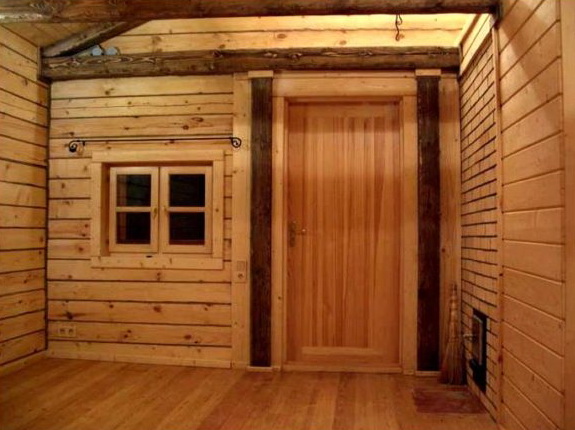
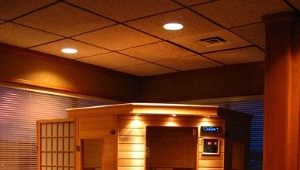
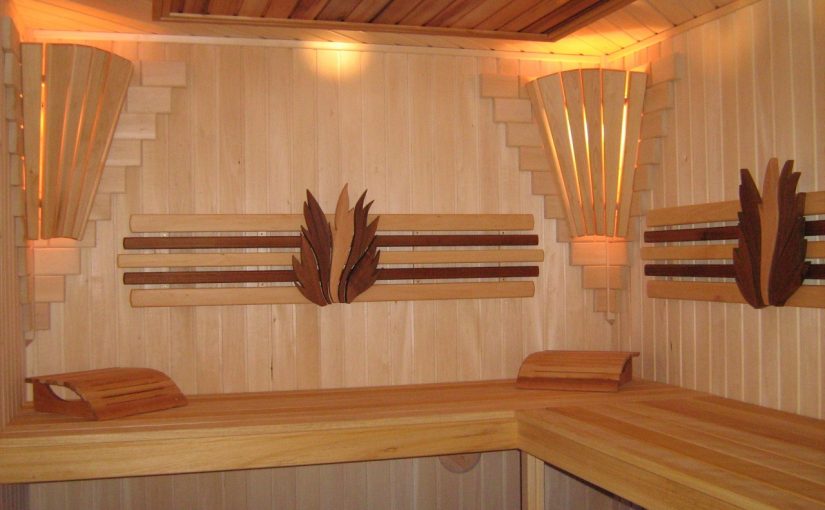
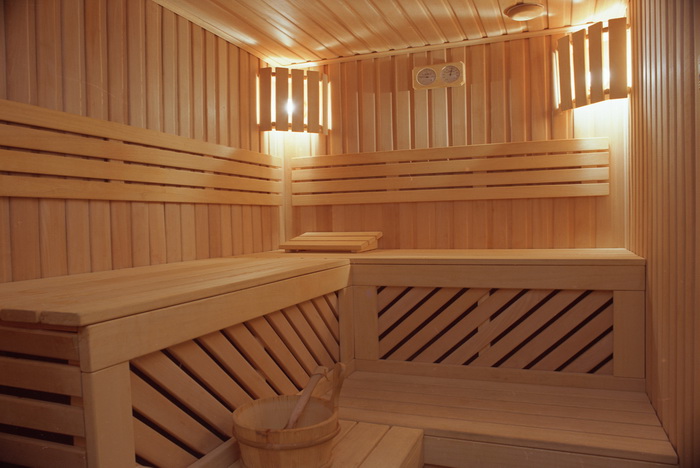
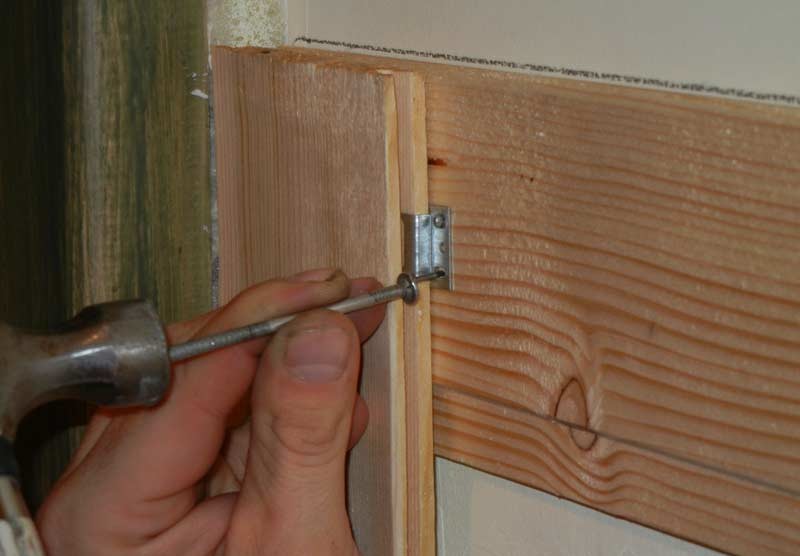
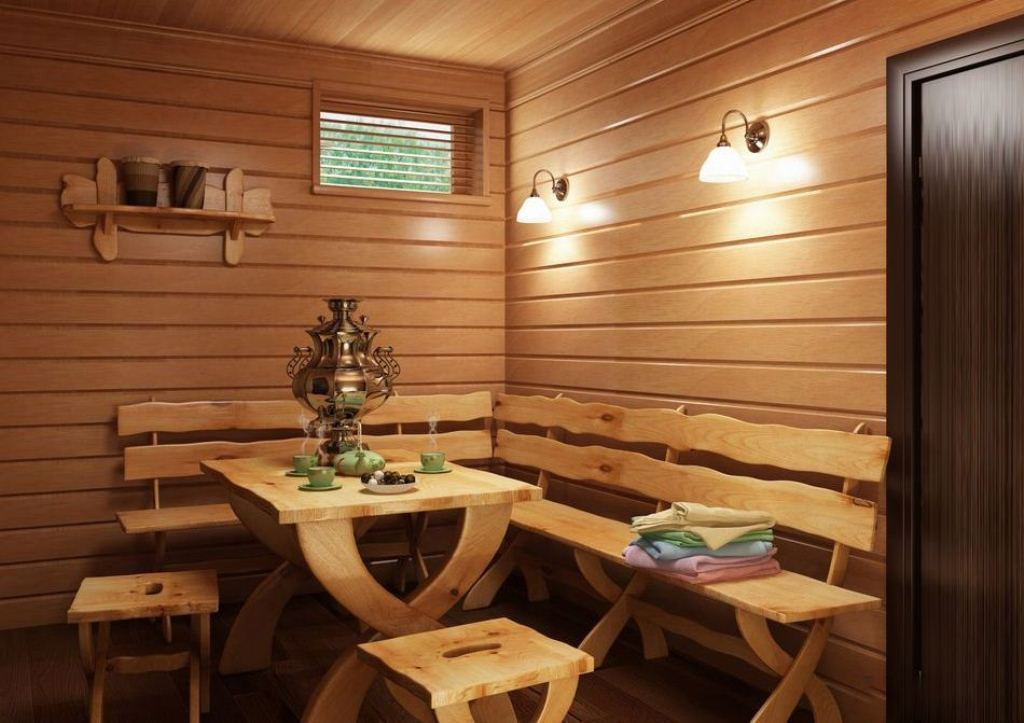
The construction of the bath is completed with its internal and external decoration. The arrangement inside is one of the most important moments. The walls of the bath can be revetted with cladding board or clapboard, which are the most popular options.Such material must be chosen in such a way that it does not absorb moisture, has low thermal conductivity, is protected from fungus and mold, passes air and does not emit tar when heated. Depending on the grade, there are 4 types of lining, the highest quality of which is extra-class. The trimming of this material occurs on small nails.
For the ceiling, floors and benches you can take the same material as for the walls.. When installing, it is worth making small gaps everywhere, taking into account the expansion of the material during heating and swelling under the action of moisture.
For the internal arrangement of the bath should not take lining treated with lacquer or other coloring matter, since when heated, they can melt and produce harmful combustible components.
A waiting room that is less affected by the effects of moisture or high temperatures can be equipped with not such fastidious finishing materials. To make it comfortable to change clothes, the floor should be covered with linoleum or even put a tile. Wooden lining of light colors, plastic PVC panels or laminated MDF sheet will be most suitable for walls.

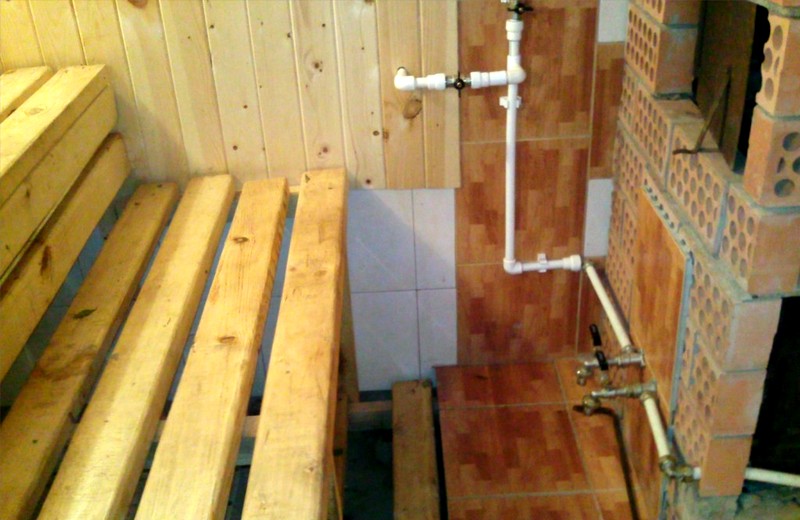
Even when planning a bath should pay attention to the laying of communications: electricity, plumbing and sewage. Those days have long passed when water was dragged into the steam room with buckets - any modern project implies laying water pipes. Today it is possible to purchase and install cheap and practical plastic options that are easy to assemble and connect with a special soldering iron, and serve no less efficiently than cast iron ones. For the withdrawal of wastewater, you can use them.
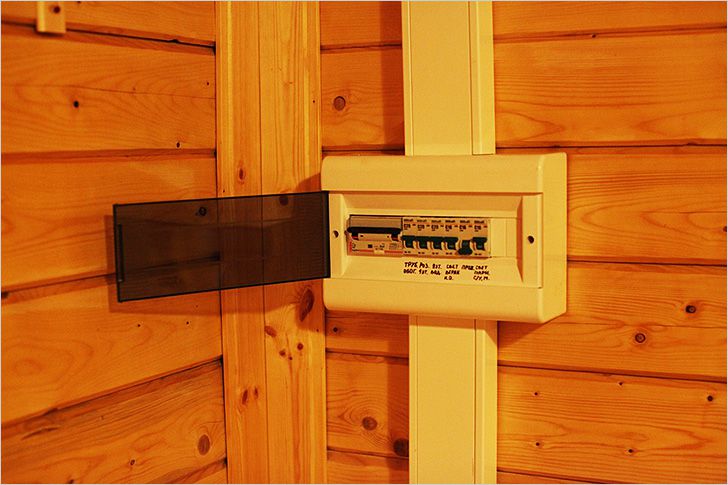
Before installing the insulation and interior decoration, it is immediately worth laying the electrical wiring connected to the household network. Cables should be placed in waterproof corrugations or boxes, mount bulbs for bulbs and switches.
Thermal insulation of the bath can be carried out with different materials, as long as they are protected from moisture and high temperature. Recently, composite polymer heat insulators, such as polystyrene foam, penofol and penoplex, have been popular.. In addition to preserving heat, they provide excellent protection from moisture and allow air to pass through.Insulation is usually placed between the outer wall of the timber and interior decoration.

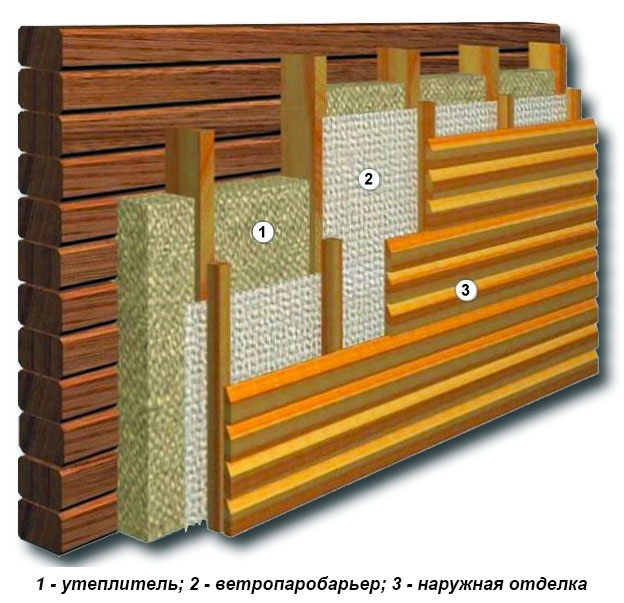
Outside a bath of profiled timber is best to decorate a tree. For this you can use natural wood materials, metal or polymer siding. Some types of building materials, for example, rounded timber, do not need decorative lining at all.
It is better not to use plaster: under the influence of temperature and moisture, it will quickly crack and fly off. The foundation is most well revetted under the rubble or natural stone.
Beautiful examples of finished buildings
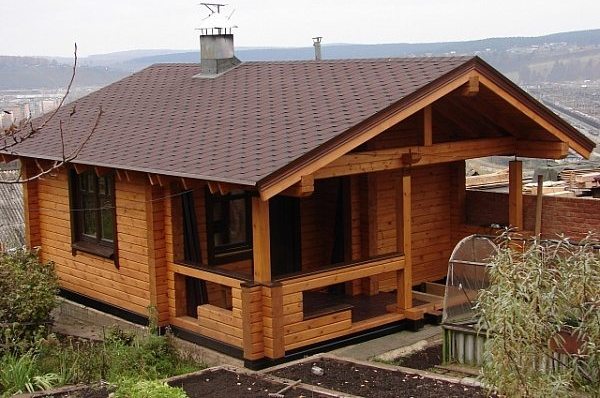
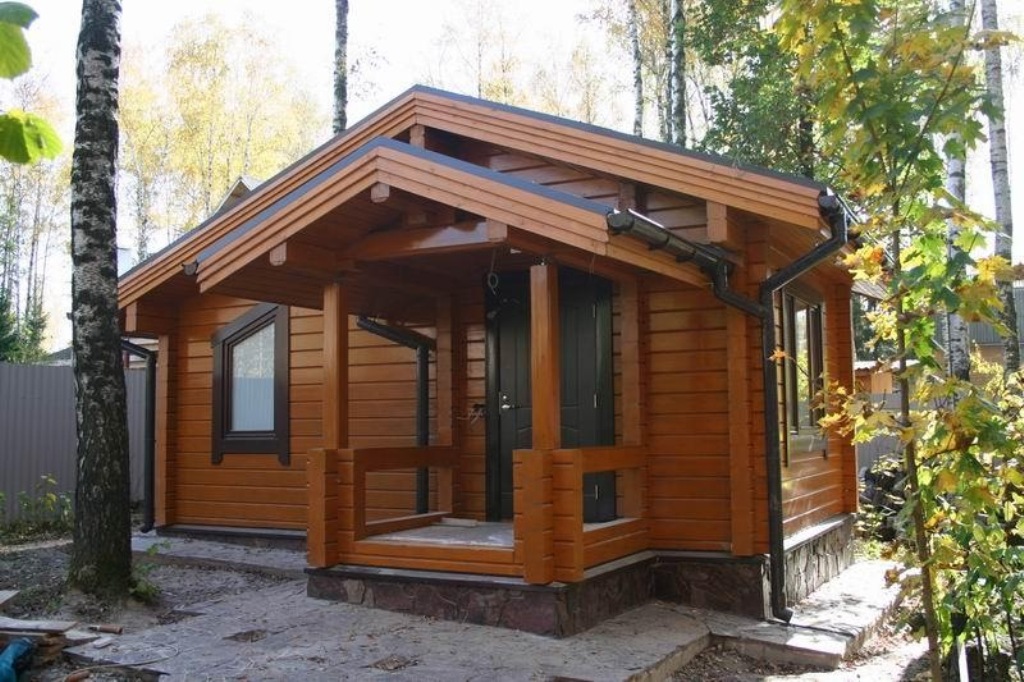
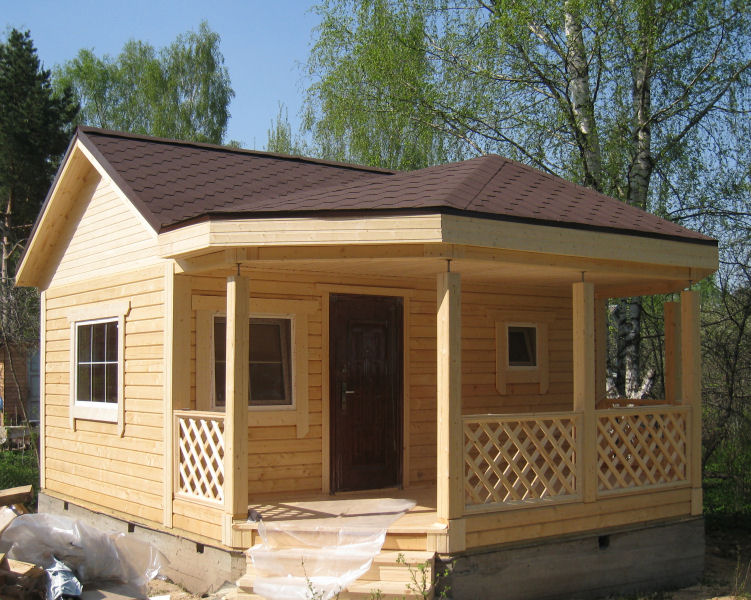
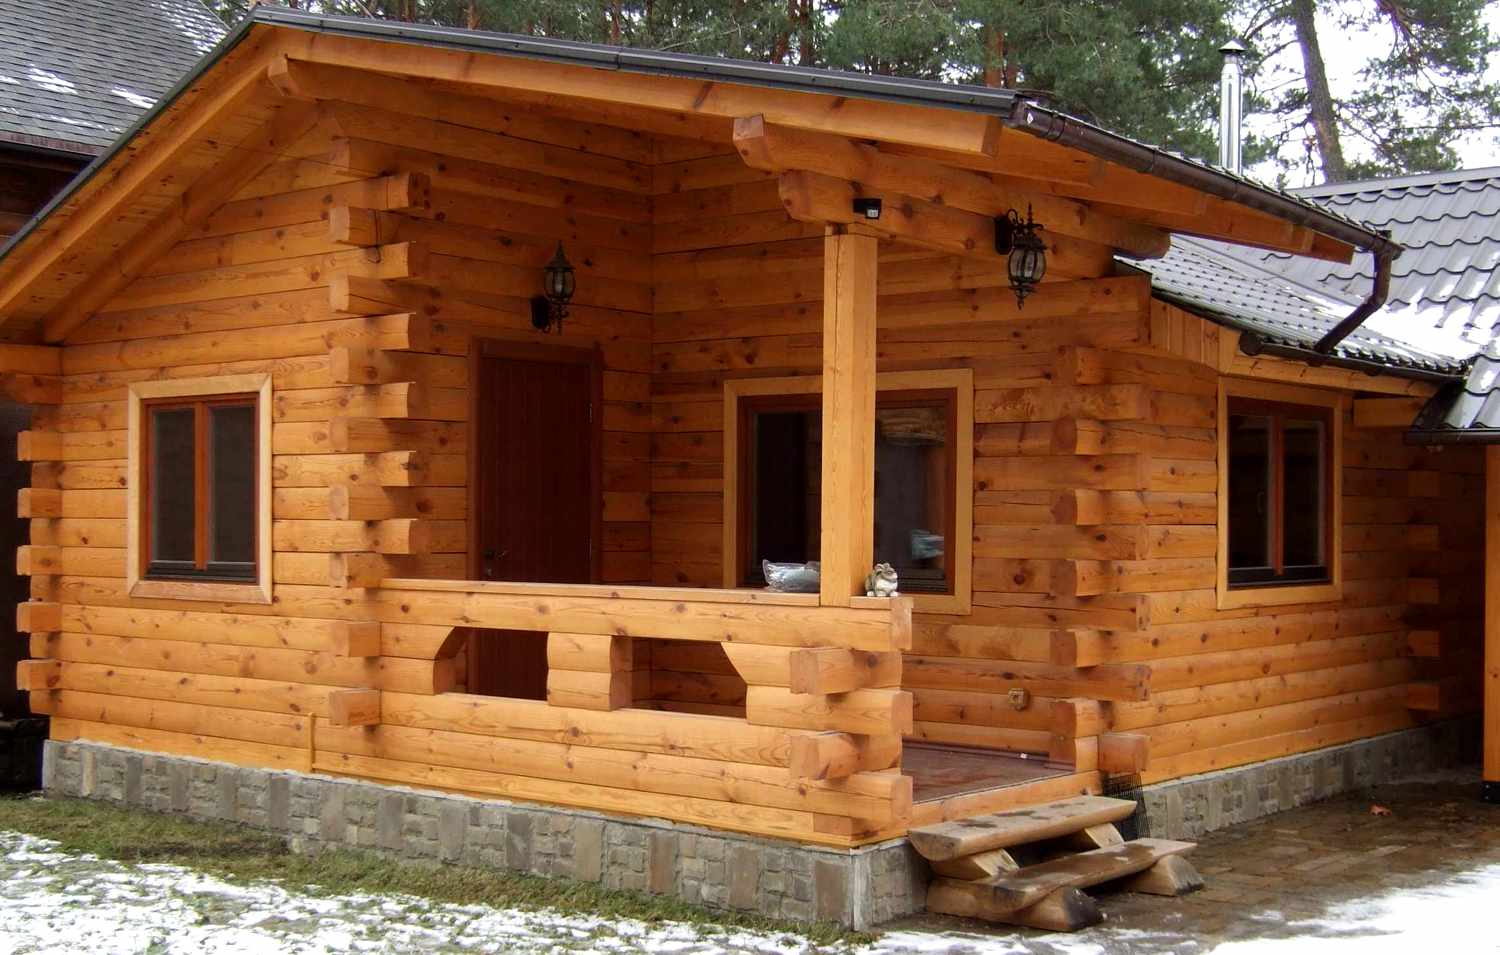
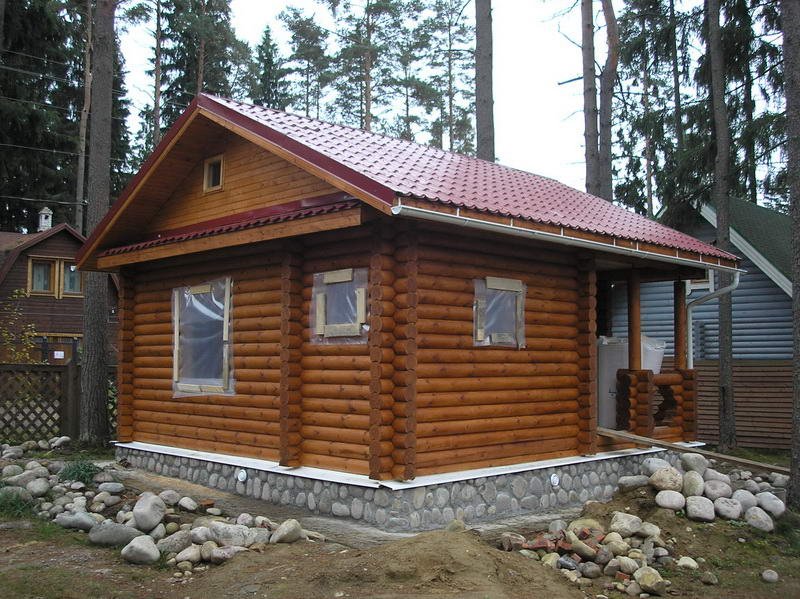
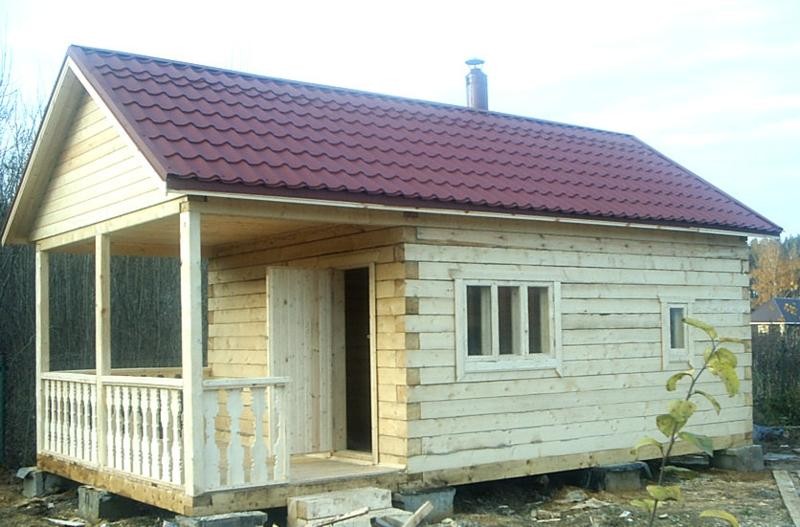
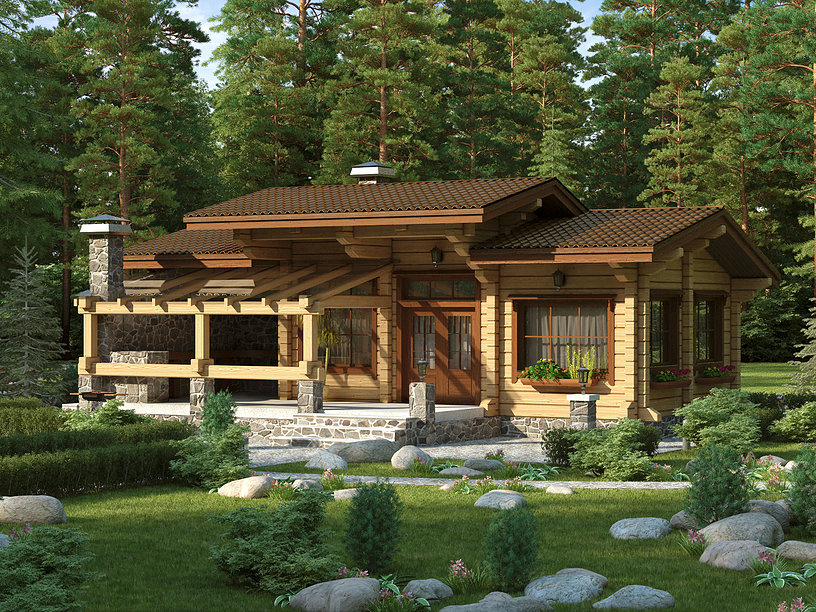
A very successful and beautiful example is a house-bath from a rounded bar, equipped with a terrace and an open gallery. In profile, it has an angular shape. The building has two wings: the residential part itself and a comfortable bath.
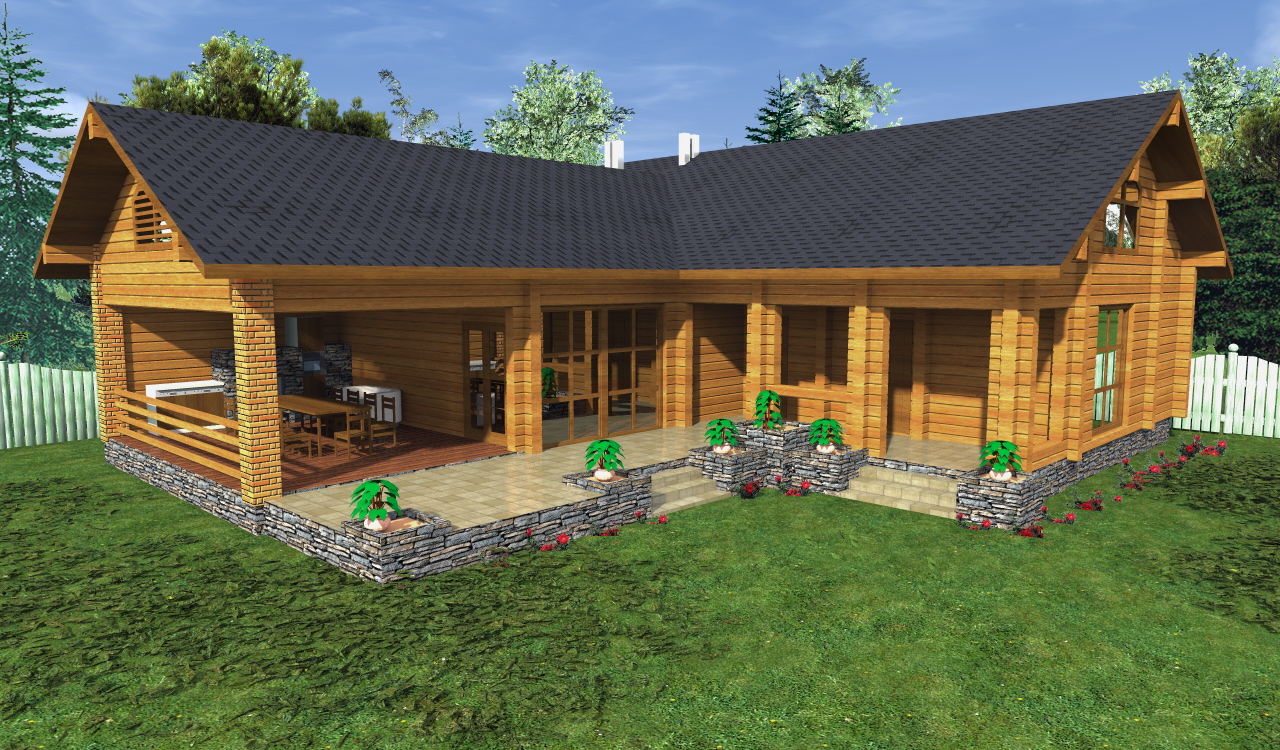
Luxury chalet-style bath with a covered terrace on the foundation, decorated with natural stone. It can be built both on a private country plot, and on a small recreation center.
Bath of glued laminated timber with a full second floor, which houses a spacious seating area.Such a building, although costly for materials and installation, but will make a huge impression on anyone who saw it.

To learn how to make a bath out of a bar, see the next video.