Brick bath: pros and cons

Bath - is an indispensable tool for relaxation after a hard day, a great place to meet friends. It is convenient to use the services of a construction company, but you will have to pay a large amount.
Many gardeners prefer to build a bath with their own hands.
Advantages and disadvantages
Traditionally, Russian baths were built of wood. Nowadays, more often for such purposes use fire-resistant brick, which is safer, while not less environmentally friendly. This building material is easy to use and allows you to bring to life a sauna project of any complexity. Before starting the construction of a brick bath, it is necessary to become familiar with the advantages and disadvantages of the material itself and the structure of it.
Fire-resistant brick is more expensive than wood, but it has a lot of advantages, namely:
- high level of fire safety - the brick far surpasses wood in the degree of fire resistance. The fire-resistant brick perfectly resists a fire, what can not be said about wood;
- durability - a bath built of brick can last more than 50 years;
- environmental friendliness - in the manufacture of bricks, natural, natural raw materials are used, the material does not pose a danger to human health;
- ease of operation - does not require special care for the brick facade of the bath;
- the use of bricks will allow building baths of various shapes and sizes, embodying even the most complex architectural projects, and using various types of interior and exterior decoration. The strength of the building allows you to experiment with the internal layout and shape of the roof.
The cons of brick baths are as follows:
- high heat capacity - it will take much longer to heat a brick steam room than a similar wooden structure;
- increased hygroscopicity - in order to avoid the formation of dampness in the room, it is necessary to perform a complex of hydro, steam and thermal insulation works;
- the cost of building material - fire-resistant brick is quite expensive material, therefore, the construction of a bath will cost a lot;
- the need to build a ribbon, deep foundation and finishing works;
- to ensure heat savings will require a large thickness of the walls.

Types of designs
When building a brick bath, you can choose a variety of shapes and designs. The quality of the bath depends on the correct internal planning. Ready projects will help not to be mistaken. You can build the structure exactly with the submitted drawings or use the project as an idea and modify it according to personal preferences.

It is worth considering a few of the most popular options, brief instructions for creating them.
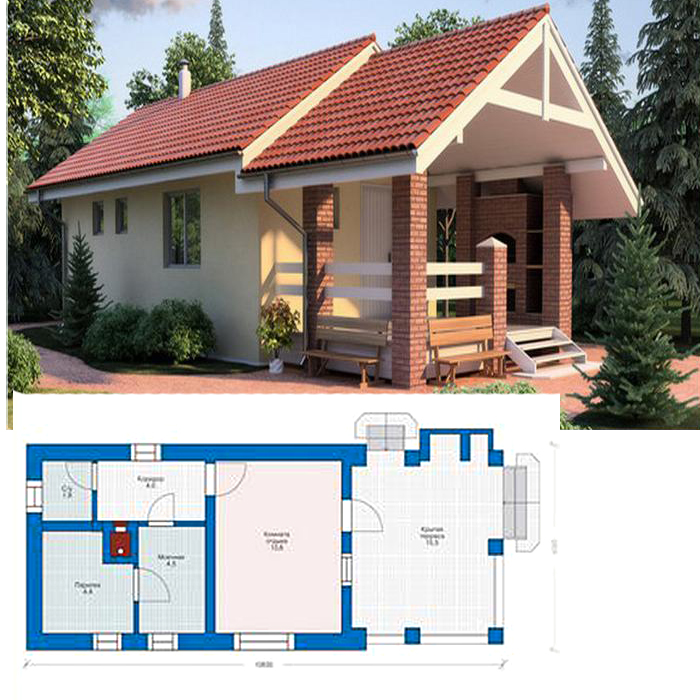
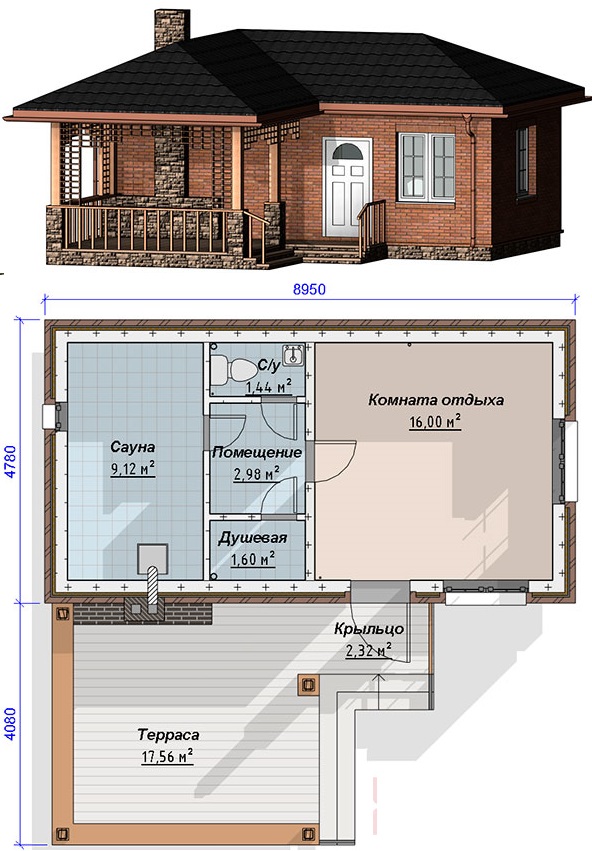
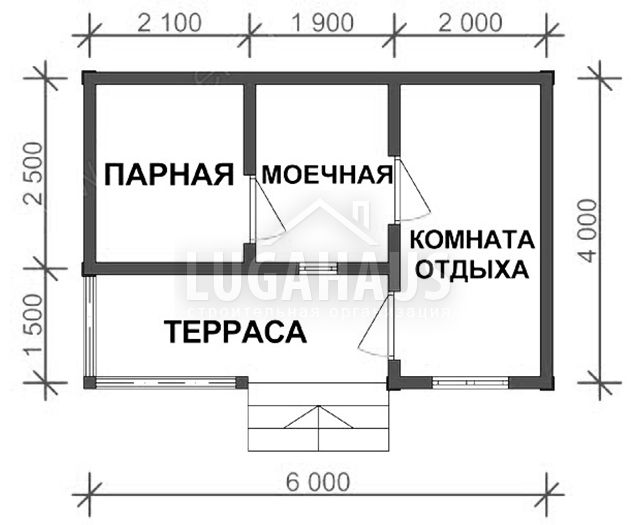
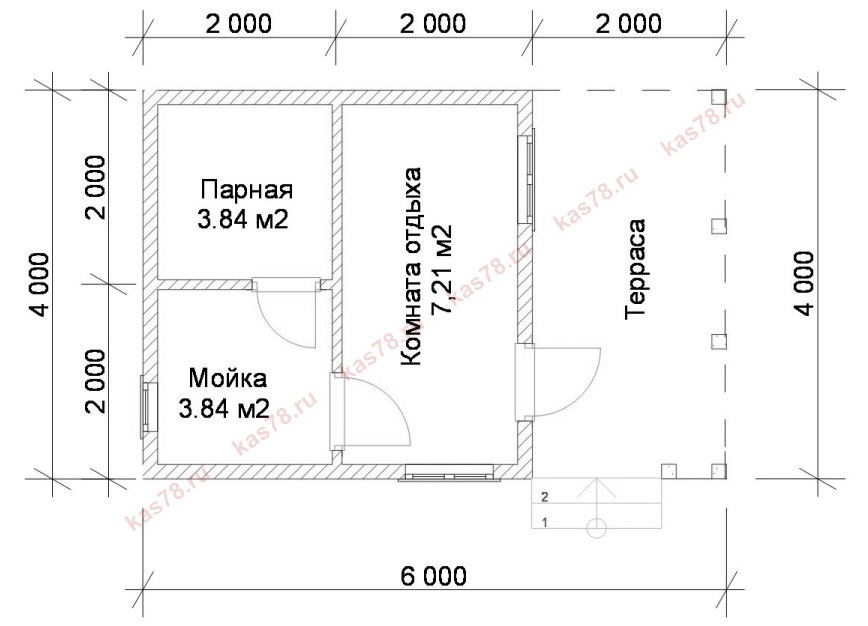
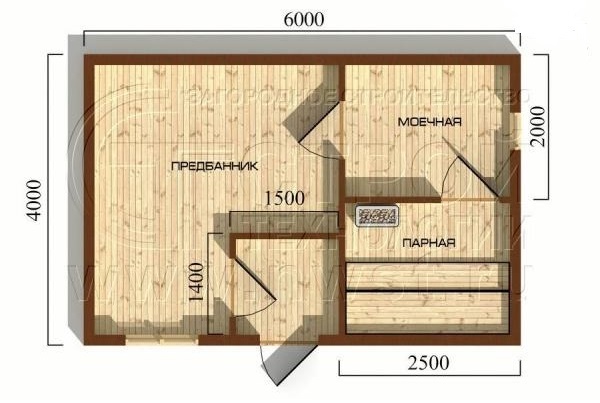
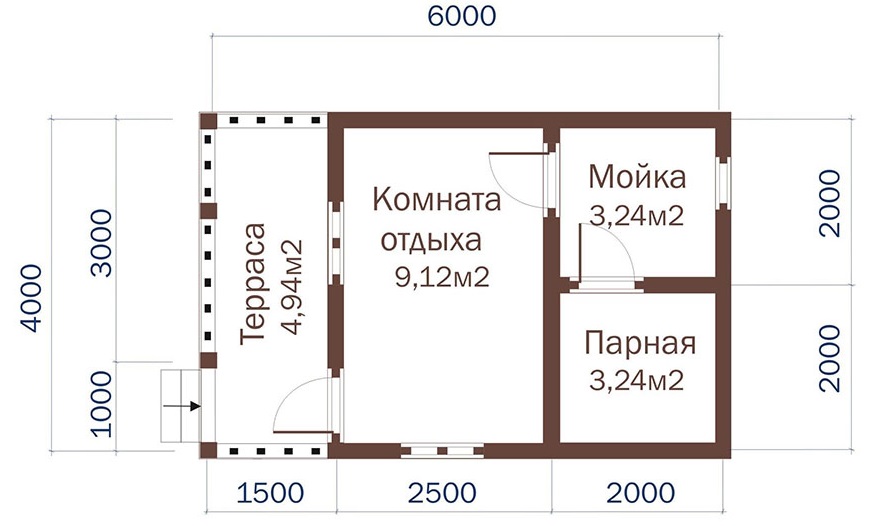
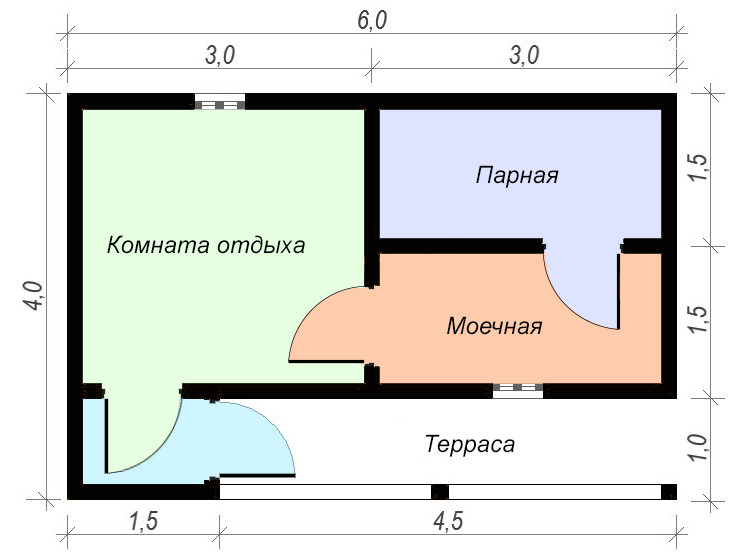
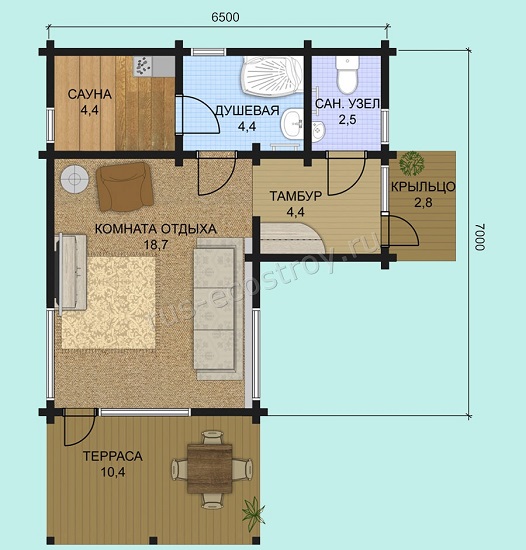
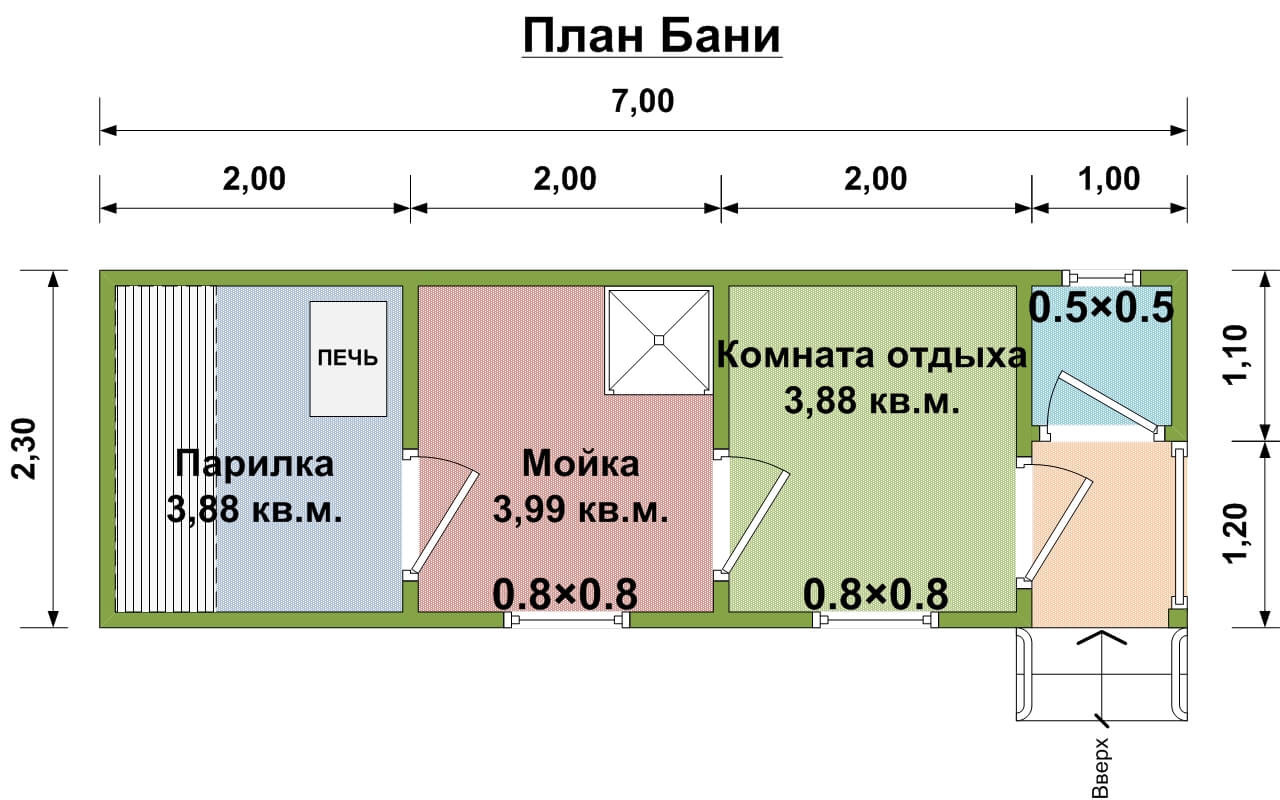
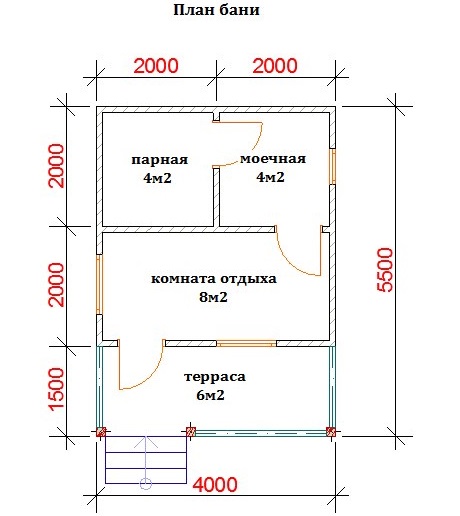
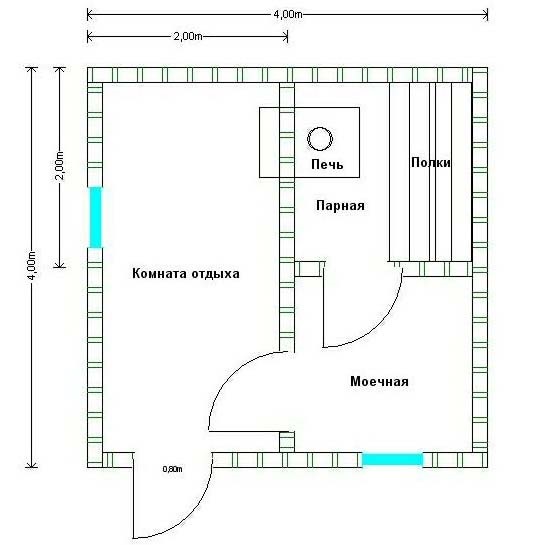
Single-storey 6x4m bath with terrace
This project assumes the presence of such three rooms as:
- restroom;
- washing room;
- steam room.
The layout of the bath can be changed by swapping the doorways. It should be noted that Direct access to the recreation room is not a good option.. The fact is that when you open the door, the cold will go inside. The terrace or the attached vestibule will help to eliminate the deficiency.
Projects bath with terraces are very popular. The terrace can be equipped at your discretion, set up comfortable furniture for meeting with friends, place a billiard room.
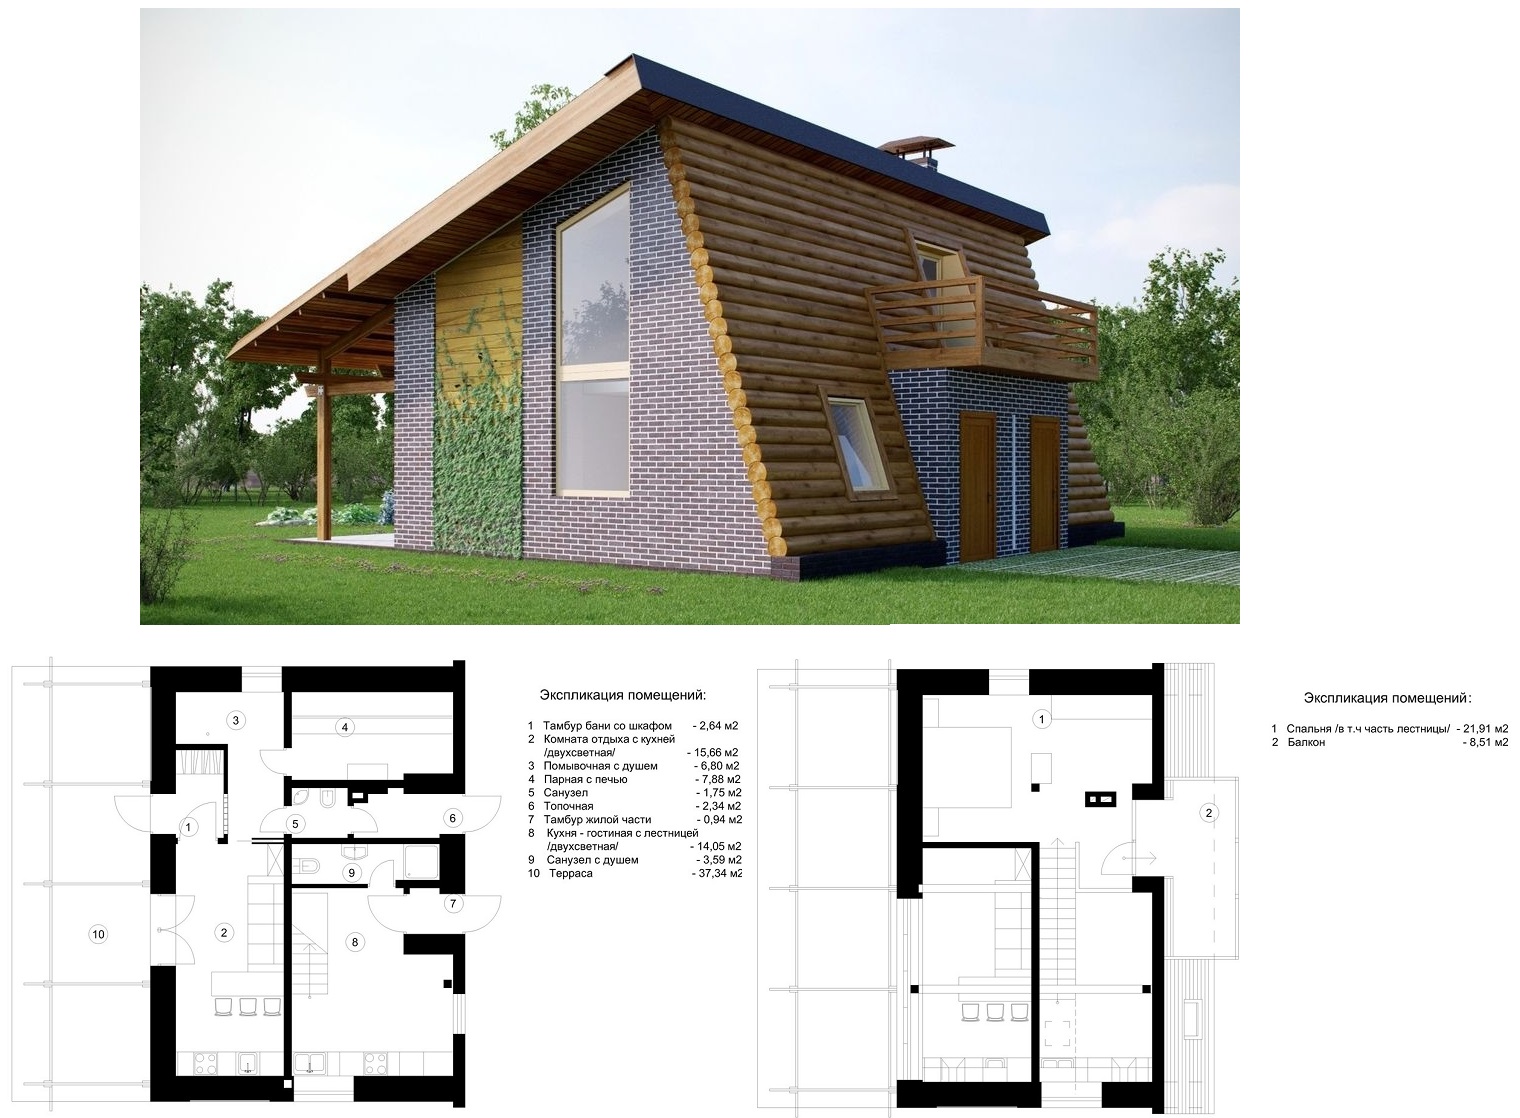
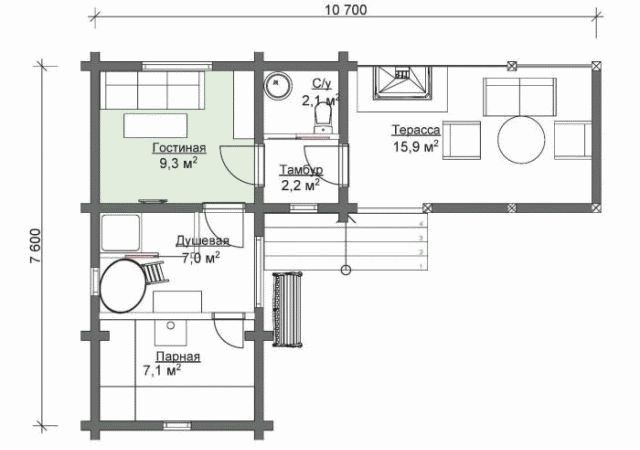
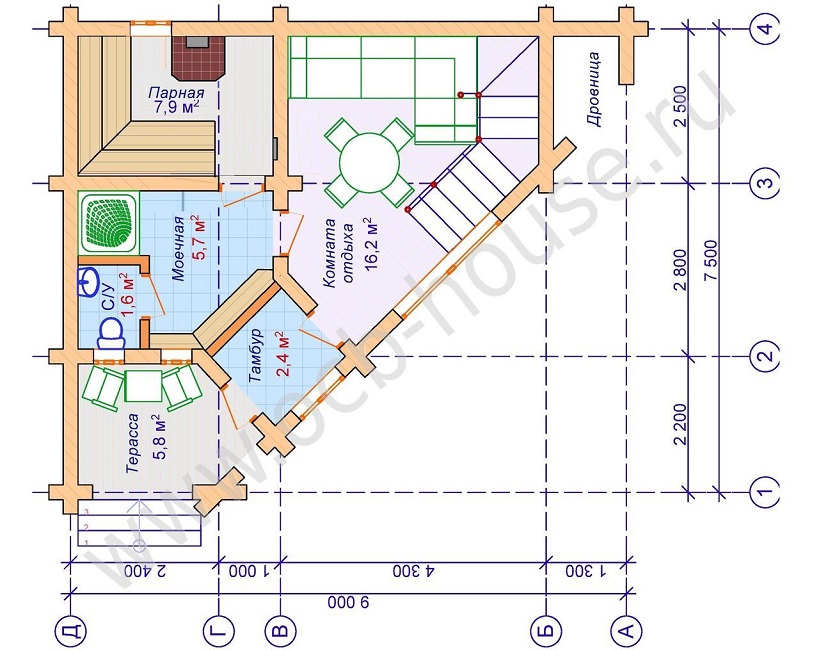
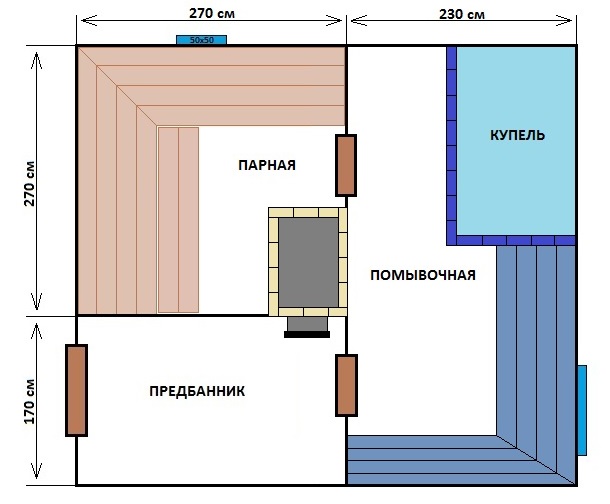
Corner baths
The main feature of the baths of the angular type is their not quite standard shape, which looks beautiful and stylish. Such a variant of the building is characterized by the location of the steam room perpendicular to the rest of the building.
The main advantages of corner baths are as follows:
- the location of the stove for a steam room in the central part of the building provides heating of all the rooms at once and helps to reduce heat loss;
- corner baths save space on a plot of land. Usually they are placed in the corner of the site. They are ideally suited for construction in problem areas, where with the help of this type of structure you can “bypass” communications or, for example, a large tree;
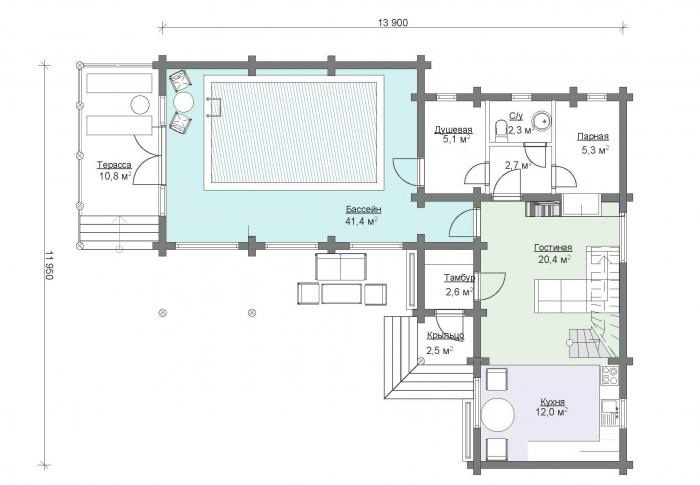
- If you wish, you can make a corner bath with a pool or a font. To implement such a project will require significant material costs and the presence of a large area under construction;
- the shape of the structure allows you to attach a corner steam room to the house or summer kitchen. A variety of options allows you to choose a project based on your needs and capabilities, the shape of the land.

What material to choose?
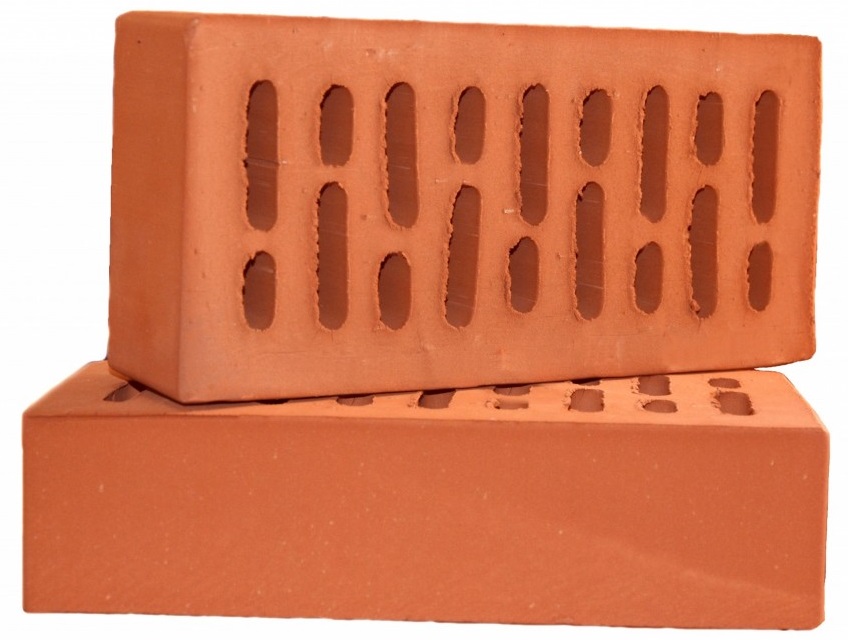
In the modern market you can find several types of bricks:
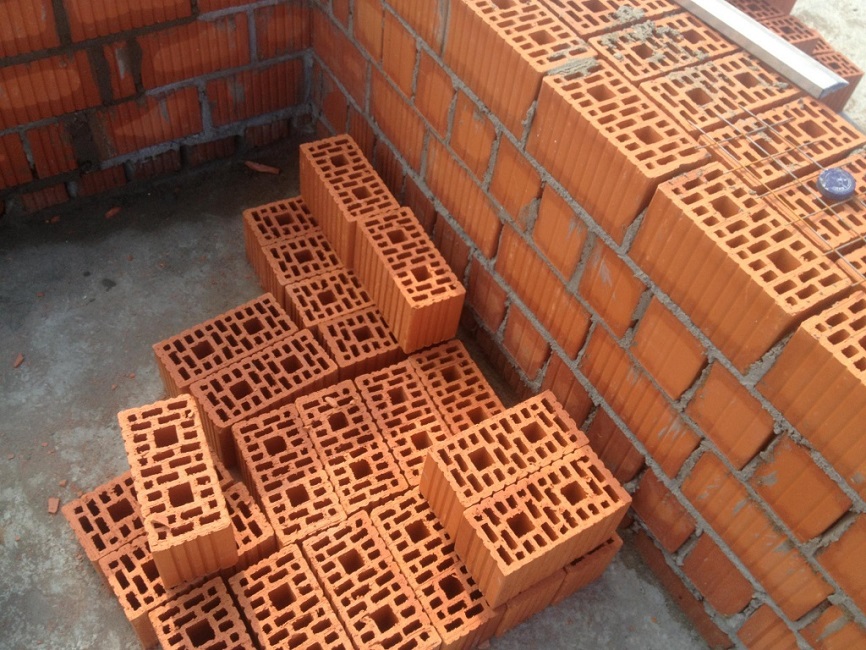
- Red ceramic hollow and corpulent. Ceramic bricks can be either facing or masonry. The full-bodied brick is a strong, durable and frost-resistant material. It is used for masonry walls, basement, ventilation ducts and chimneys. The disadvantage is the high thermal conductivity, because of which the outer walls are laid out in two rows. Solid brick is a heavy material, so the foundation must be fairly strong to withstand the weight of the walls. The cost of the material is high, since the production takes a lot of raw materials.
Hollow brick has a low weight and good thermal insulation qualities. It is not suitable for laying socles, chimneys.
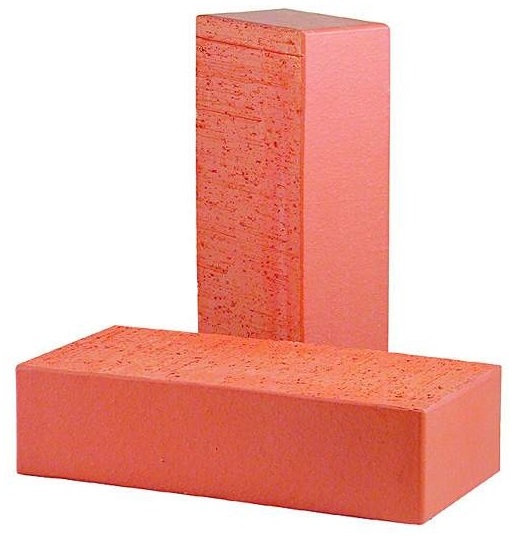
- Porous Ceramic. In its manufacture is used clay mixture with the addition of sawdust. During firing, sawdust burns, forming air pores in the material that prevent air from entering. This achieves thermal conductivity close to the tree. Such a building material has a low weight, durability, good heat and sound insulation qualities.

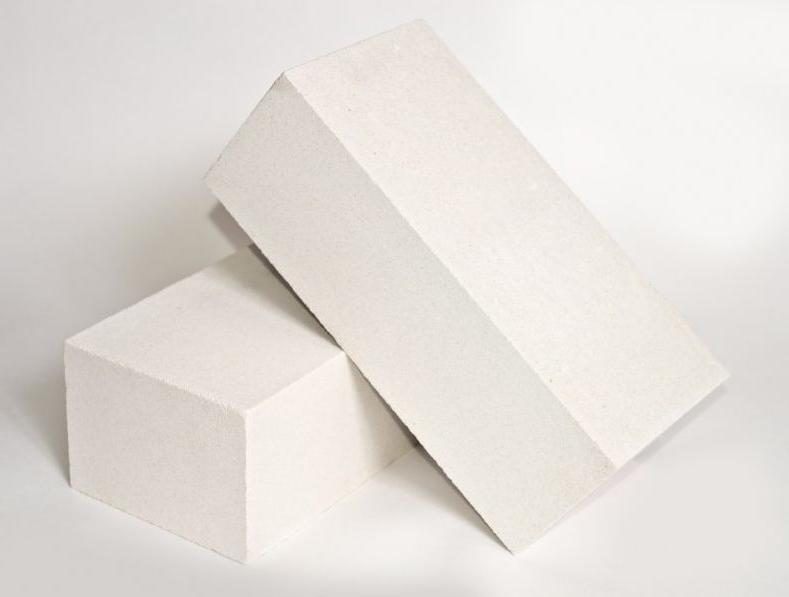
- White silicate. This durable material has good thermal insulation properties, but does not tolerate temperature fluctuations, collapses under the action of moisture.
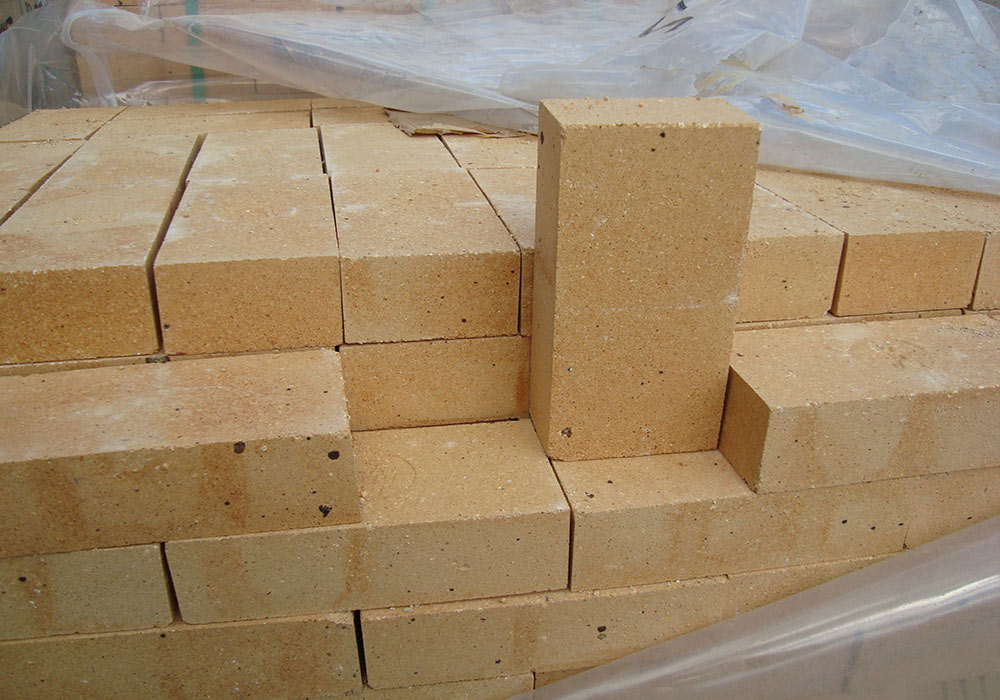
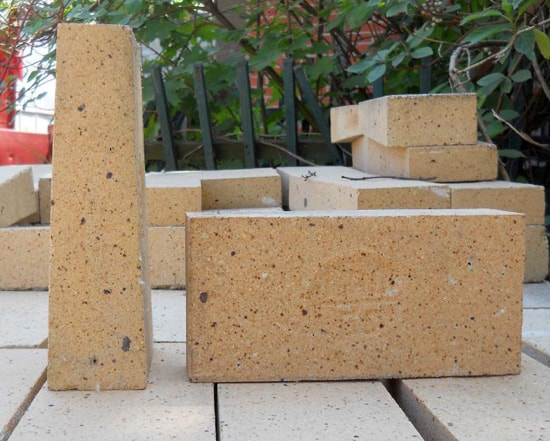
- Fireclay Fireclay. Material with a granular structure is made by sintering fireclay powder with ground refractory clay. It does not apply to masonry walls. It is used for the construction of structures that need to withstand high temperatures - stoves and fireplaces. The fire-resistant brick accumulates heat, keeps the furnace temperature for a long time, gives off heat as it cools.
DIY assembly
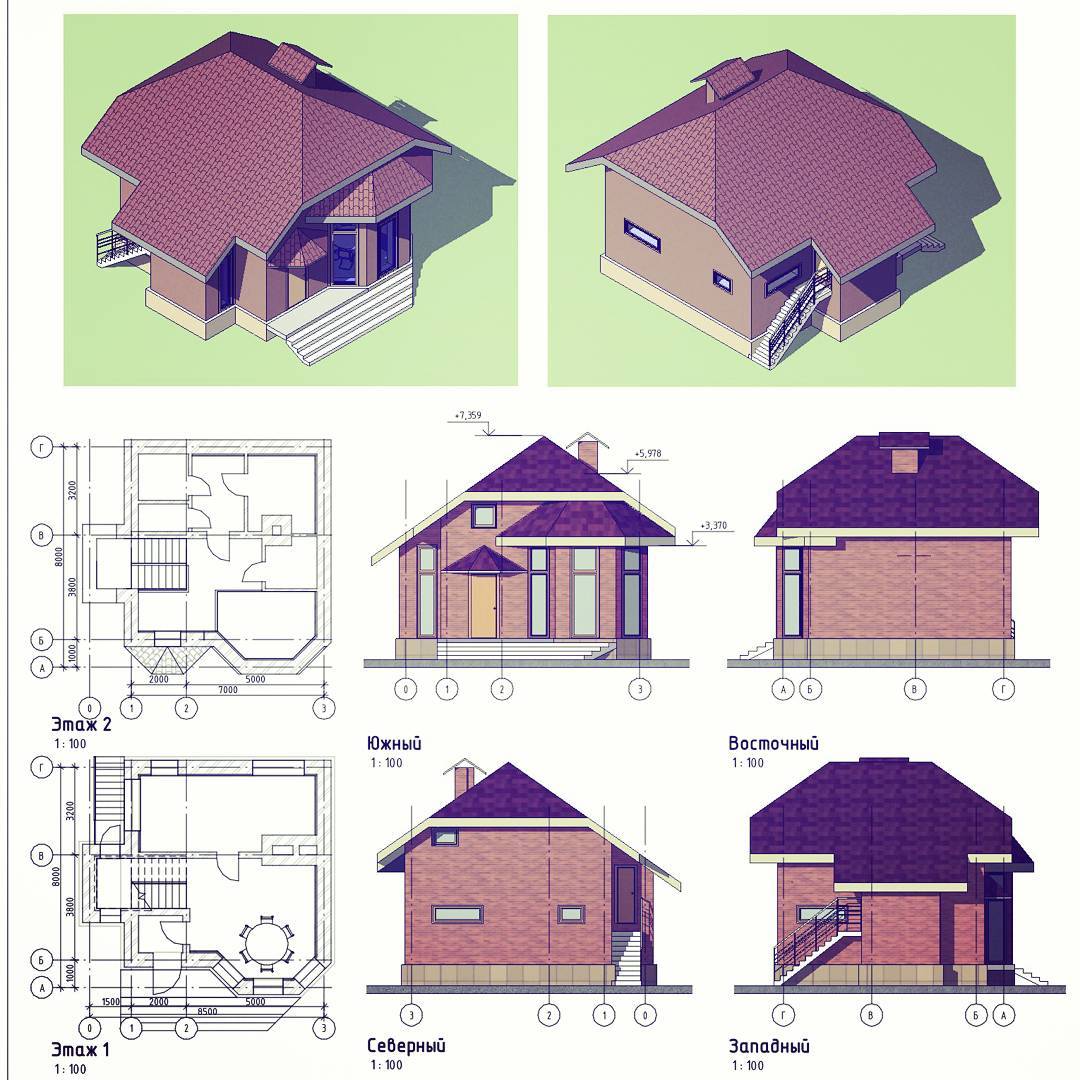
Blueprints
Before proceeding with the construction of the bath, it is necessary to correctly draw up a draft (draft) of the future construction. It is necessary to take into account all the features of the building: the appearance, the number and size of rooms, the wiring diagram of communications, the weight distribution of the structures, the calculation of the amount of necessary materials. The simplest projects of small-sized baths consist of one room, which combines a steam room, a washing room and a dressing room.
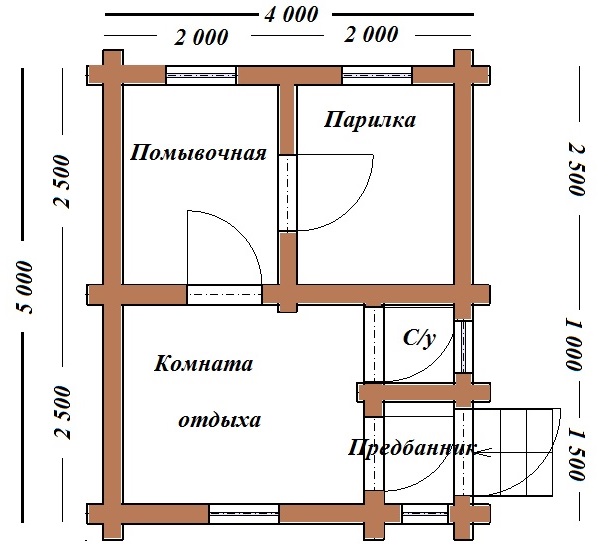
However, this option is not very convenient, so in most drawings the buildings consist of such rooms as:
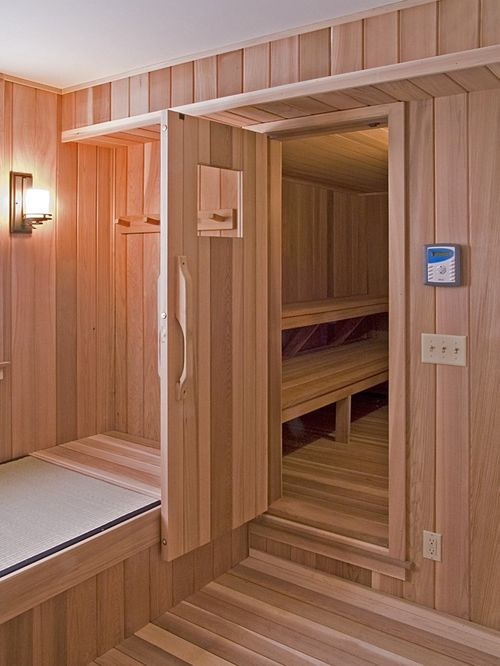
- steam room. It is important to consider that the door opens to the outside, as required by fire safety regulations. It is recommended that the height from floor to ceiling in the steam room does not exceed 2.5 m. This will allow you to spend less material resources, time and effort to build a bath and heat the rooms to the required temperature;
- lounge. Usually, a table, comfortable furniture is installed in it so that you can sit down, have a snack and chat;
- waiting room. It can also be used as a dressing room by installing wardrobes and clothes hangers;
- washing. It is a shower or pool.

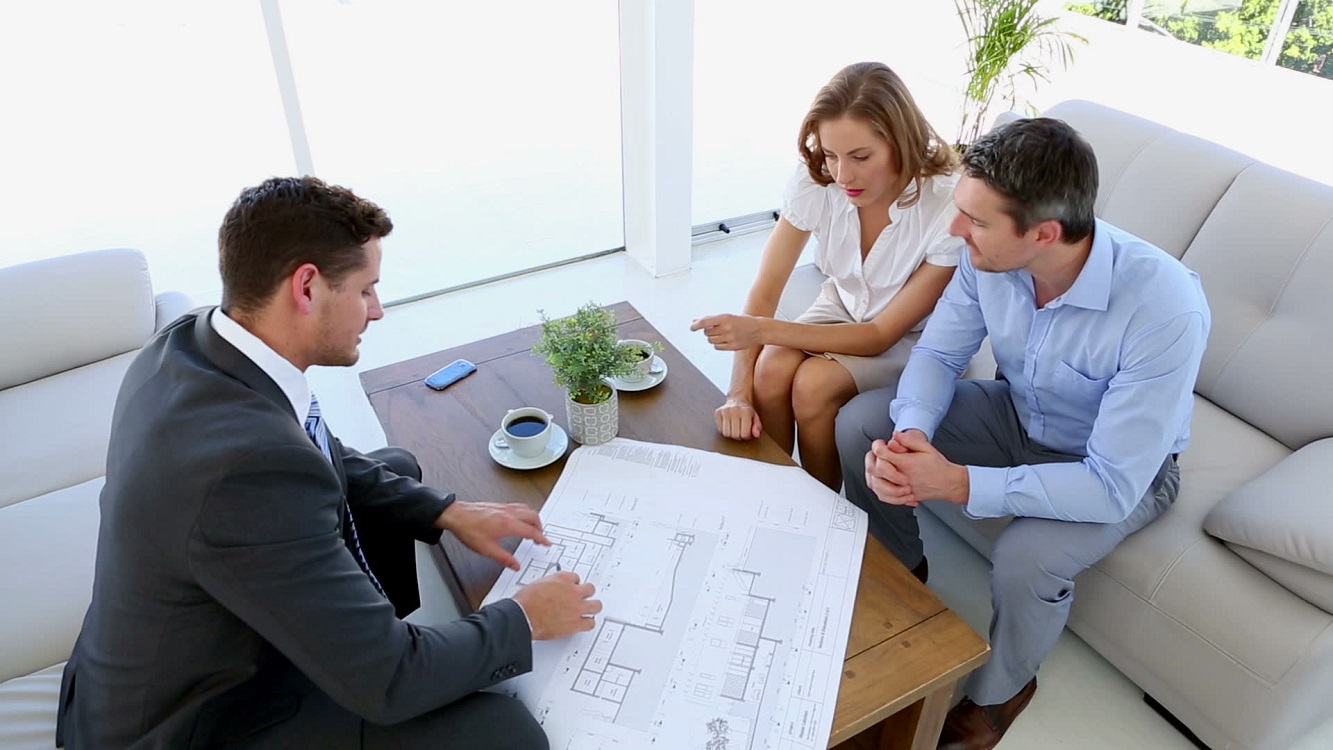
For the development of the drawing of the building you can contact the design organization. Specialists in the field of design will competently create a project taking into account the wishes of the client, the requirements of legislation in the field of construction and fire safety rules.
In order to save, you can take advantage of ready-made projects of brick baths, provided in this article.
Foundation
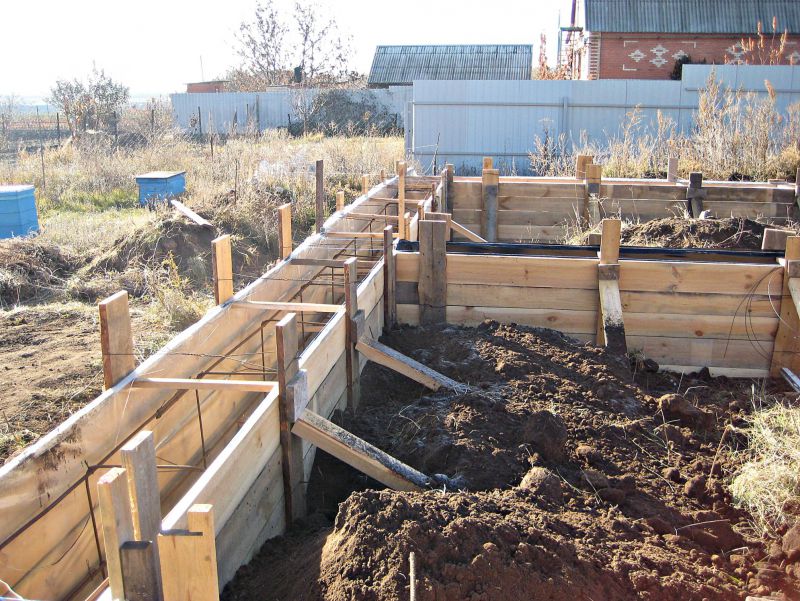
If you have a ready project of a future bath, you can proceed to the construction of the foundation. Given that the brick structure is quite heavy, the foundation must be powerful to withstand the weight of the structure.The best choice is a strip foundation.
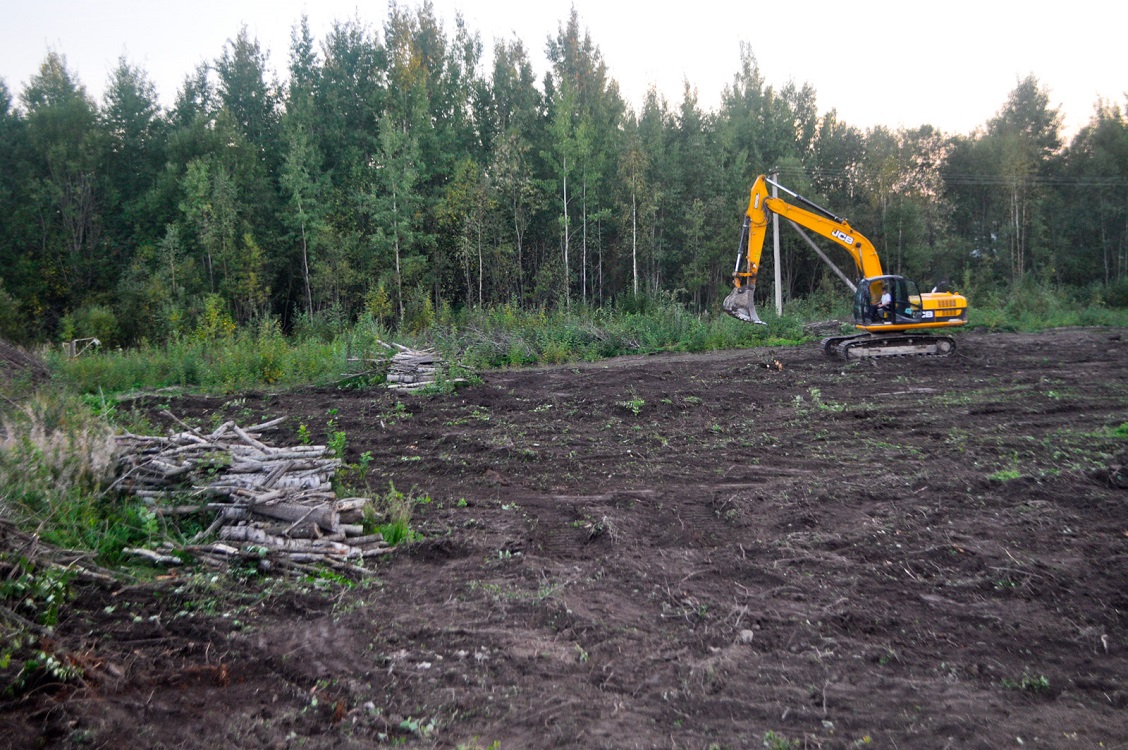
Foundation construction consists of the following steps:
- preparation and clearing of a site from various garbage, stones, undesirable vegetation and other;
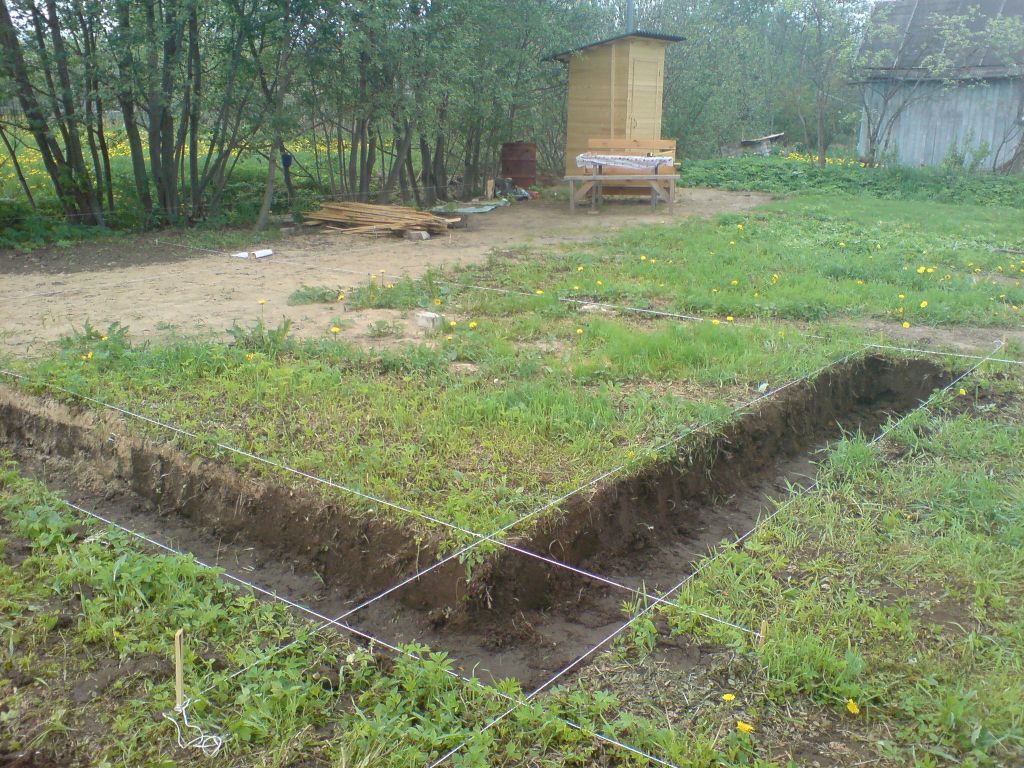
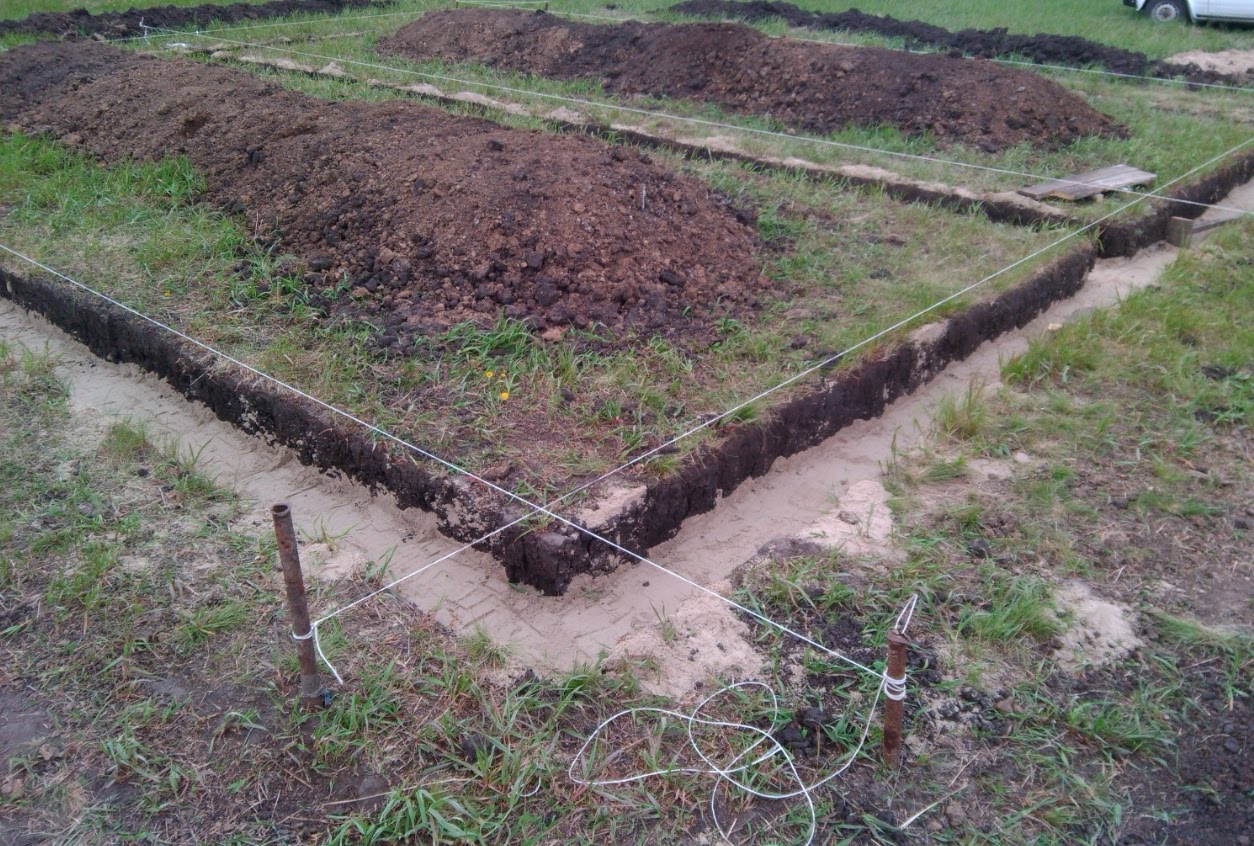
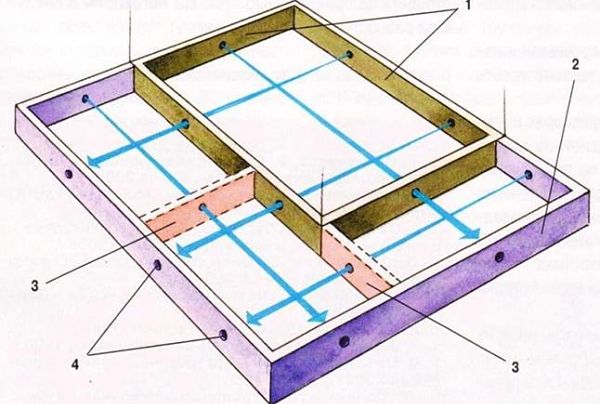
- marking of the future structure according to the project. Pegs are placed along the walls and in the corners, between which a strong thread is pulled;
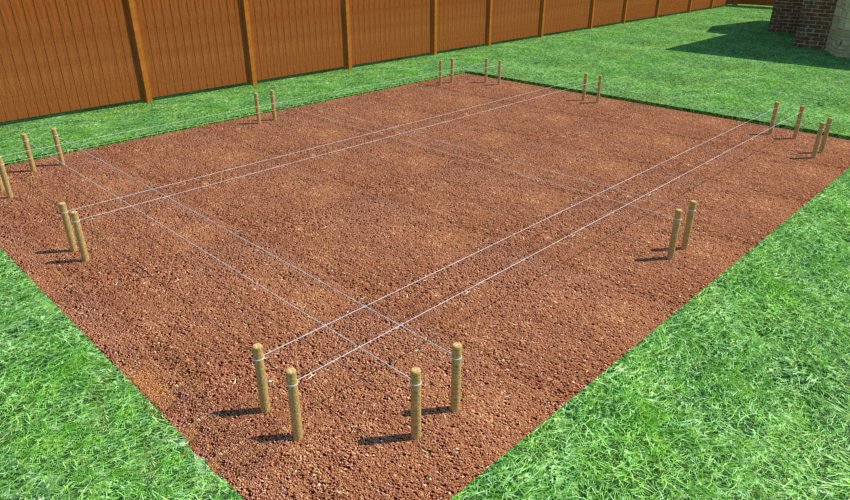
- excavation of the trench (depth 0.3–0.8 m, width 25–40 cm). It is important to consider that the foundation should start at least one meter above the flow of groundwater;
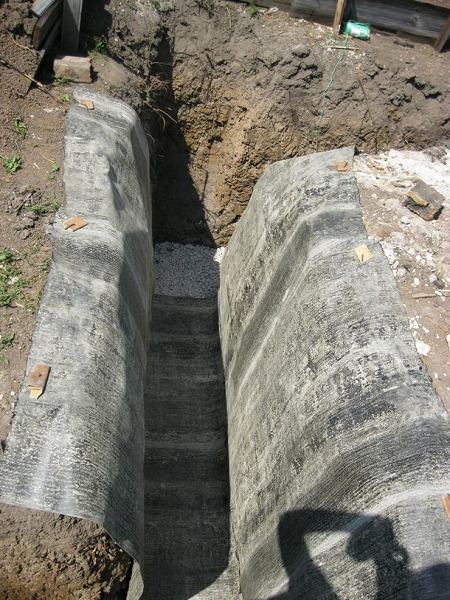
- a layer of sand (10–20 cm) is poured at the bottom of the trench, moistened with water and carefully tamped;
- over the sand layer lay a layer of rubble, moistened, and tightly tamped;
- On the resulting pillow put 1-2 layers of waterproofing material. Roofing material or geotextiles are most commonly used;
- installation of formwork boards. It should rise 30–60 cm above the ground;
- inward, a reinforced base of metal rods 1.2–1.6 cm in diameter is mounted. The rows are tied together by solid wire;
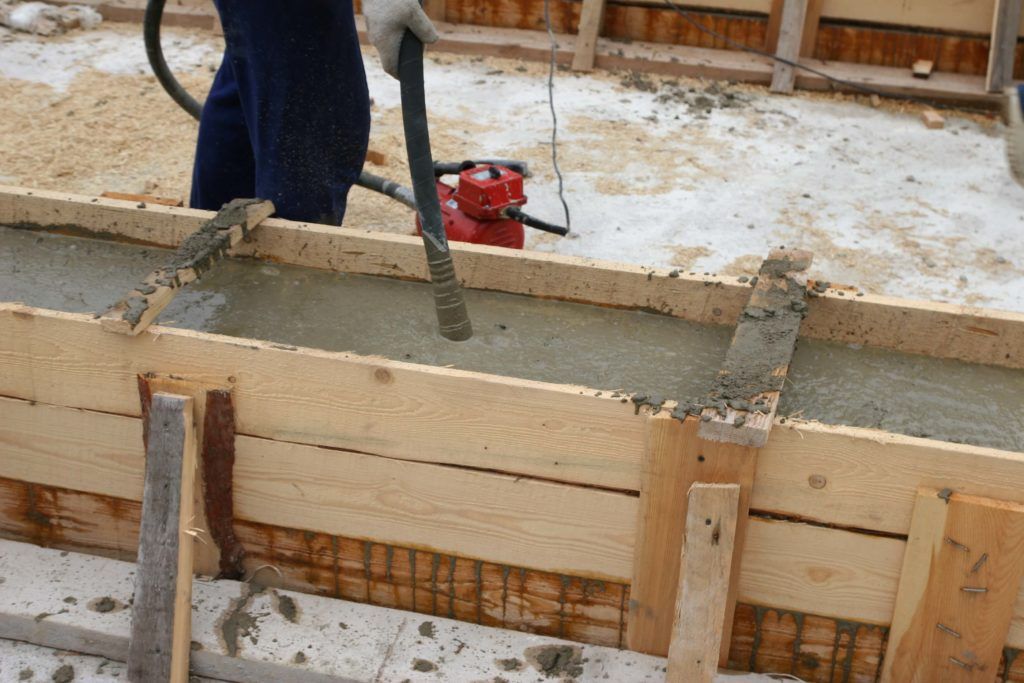
- be sure to moisten the internal parts of the formwork in advance;
- Cement-concrete mortar is poured into the resulting structure.It can be made with your own hands using sifted river or quarry sand, fine crushed stone, cement and water;
- The formwork is usually removed in 5–14 days, depending on the air temperature. To prevent deformation in the first few days, the base should be watered with water 3-4 times a day. In order to protect the foundation from precipitation of clay and rubble, a blind area 1 m wide is poured. The cement hardens to the desired strength after 28 days.
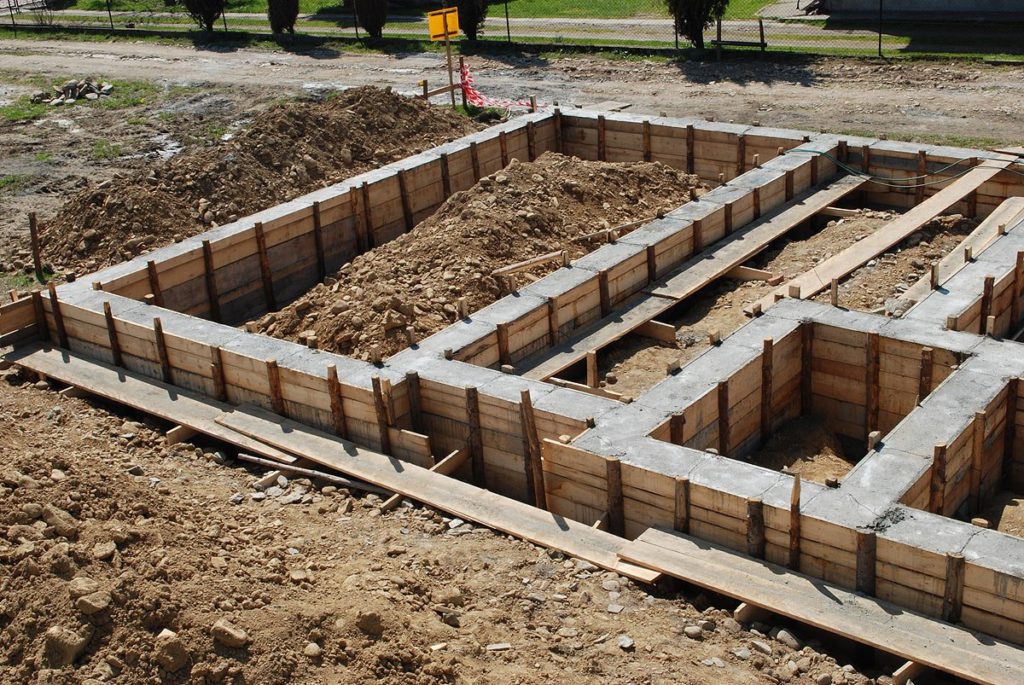
Be sure to make holes for ventilation in the foundation with a diameter of 8–12 cm and build a separate foundation for the stove if you plan to use the heater.
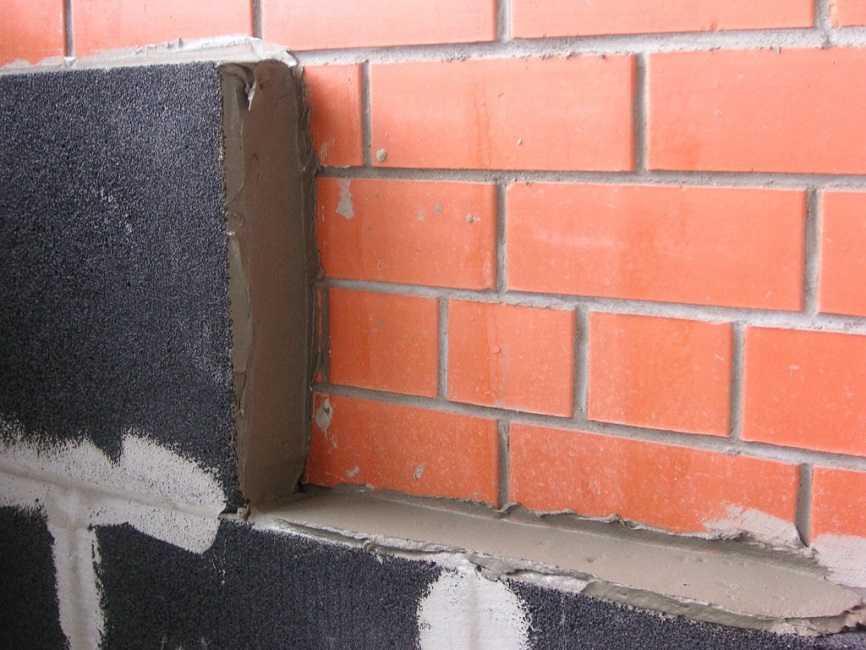
Considering that concrete is capable of absorbing moisture well, it is recommended to carefully treat the above-ground part carefully with special waterproofing mixtures before starting the laying of the walls. At the stage of foundation construction, it is necessary to provide for the wiring of water supply and wastewater systems. Electricity and gas can be installed later.

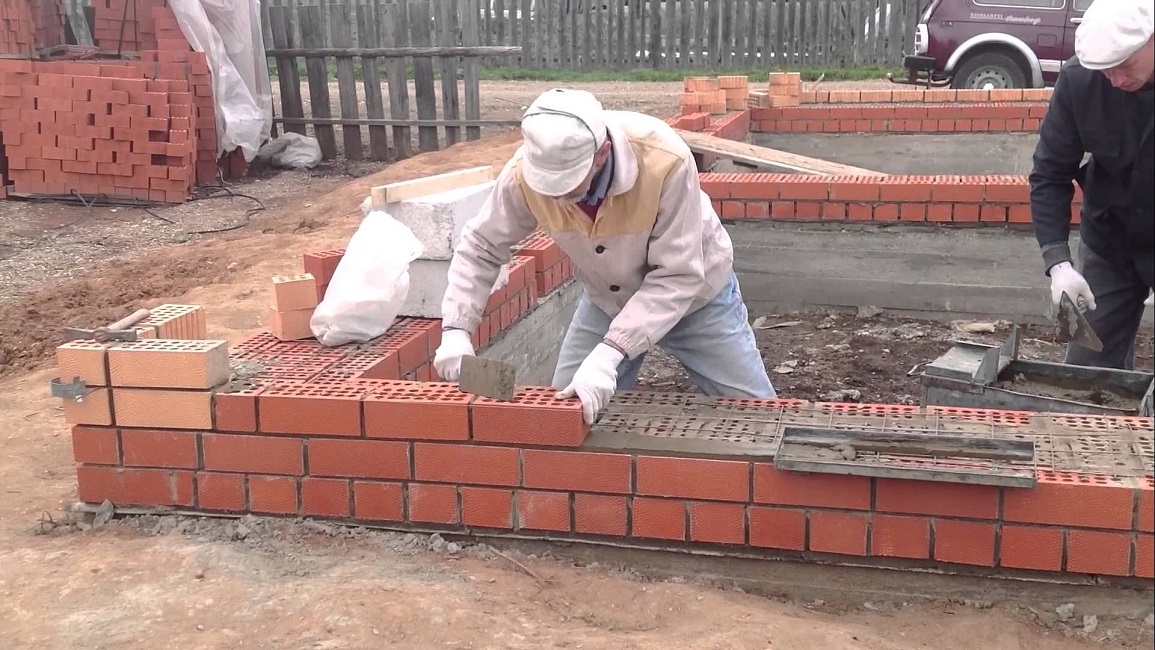
Walls
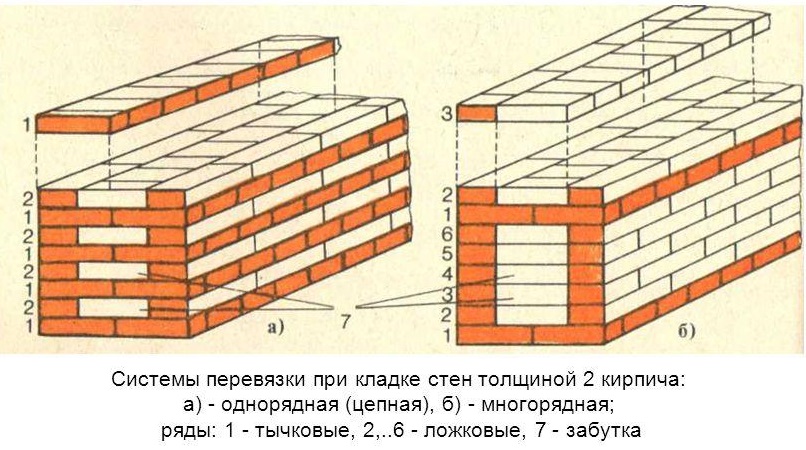
After completion of the waterproofing of the foundation, you can proceed to the construction of walls. The most commonly used single-ligation system, as it is easy to use,it can easily be built alone. This system consists in the alternation of spoon and bonded rows of bricks. A spoon row is a row of bricks that are laid with the side along the wall, and the row is laid with the ends to the outside of the wall.
There are three types of masonry brick walls, such as:
- solid - brick stacks in two rows without a gap between the rows. It is more durable;
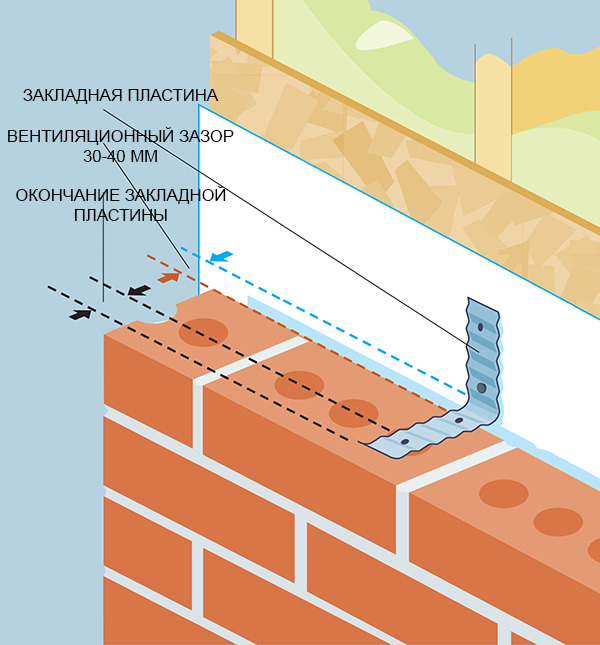
- with a ventilation gap of 40–60 mm;
- lightweight This type consists of two walls, between which the insulation is filled up (expanded clay or fine slag).
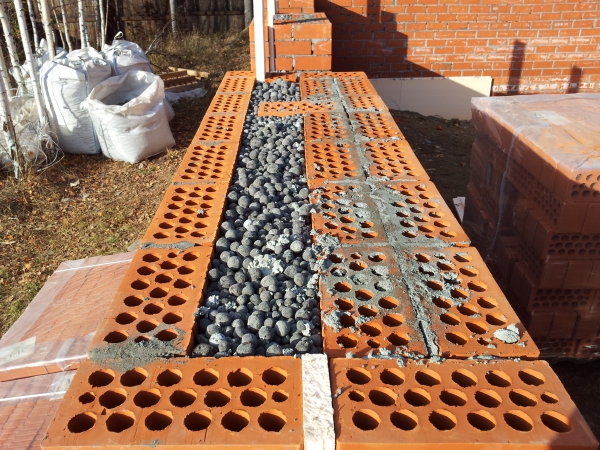
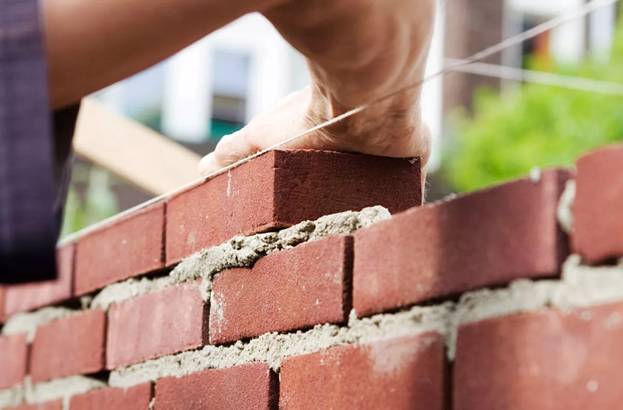
Lightweight masonry is used more often because it allows you to reduce pressure on the foundation and save on building material. Regardless of the type of masonry, walls should be erected from the corners. Initially, it is necessary to lay out six rows of bricks on the solution in the corners. Along each row you need to hold the cord. They are wrapped with nails, which are inserted into the seams between the bricks at a distance of 3-4 mm from the vertical row. This determines the evenness of the masonry. For the same purpose, use the construction level and plumb.
The basement of the bath is recommended to be laid out of solid, and the walls themselves should be made of hollow brick. During the laying, you need to do everything quickly so that the cement mortar does not grab ahead of time. In the production of construction work in the summer, the brick must first be moistened with water. The thickness of the cement layer should be 2-3 cm.

There are several variations of continuous masonry, among them:
- "Single order" - the constant change of the butt and spoon series;
- "Multi-order" - tychkovy rows go through 5-6 spoon rows.
When laying butt rows, it is necessary to apply the solution with an indent of 10 mm when filling the seams and 30–35 mm when laying the wasteland. If there are bricks with different chips, defects, then they can be used for laying masonry rows, except for the corners and supporting zones.
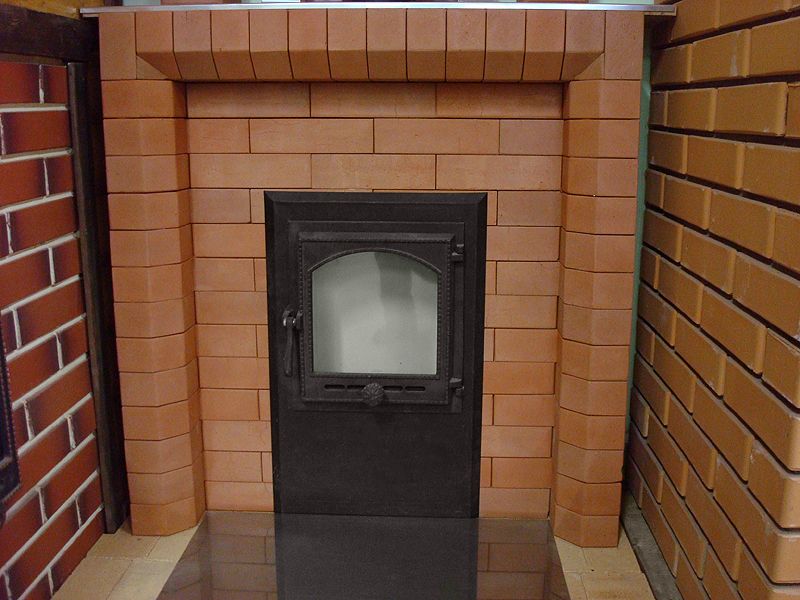
Be sure to build a screen for the furnace of refractory bricks. It serves as a kind of case for the furnace and contributes to the smooth heating.
Roof and floor
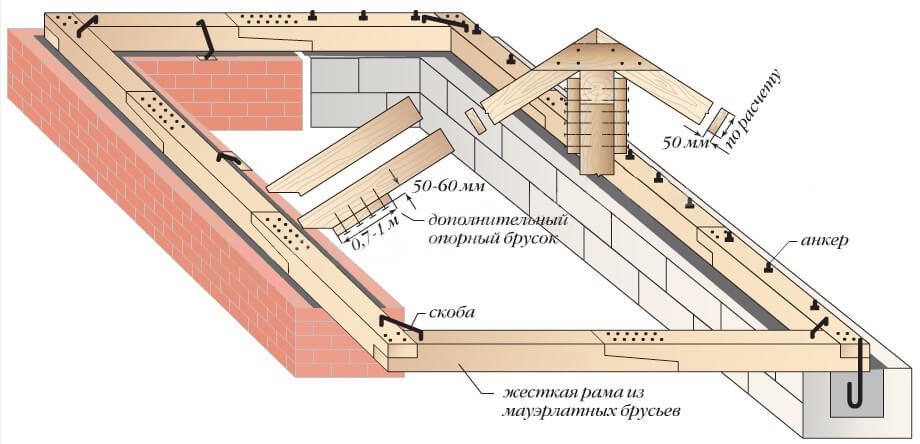
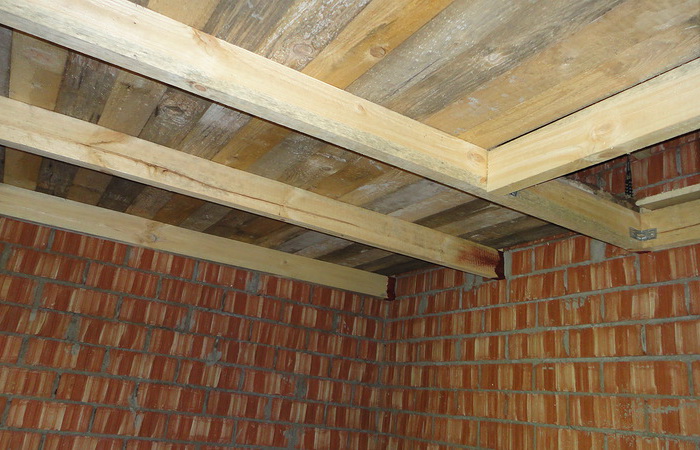
The roof structure can be made in one, two or more ramps. It should be borne in mind that the more complex the roof construction, the more expensive the installation will cost.From the choice of design also depends on the sequence of work. Holes for fixing pins are drilled in the top rows of the walls. Mauerlat and ceiling lags are mounted on top of them.
If the ends of the beams are in contact with the walls, they are wrapped with roofing felt. Then build a flooring from unedged boards. At the same stage is determined by the hole for the chimney.
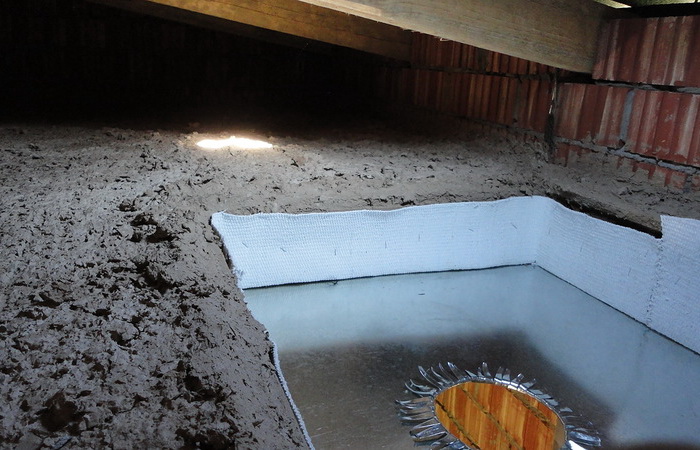
To increase the service life of ceiling lags, they must be covered with a waterproofing layer.. You can use fabric absinthe, which is convenient to mount with construction brackets. Over poured a layer consisting of a mixture of clay and sawdust. After drying it is sprinkled with sand.
In the place of contact of the chimney with the ceiling is lined with sheets of metal.
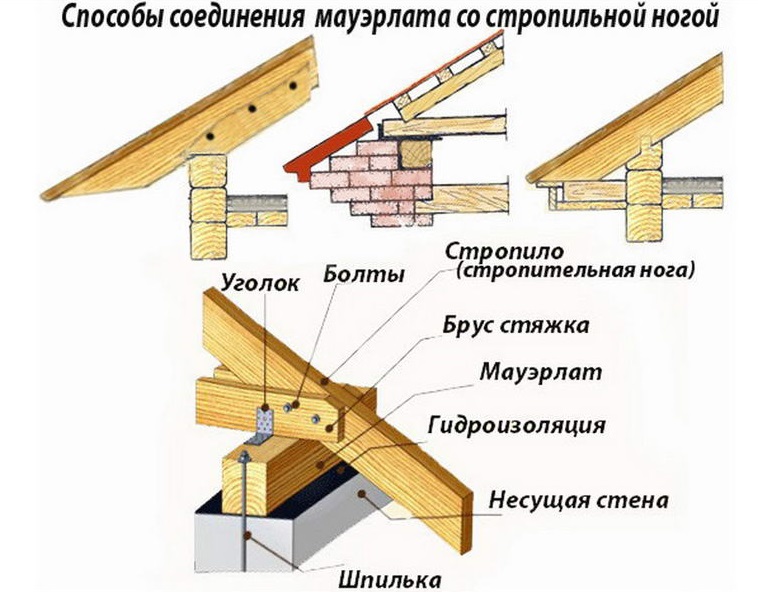
After that collect the truss system. The rafter legs are fastened to the mauerlat with metal corners and self-tapping screws.
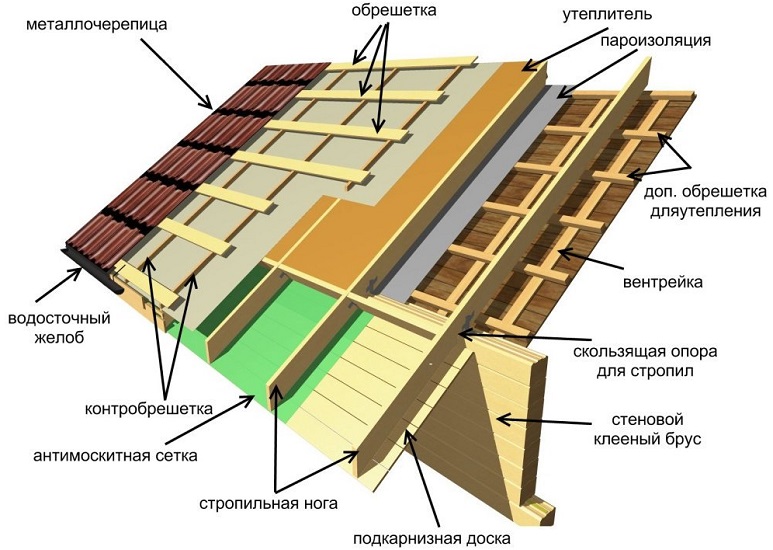
If the roof has two or more slopes, then additional supports are installed between the slopes. On top of the beams, they mount the crate of small slats, cover them with waterproofing and corrugated flooring, metal tile or other modern analogues. If necessary, make a counter lattice.
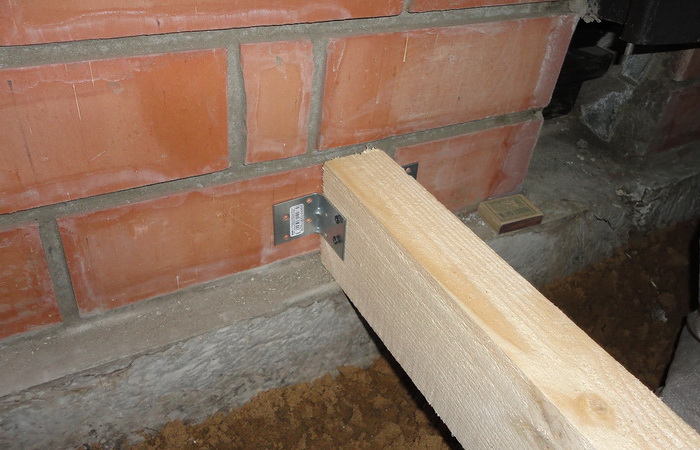
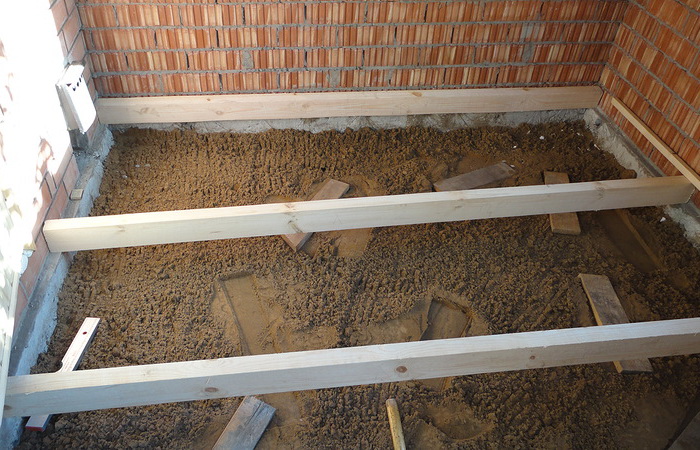
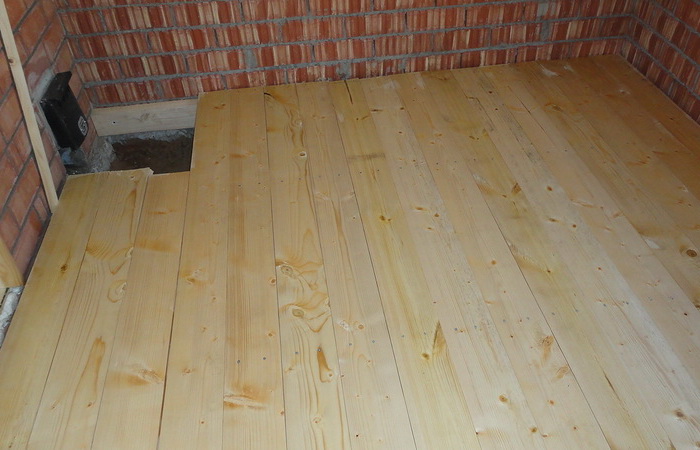
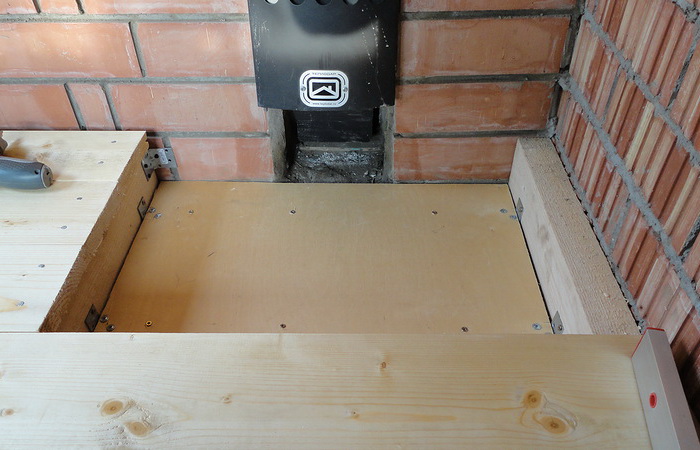
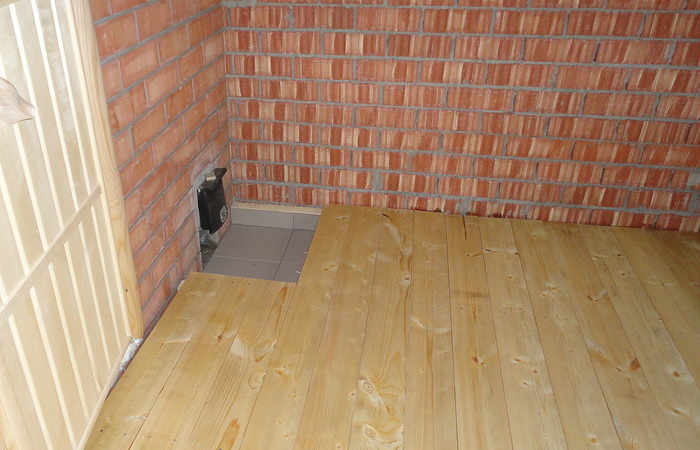
For installation of the floor, beams with a section of 15x10, 25x10 mm are used, which are mounted to the lower part of the walls with metal corners. To lag from two sides nail the bars - the basis for the subfloor. A board is fastened on top of them, then a layer of waterproofing, insulation and a second layer of waterproofing. After that a clean floor is installed.
Warming and waterproofing
Waterproofing and insulation are needed to improve the functional qualities of a brick bath.
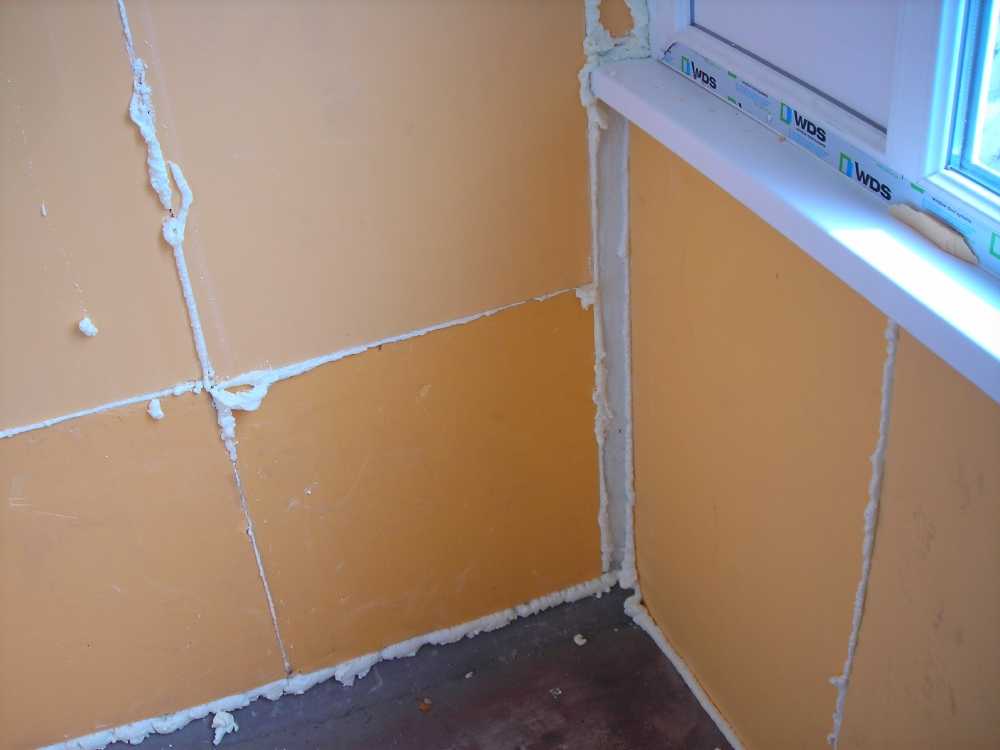
Waterproofing can be done in two ways:
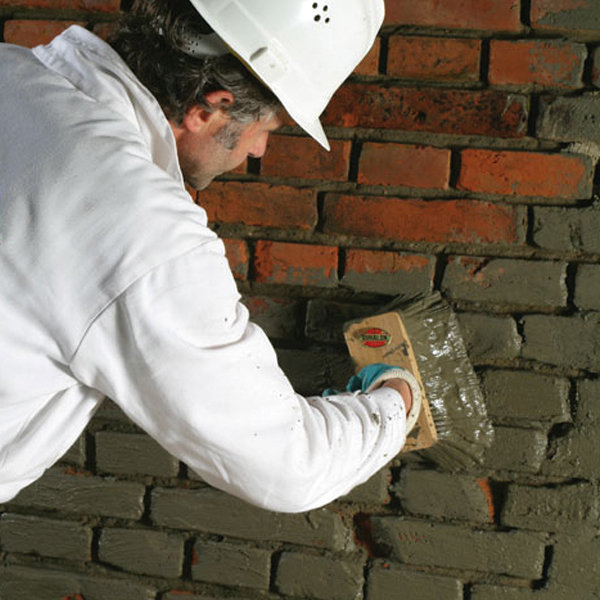
- painting method - from the inside all surfaces of the bath are covered with waterproofing agents: bitumen mastic or epoxy resins;
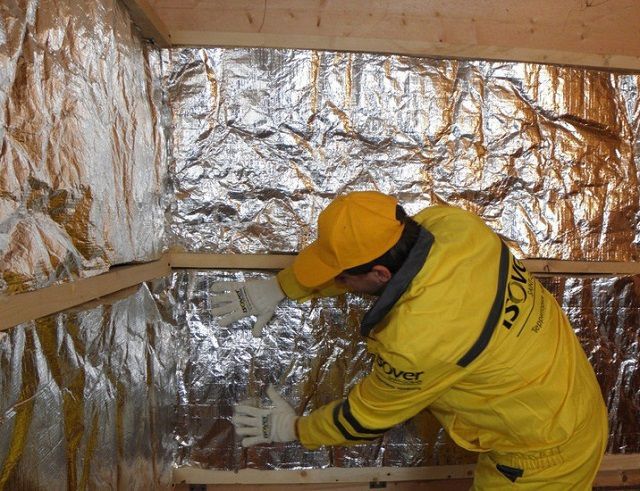
- okleechny way - internal surfaces can be veneered sheet or rolled roofing material. And also foiled polyethylene is used for this purpose. It is convenient to fix it with wooden slats, and the joints must be sealed with aluminum tape. Mount it should be from the inside of the bath mirror side up.
It is necessary to leave a gap between the foam and the wall.
Thermal insulation is the most important aspect in creating a bath. It depends on the functionality of the room.If the bath will not warm up, all the work will go down the drain.
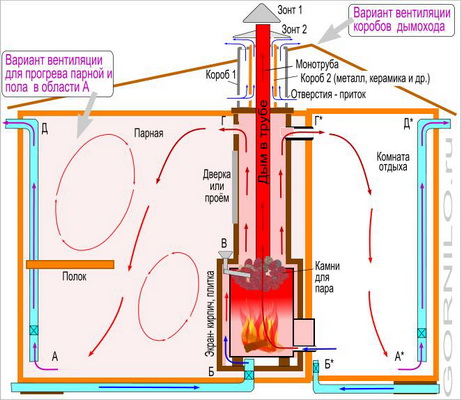
In rooms with high humidity, it is important to achieve excellent ventilation of insulation materials. Thus, the bath will warm up faster and decrease the amount of condensate, as it evaporates faster.

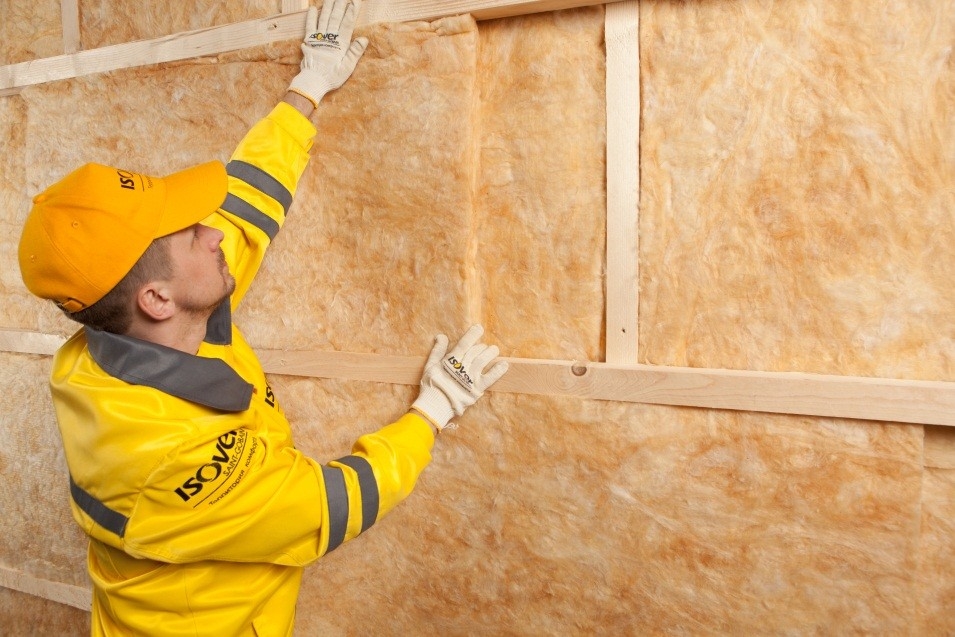
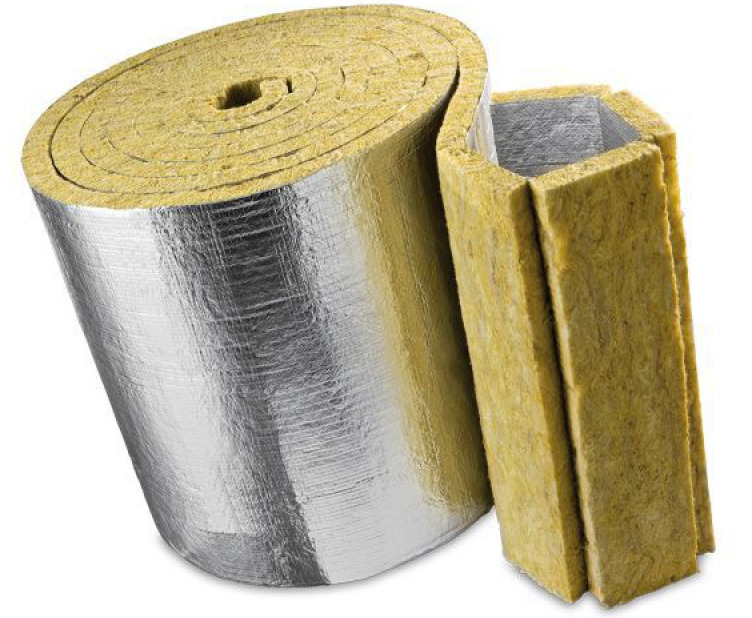
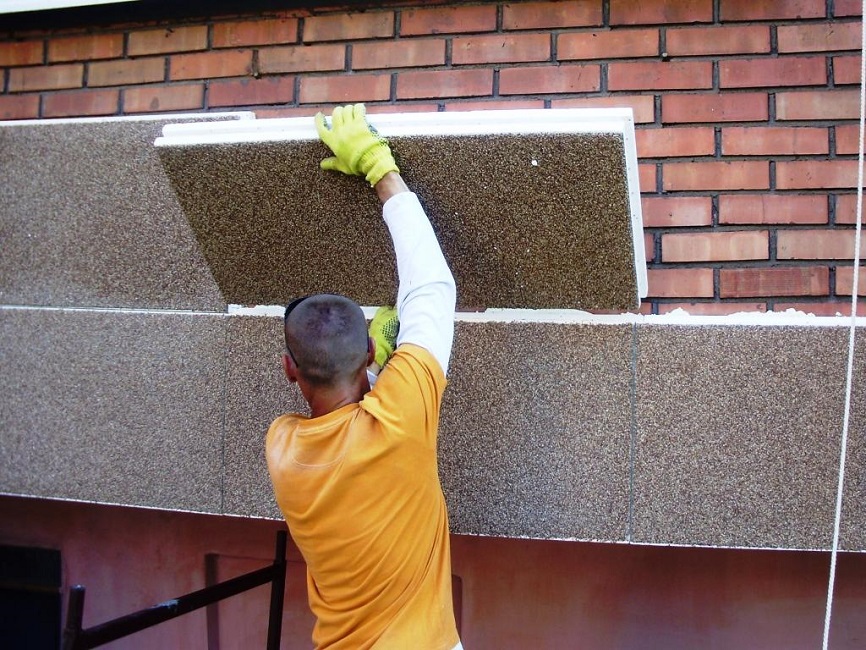
As insulating material can be applied thermoplates, mineral wool, foam, fiberglass or penoplex. Work on insulation should be started from the initial stage - the construction of the foundation and the arrangement of the floor.
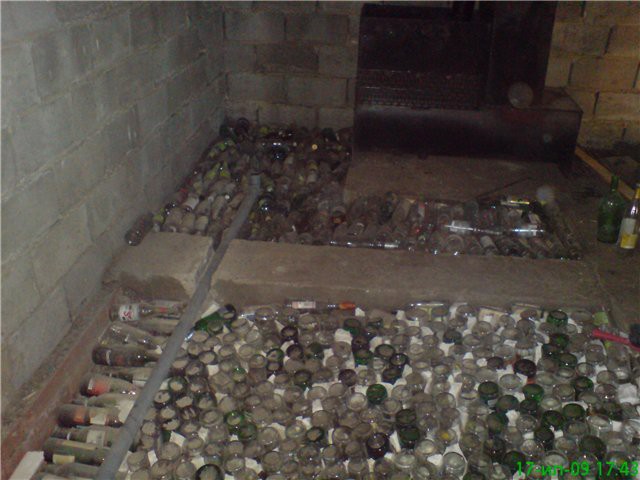
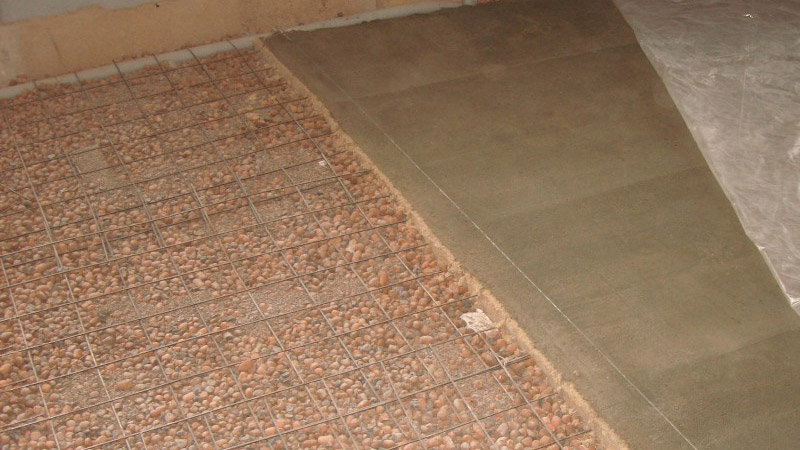
Folk and the most affordable way to insulate the bathing underground - corked bottles are placed in rows under the welded mesh. Rows of bottles covered with sand and shed water, then poured cement.
In order not to get cold in the bath, it is recommended to cover the ground under the floor with a layer of expanded clay and slag.
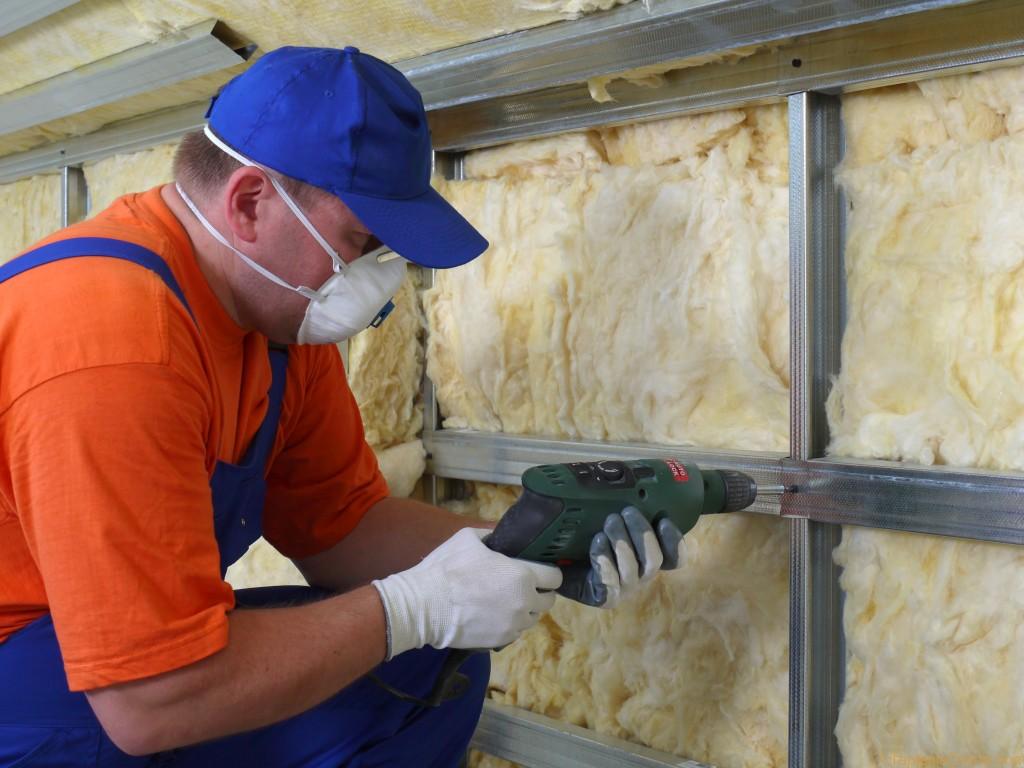

For wall insulation using the following approximate sequence of layers:
- crate of timber or aluminum profile for drywall;
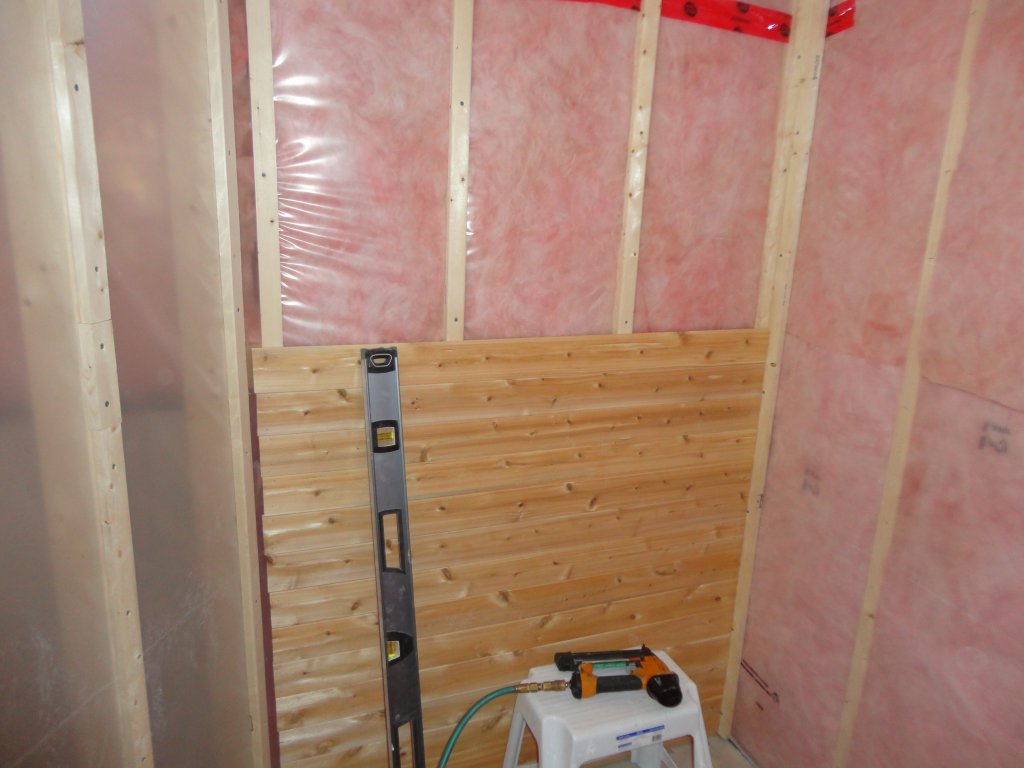
- Minvata - layer thickness for a steam room 10 cm, for auxiliary premises - 5 cm;
- moisture resistant slab material - board, impregnated with fungi and mold;
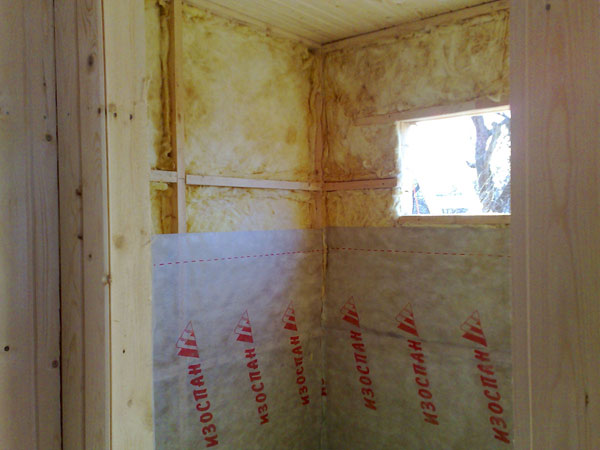
- steam and moisture insulation "Izospan";
- vertical bars of the counter lattice;
- lining.
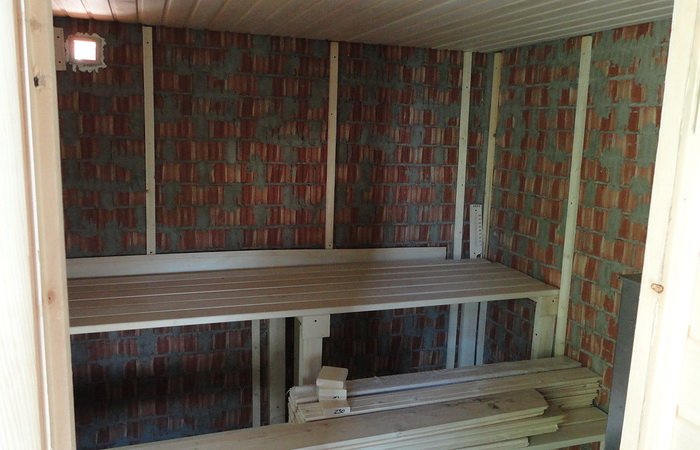

This design of insulation eats up a lot of internal space, which must be considered when planning. If the area of the bath is small, to save space, it is better to use foam glass for wall insulation. On it to make laying of vapor barrier, sheathing and lining. This option is less thick and environmentally safe, chemically neutral and does not emit harmful substances at high temperatures.
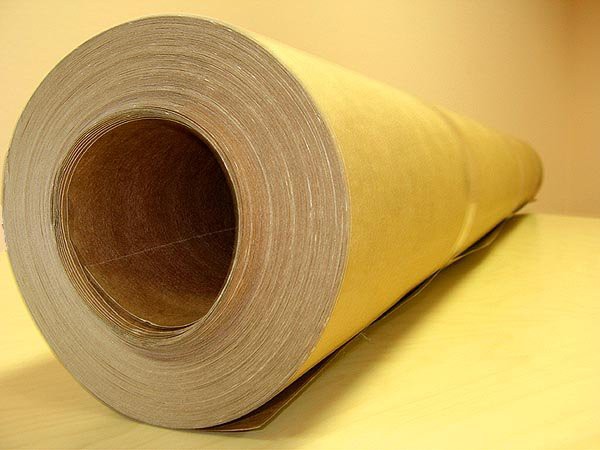
Foam glass has one drawback - it is high cost. Vapor barrier steam rooms and washing room should be given due attention. It is necessary to lay folded mineral wool under the wooden covering. The ceiling should also be insulated.. For warming of the waiting room, you can use kraft paper instead of foil, which will make the process cheaper.
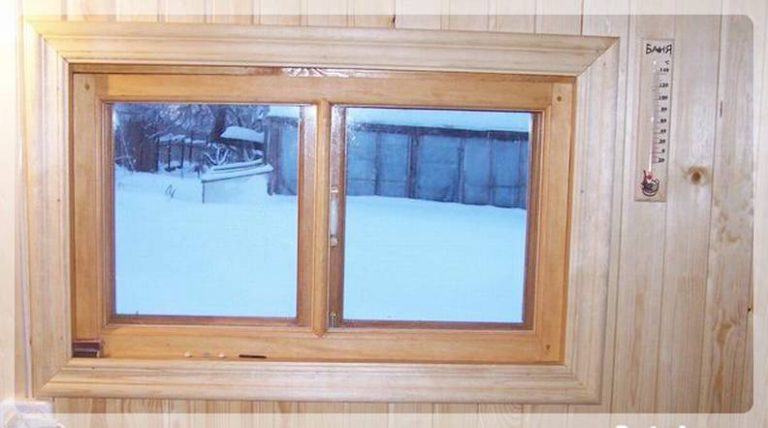
To improve thermal insulation, windows should be placed as low as possible and high thresholds should be made in the steam room. It is important to make the windows small. The larger the glazing area, the greater the heat loss. The area of the window in the bath should not exceed 5% of the floor area.The frames should be tightly fitted to the bindings, the slots carefully caulked.
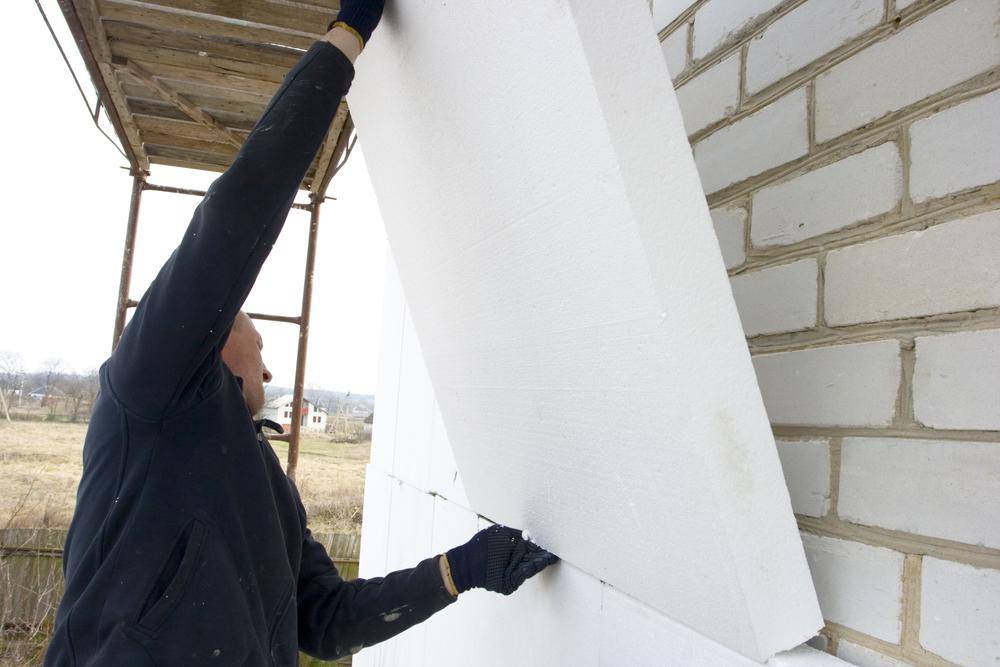
Warming of a bath from a brick can be made and outside, foam plastic will be suitable for these purposes.
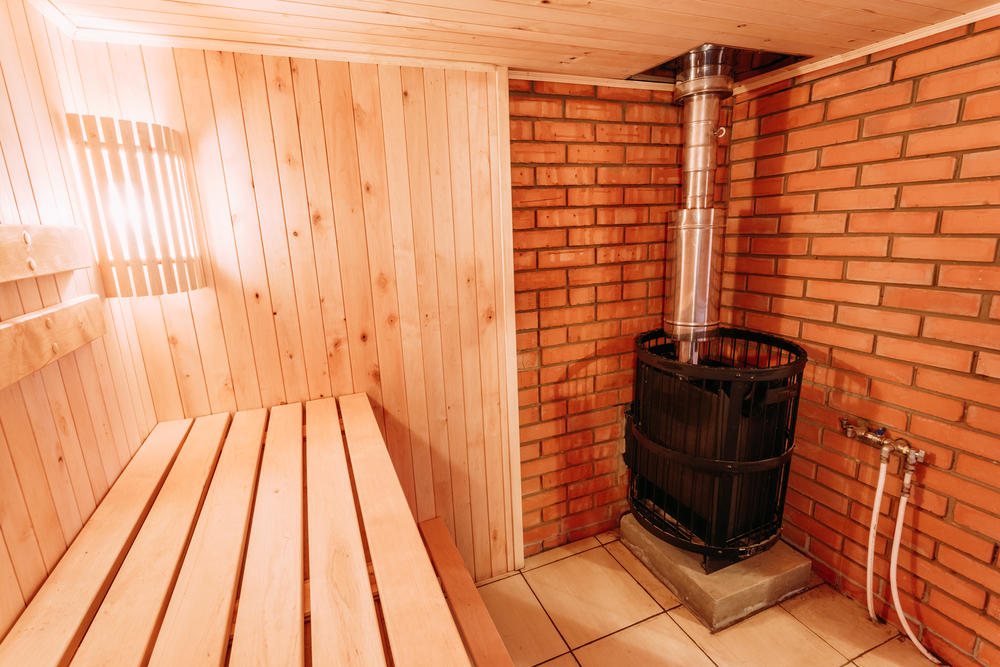
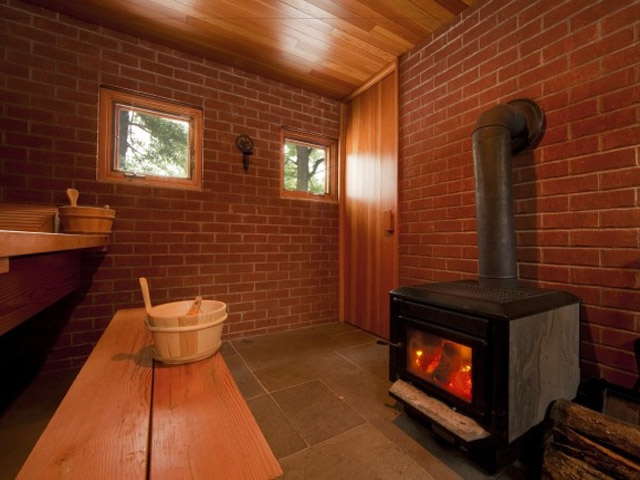
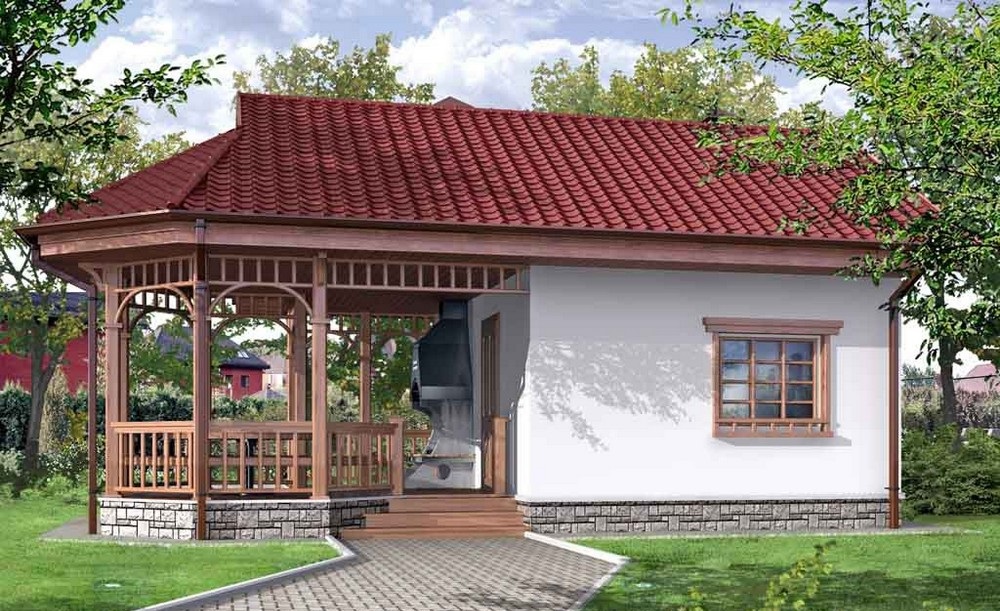
Beautiful examples of finished buildings
A modern bath is not only a functional room, but also a place for a comfortable rest with family members or friends in the country. We present to your attention examples of finished buildings.
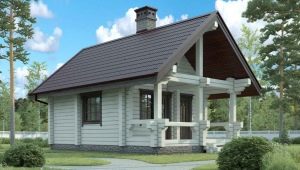
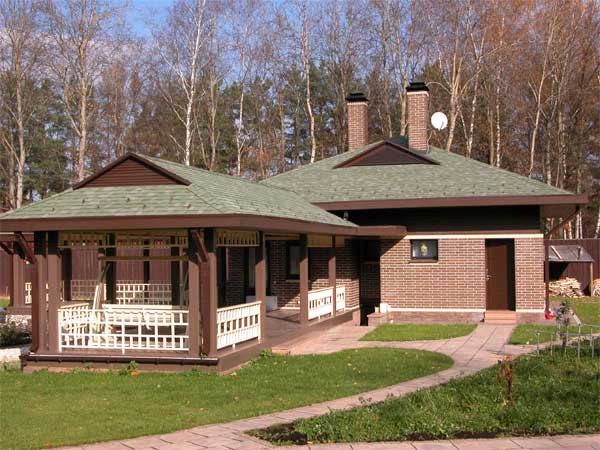
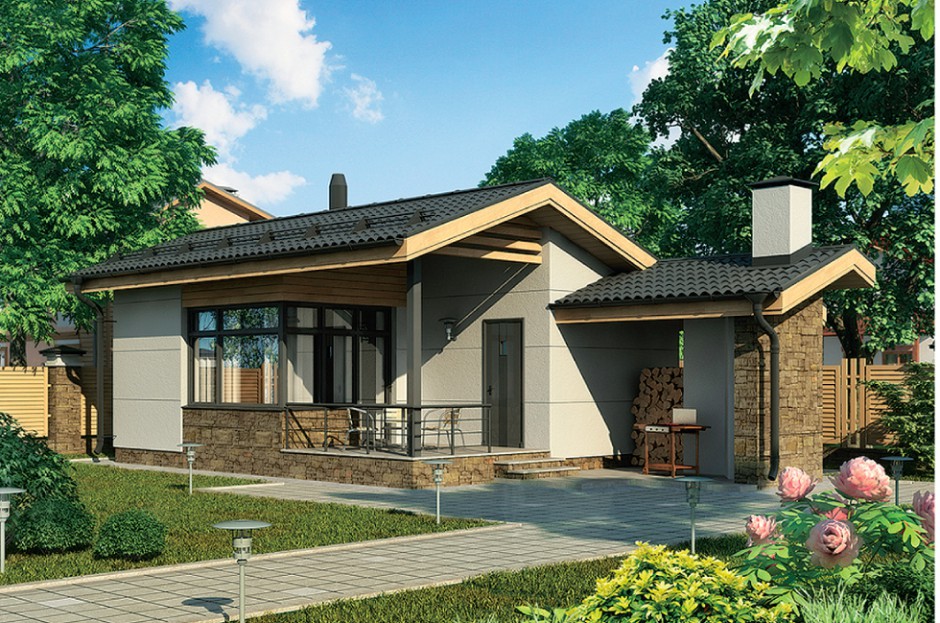
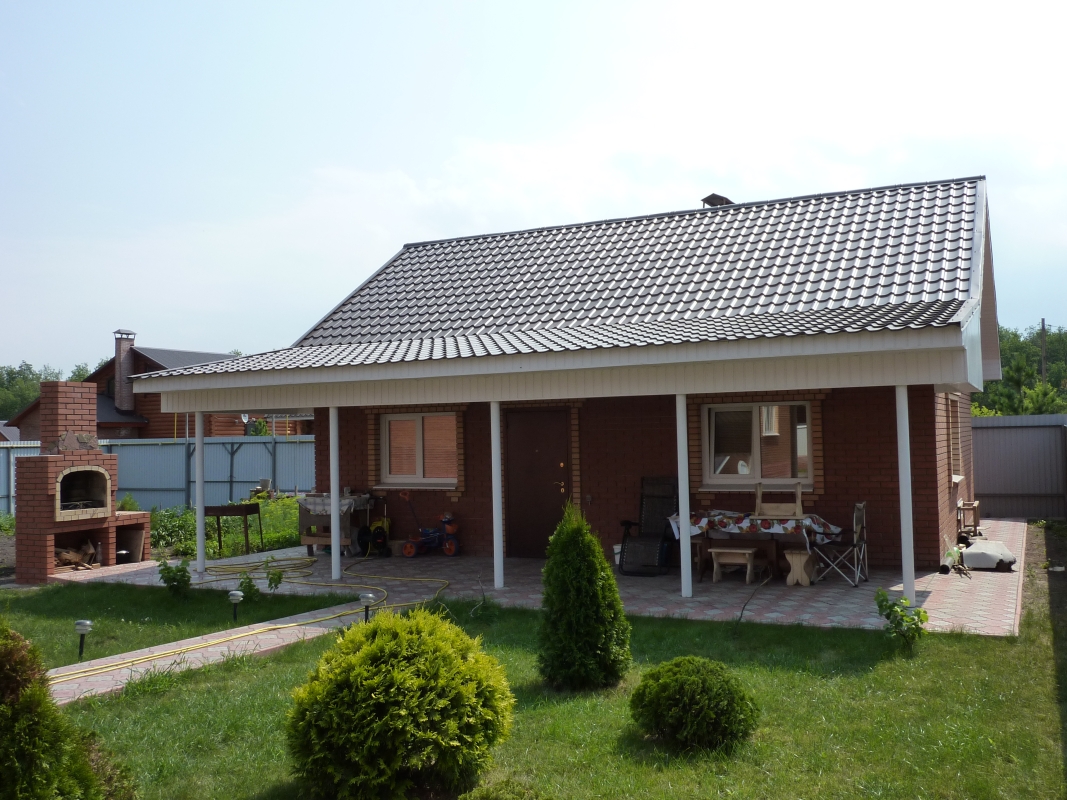
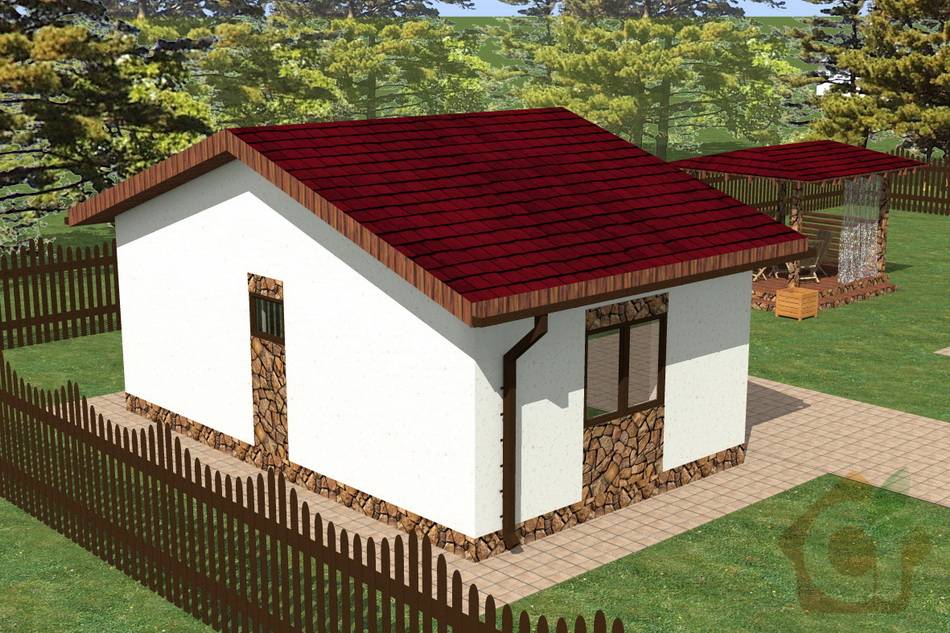
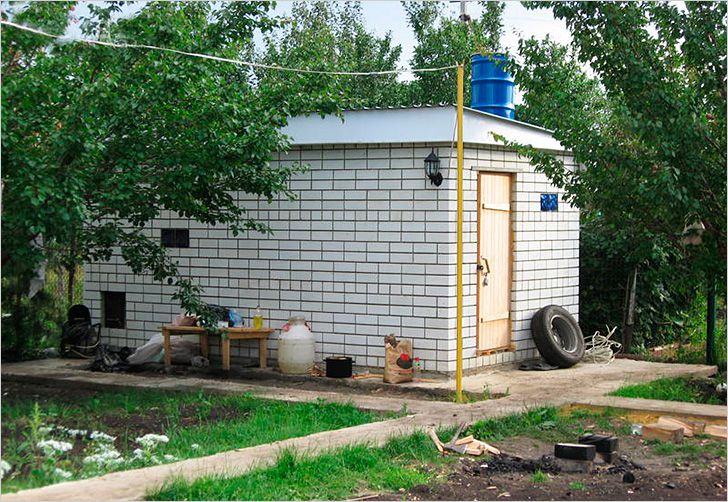
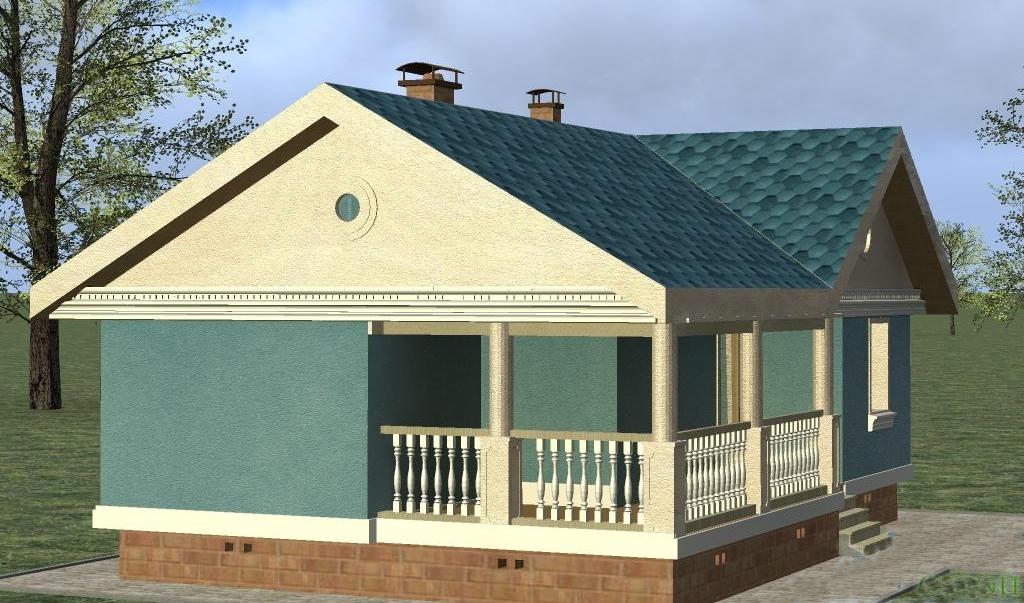
Spacious bath with a cozy terrace. White color goes well with wooden fences and terraces.
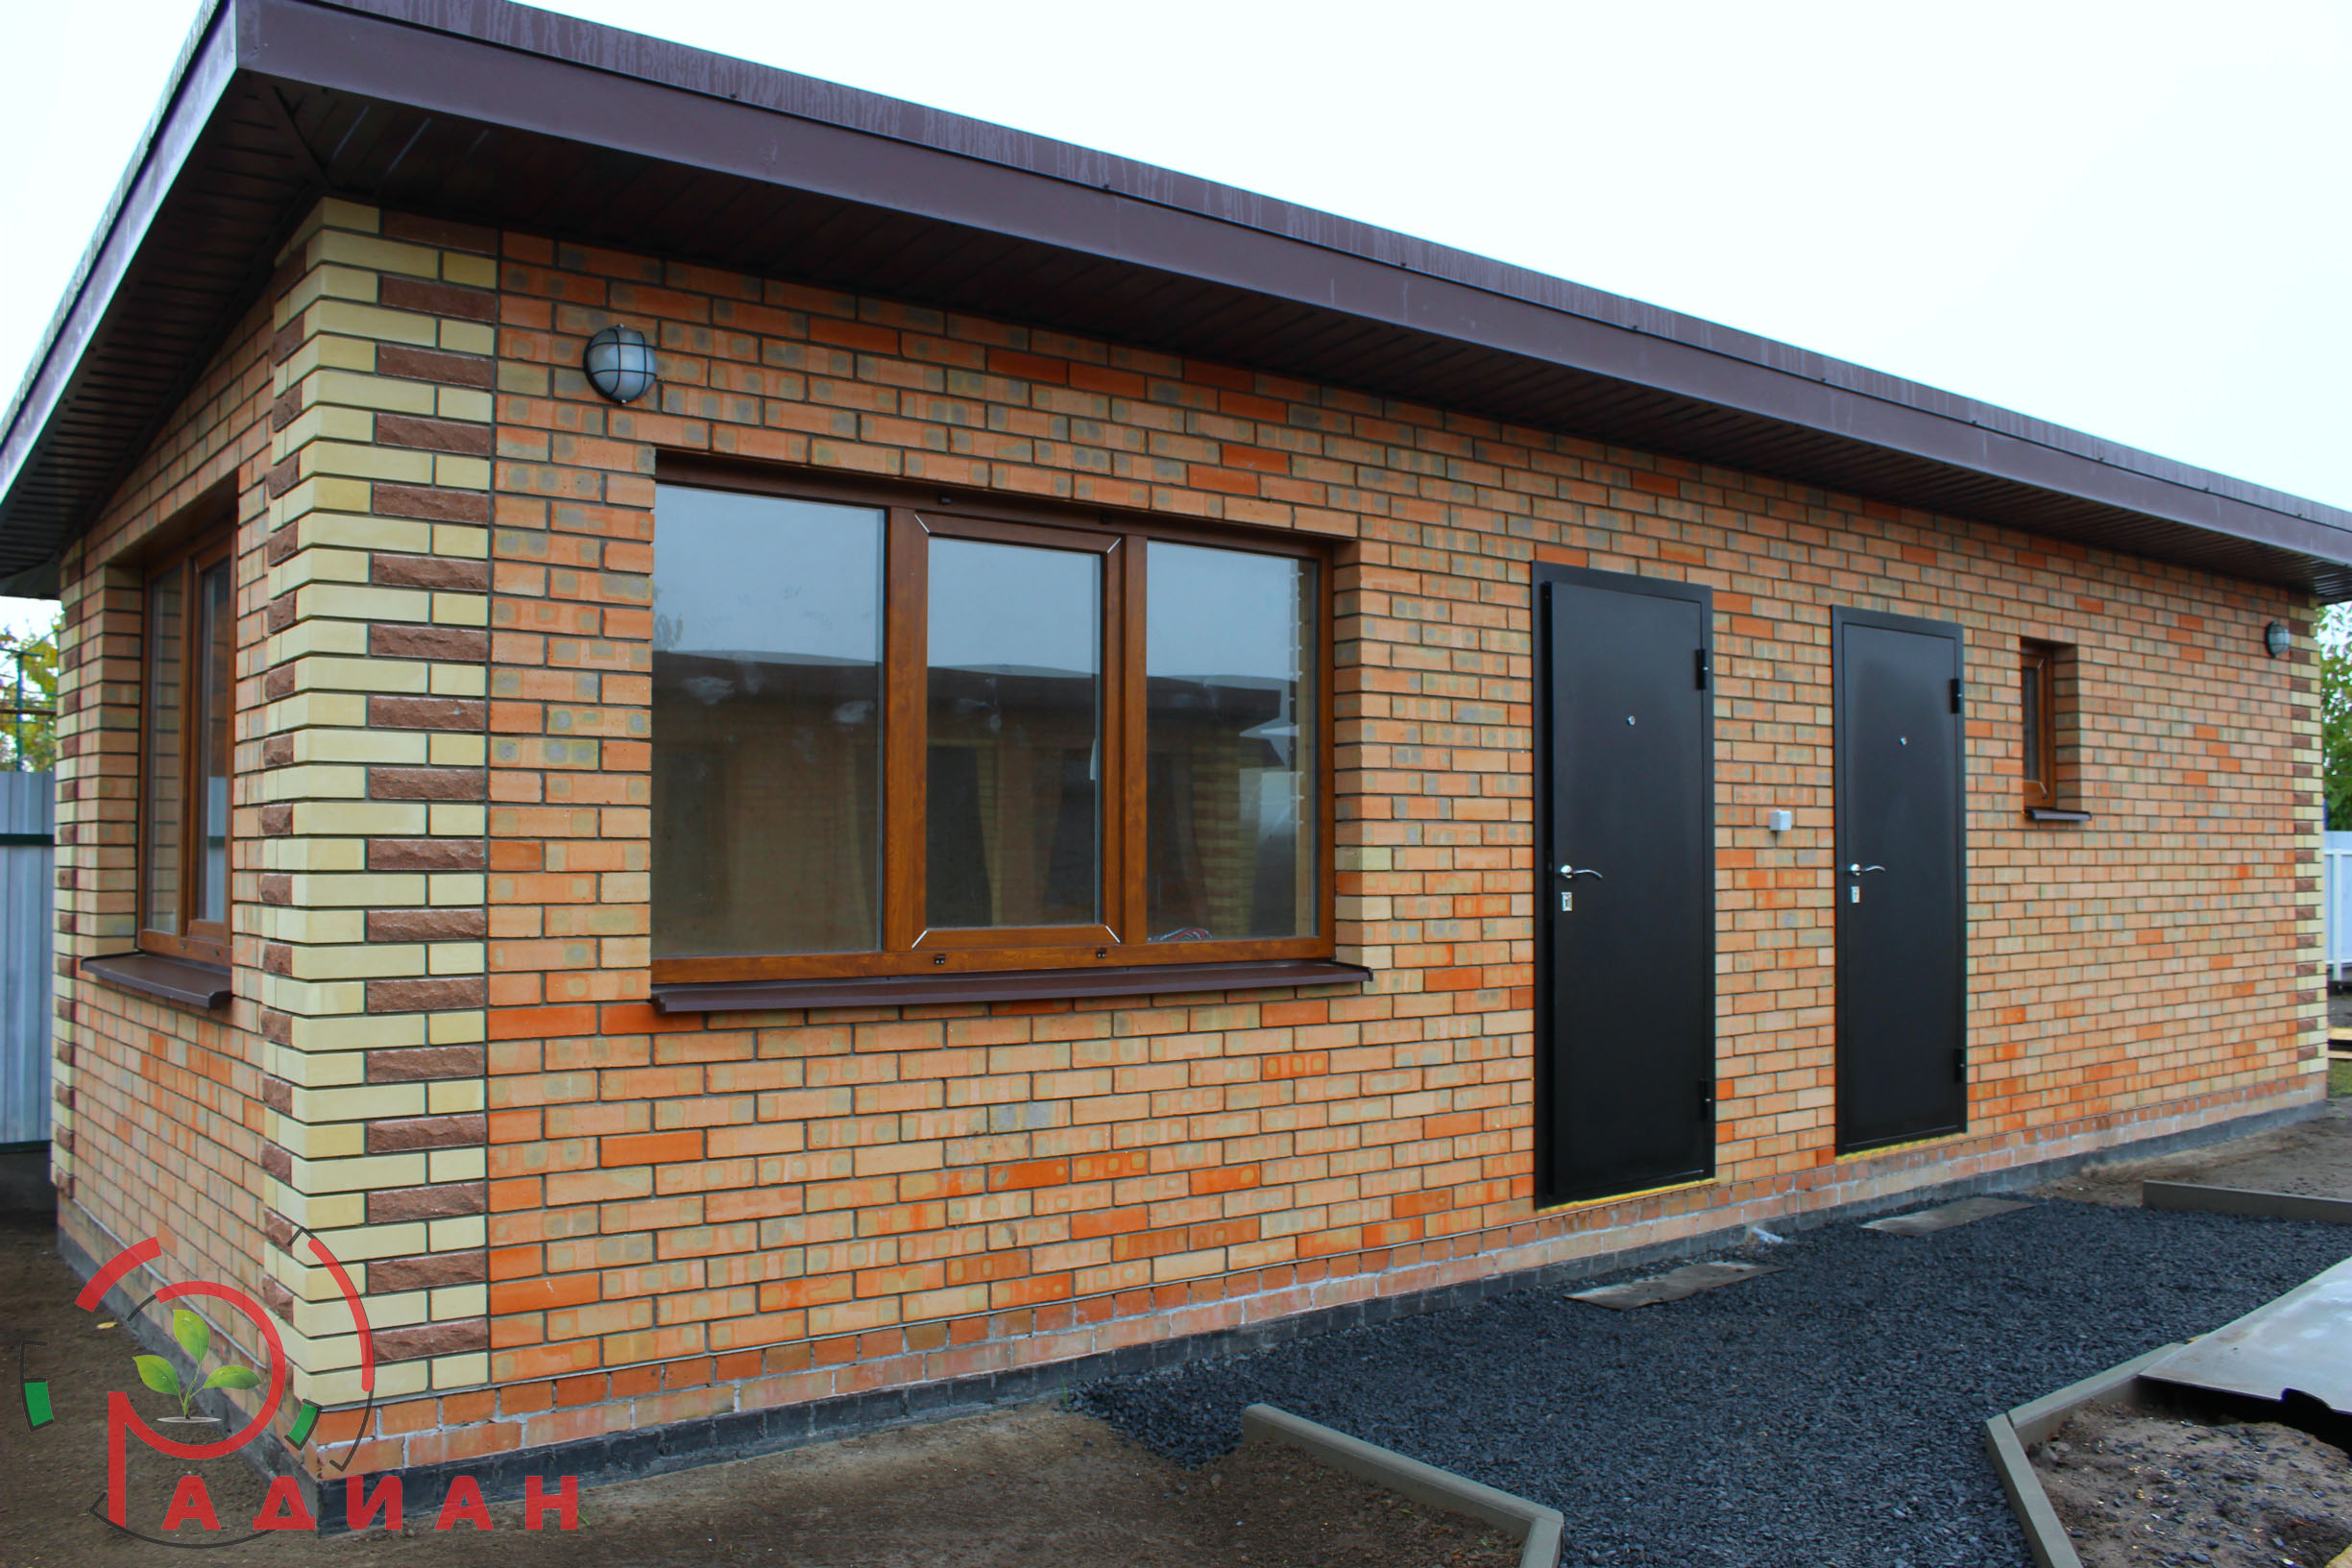
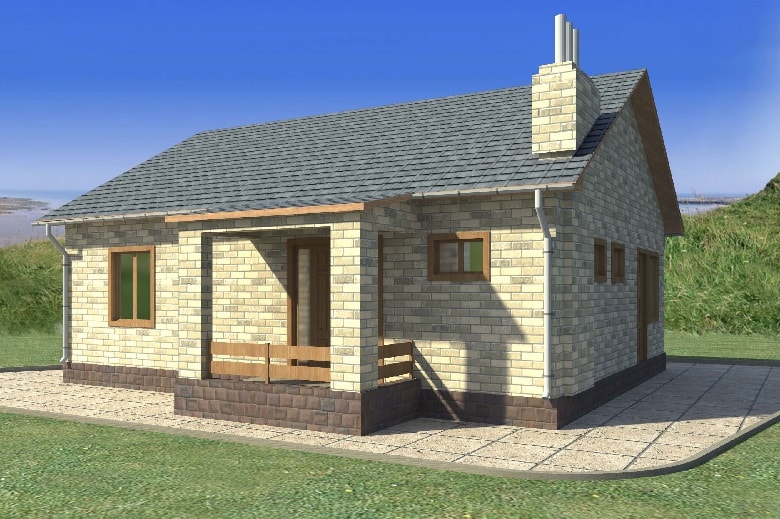
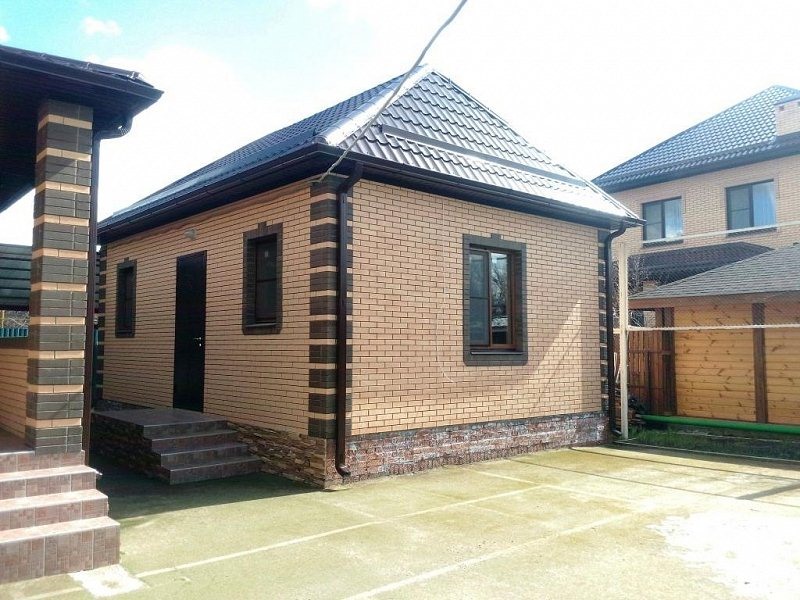
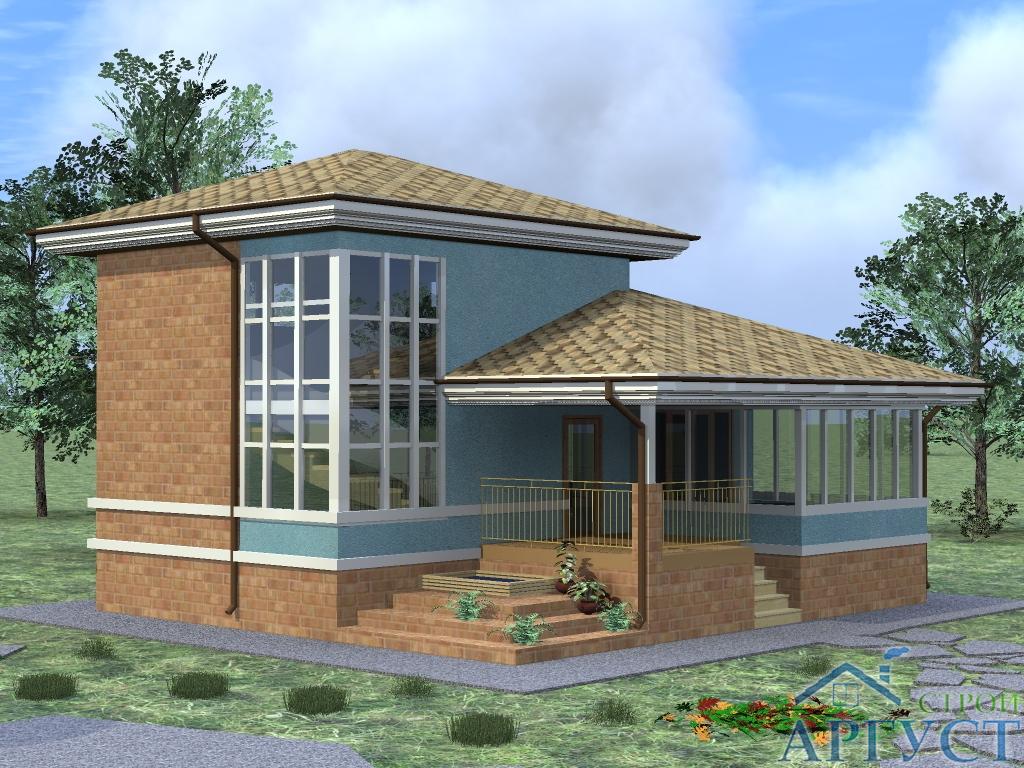
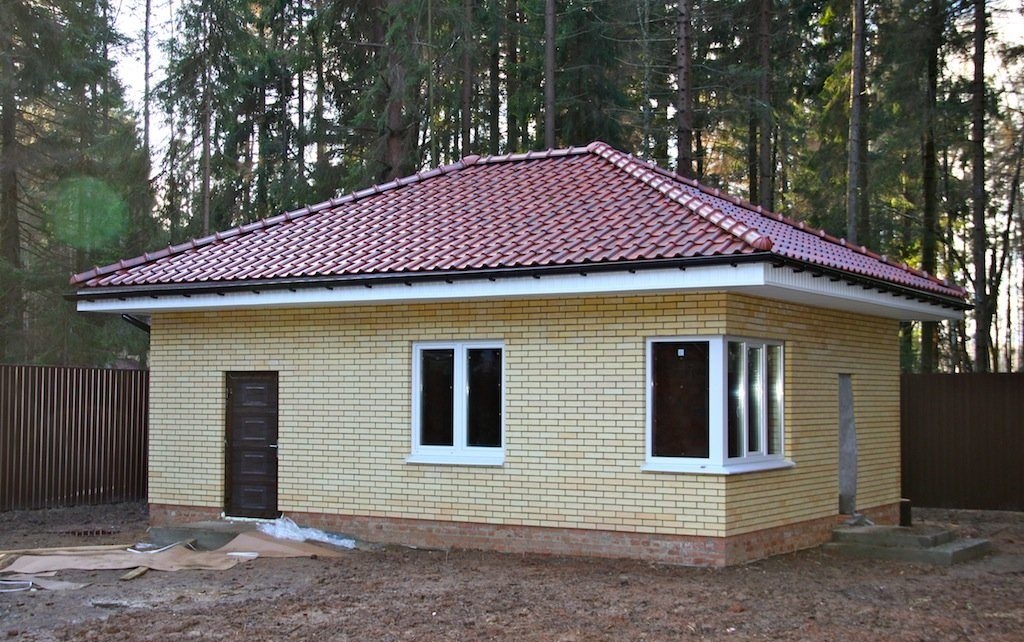
The rectangular bath of light brick with the original corner window looks stylish and attractive.
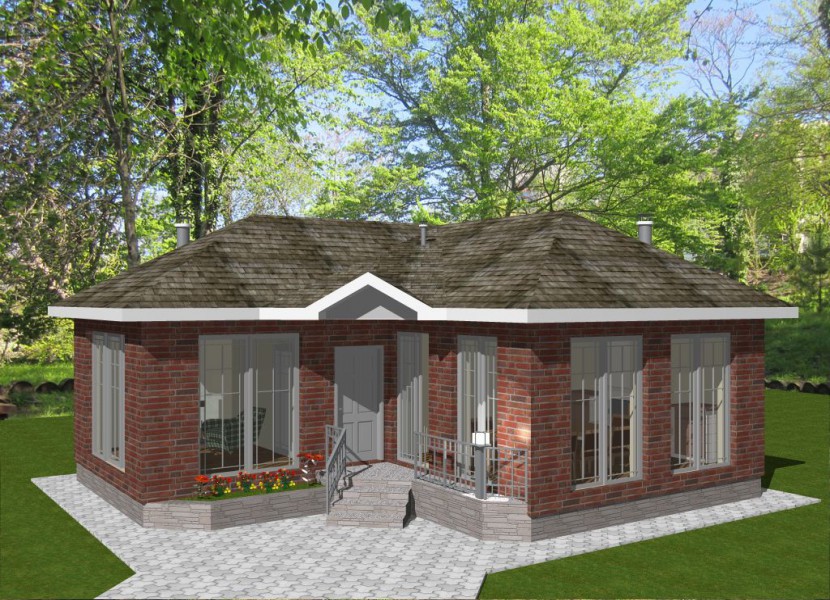
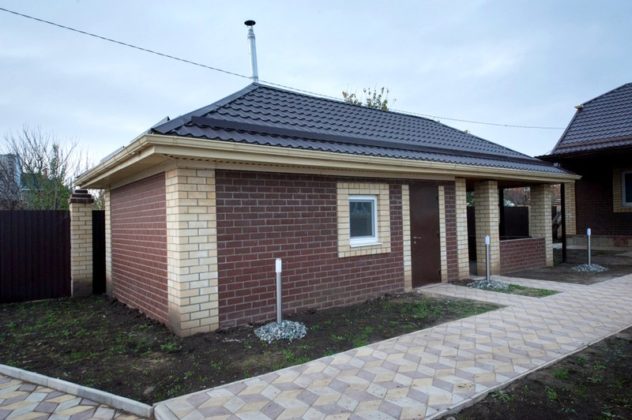
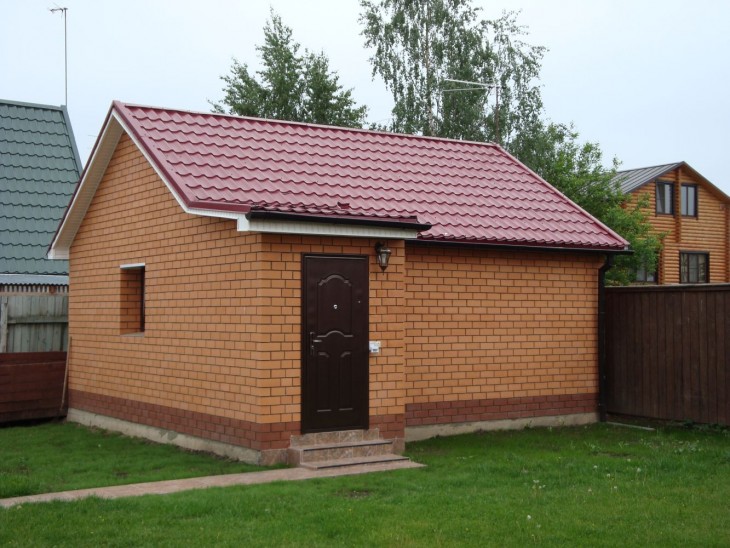
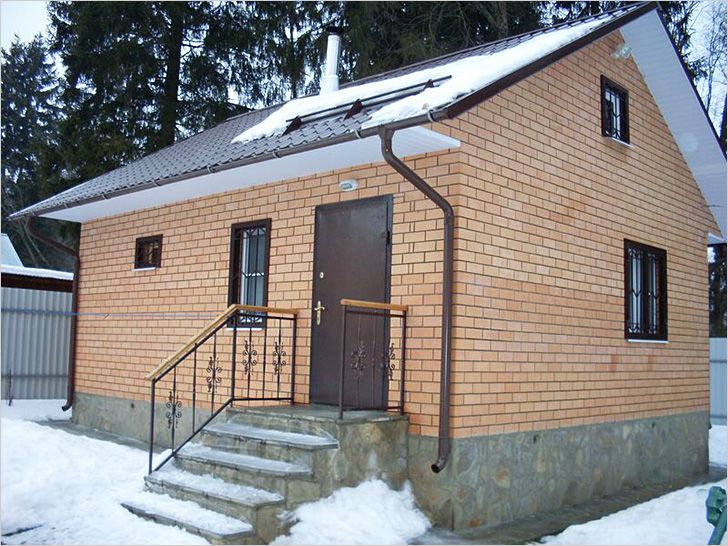
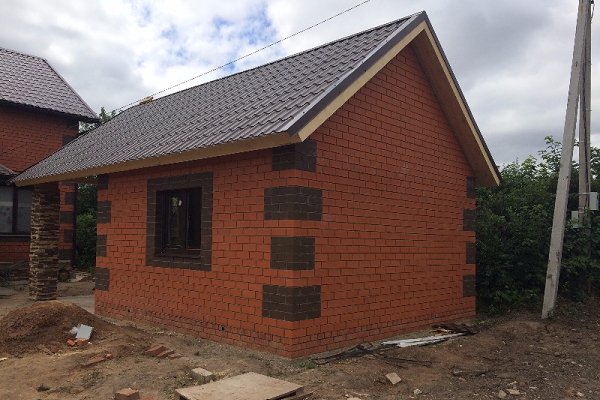
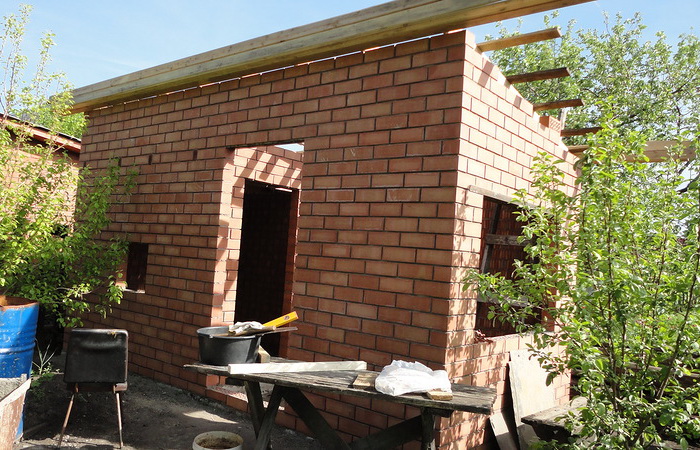
A compact red brick bath is the best choice.
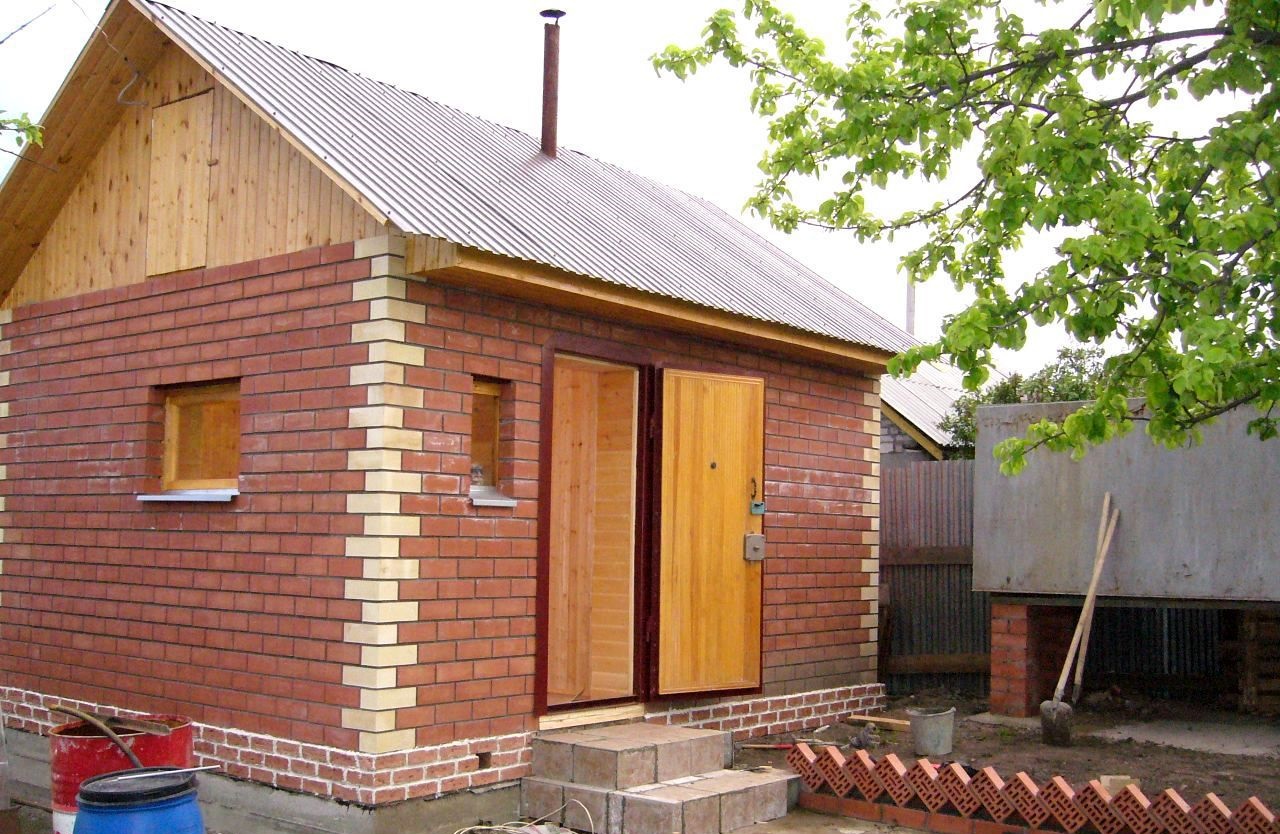
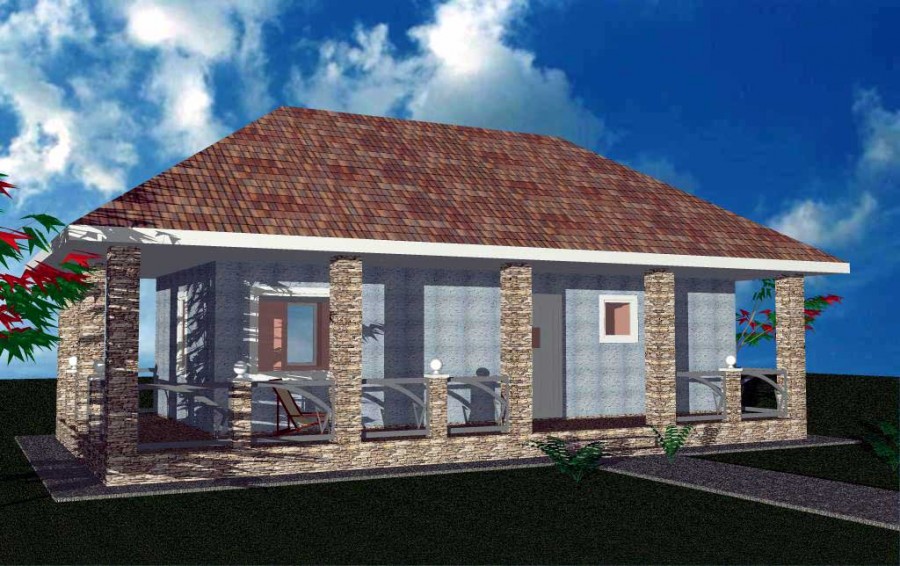
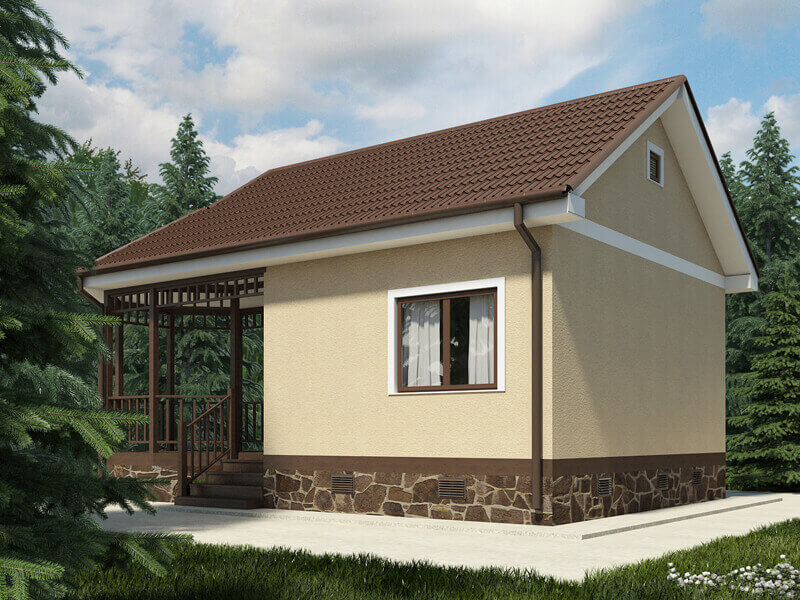
The original exterior of the brick bath makes it unusual.
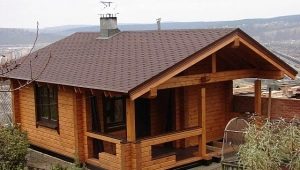
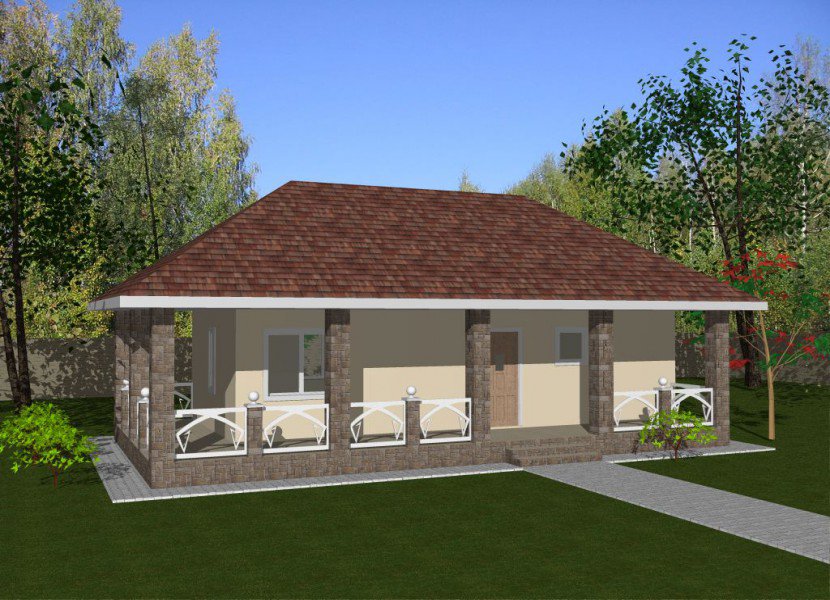
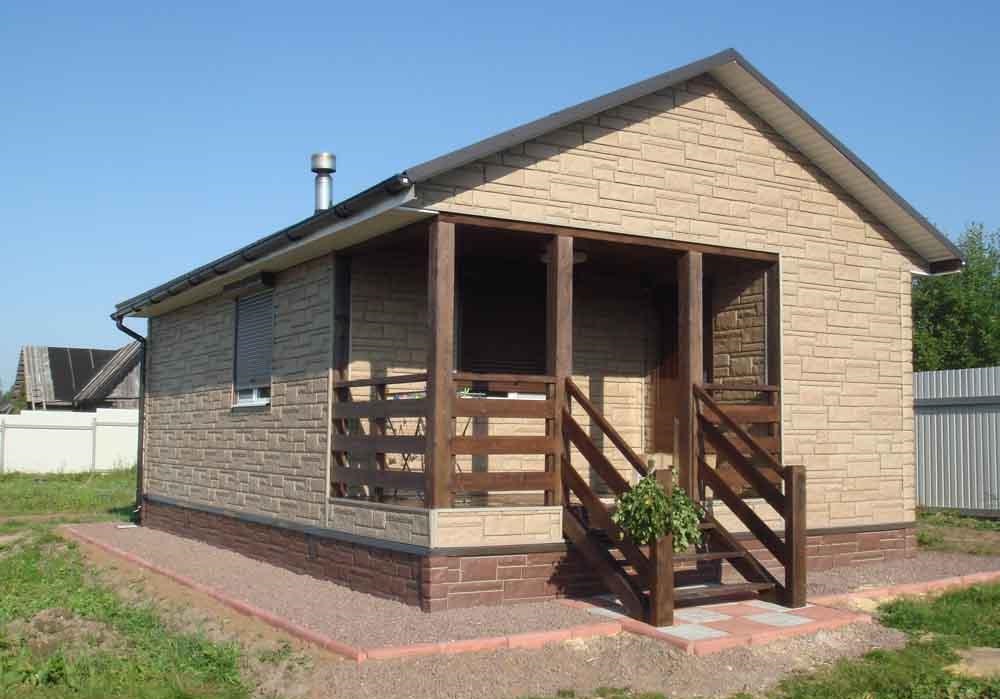
A stylish bath with a small terrace of dark wood will appeal to many.
Review the project of a brick bath with a rest room, see the following video.