Built-in closet do-it-yourself
Features and benefits
Built-in closet can be installed in the bedroom or in the hallway, in a one-bedroom apartment or a luxurious country house with a large area. These furnishings at the same time and the most functional, and in a modern style, they fit into any interior. You can point out their main advantages:
- such furniture with excellent capacity occupies a minimum of free space in the house;
- You can put all family wardrobe items in one place and get rid of excess furniture for clothes;
- thanks to the sliding doors, they do not require a free area for their opening;
- the doors on the rails are safe, especially if there are children in the house, they will not pinch your fingers like swing systems;
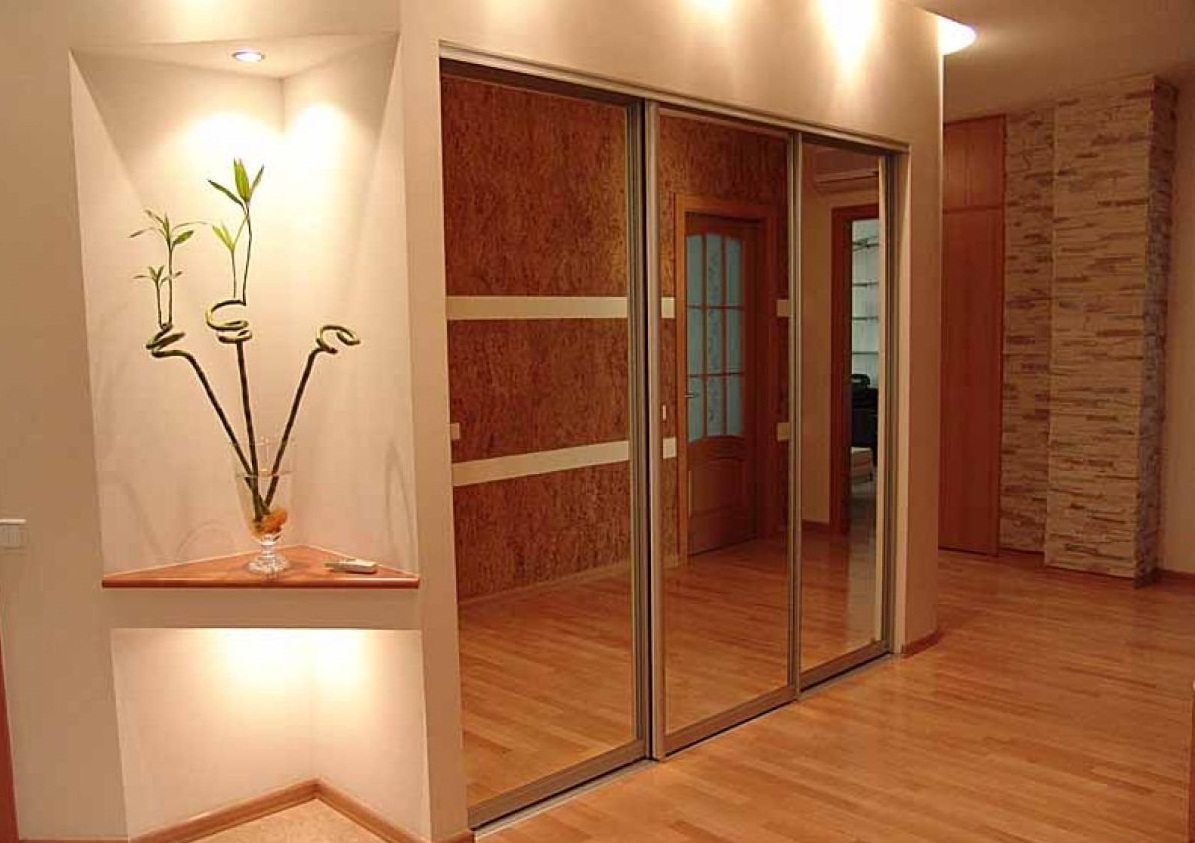
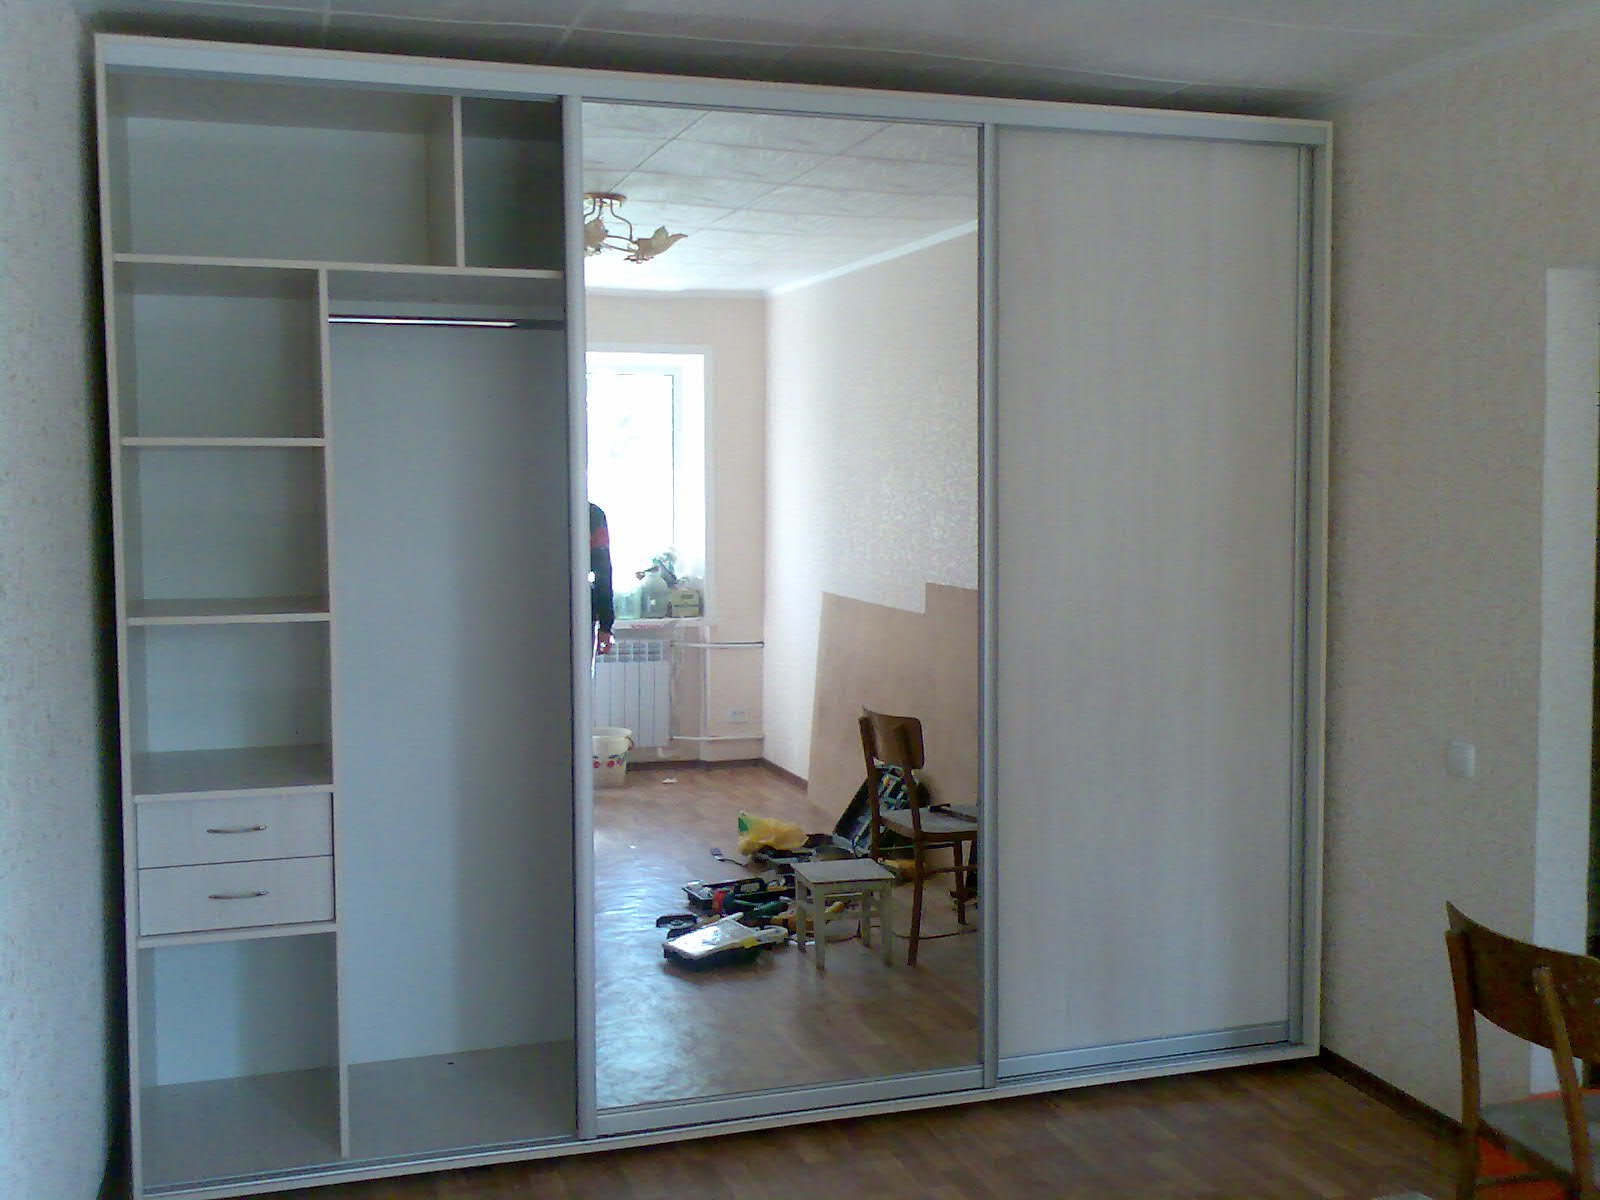
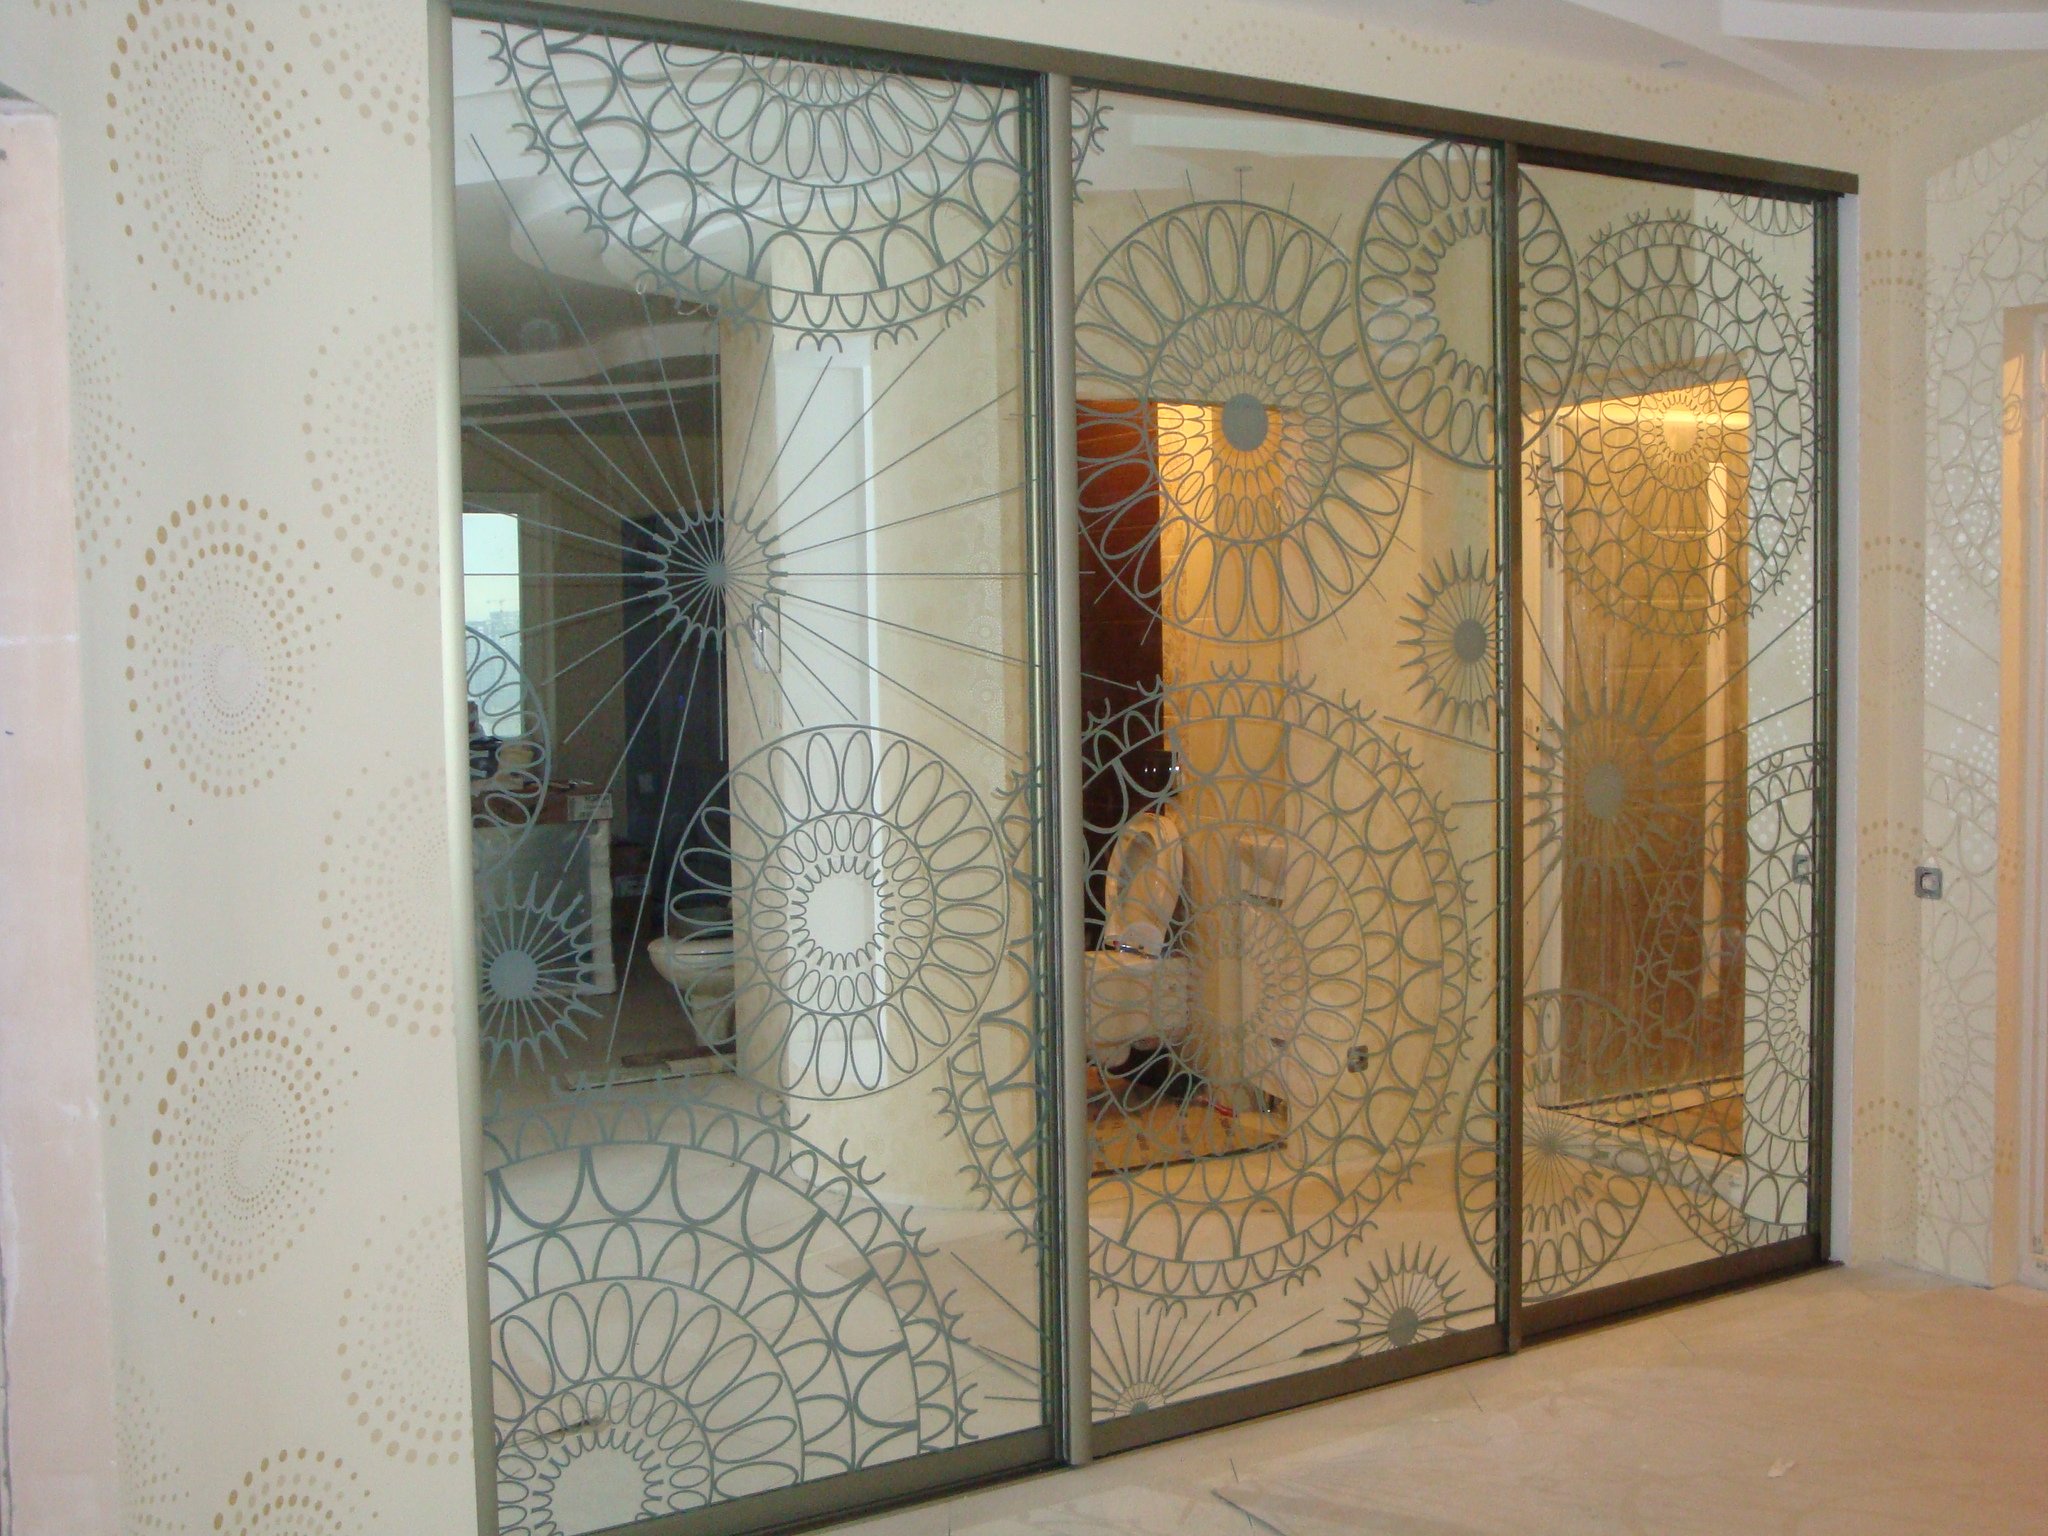
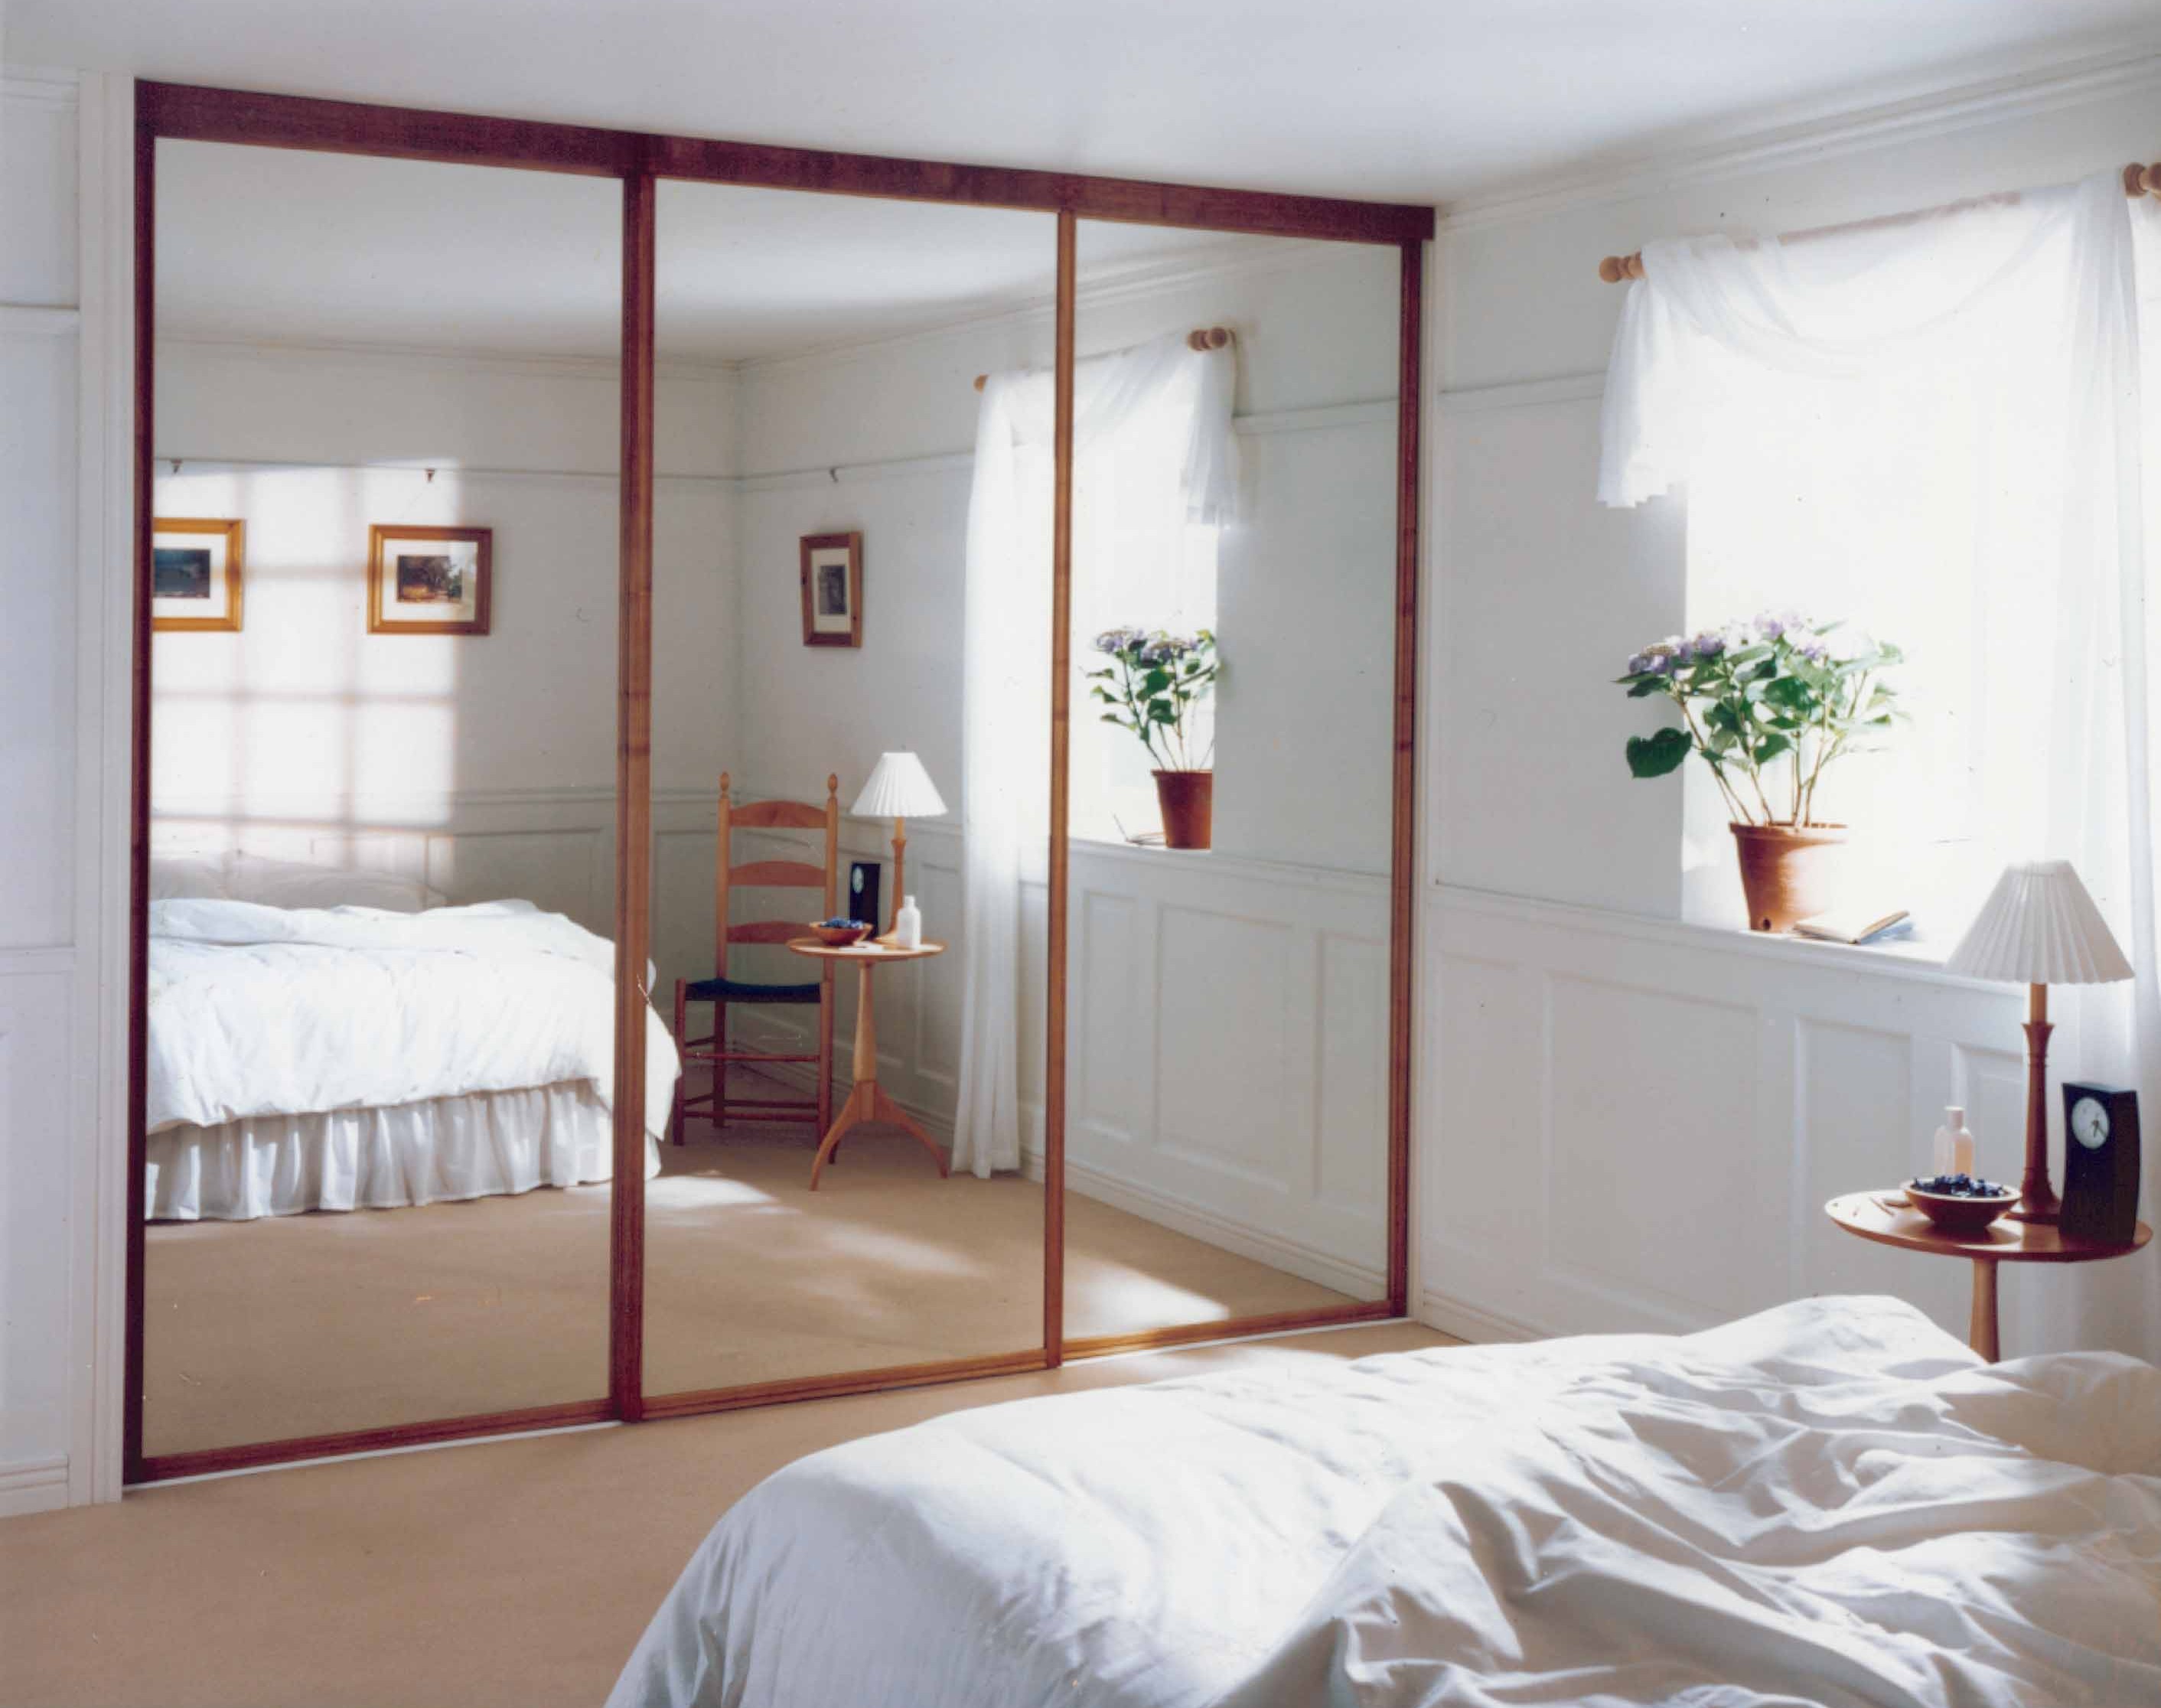
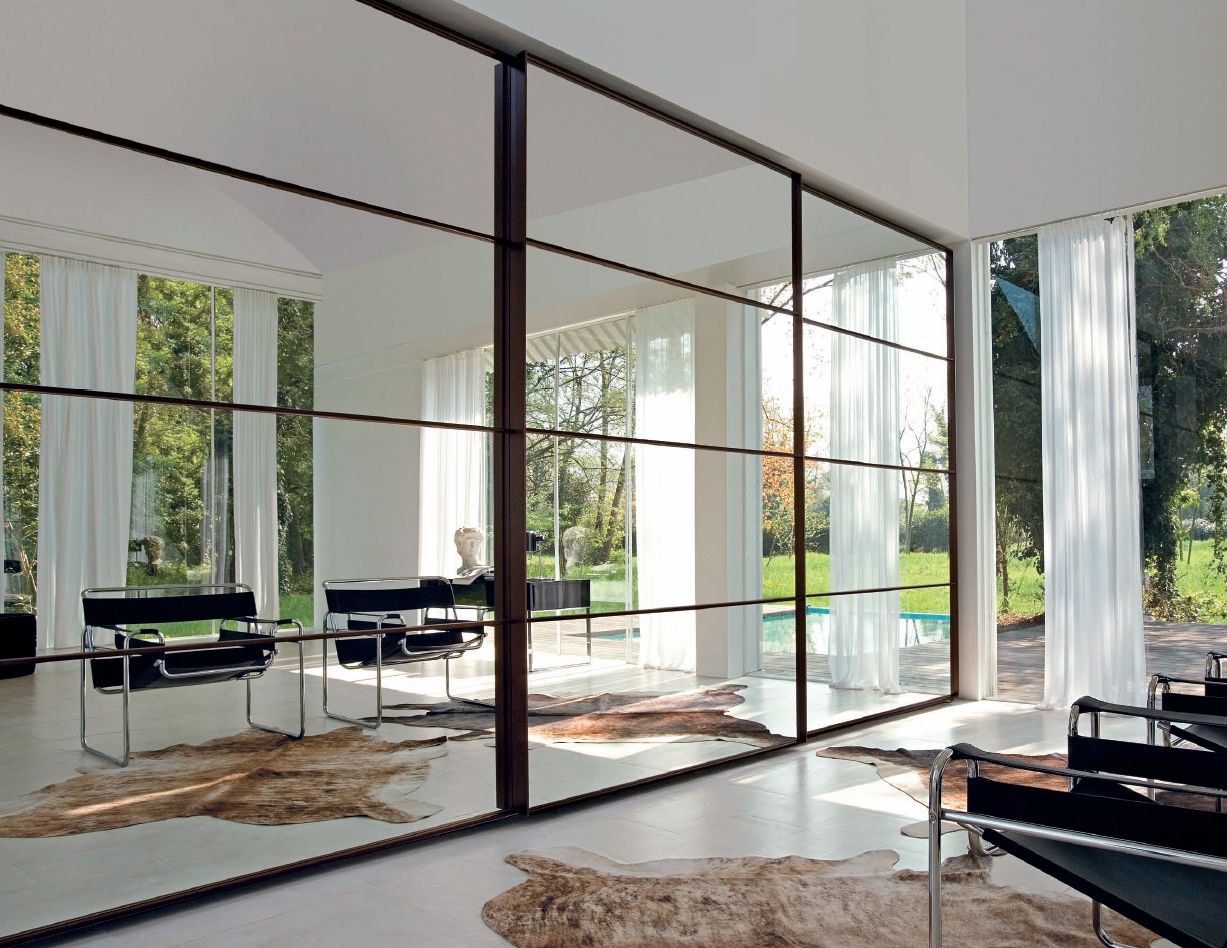
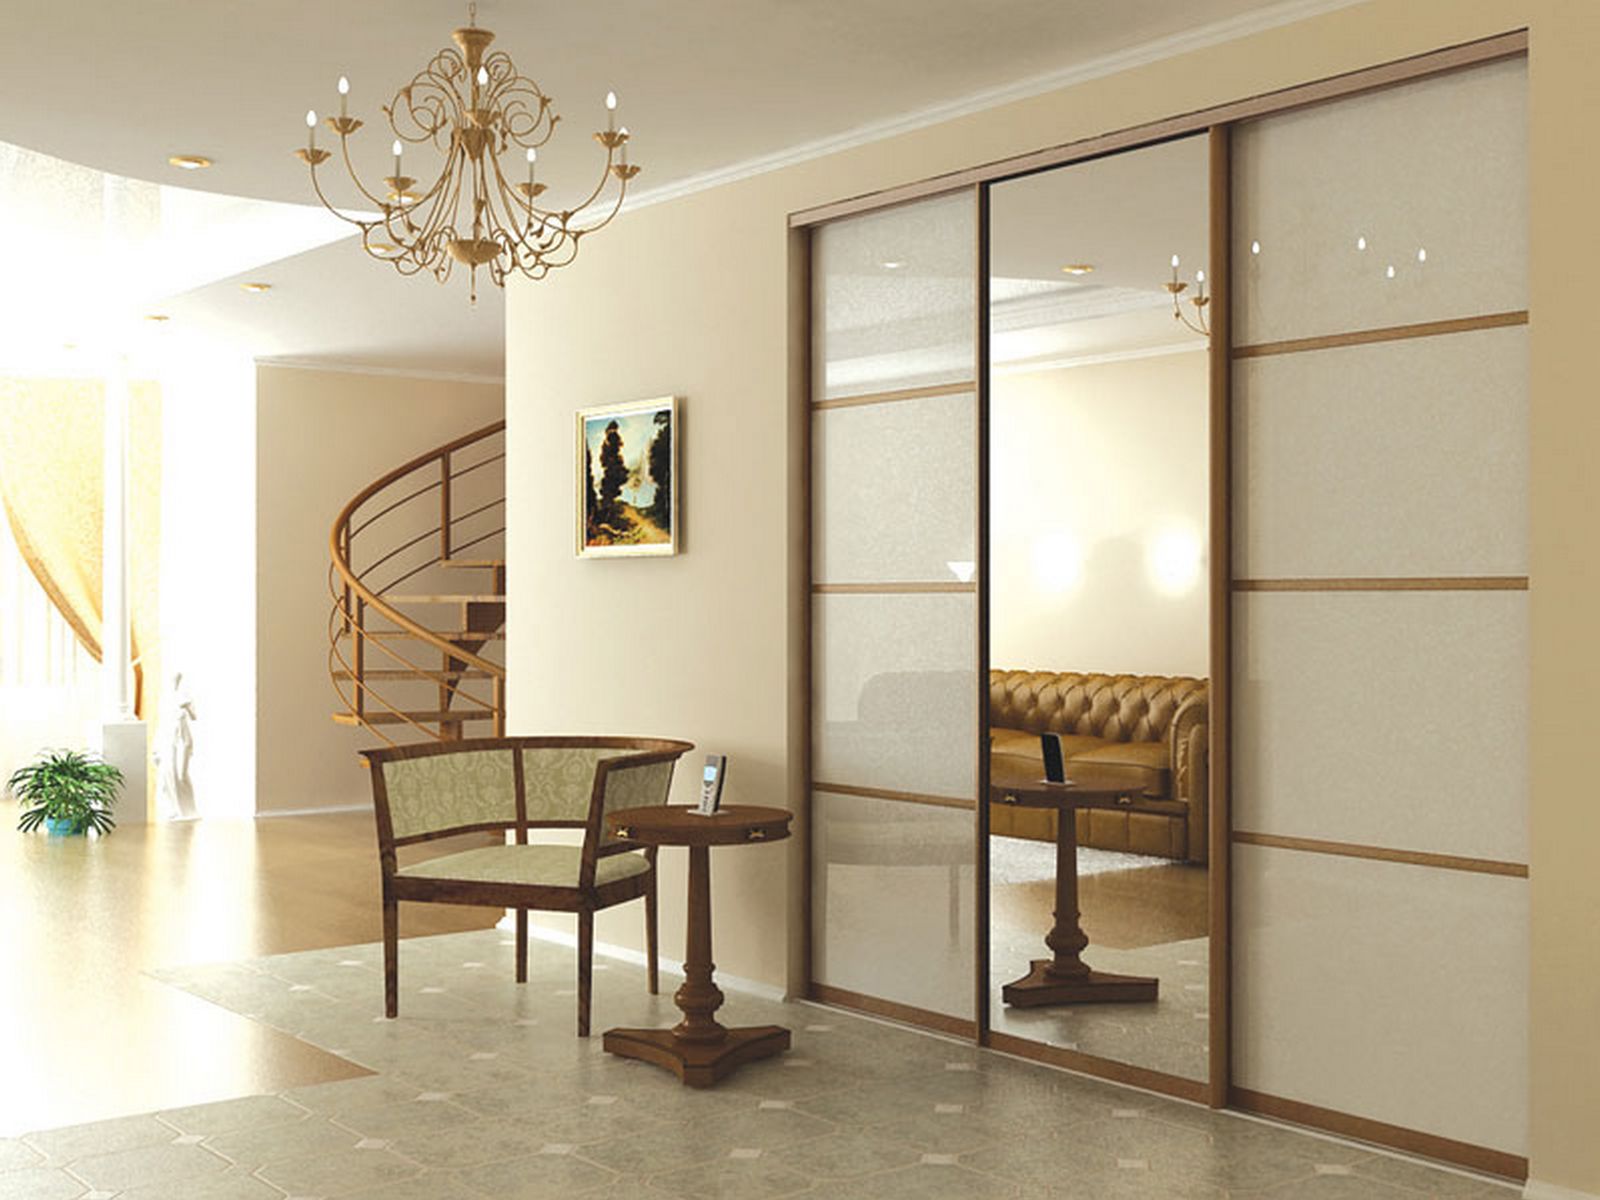
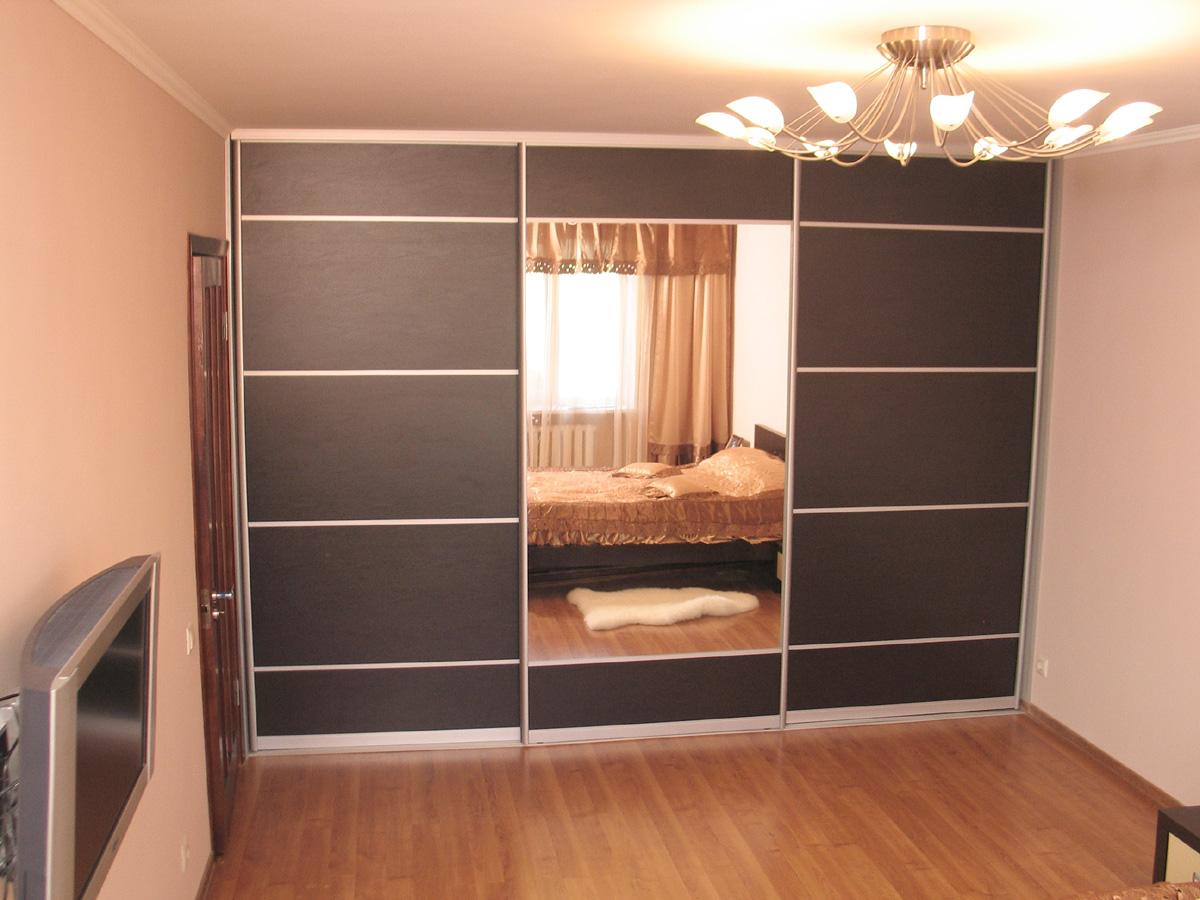
- from the outside you can hang a large mirror;
- wardrobes have a modern fashionable design.
You can order a ready-made model of built-in wardrobes with services for their installation, assemble the construction from factory parts yourself, or make a complete wardrobe yourself.

How to make your own built-in corner cabinet: step by step instructions
In order to properly do all the work yourself, you must first determine the location of the future wardrobe, taking into account the space under it to draw up drawings and diagrams with the detailing of the outer walls, floors, shelves, drawers and hanging rods with their sizes. Then select the materials and the type of doors with sliding mechanism and guides. When all the tools and materials are available, it is useful to create a description of the work, where all stages of the manufacture of built-in furniture are indicated step by step.
The necessary materials and tools for building a wardrobe are as follows:
- raw materials for the body, walls, shelves and doors (wood, lining, drywall, laminate, MDF, fiberboard);
- metal guides;
- door rollers;
- fasteners: bolts, screws, screws, angles, brackets, profiles;
- magnetic latches and stoppers for fixing;
- soft dust collector;
- building level;
- roulette;
- drill, screwdriver, cross screwdriver;
- a hacksaw for cutting wood materials or a knife for cutting plasterboard parts;
- hexagon;
- scissors for metal or angle grinder (Bulgarian) with discs for metal.
Natural wood is a traditional material for the manufacture of furniture, which is currently also prestigious. For wardrobes, one should select straight-layer sheets without knots, cracks and chips, aged and treated with linseed oil or emulsion. The tree is the most pure natural material, which has the strength and magnificent views. But from the drawbacks for the wardrobe, it is possible to note its large weight, high cost and moisture, which is important for the room where the outerwear is stored.
Lining of wood is a less durable material and requires the bonding of its individual boards. This can be done with PVA glue, joining grooves with grooves. This material is rarely used to create wardrobes, mainly for models embedded in a niche.
Drywall responds well to treatment, is easy to install and has protection from moisture. But in itself it is very fragile, and under great weight it sags over time. But if you make a rigid frame of metal ribs and drywall sheets, you can get a reliable and durable construction. It is used to create internal shelves, niches and partitions in wardrobes due to the ease of installation and low cost compared to wood and laminated plates.But the sliding doors are not made of drywall, as with regular slamming of the doors it will crack.
Laminate, MDF and fiberboard are considered by many to be the most successful materials for the production of wardrobes. They are durable, easily processed, protected from moisture due to the special microstructure of wood and moisture-resistant components added to the fibers. The laminated surface has a smooth shiny look with any colors, it can be washed with a damp cloth. For the production of such furniture using MDF medium and high density, which are less susceptible to mechanical damage and deformation.
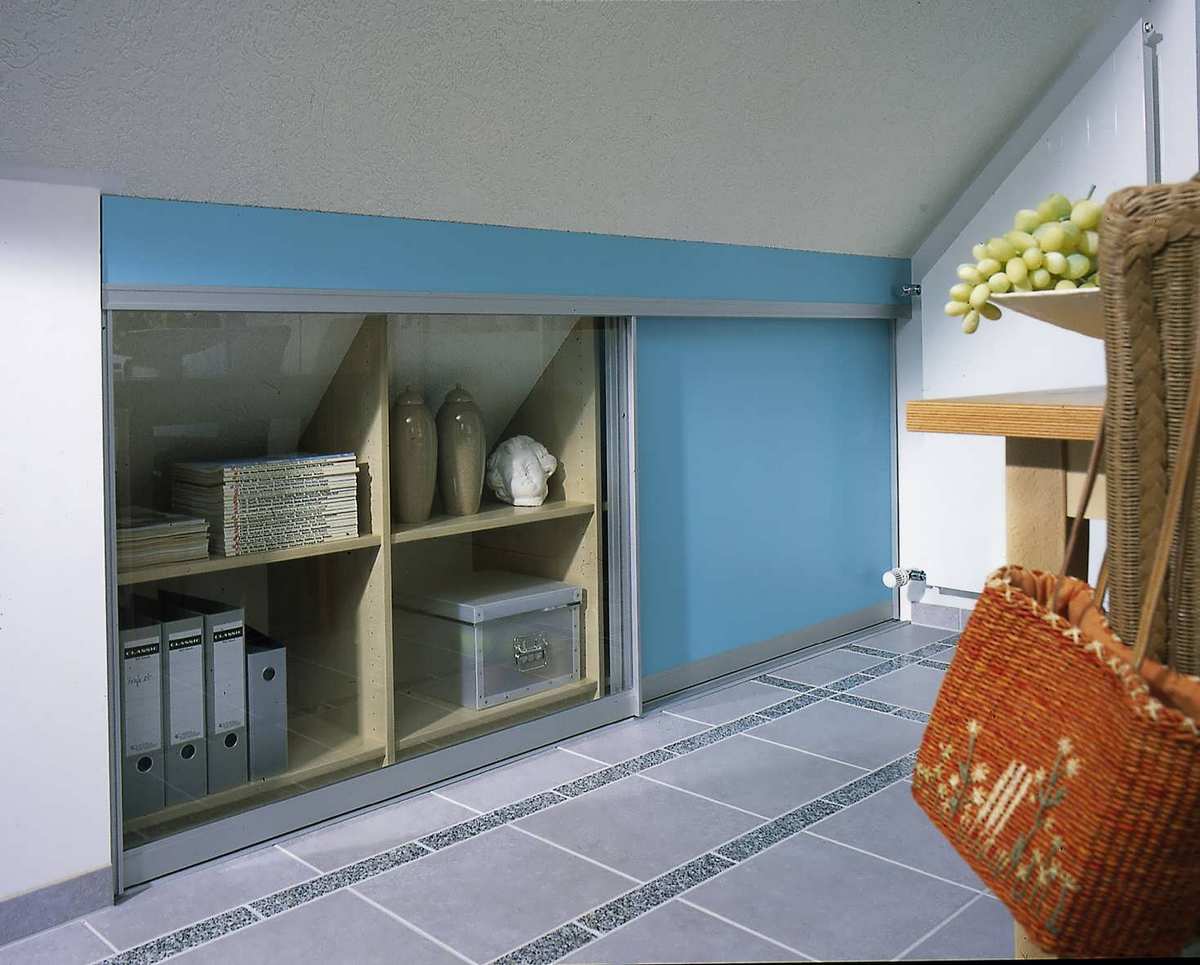
Location should be chosen based on the area of the apartment and the number of stored items. The easiest way is to build a wardrobe in the hallway niche, which are available in most apartments of standard planning. Usually they are equipped with hinged doors from the time of the housewarming, which can be easily dismantled. Three walls are already finished and it remains only to equip the place with a system of guide rails and sliding doors.
A similar option can be used with a niche in the entire wall, using existing floors in any room.They will perform the function of the three walls of the cabinet, the fourth with moving doors to be mounted independently. Such models can be installed in the bedroom, in the nursery, in the hall. The advantage is that all the items of clothing are at hand, in the living room, and the disadvantage is that this design selects the useful area of the room.
In small apartments, to save room space, you can install the corner wardrobe by yourself. In profile, it will have a triangular shape, two existing walls of the room and a third erected wall with a sliding door. Due to its small size, only one flap can be used. If the space of the living room allows, many construct a corner option of a rectangular shape. It already has 2 own walls, more internal space where it is possible to place bars with hangers, drawers and shelves.
The finished model is a cabinet wardrobe with 4 walls. It can be placed across the room, then it will divide the room, performing the function of zoning. And if you put it close to the wall, then the clothes will have additional protection from cold and damp.
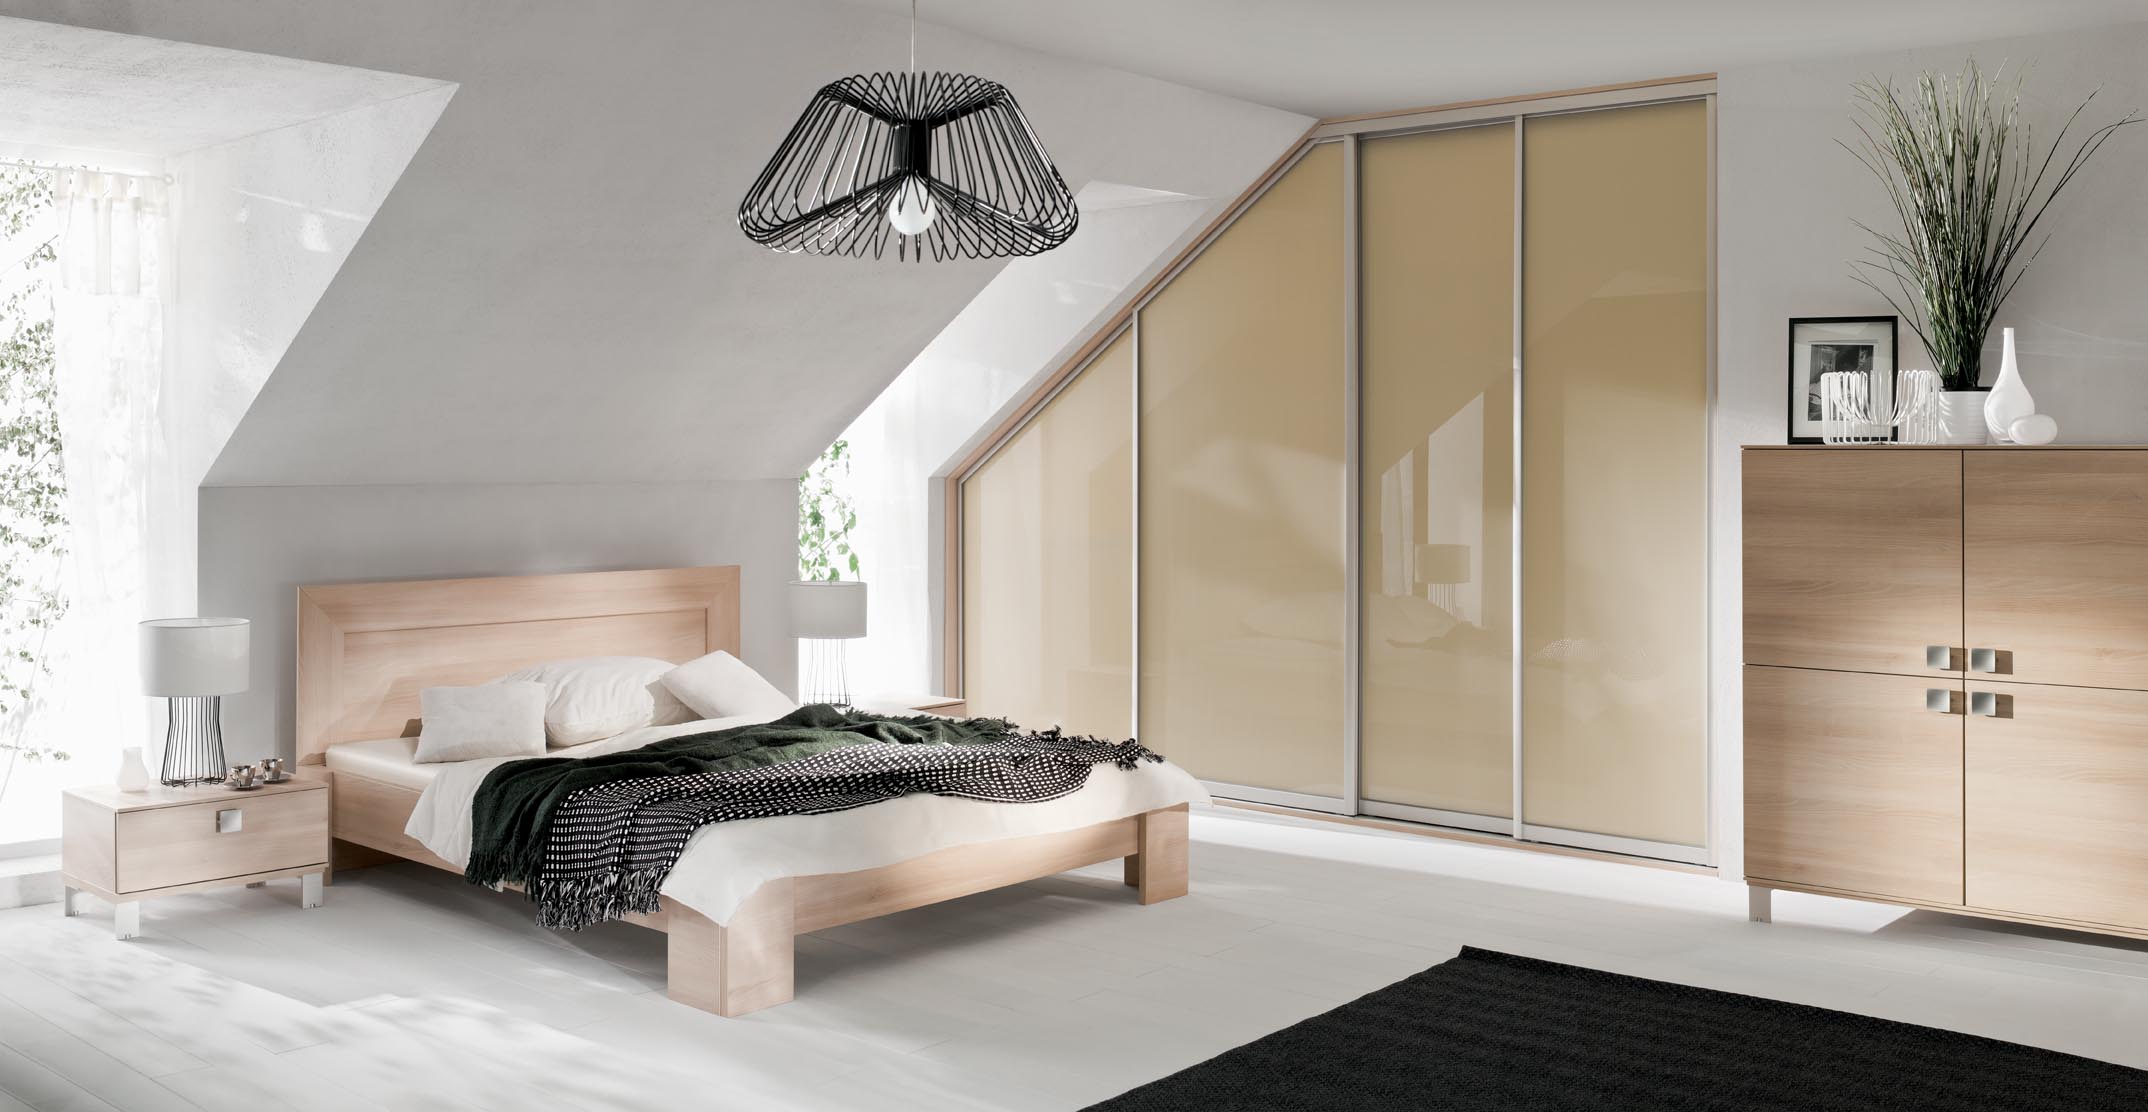
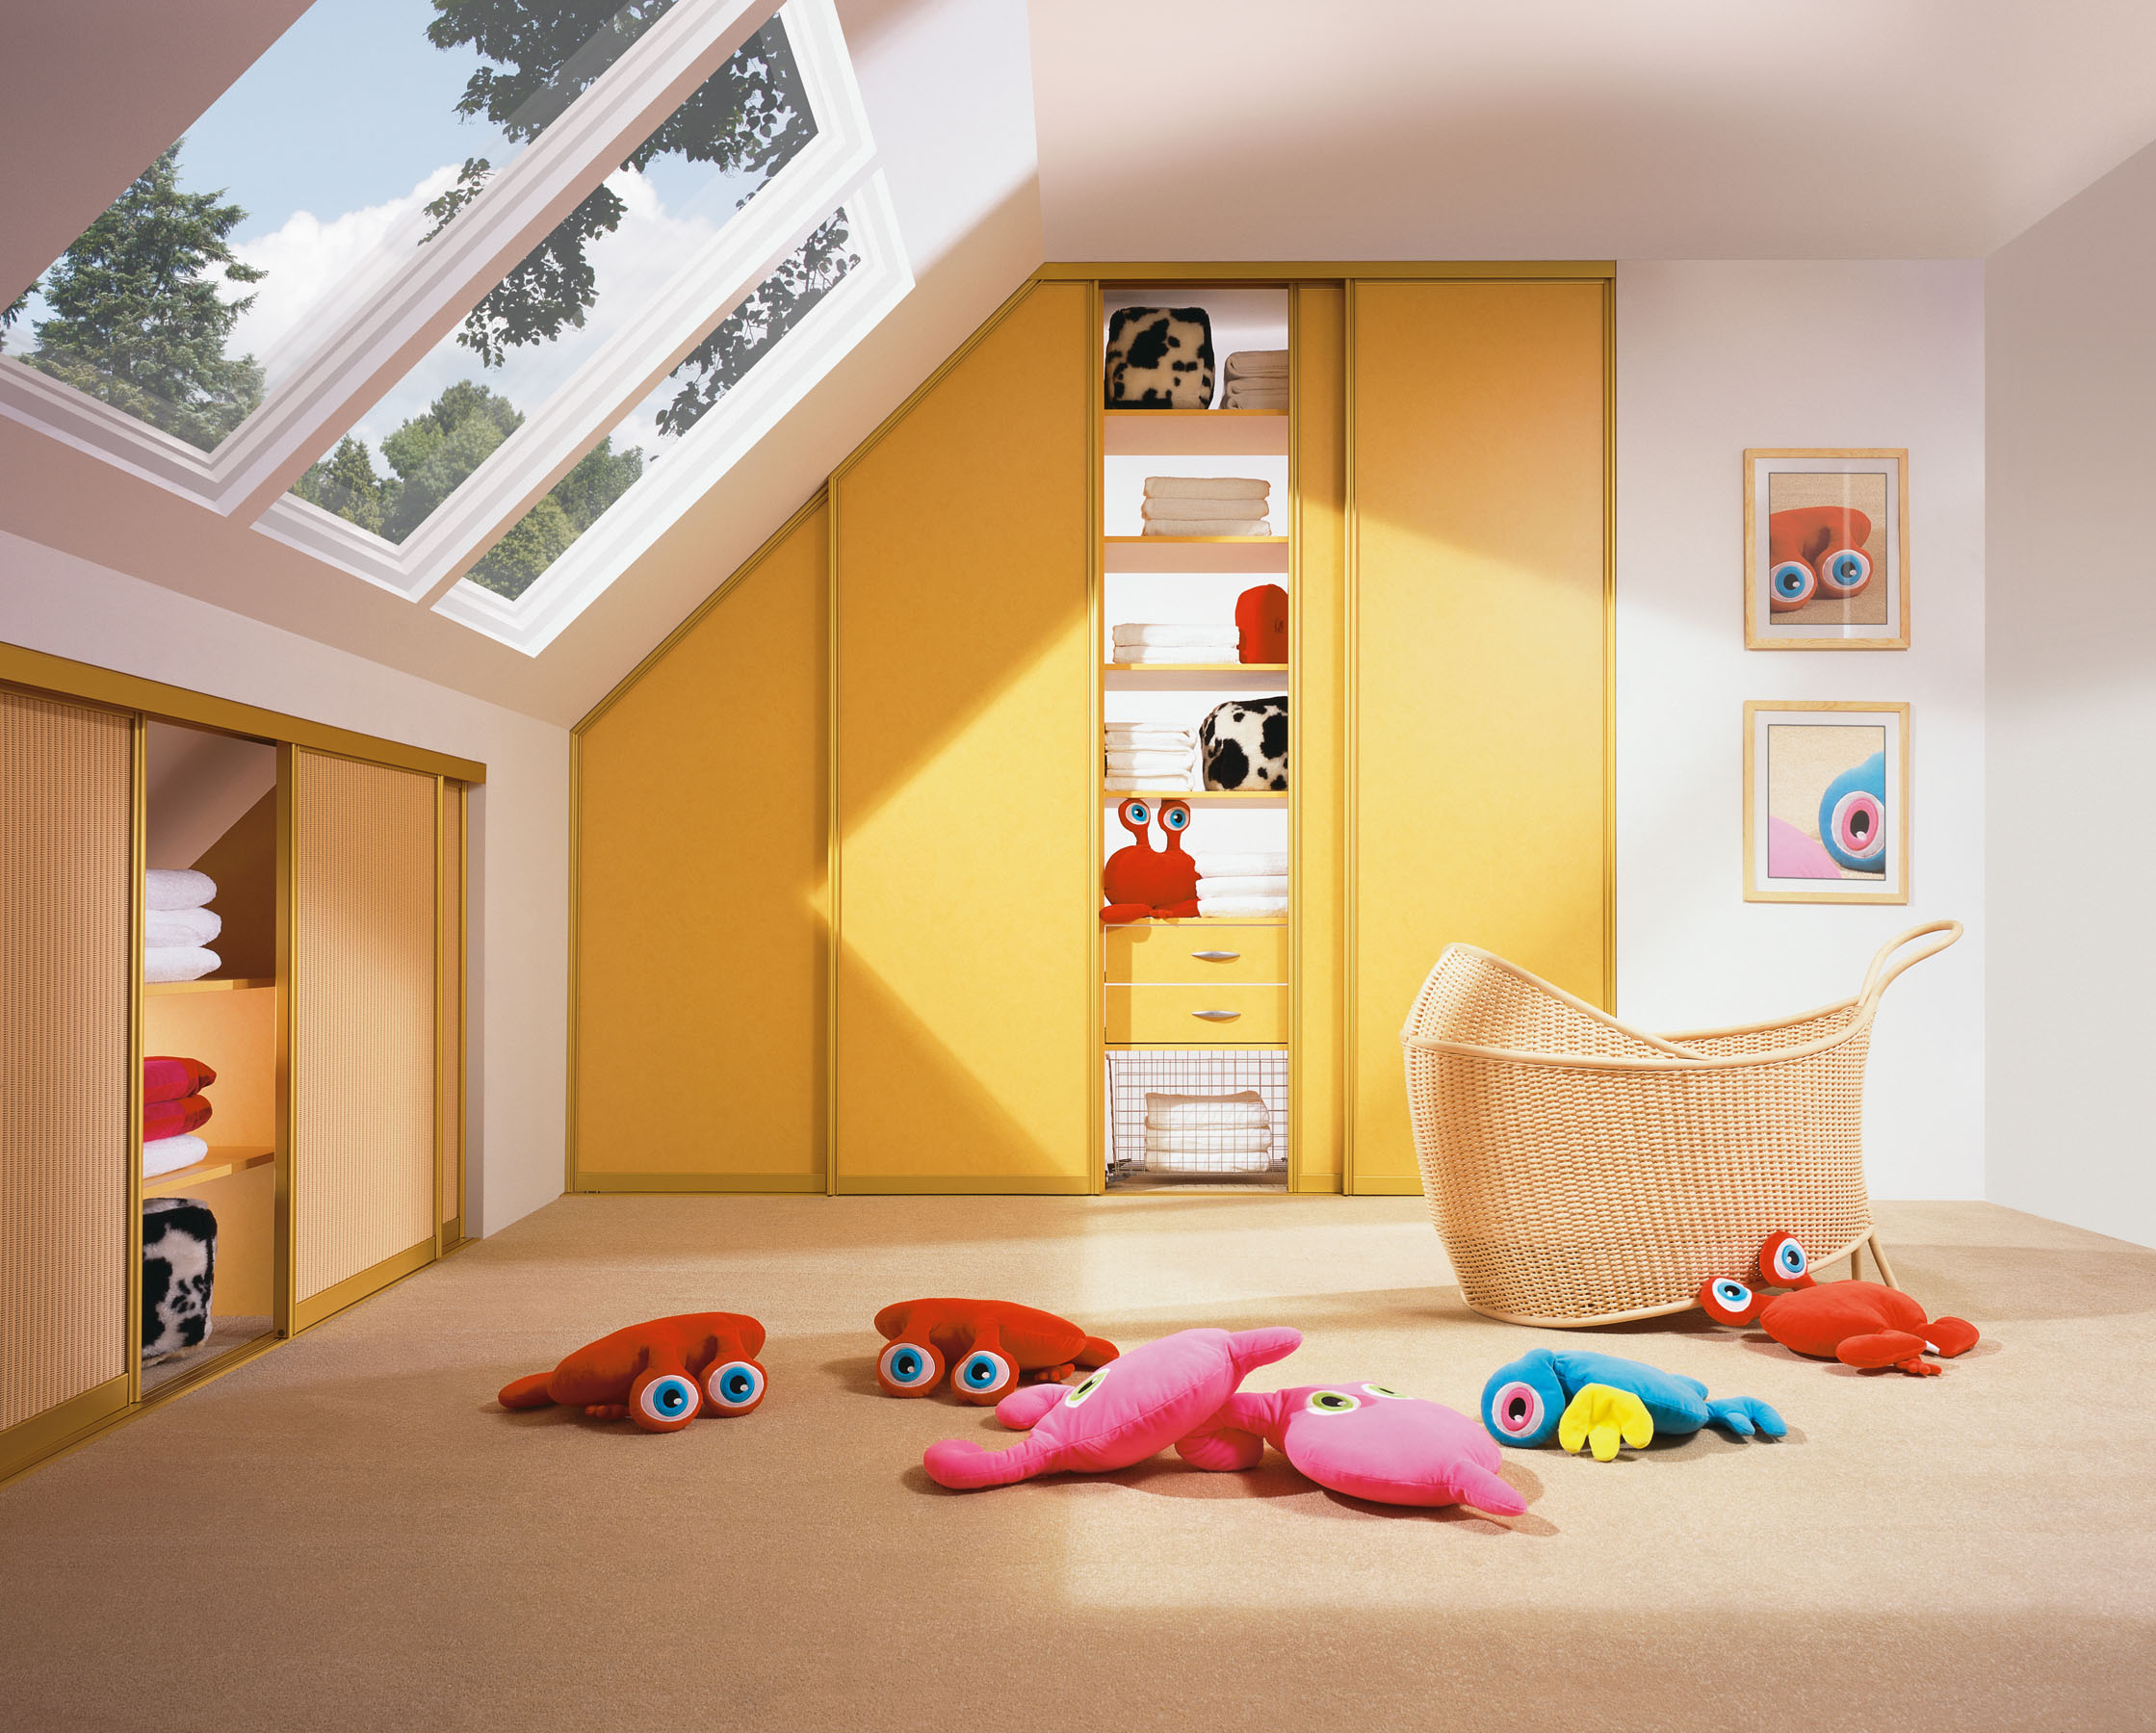
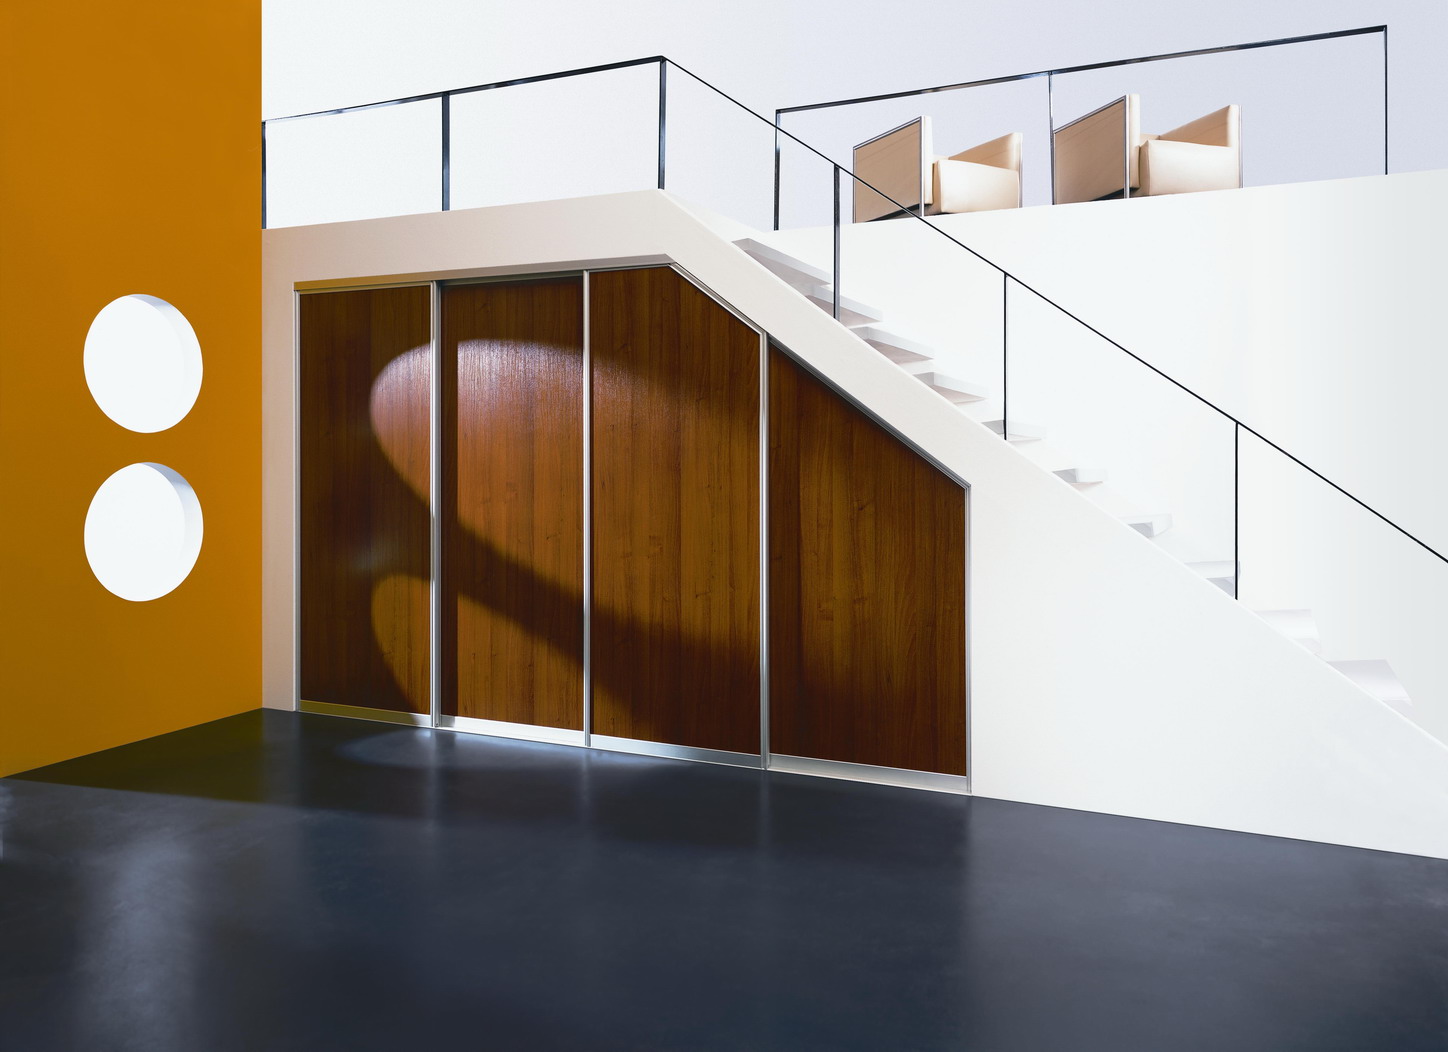
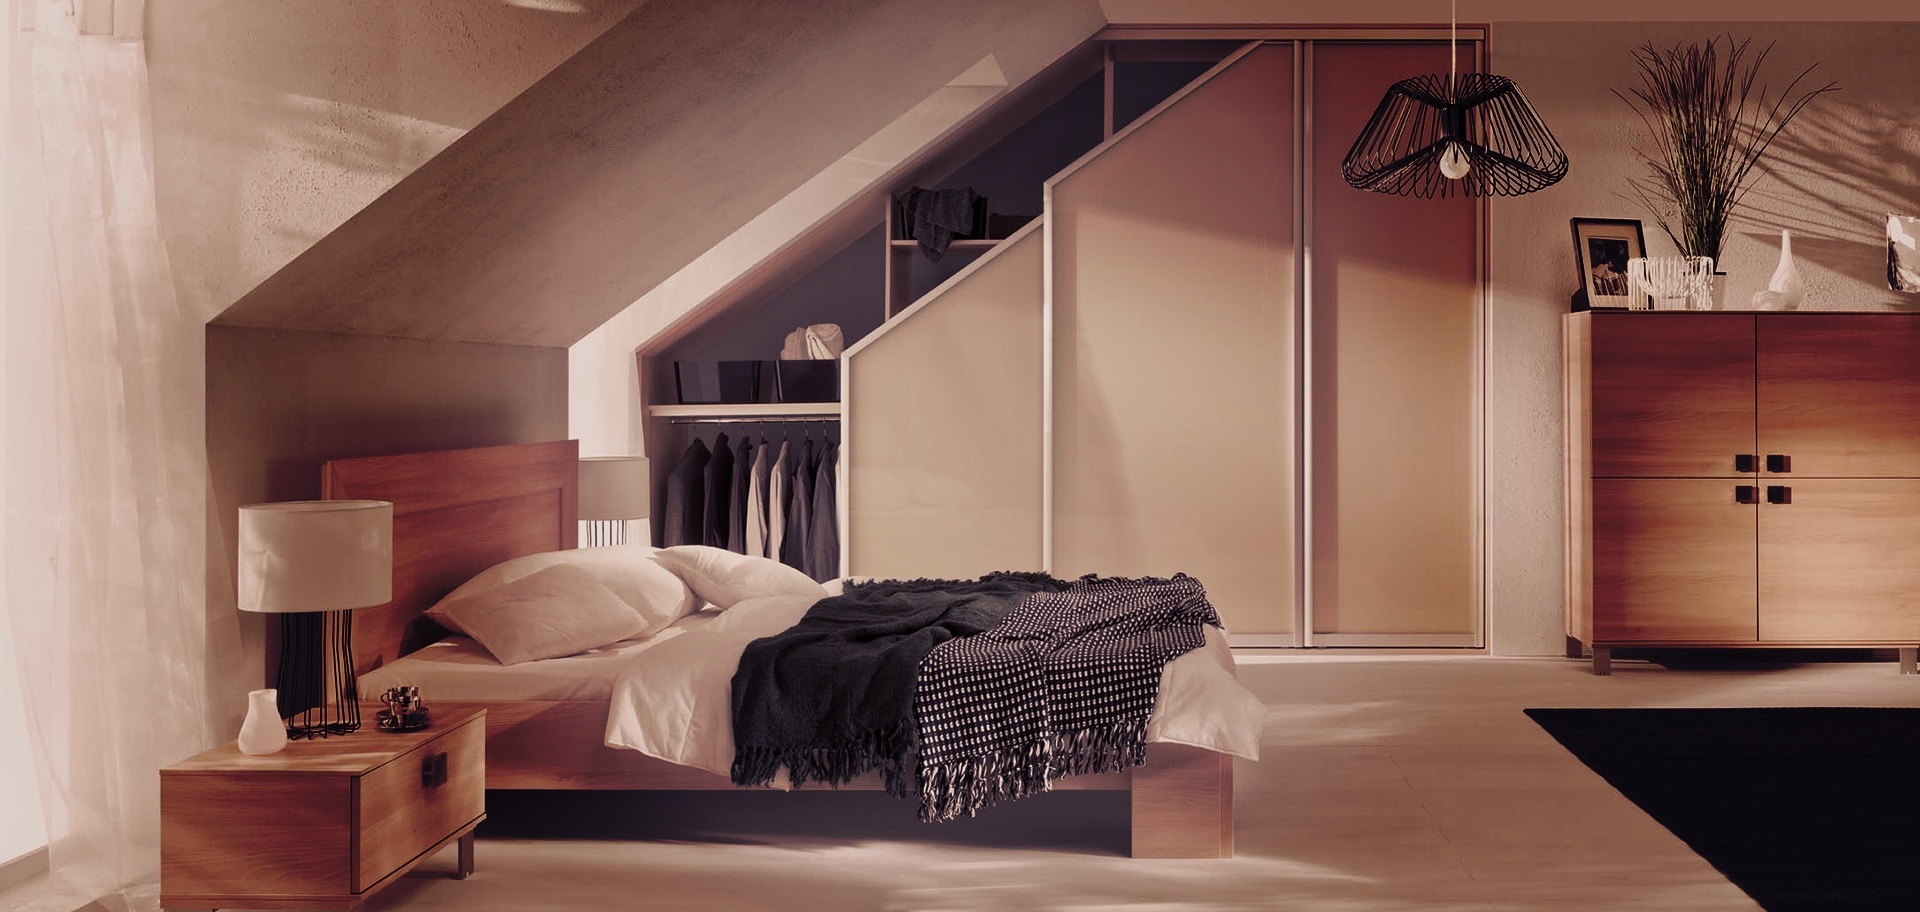
In a country house there is an opportunity to equip a wardrobe in the attic, if the attic is insulated, protected from moisture, has a fine finish. There are two options for the location of the outer wall with sliding doors: along or across inclined floors. In any case, you can not do without custom parts with beveled corners. This will complicate the assembly work, but it will allow creating an original interior and will give more free space on the 1st floor.

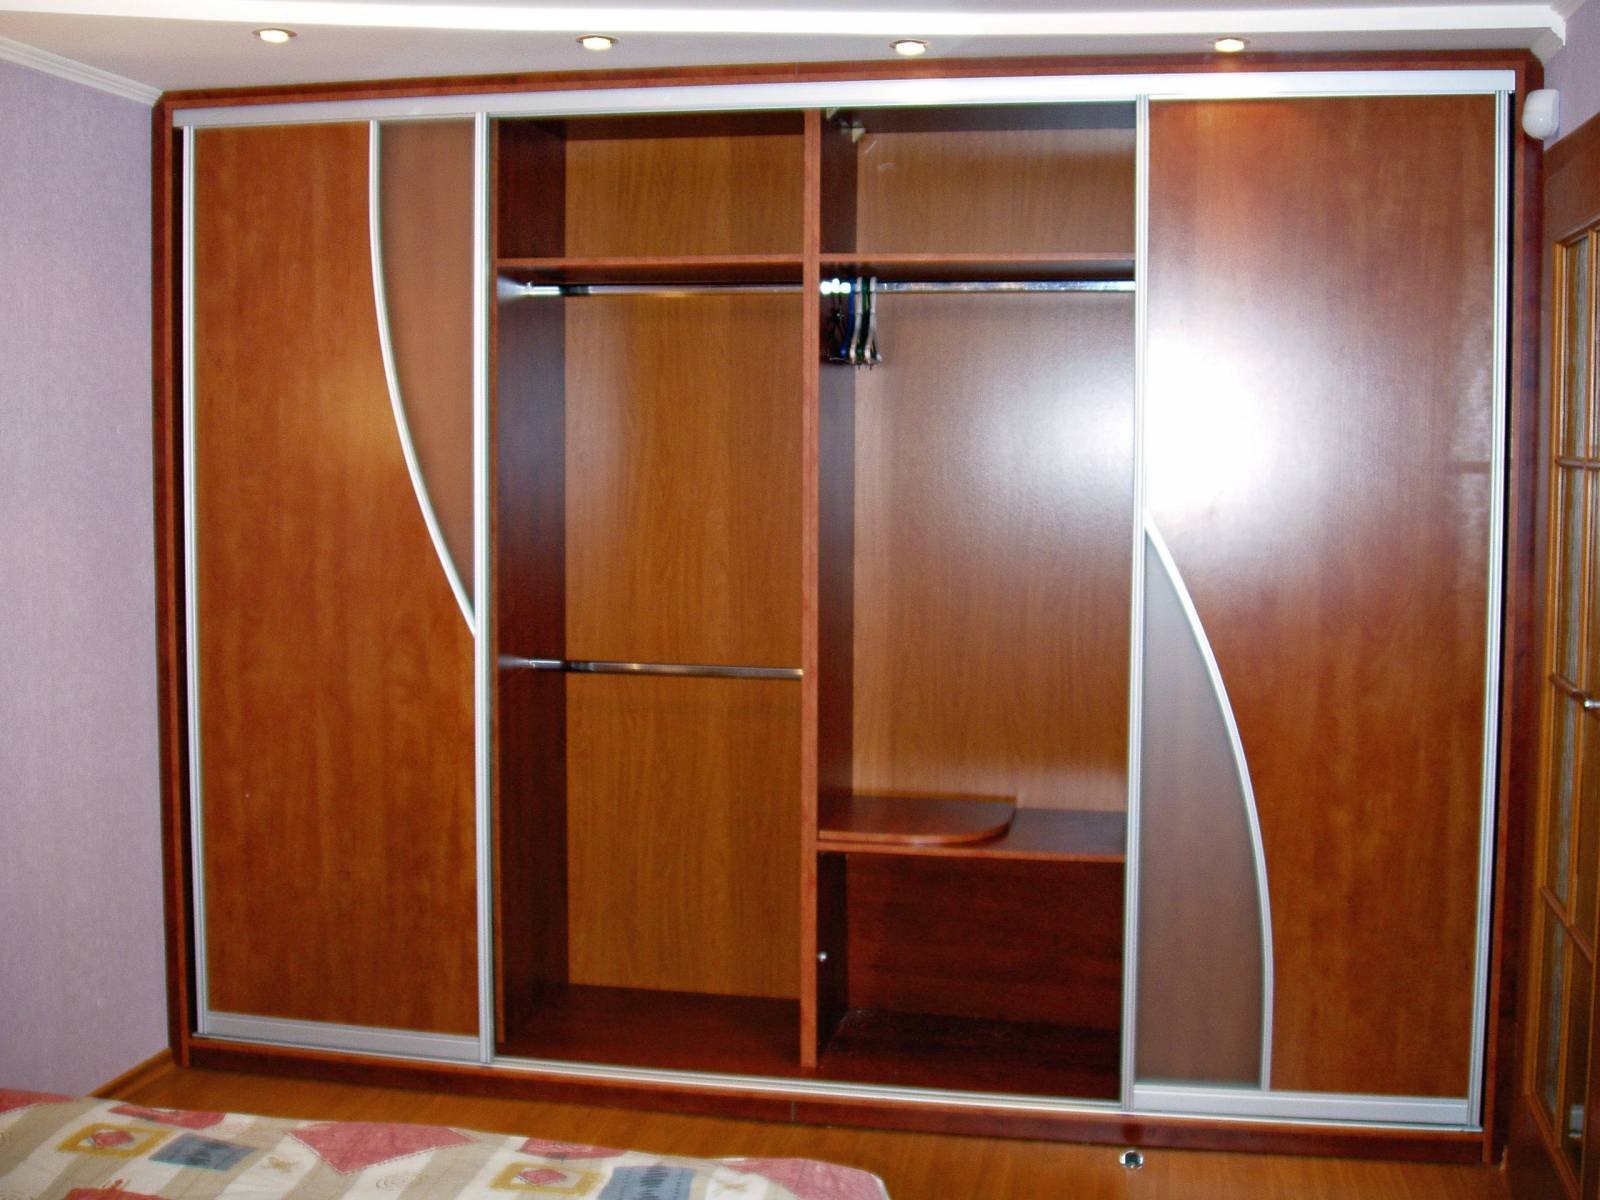
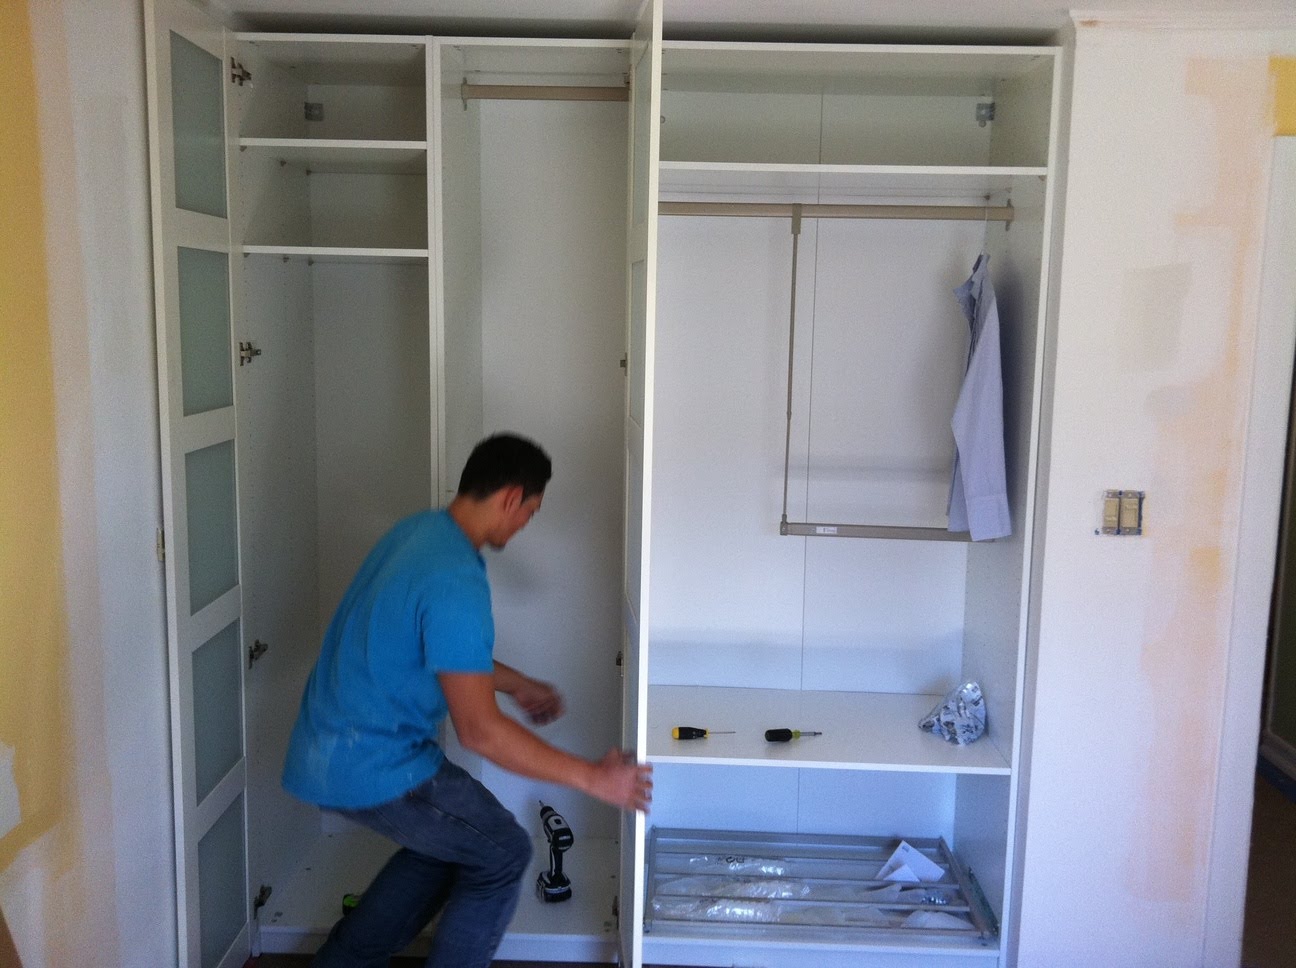
The assembly of the structure begins with the installation of the base. If it has adjustable legs, then you need to create a horizontal level of the lower overlap using them. The disadvantage of this design is that the lower part of the cabinet rises a few centimeters above the floor, dust penetrates into the voids. Next, you need to assemble the vertical stiffeners of the structure, attaching them to the base, their correct position determines all the stability of the cabinet. After that, transverse overlaps, shelves and rods are installed. The rear thin wall is screwed with screws or nailed to the finished rigid frame.
Then we assemble the sliding sash system. First of all, the bottom rail is installed.It is not fixed to the end, you must first insert into it and try on roller wheels from the door. Then the position of the top rail is marked on them. Both guides are attached to the body, the door on the rollers is inserted inside and is adjusted with a hexagonal screw at the bottom of the end. It is necessary that she move freely along the guides without much effort. Then a brush-boot is attached to the bottom of the sash, and fixing stops on the side.
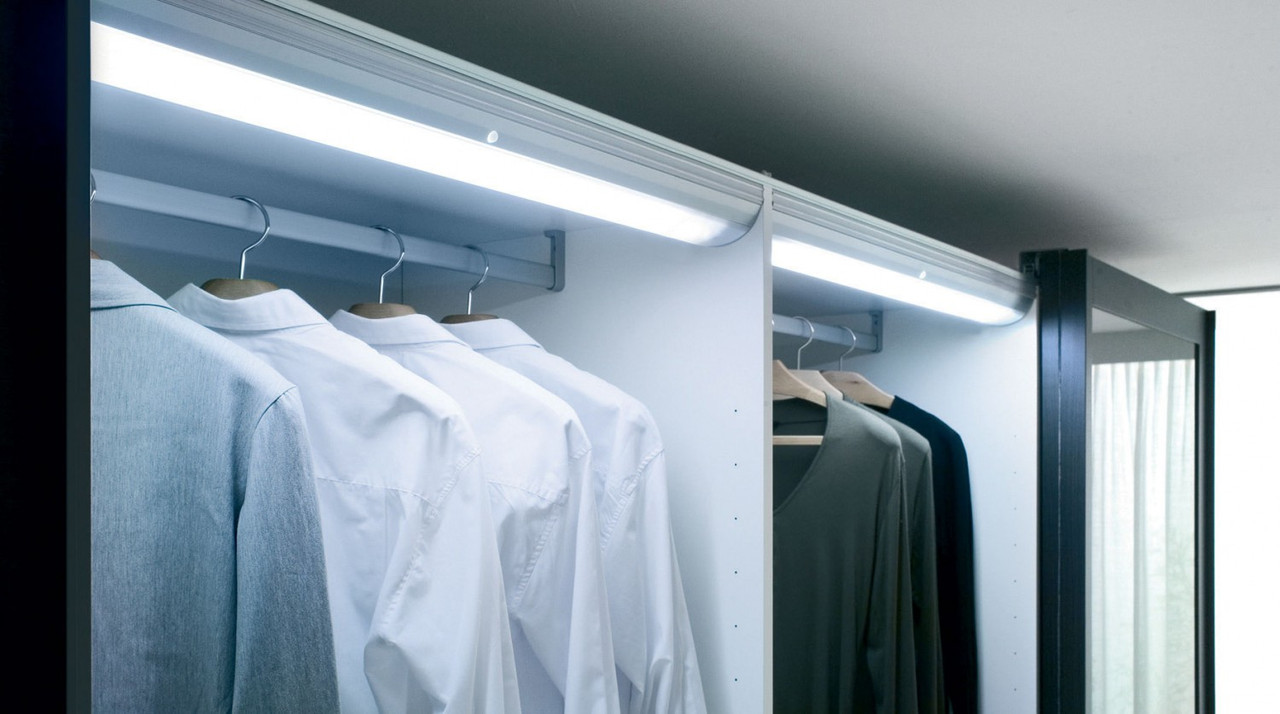
Lighting for the wardrobe is best to select from point LED lights. They create an even and flicker-free light, are trouble-free in operation and last much longer than ordinary incandescent bulbs. They consume low power, which saves energy, does not emit much heat, so the surrounding surface does not deteriorate under their influence.
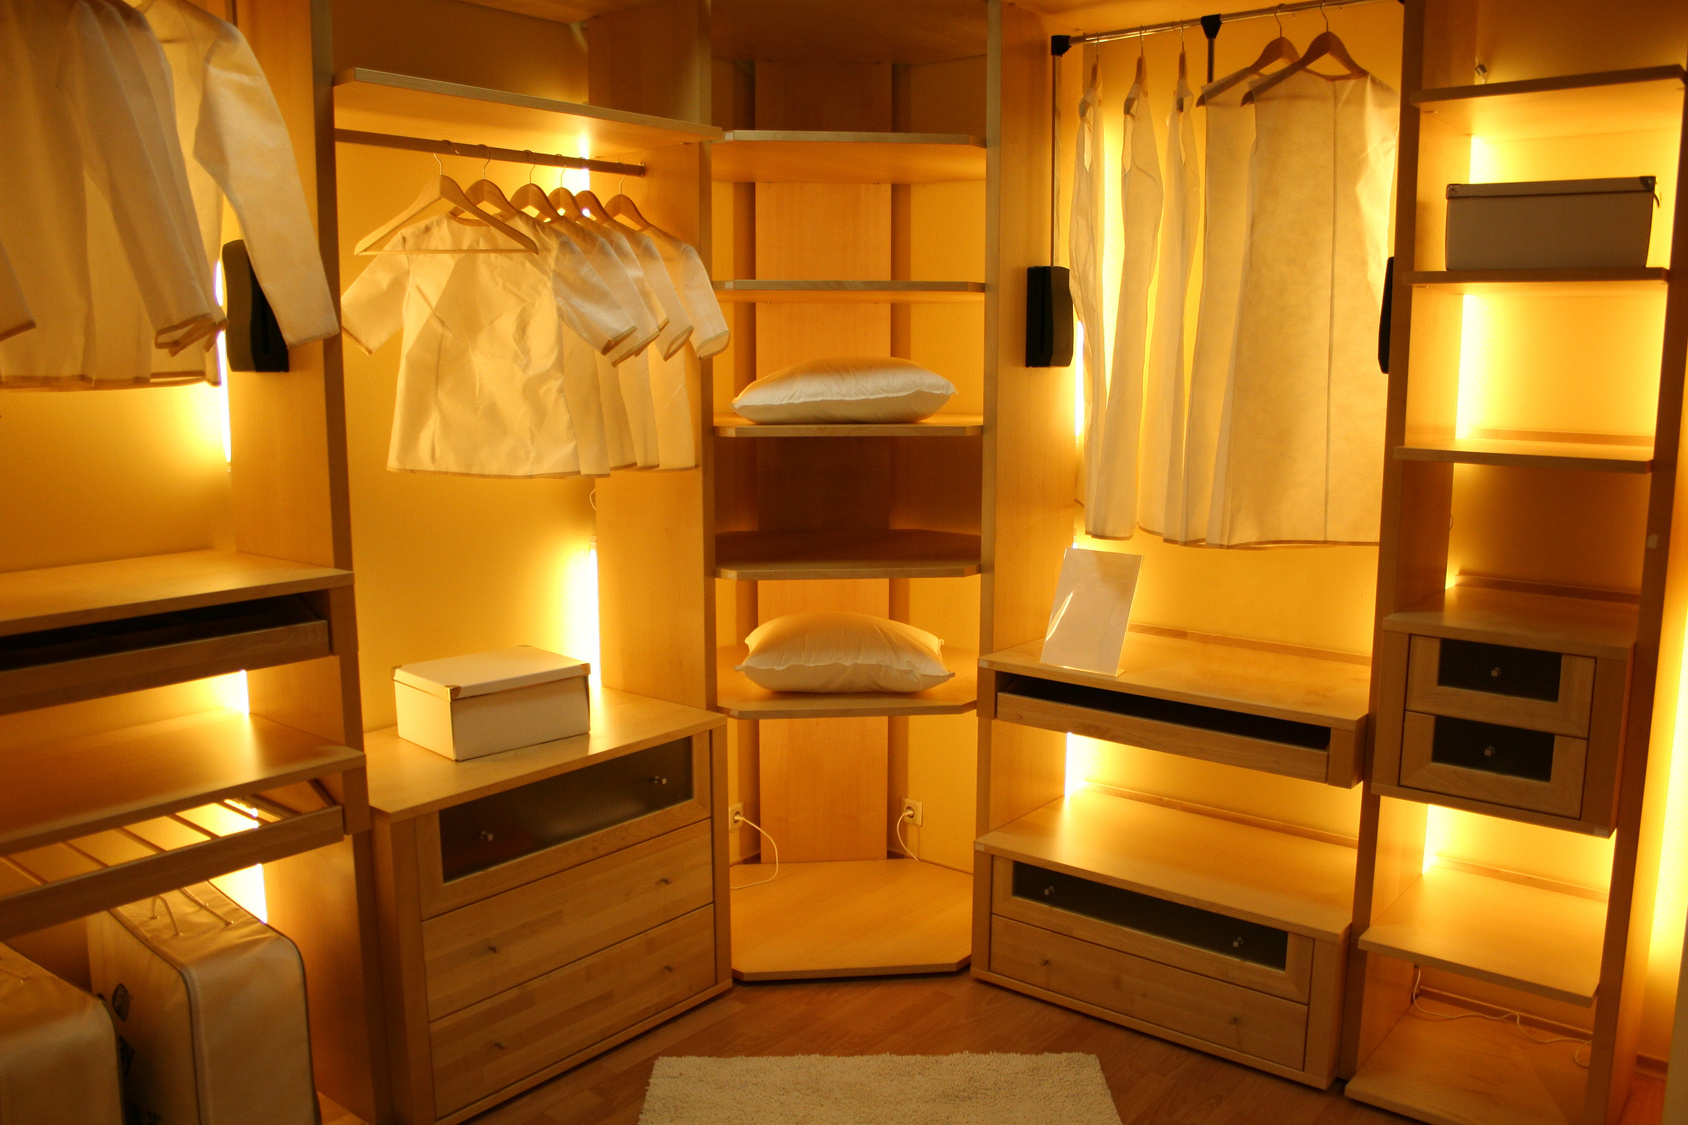
If all the details of the cabinet body are made independently, then a special protrusion can be provided for the upper part that extends beyond the plane of the swing doors. Round holes are cut out in it and lamps are mounted in a row, 3-4 lamps are enough for 1 meter of length.This creates a modern and stylish design, and inside the cabinet will be effectively lit. This method requires an additional cable connection from the home network, but you can simplify the task by using mounted lights on batteries. The lighting can be installed in the cabinet niche, it will be more convenient to navigate inside, to save energy or battery power you can build in touch sensors.
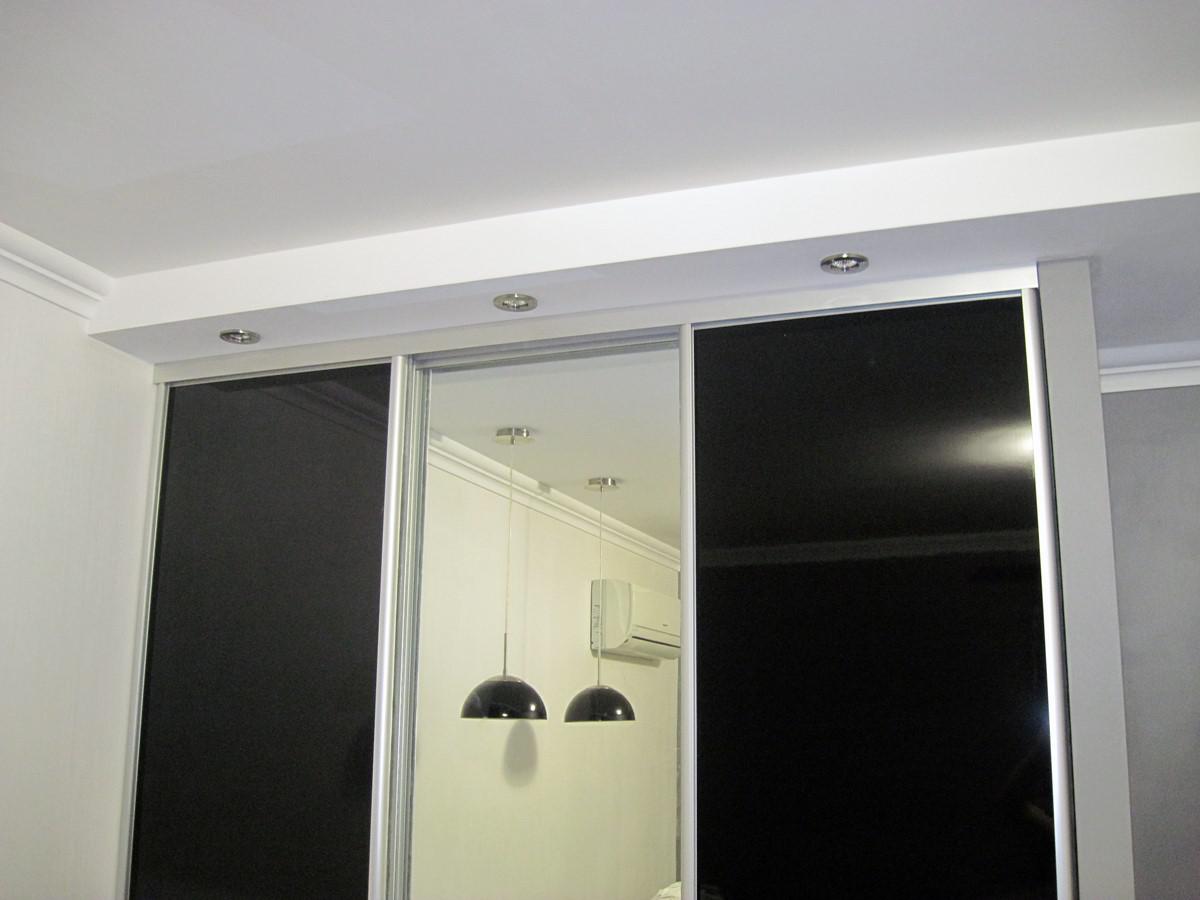
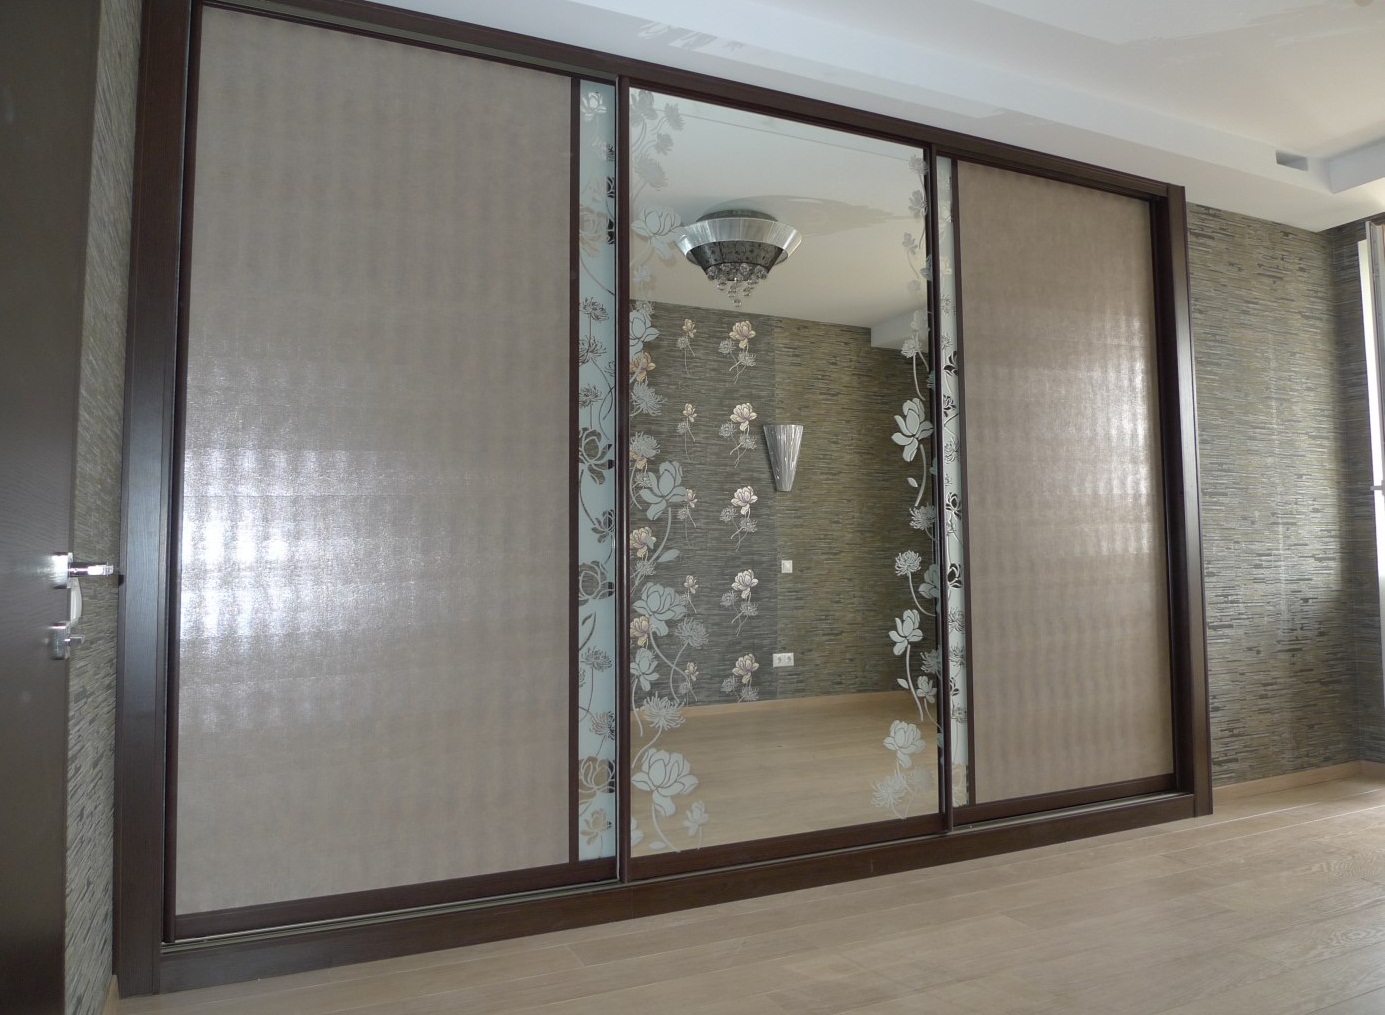
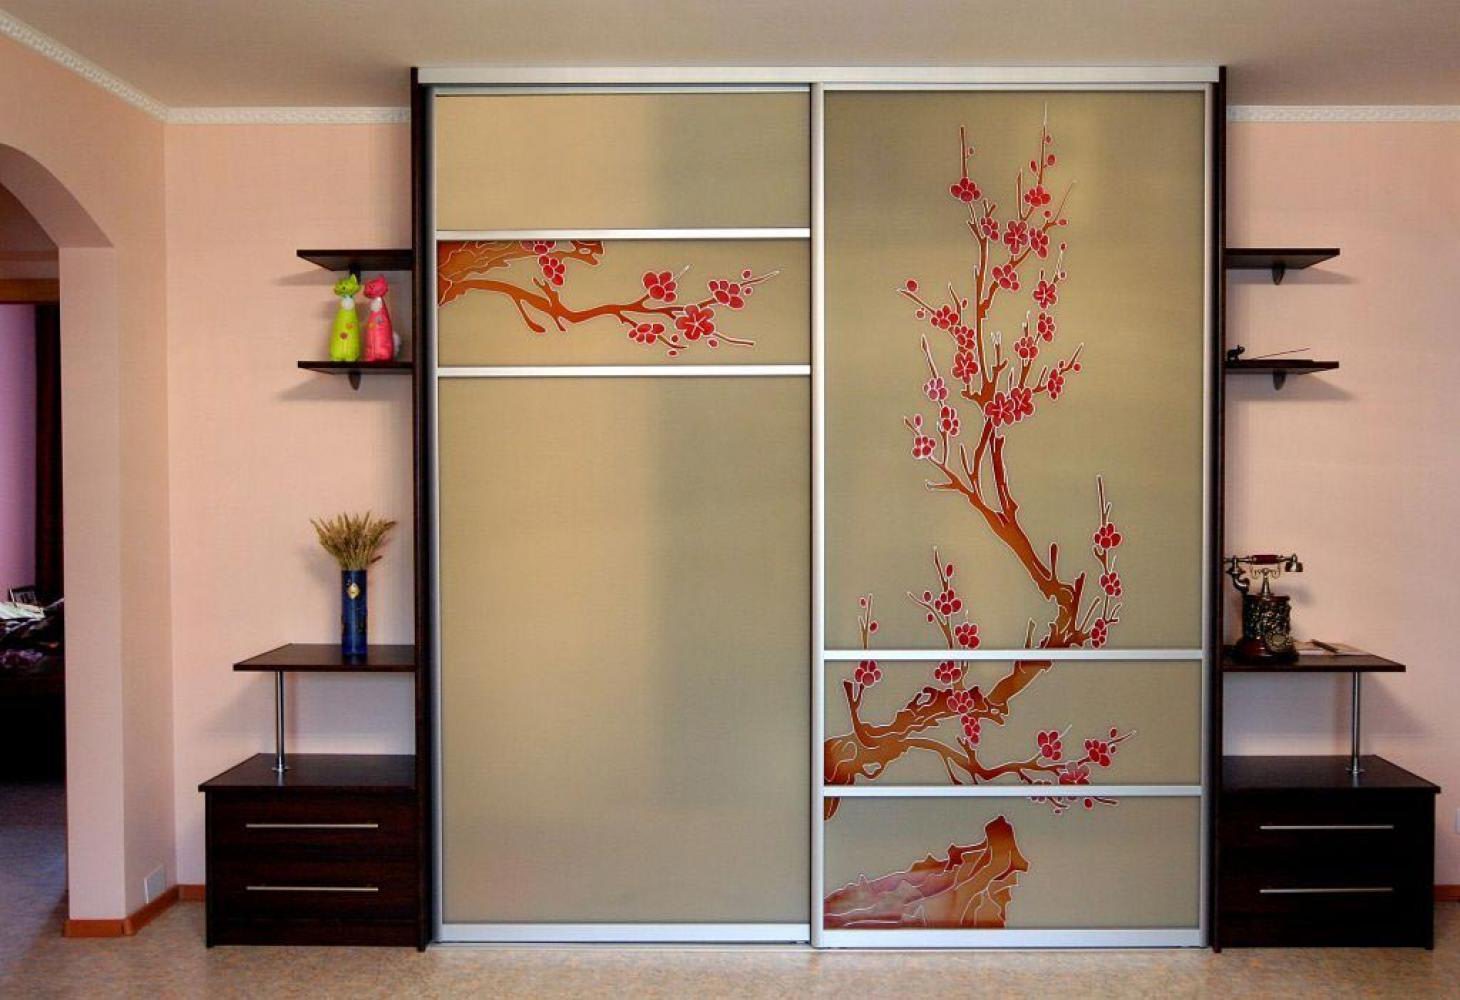
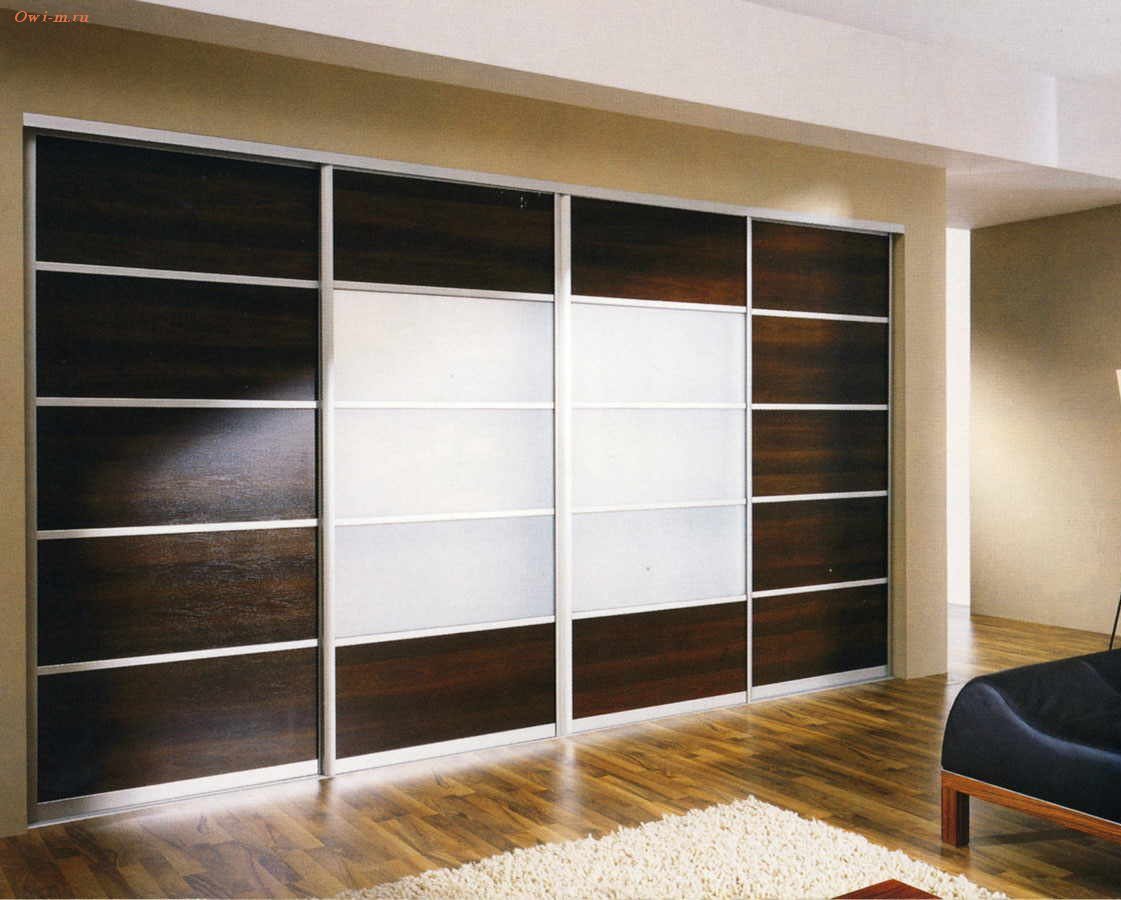
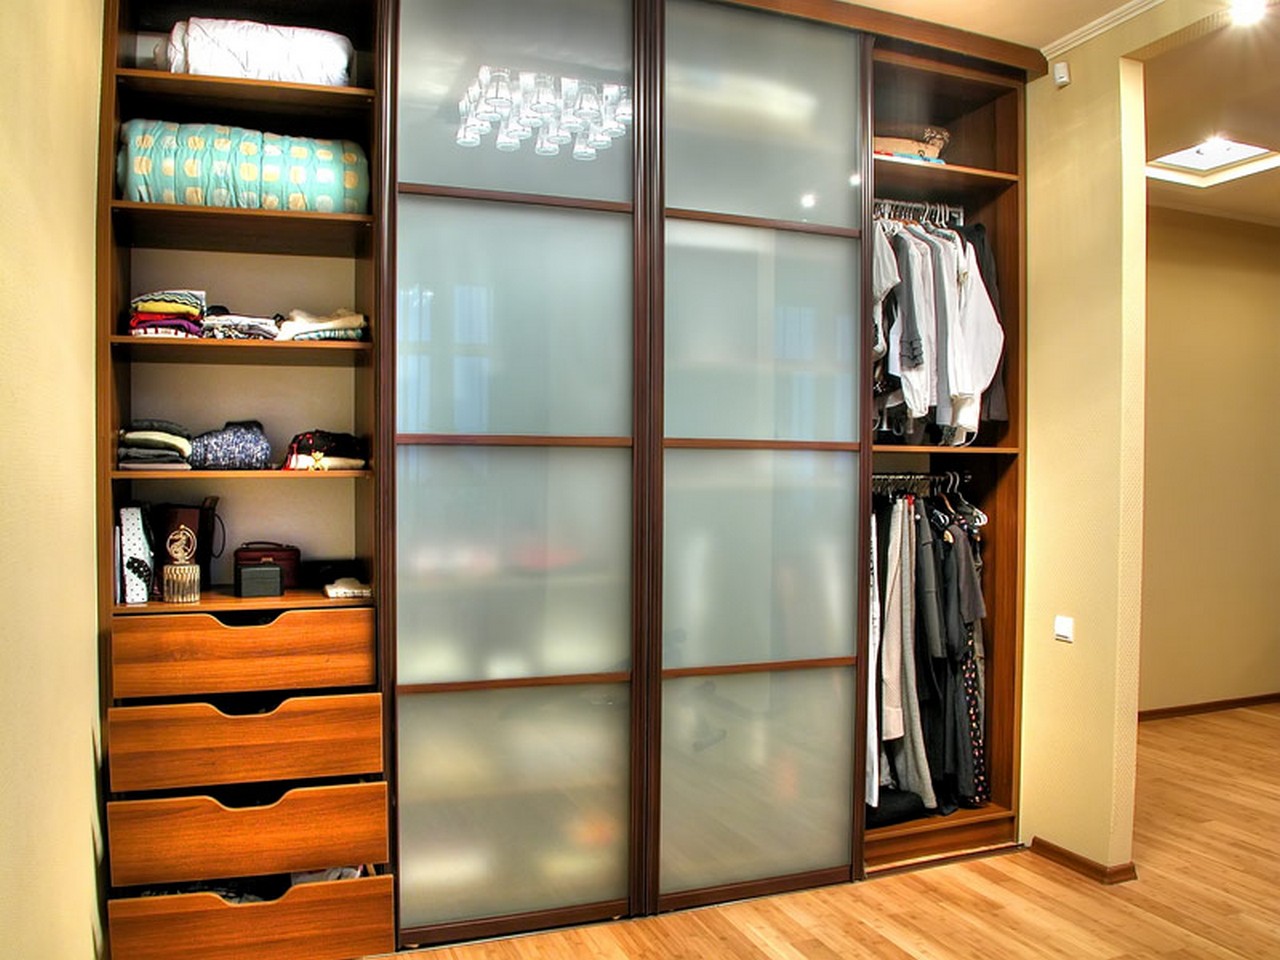
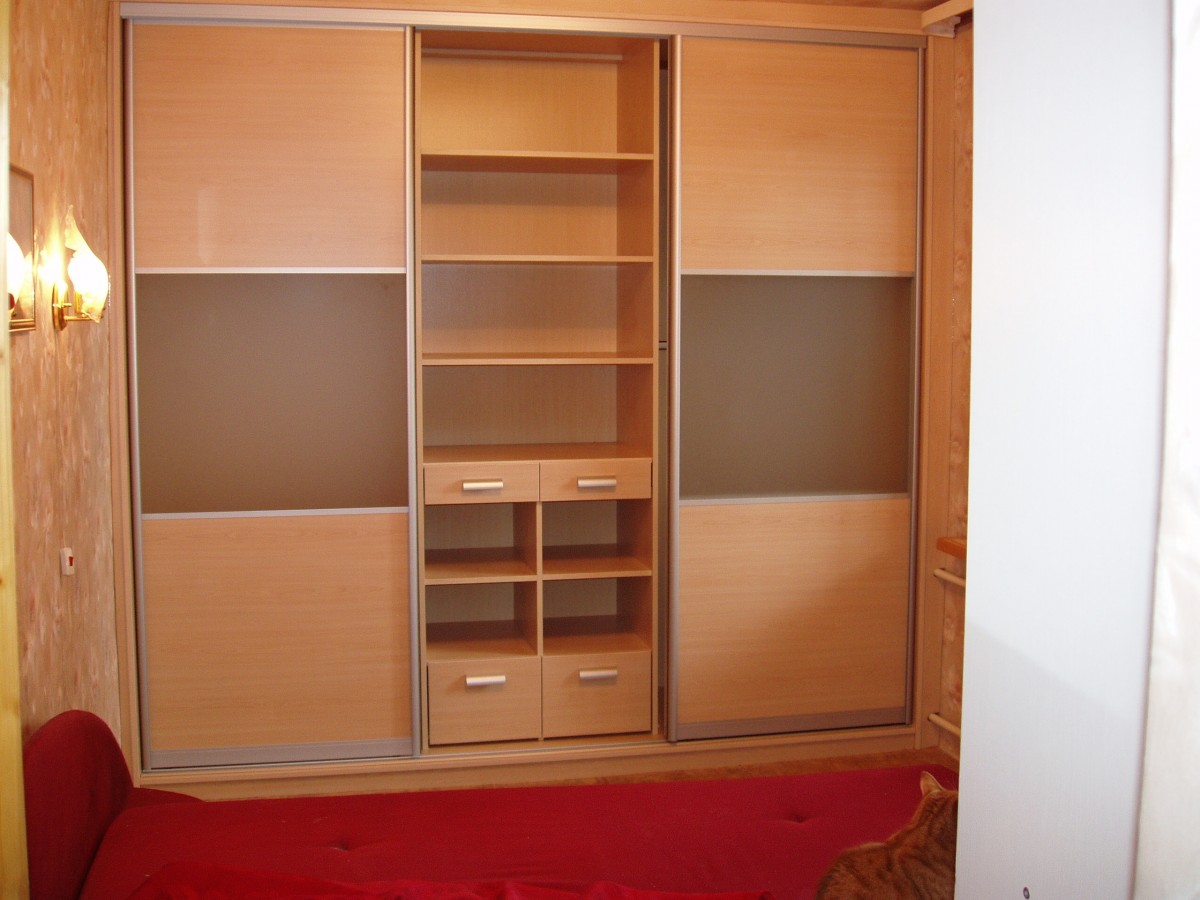
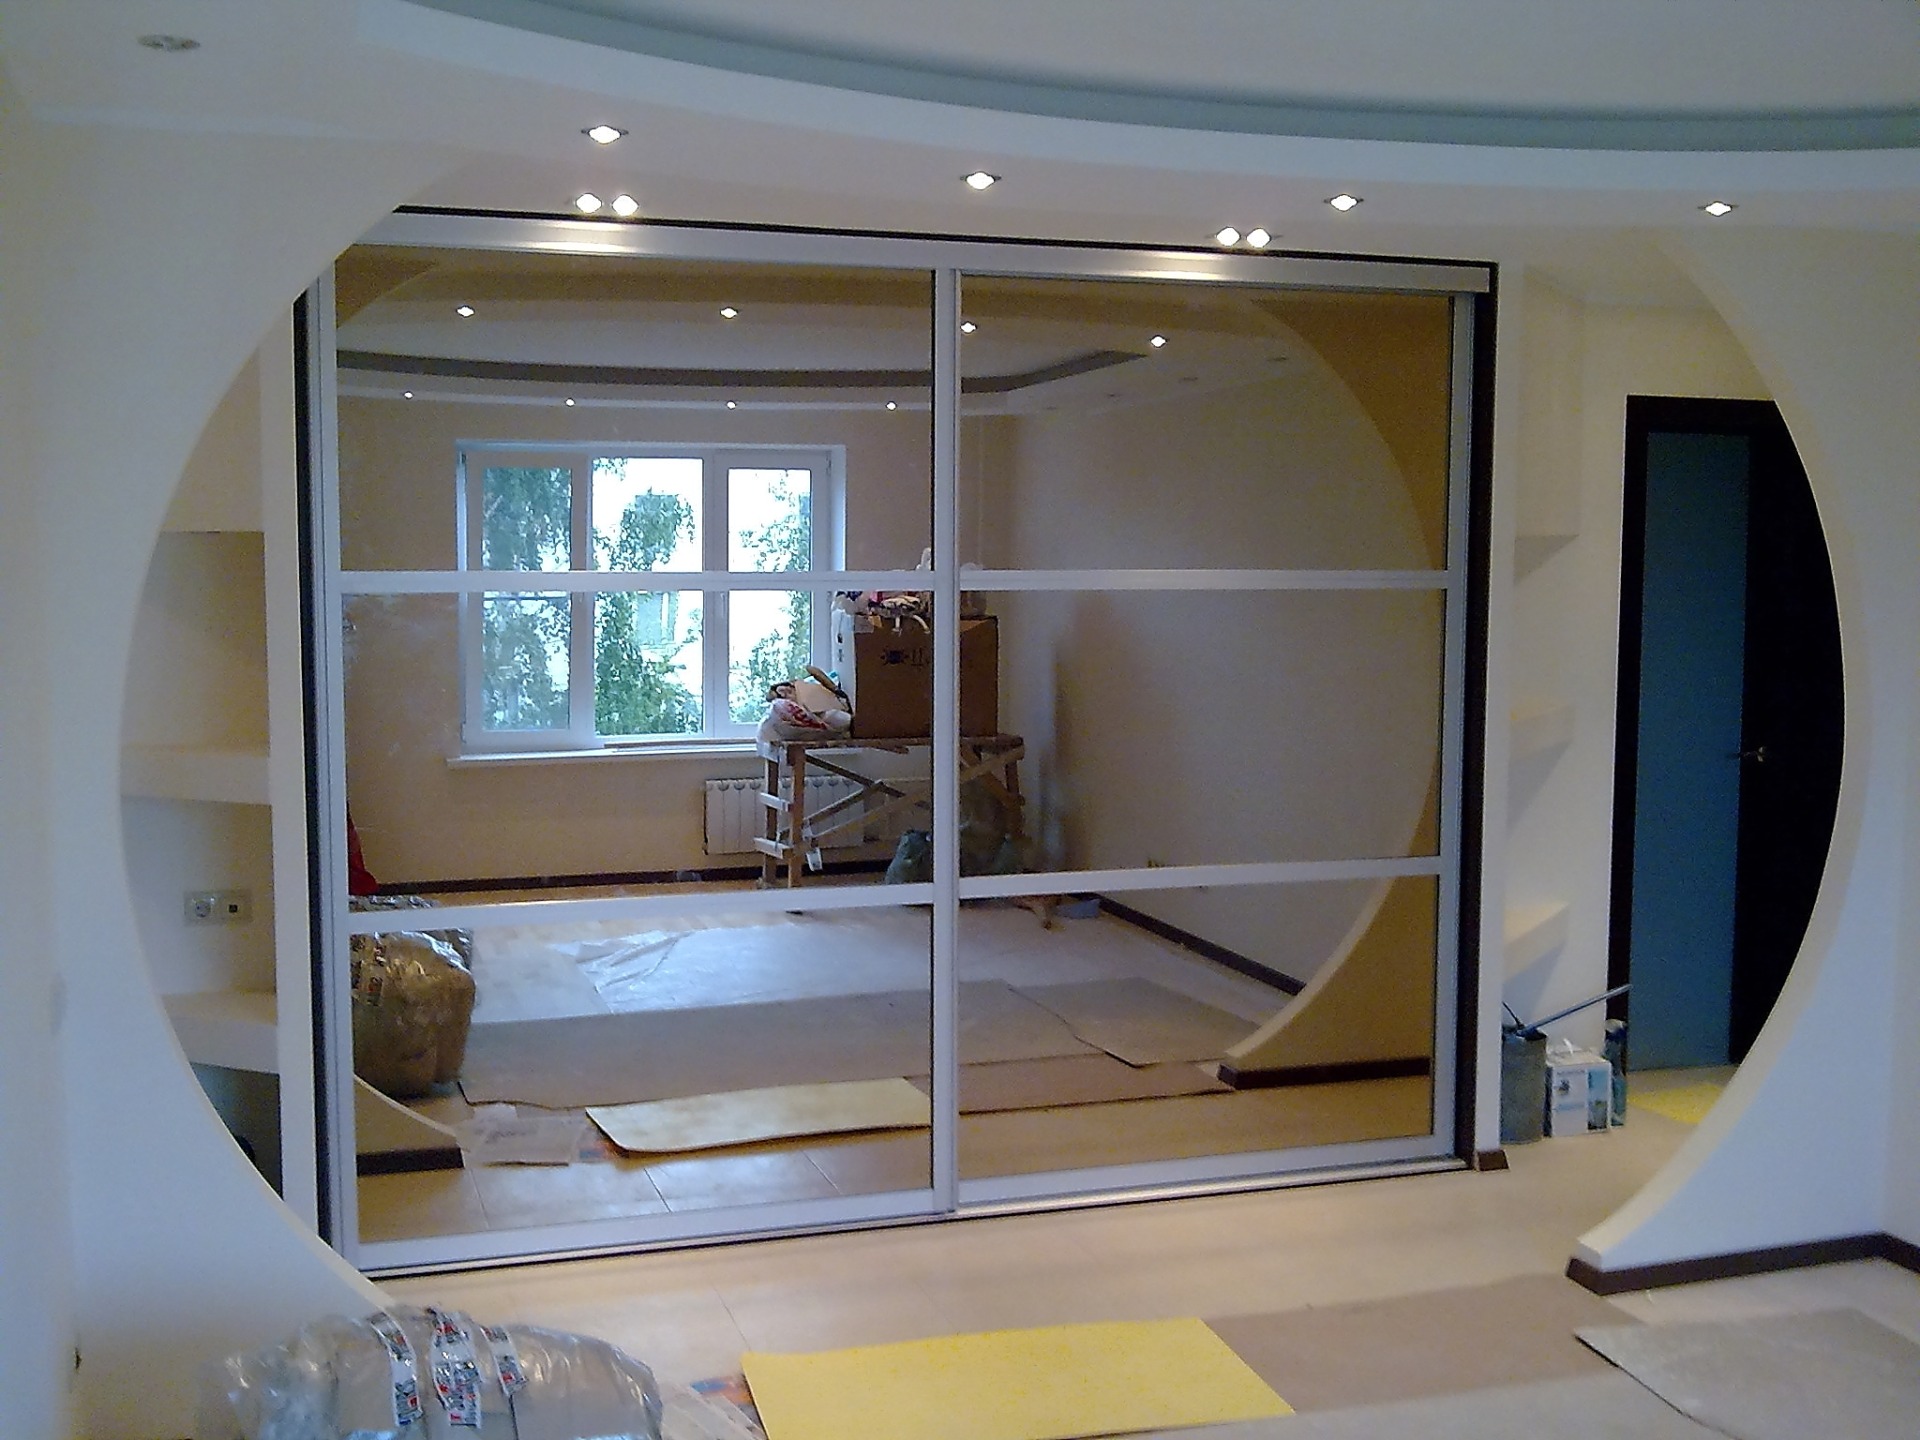
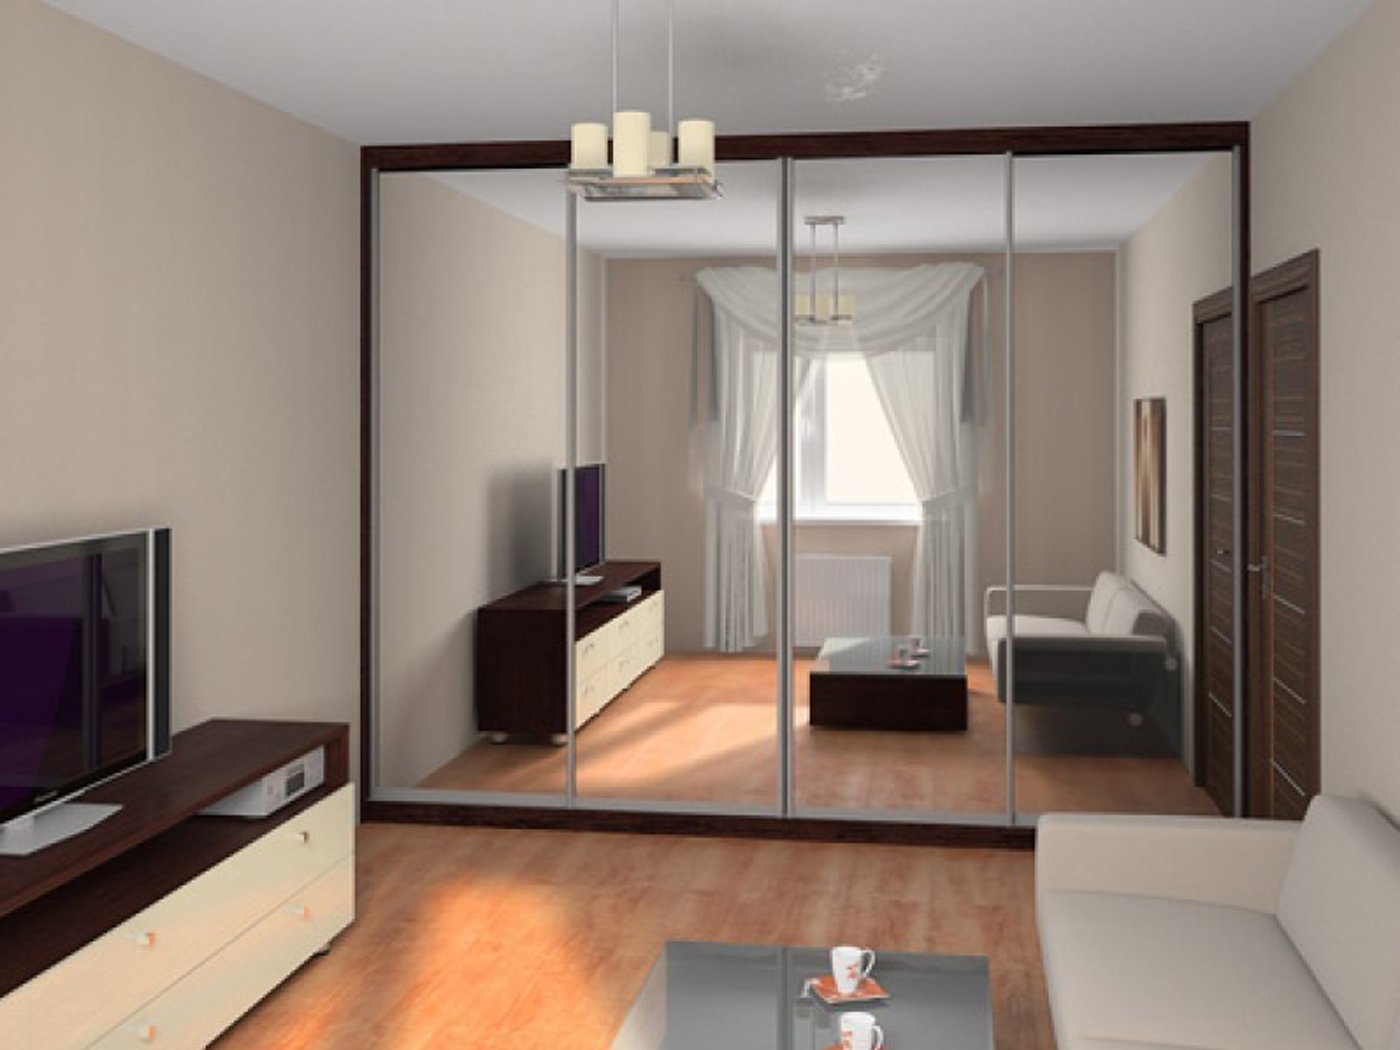
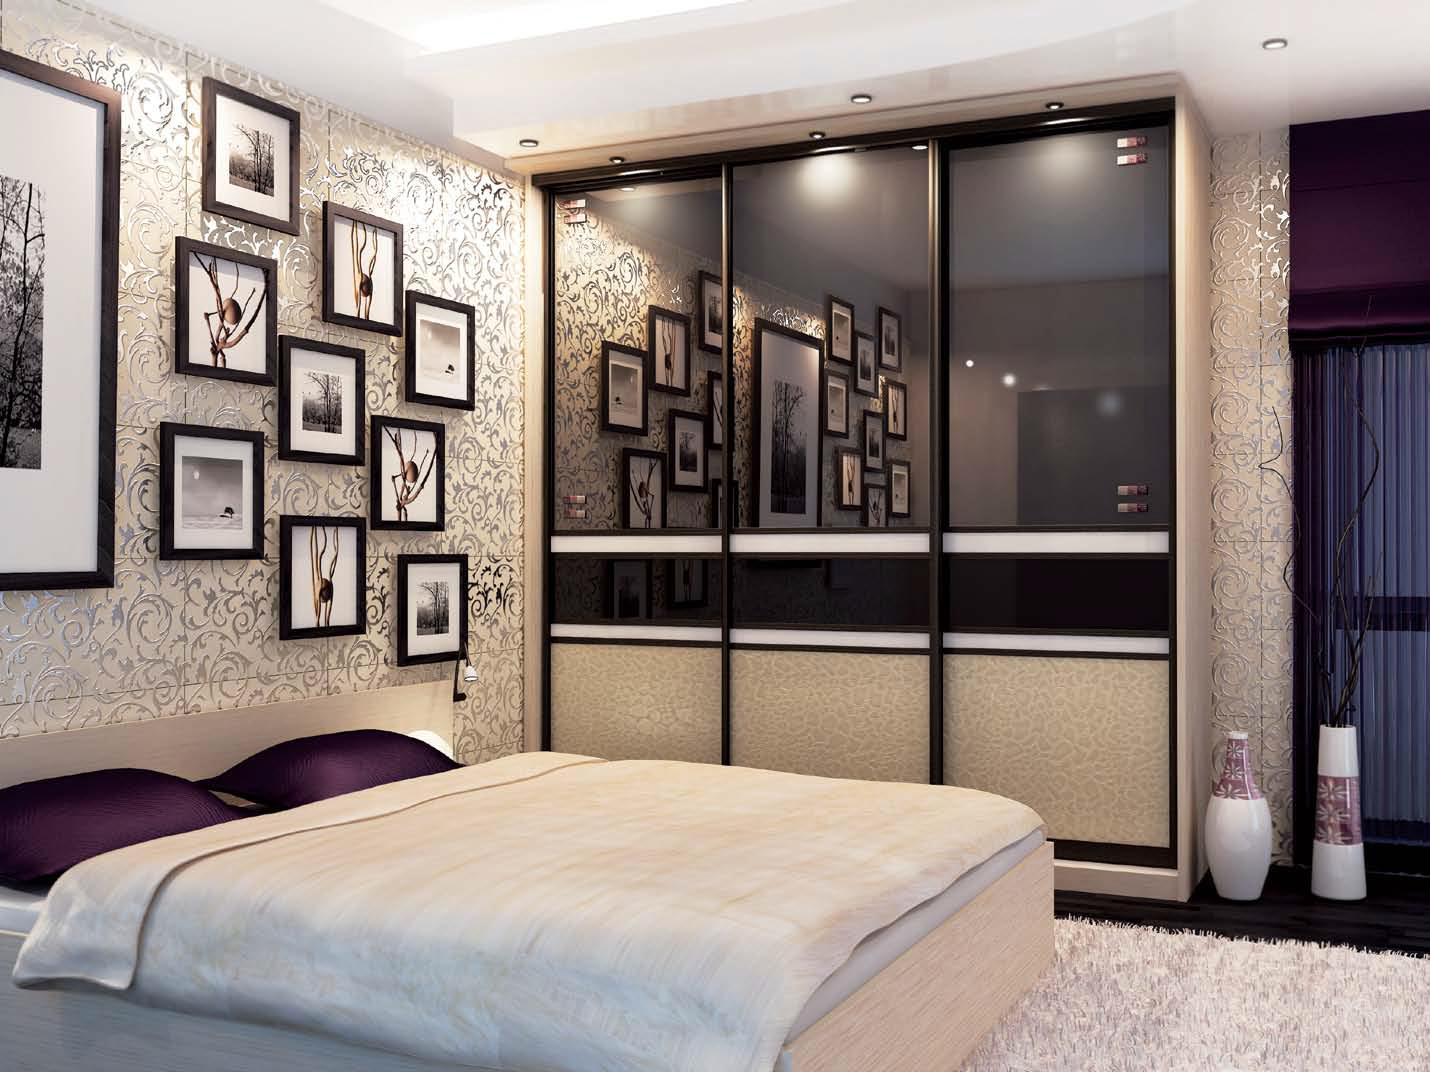
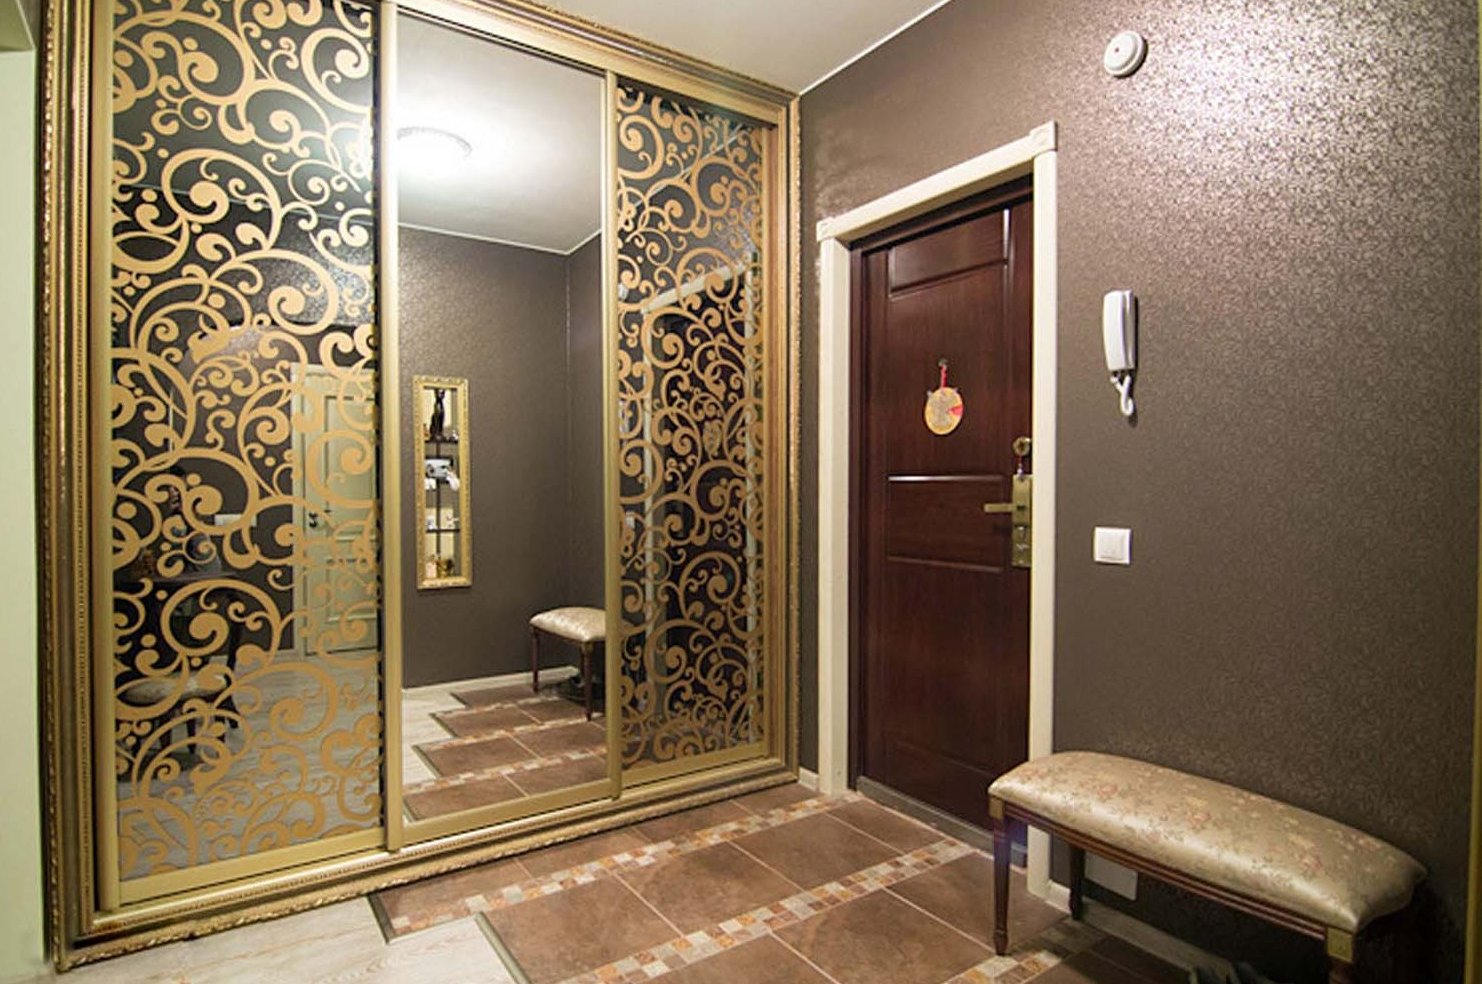
Registration of the facade most often satisfied with the help of a mirror. This is the most practical option for furniture that serves as a wardrobe. Since large full-length mirrors are heavy, the design of sliding doors should be as durable as possible. It is worth choosing as materials of MDF and chipboard high density or dense varieties of wood, lining is not suitable. The facade of the wardrobes can be made of various decorative materials: colored plastic, transparent or translucent PVC, laminated plywood or light organic glass. The strength of the facade materials is not important, since the internal stiffening ribs take up the entire load.
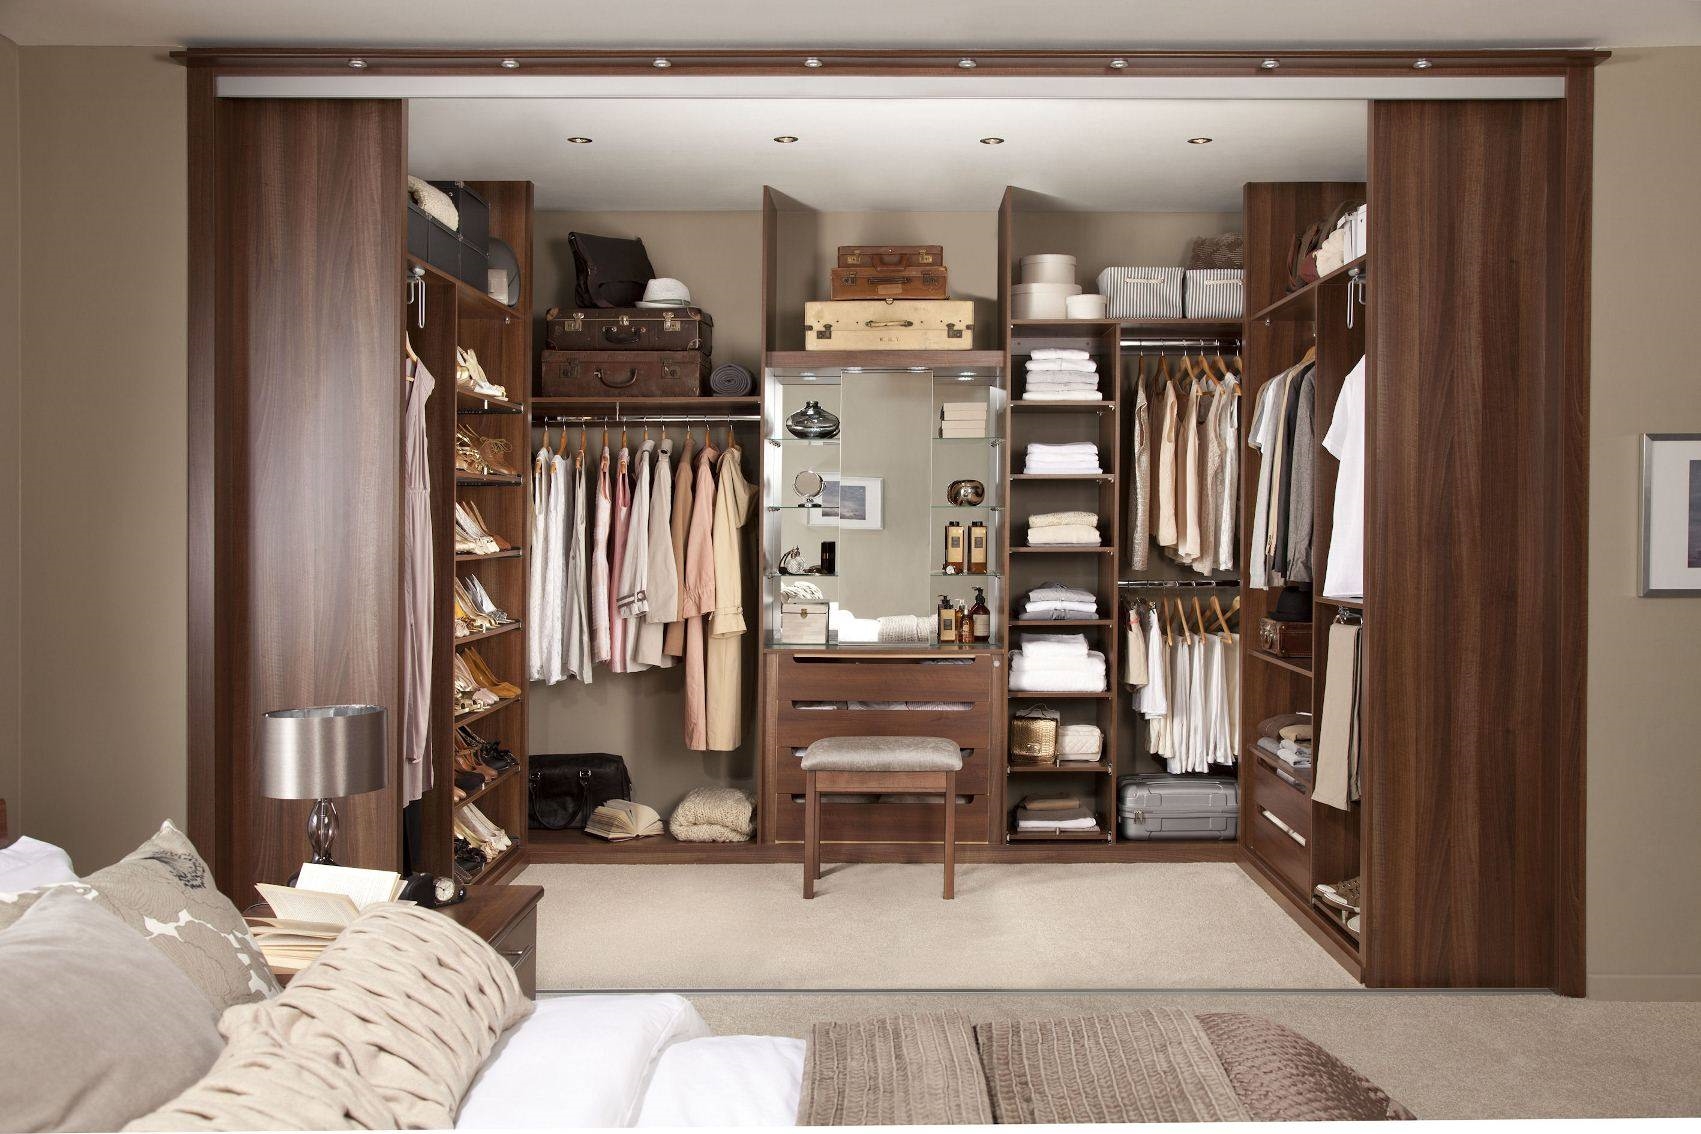
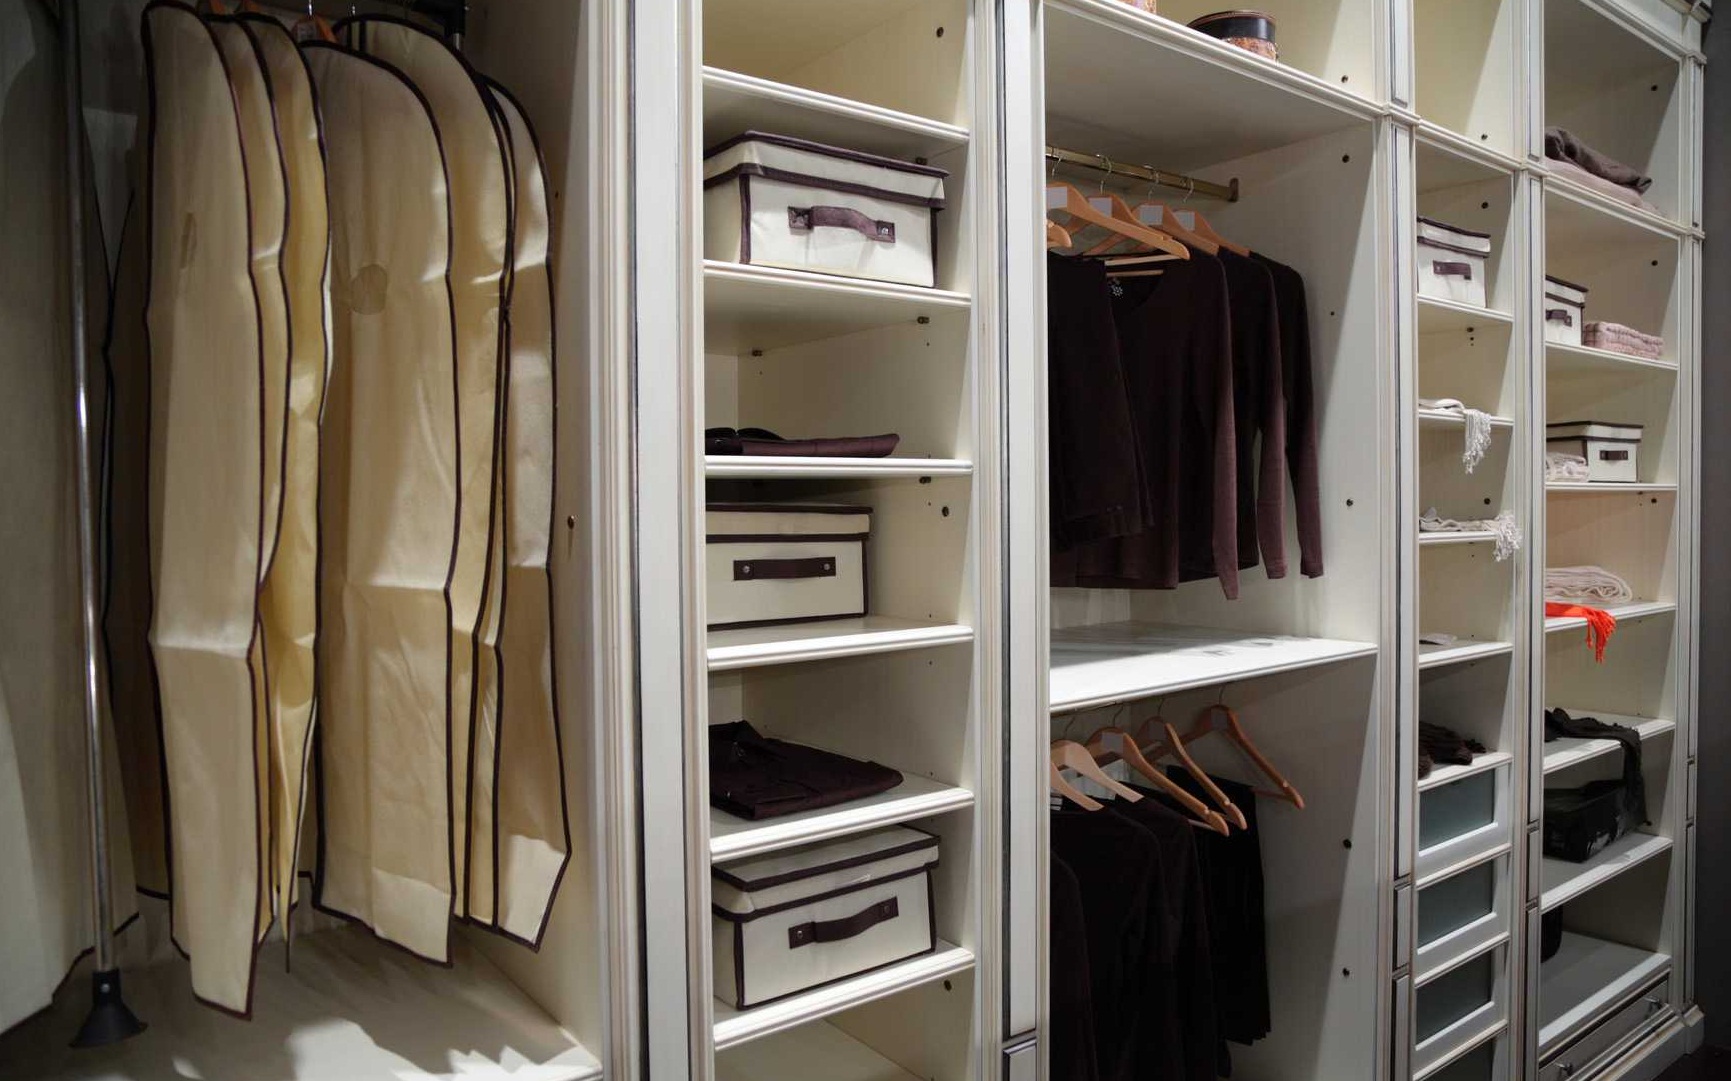
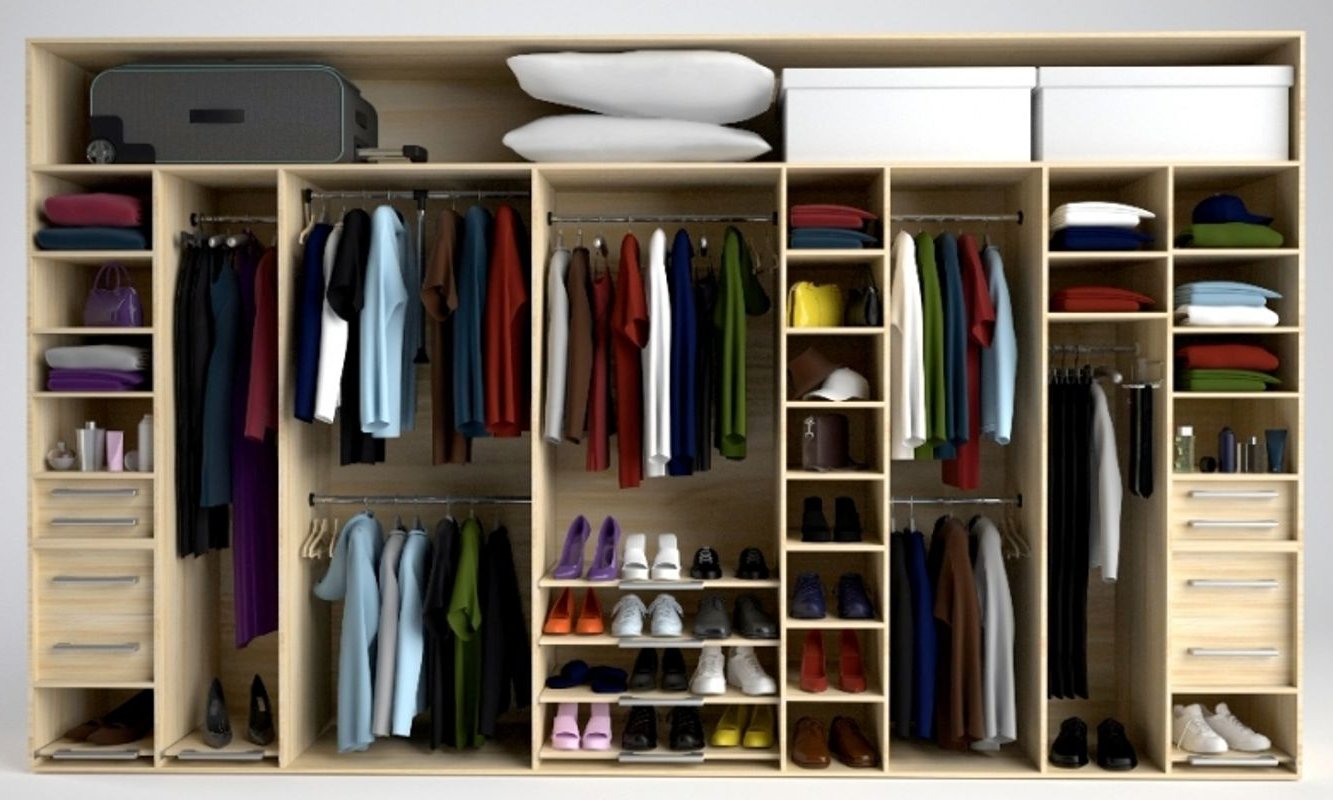
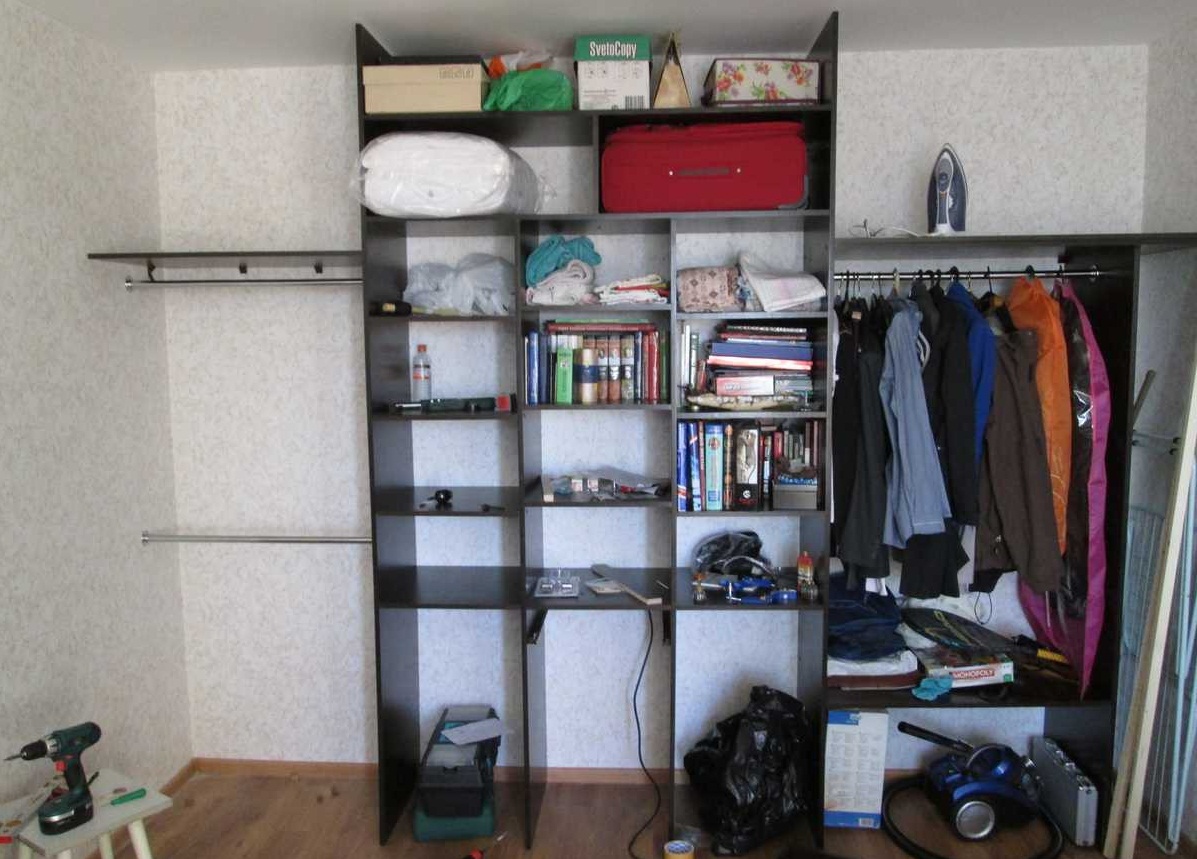
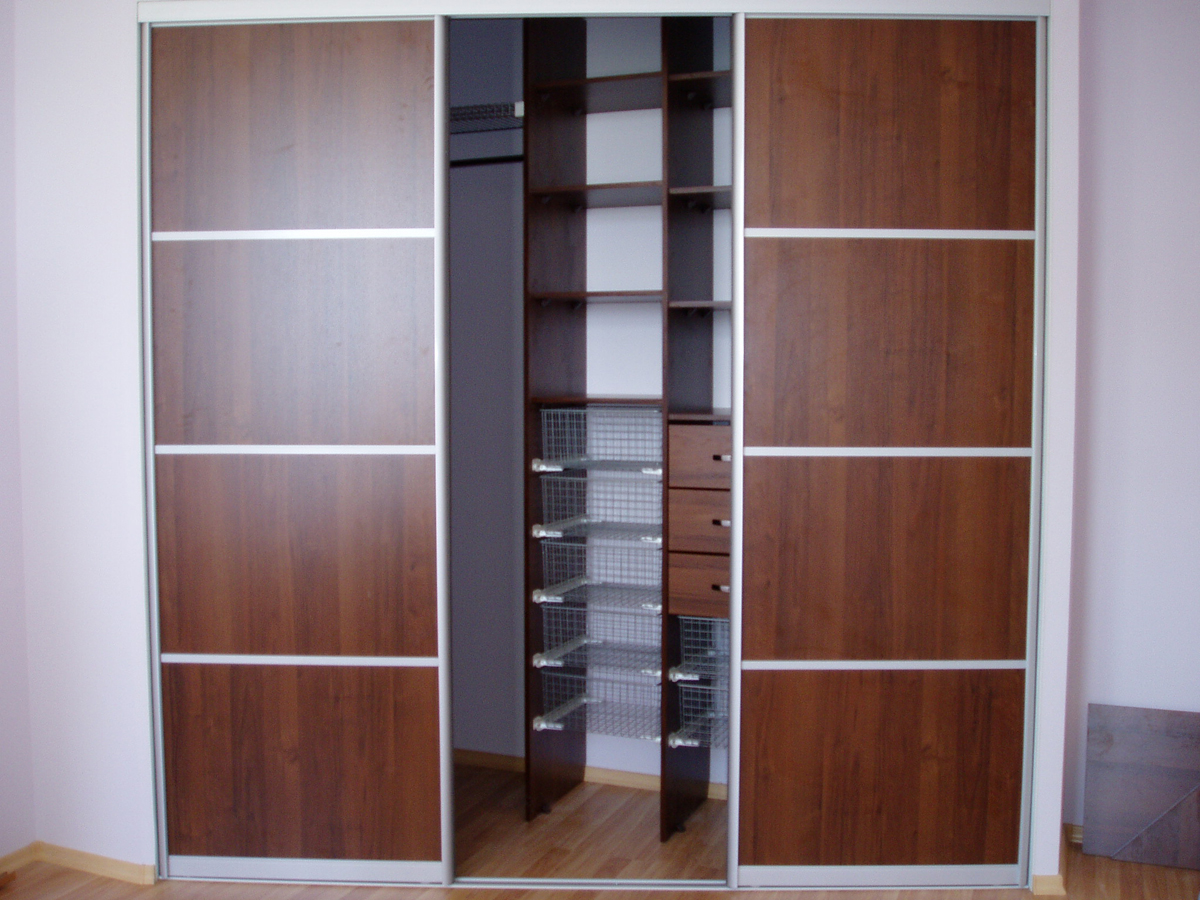
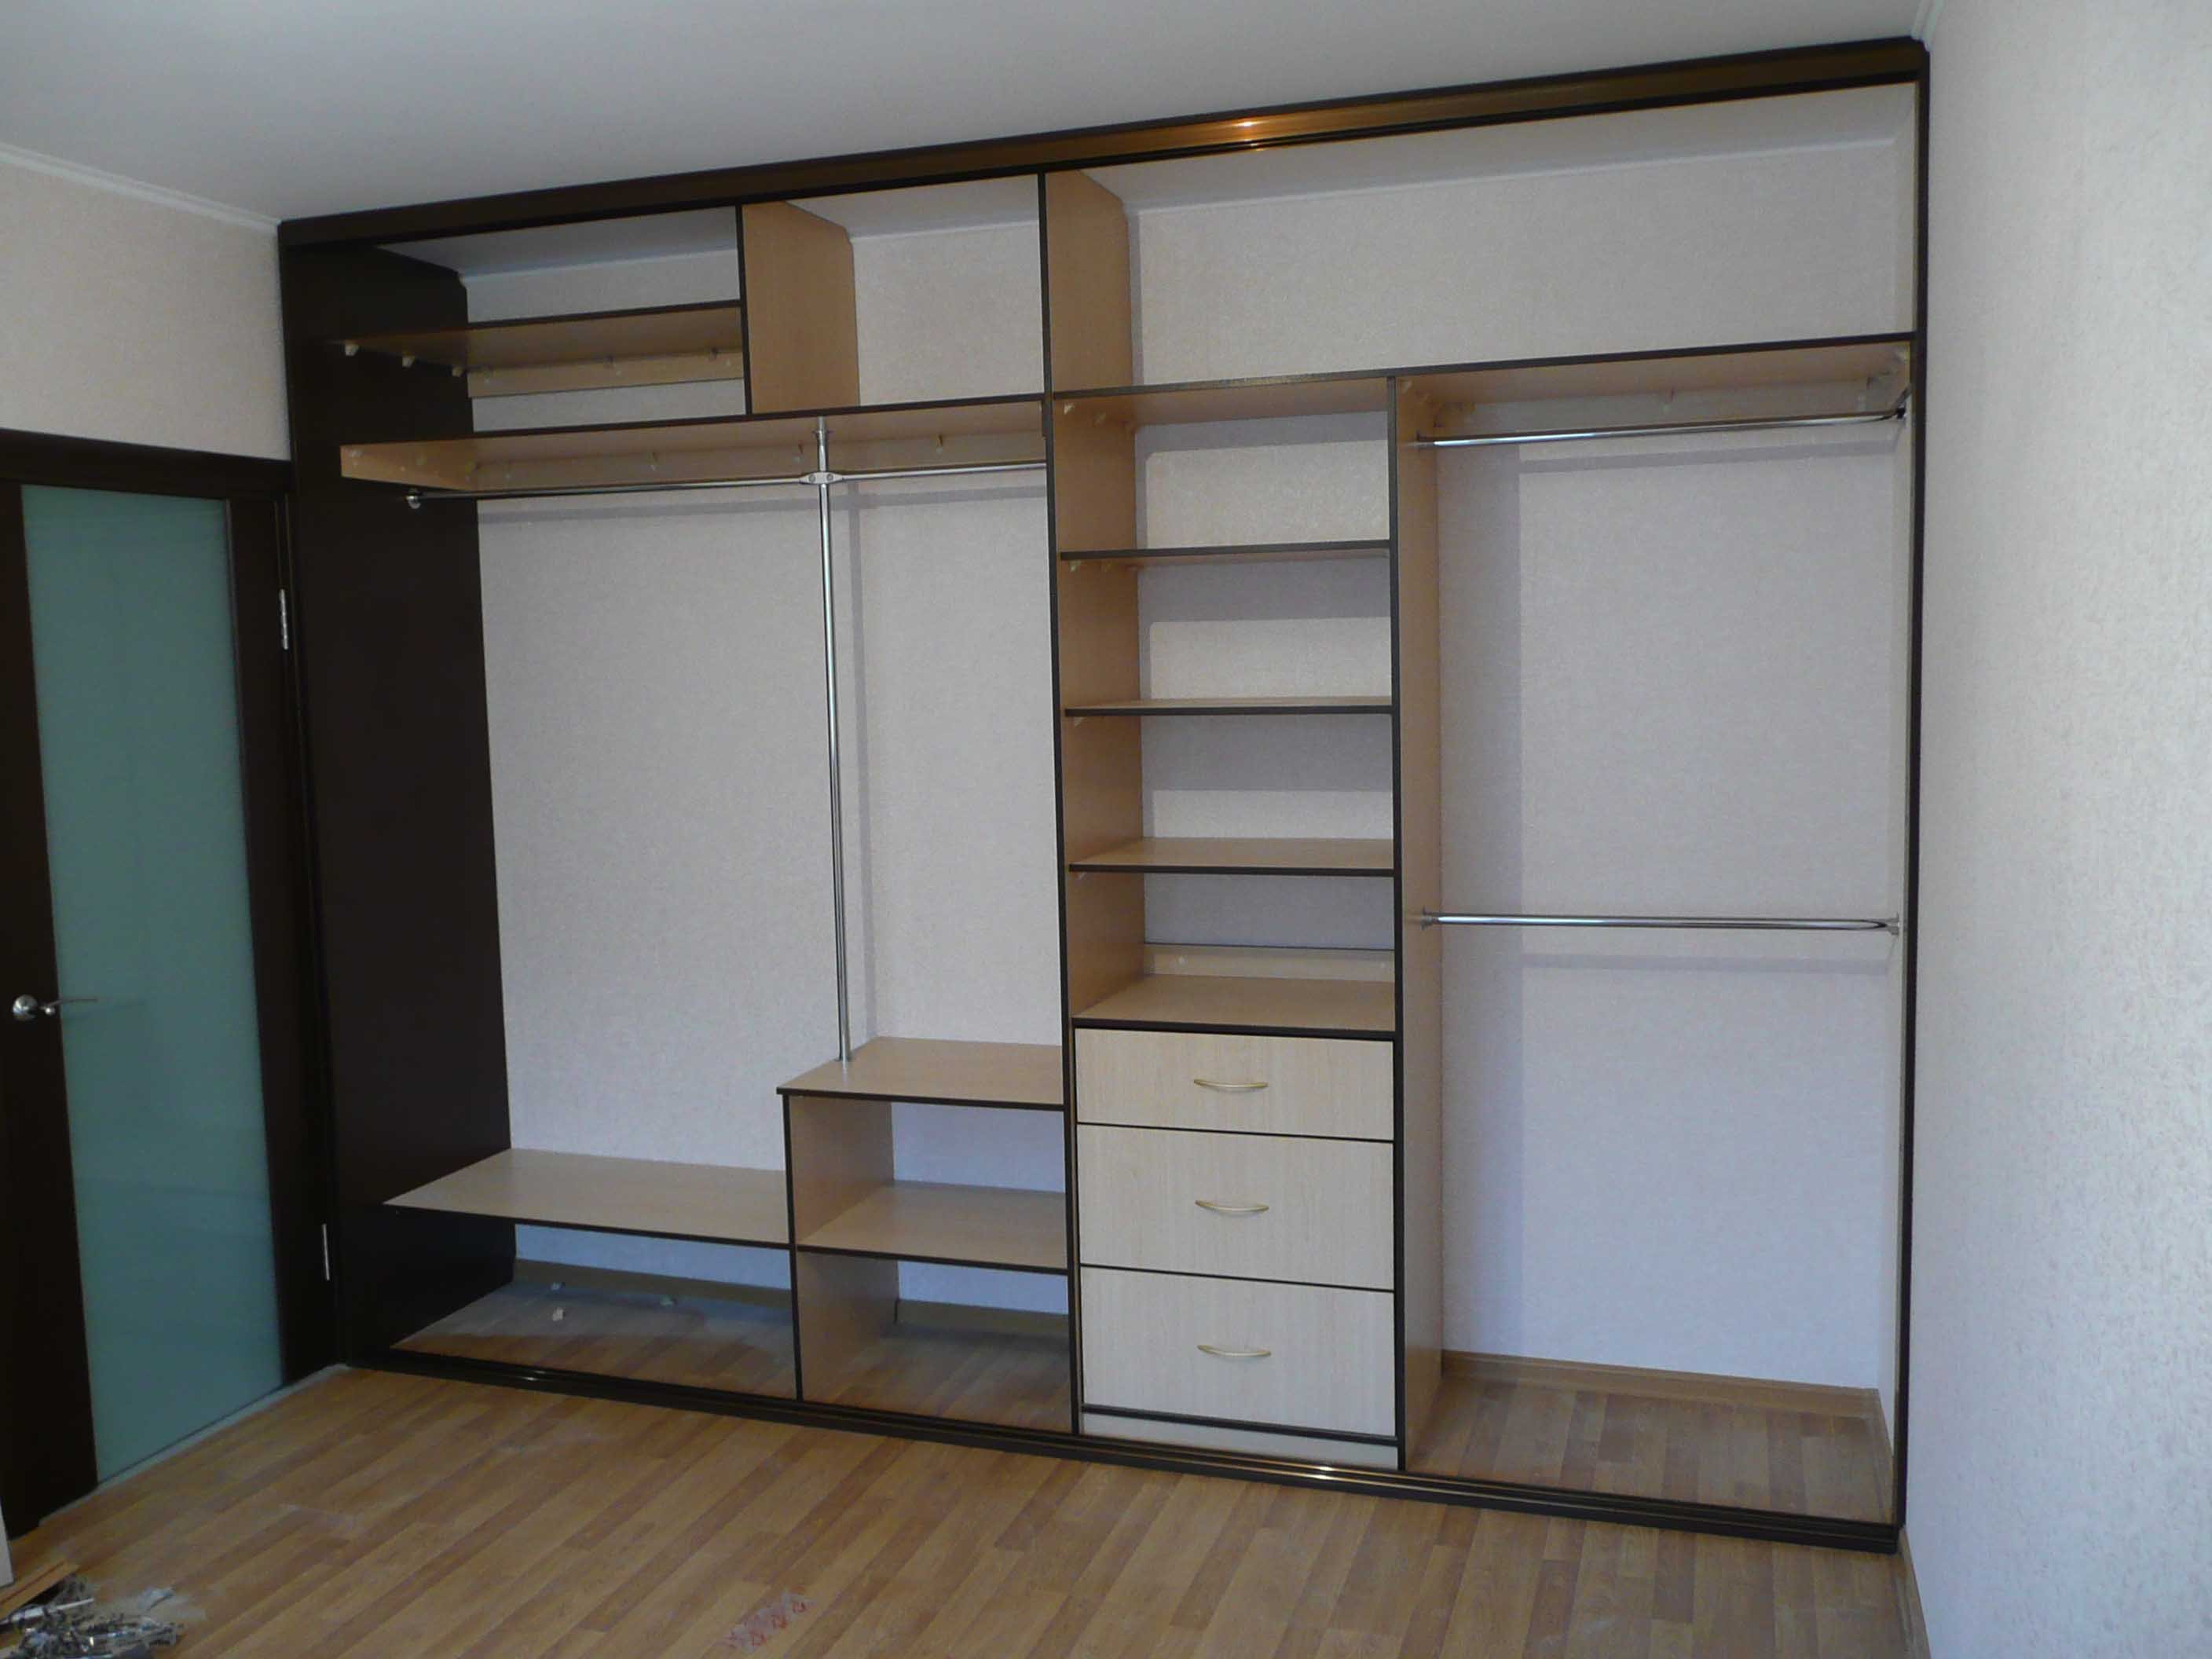
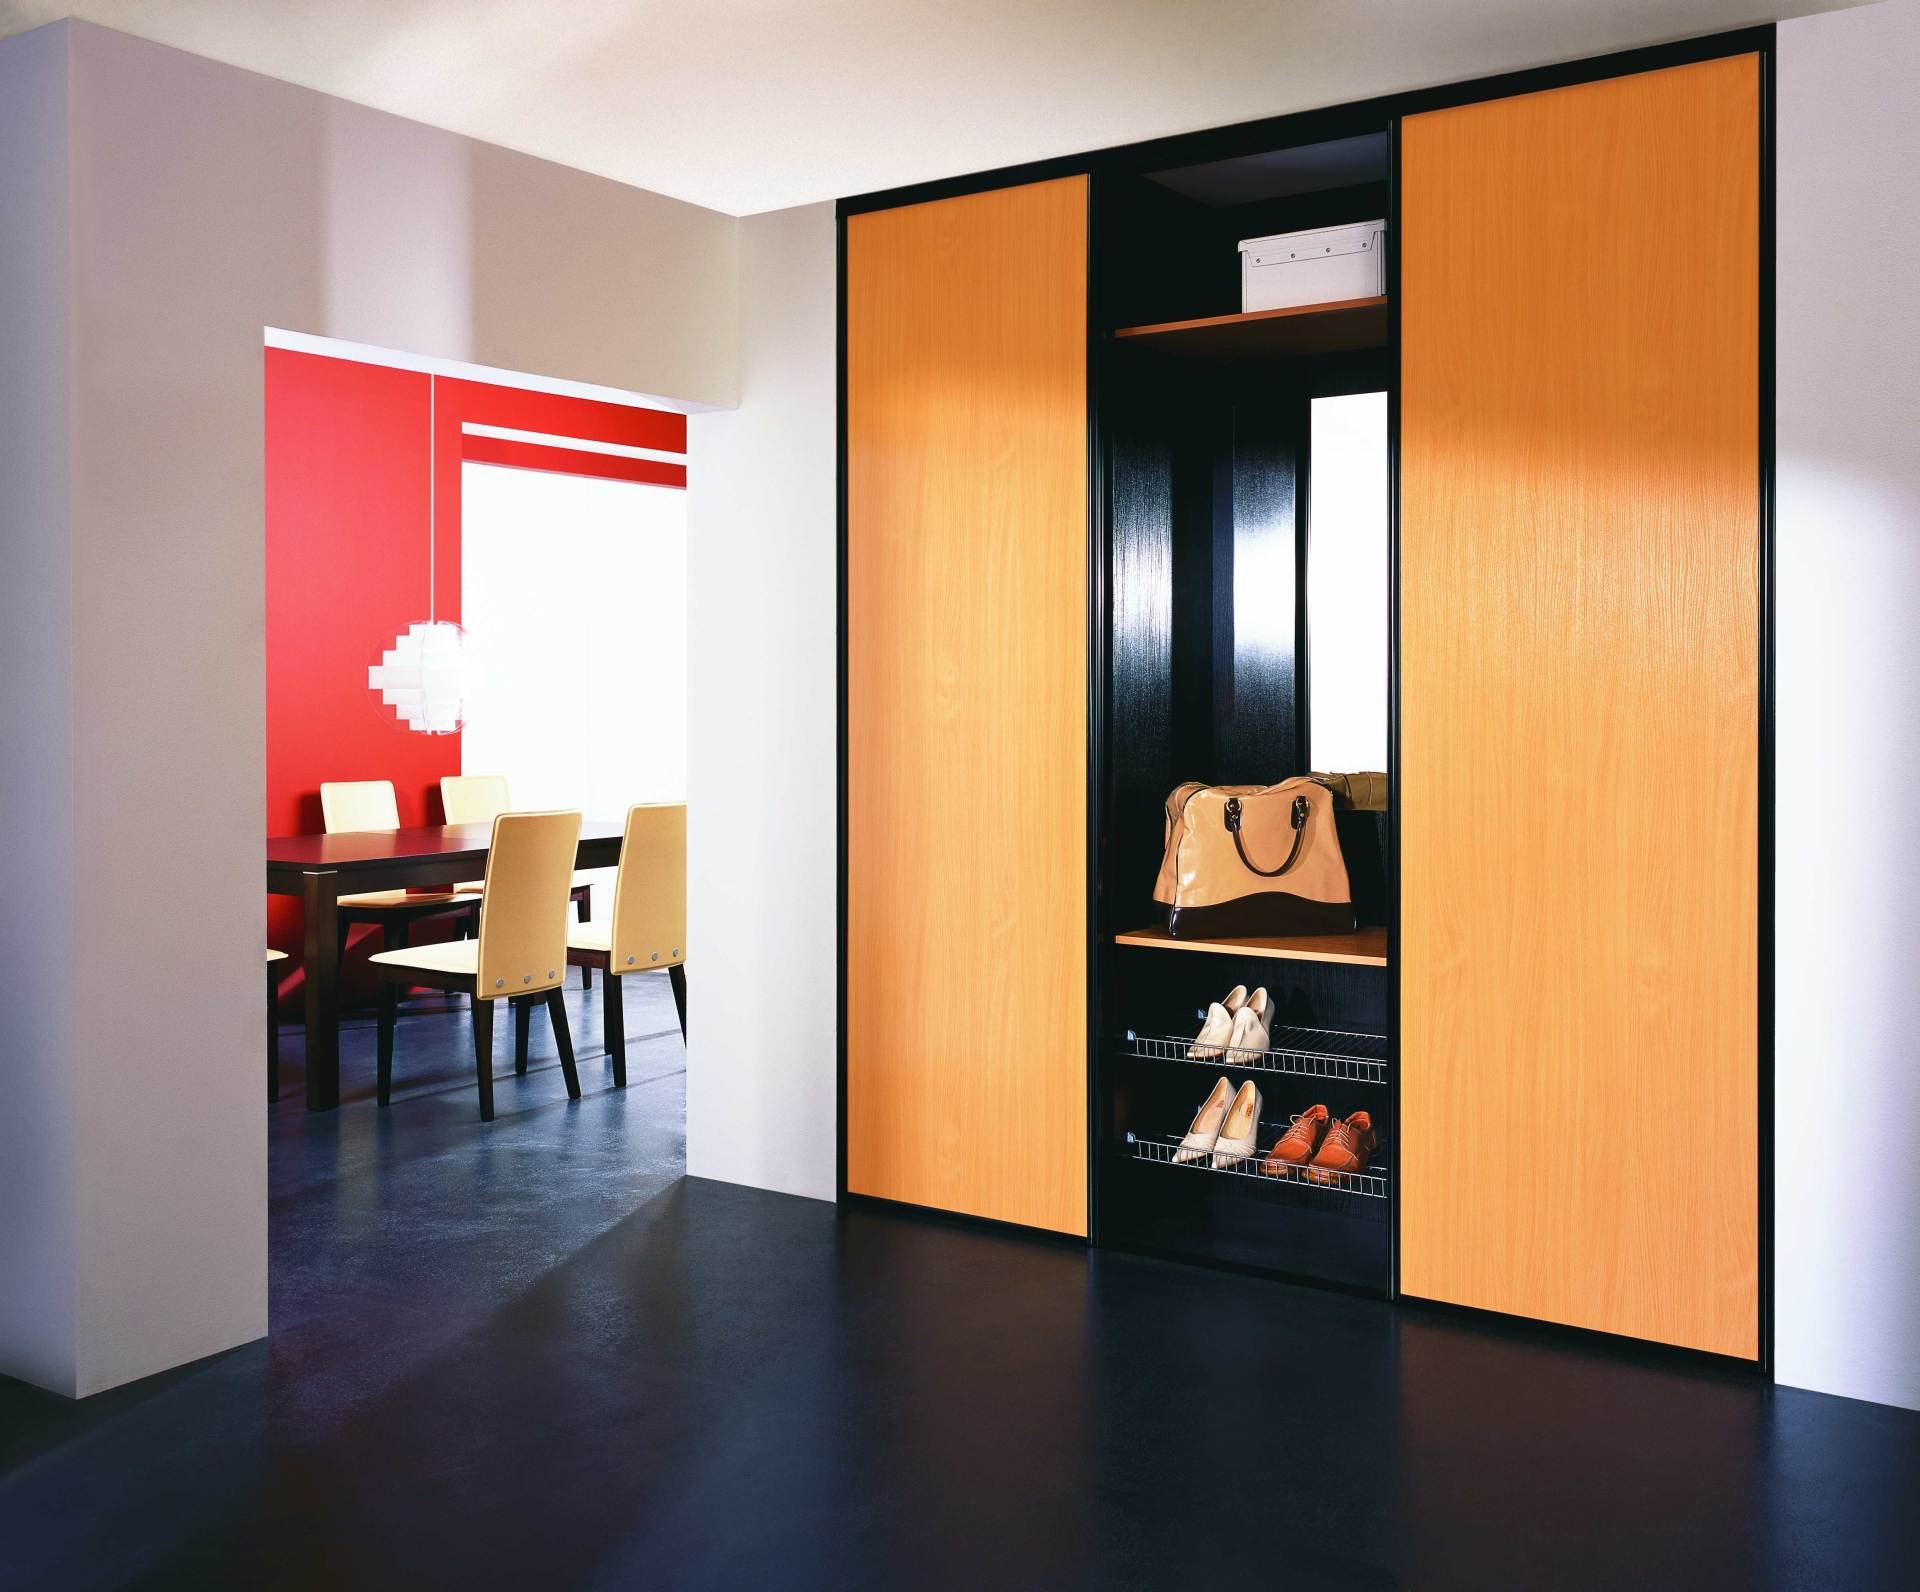
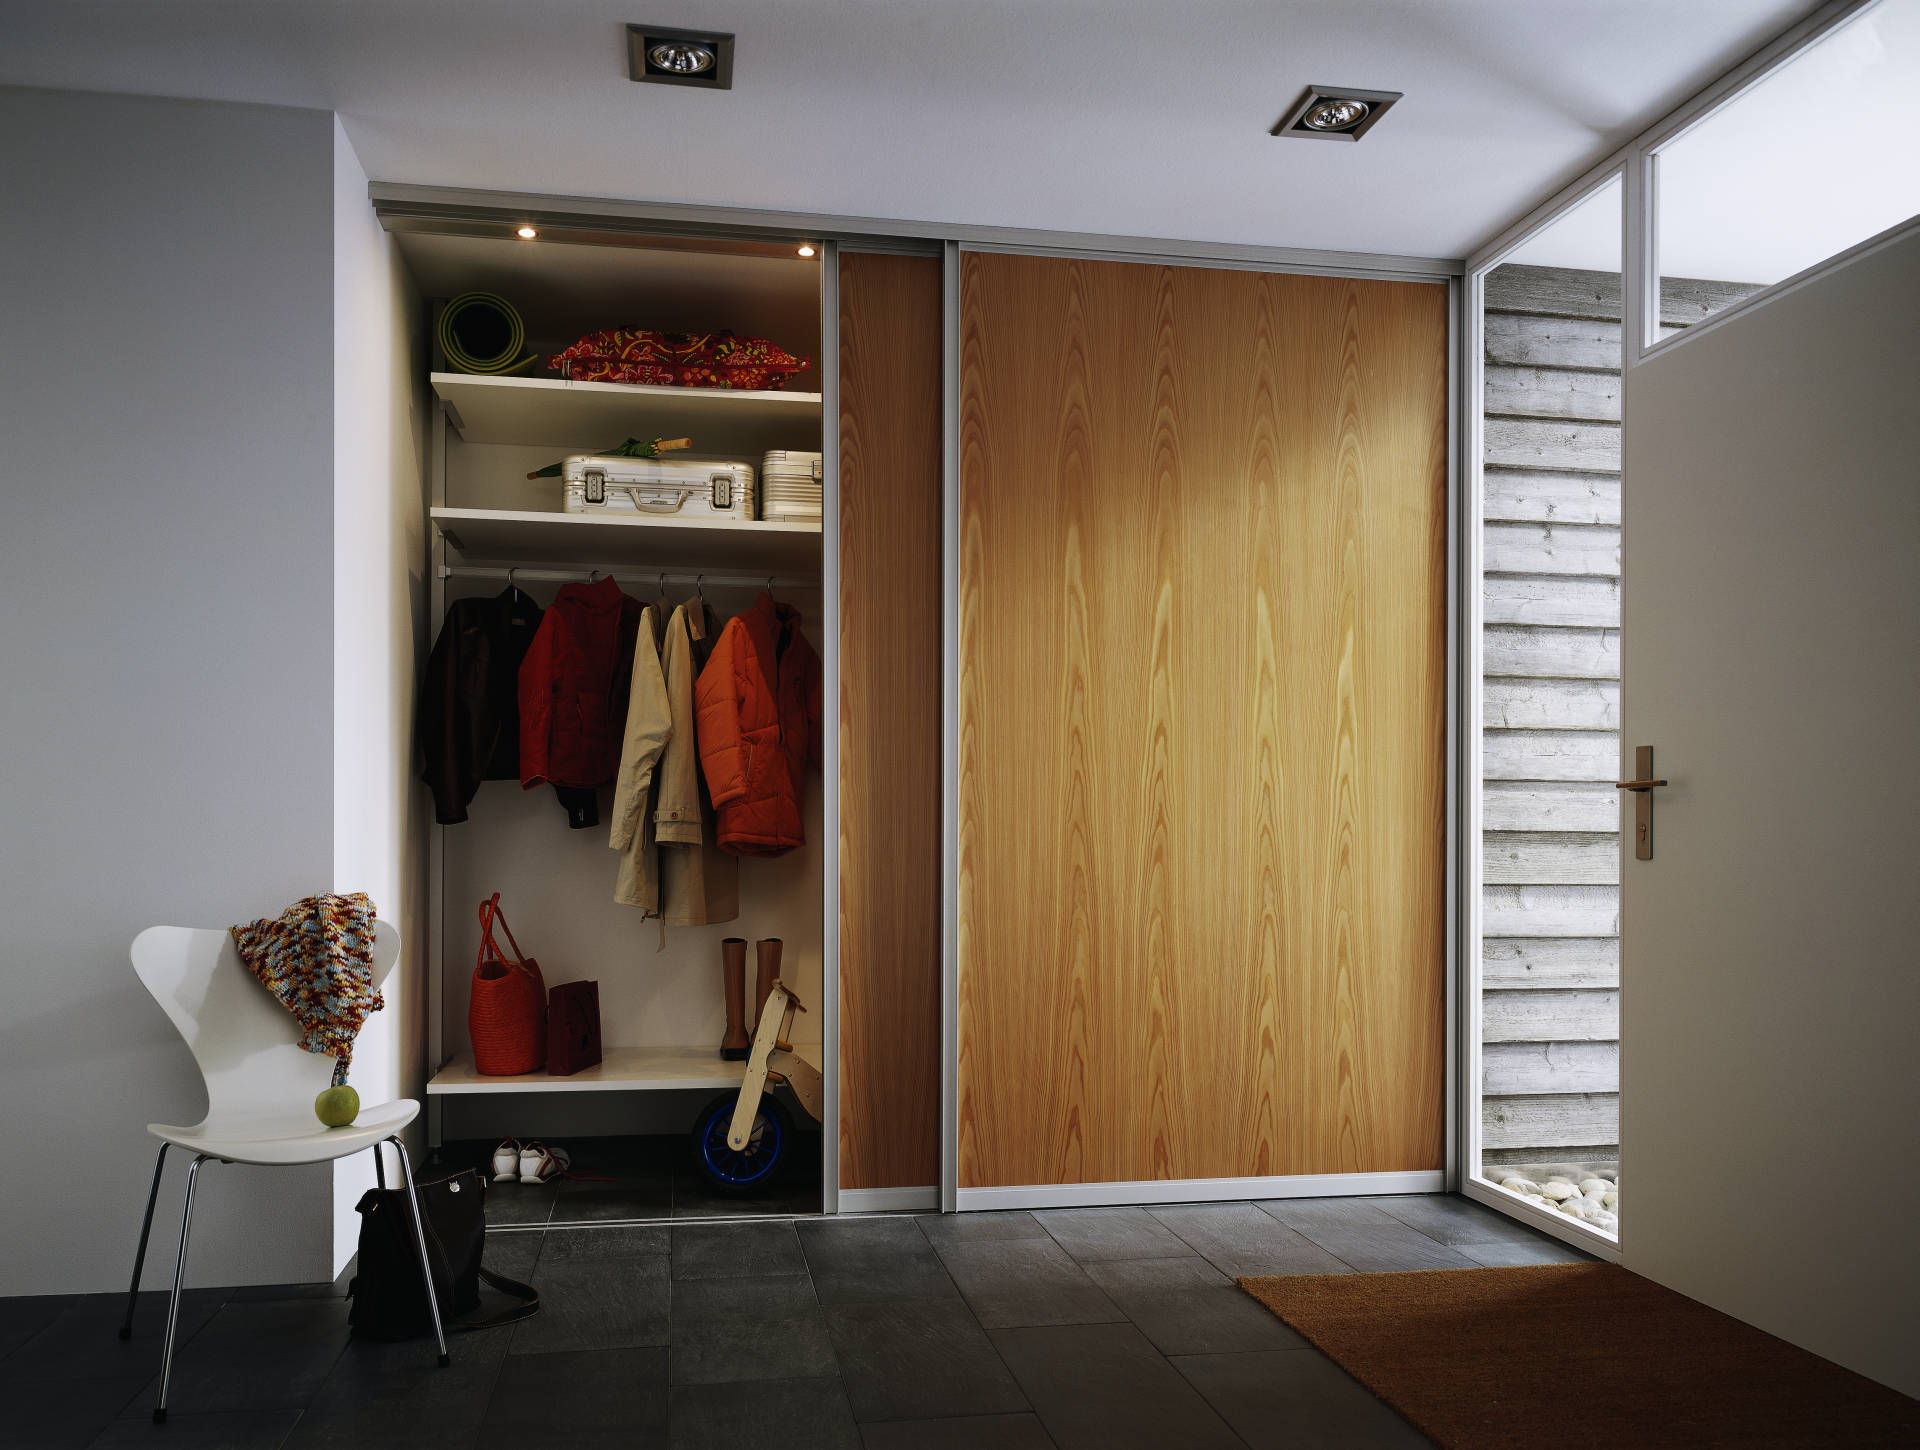
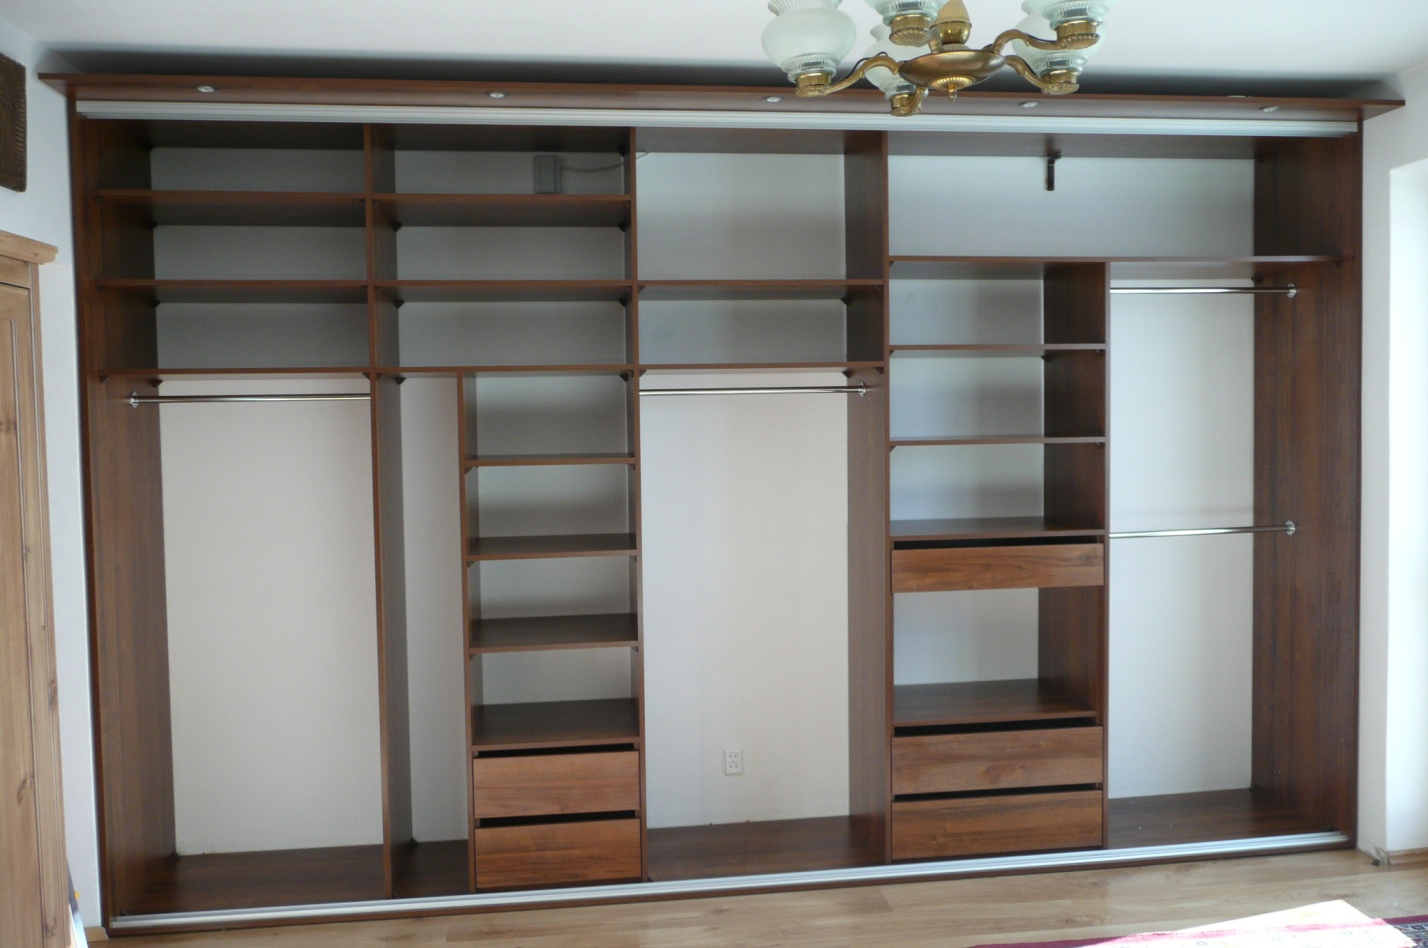
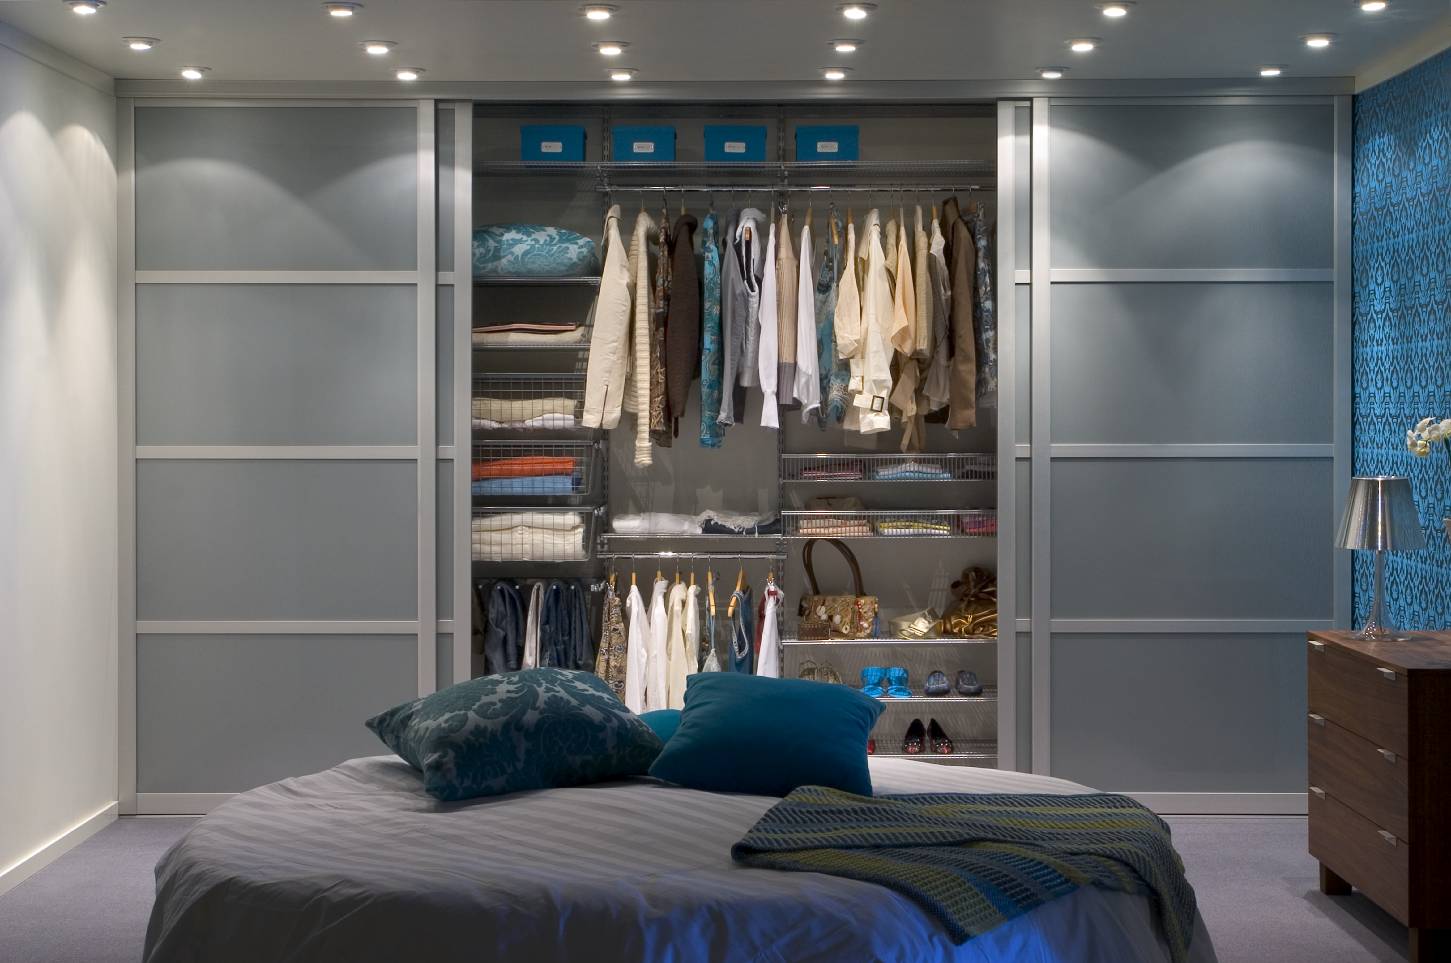
Filling the wardrobe should be carried out in accordance with their needs and the wealth of personal wardrobe. But regardless of the amount of clothing, the standard model of such furniture should contain the following elements:
- horizontal bars for hanging suits, coats, jackets, raincoats, jackets, shirts;
- sliding bars for trousers;
- closed and open shelves for small accessories;
- drawers for underwear, t-shirts, knitwear, bedding;
- lower shelves for shoes.
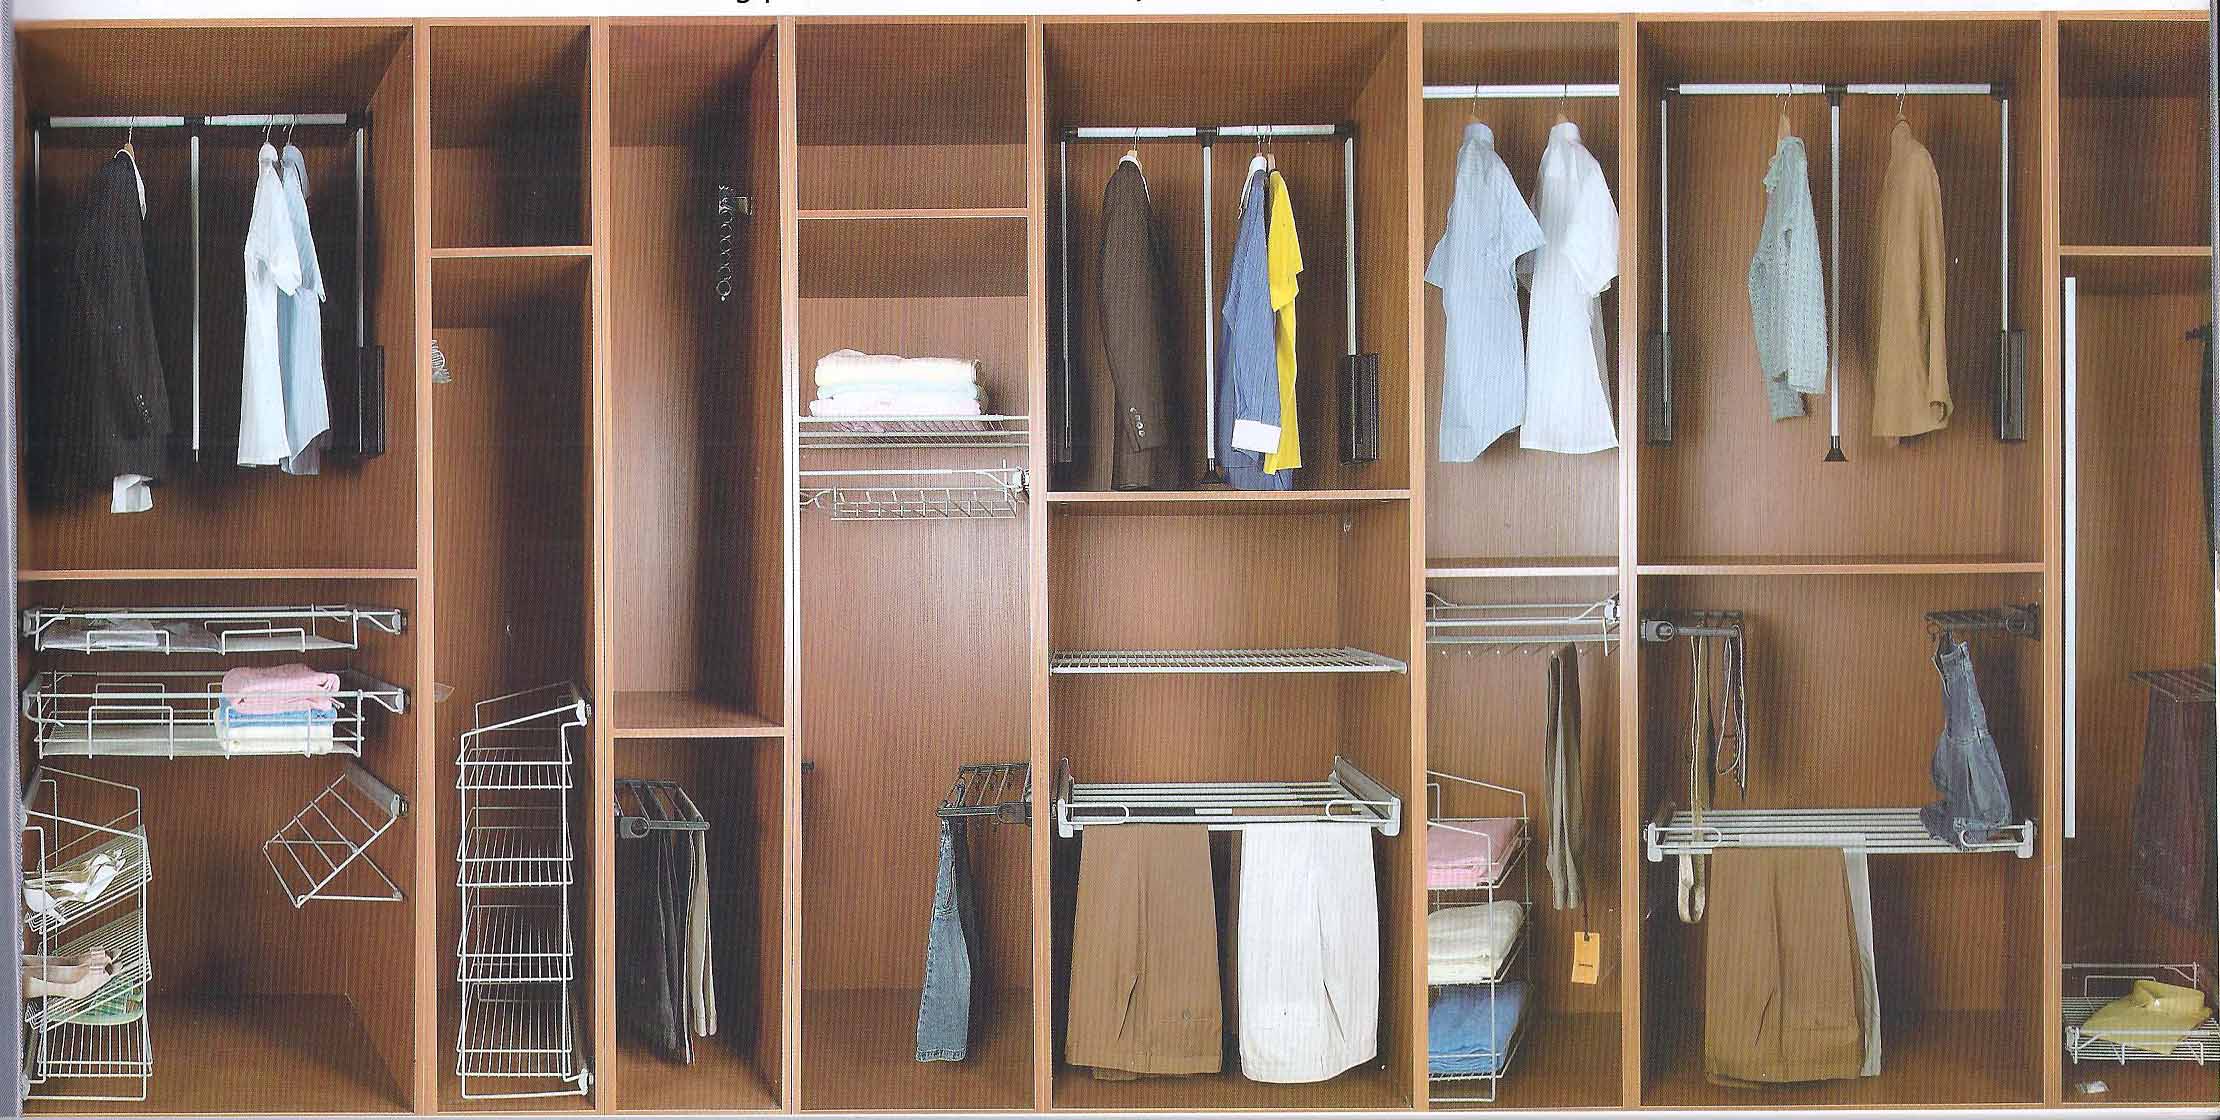

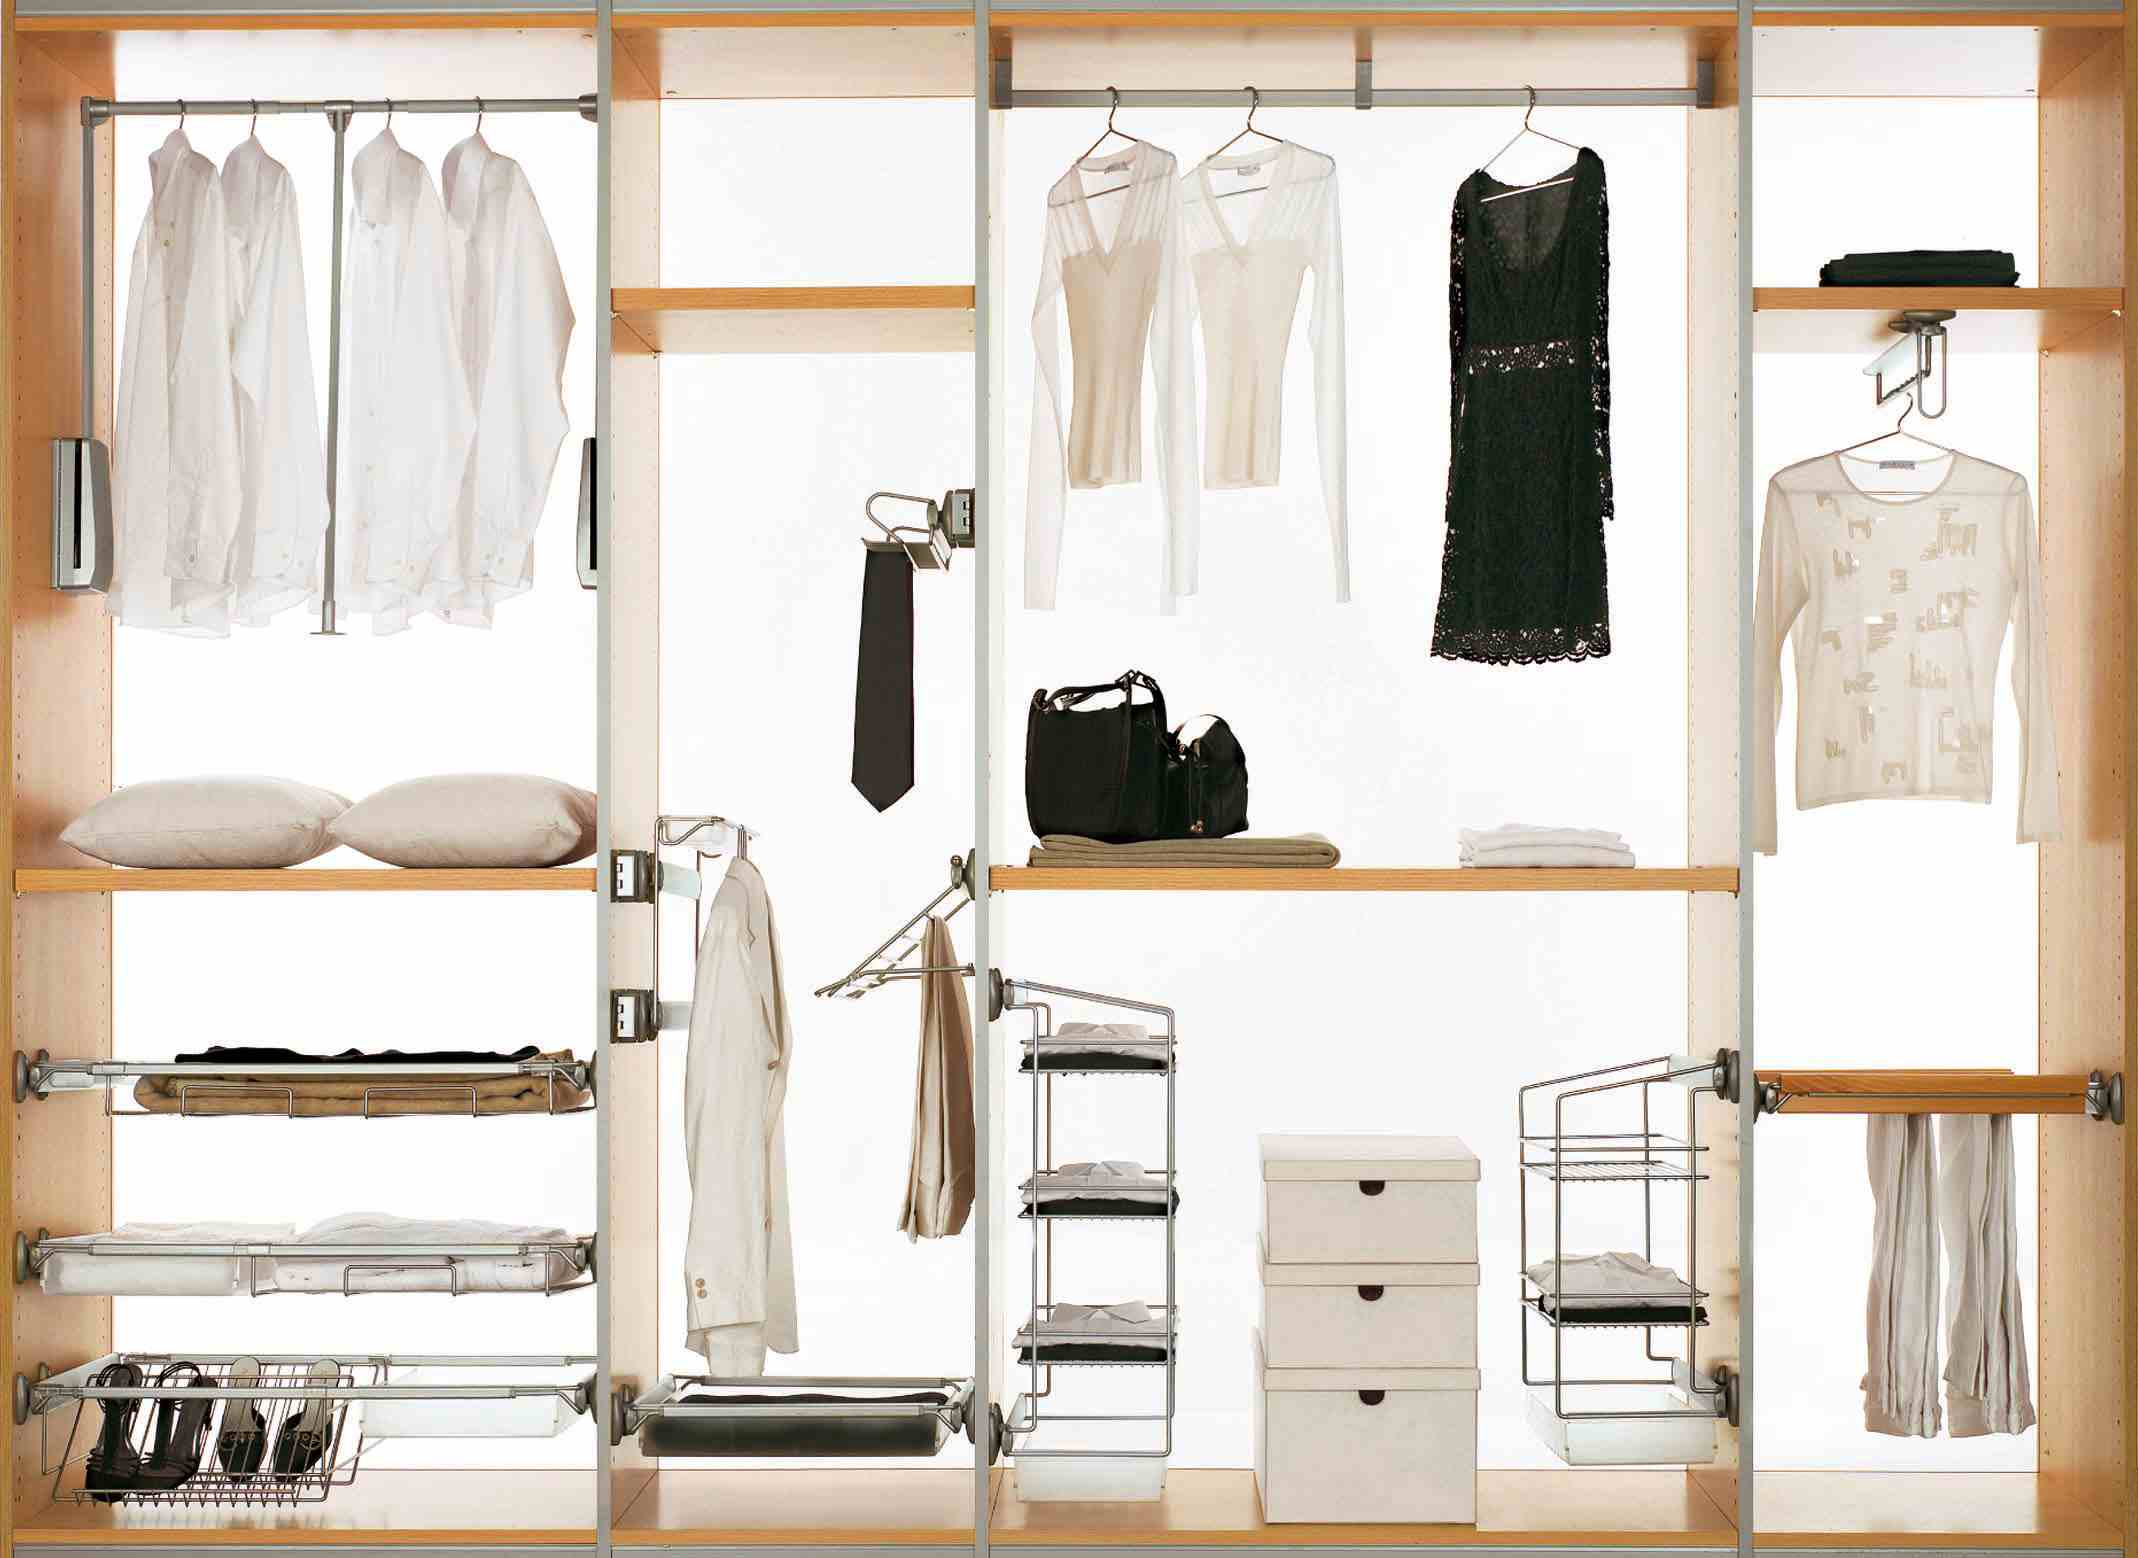


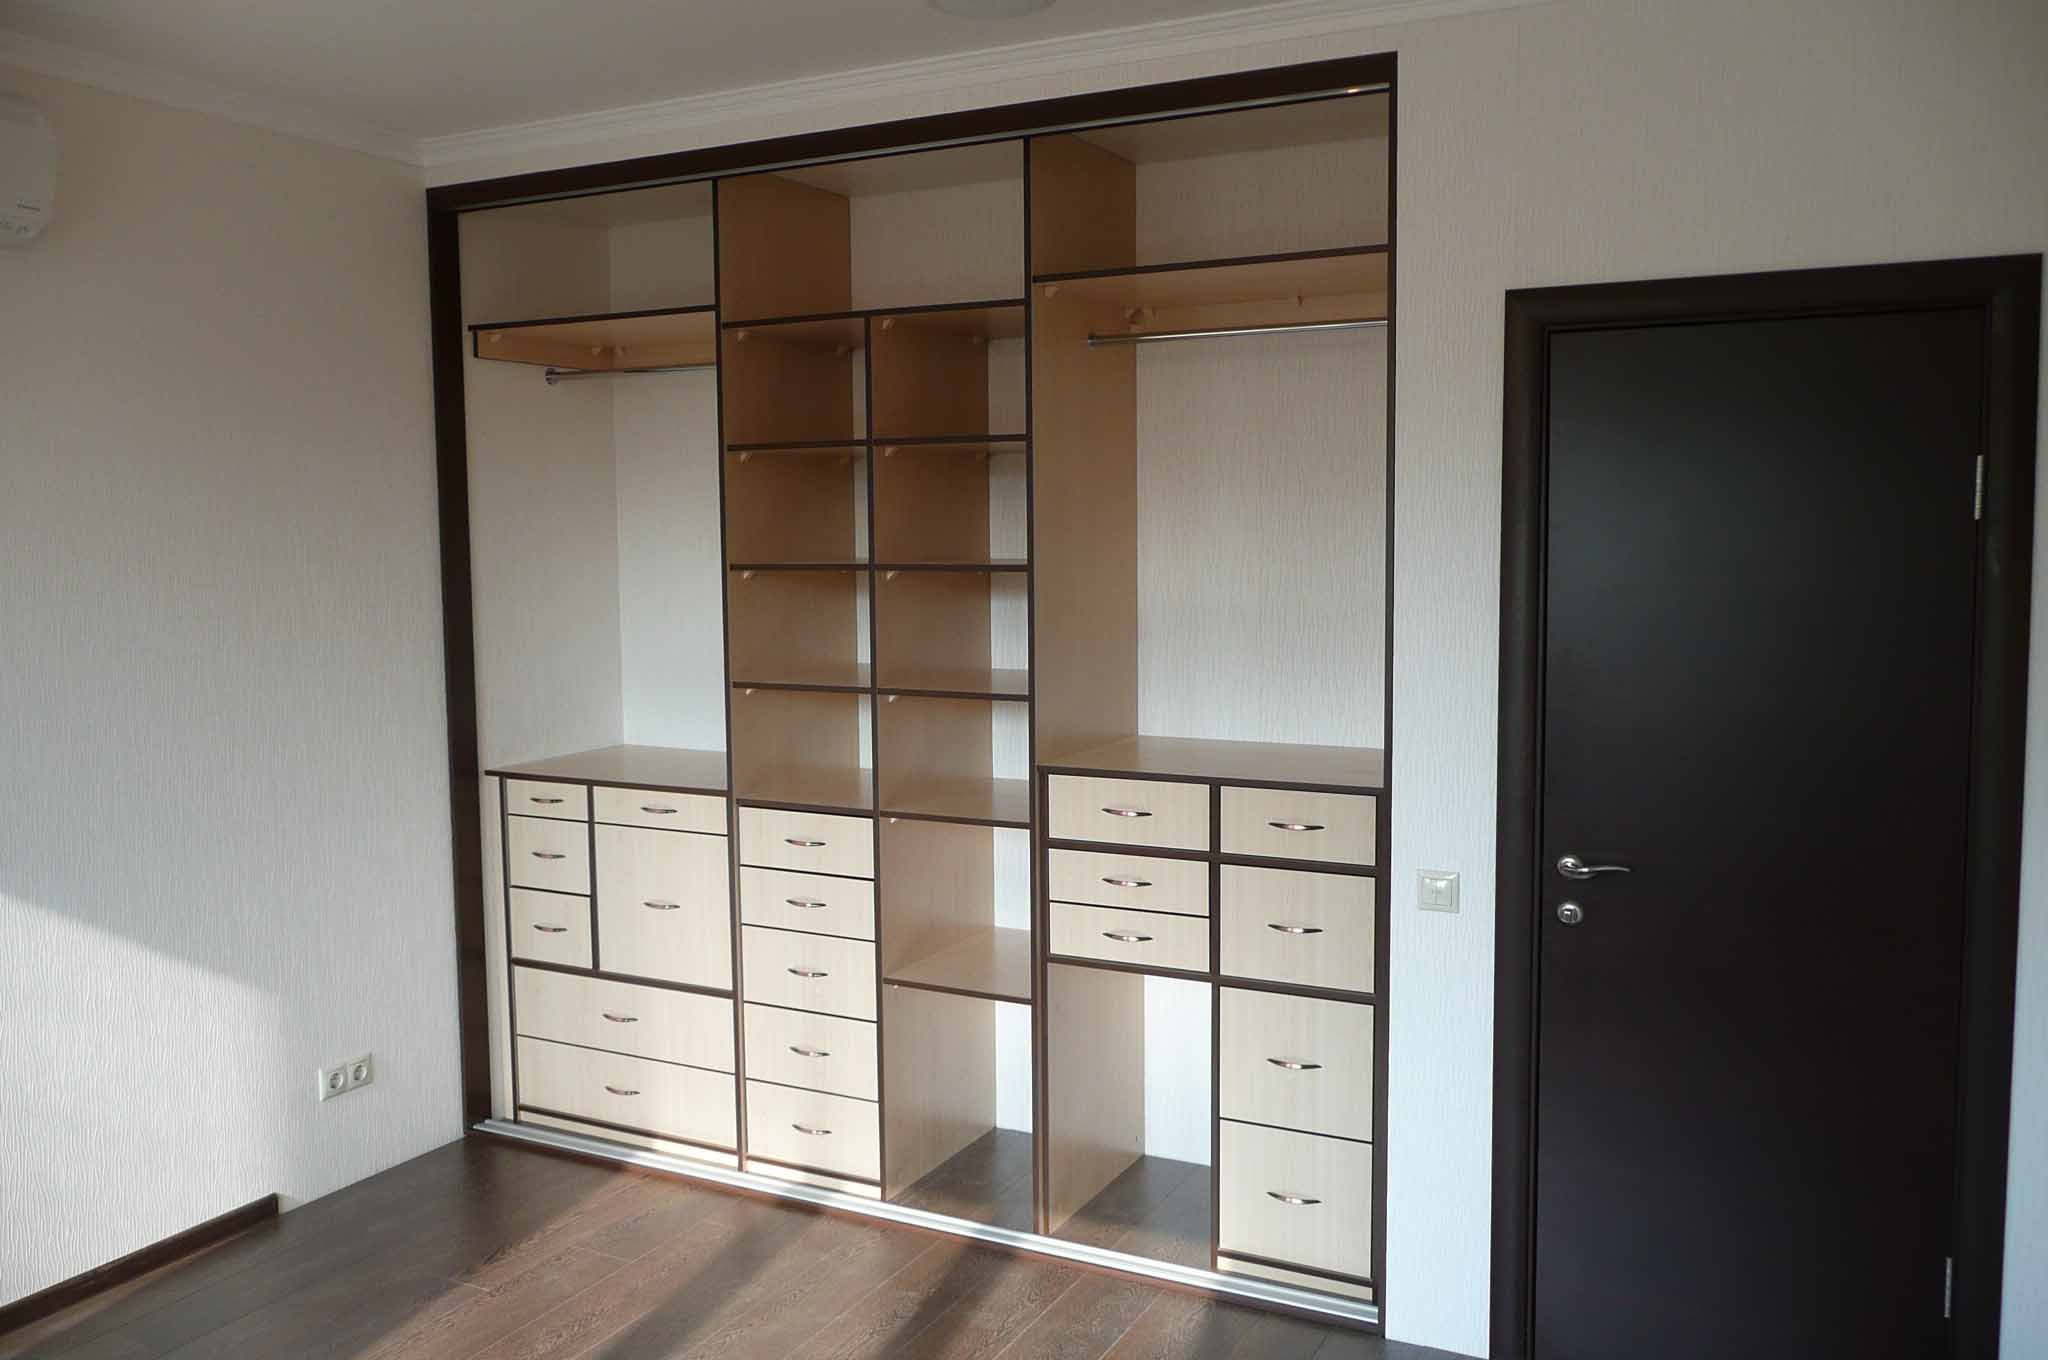
If the wardrobe has small dimensions, for example 3 doors in length, then it is possible to install one longitudinal bar for 2/3 where to hang all outerwear on hangers. The rest of the use under the drawers, and leave a little space on top of the open racks. Below the full length, you can organize a shoe compartment, which is separated from the main space by a horizontal shelf.
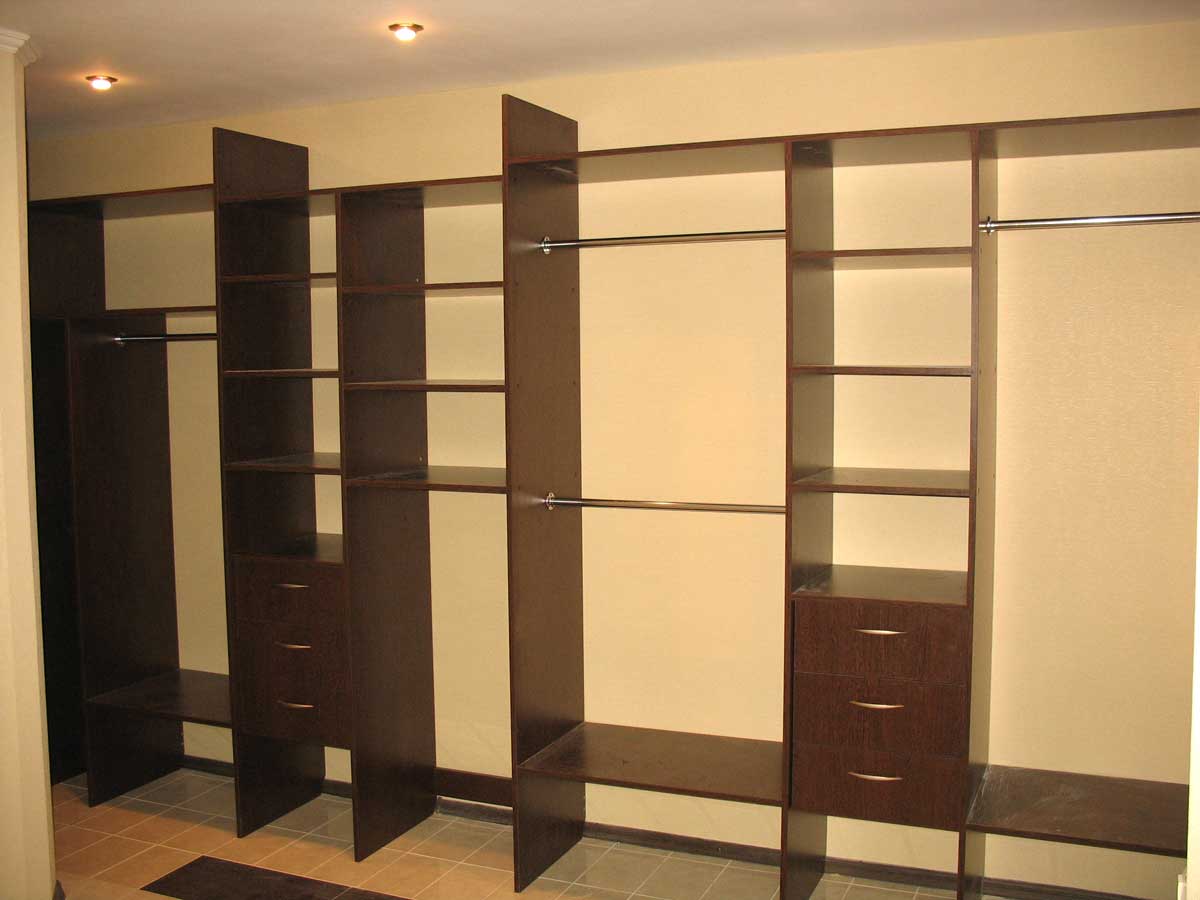
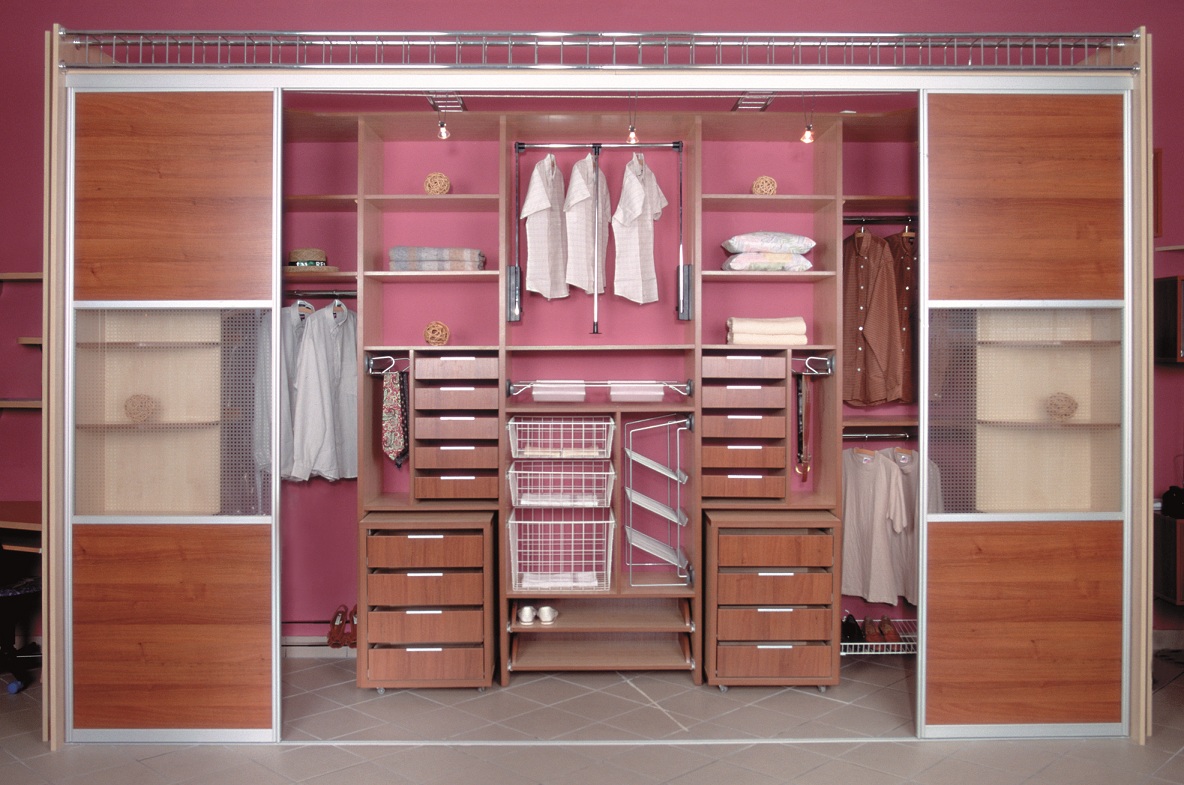
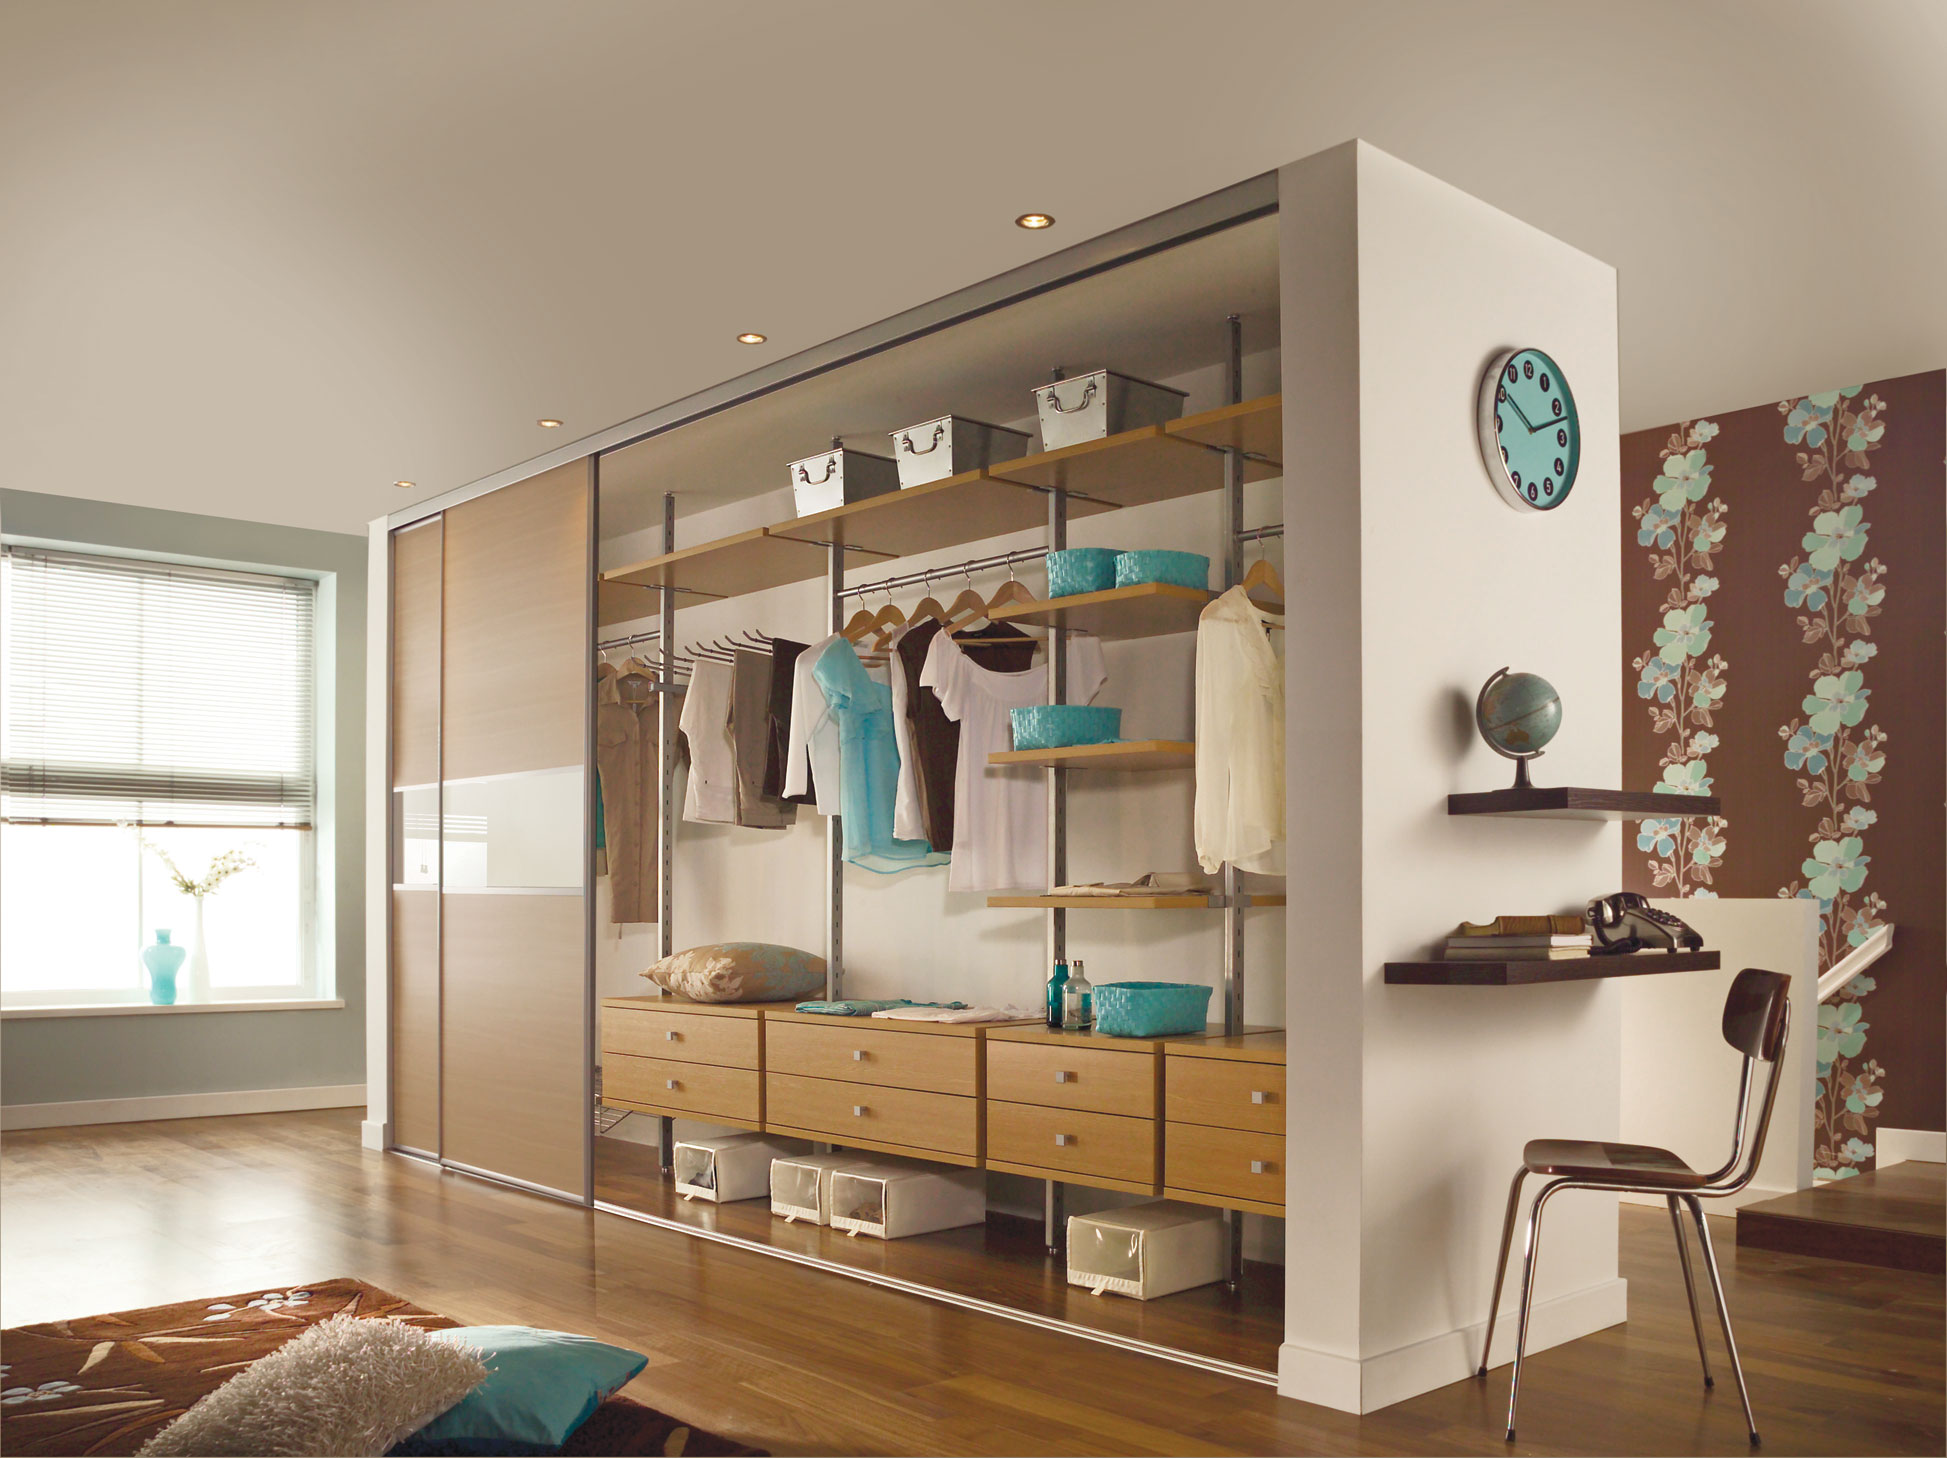
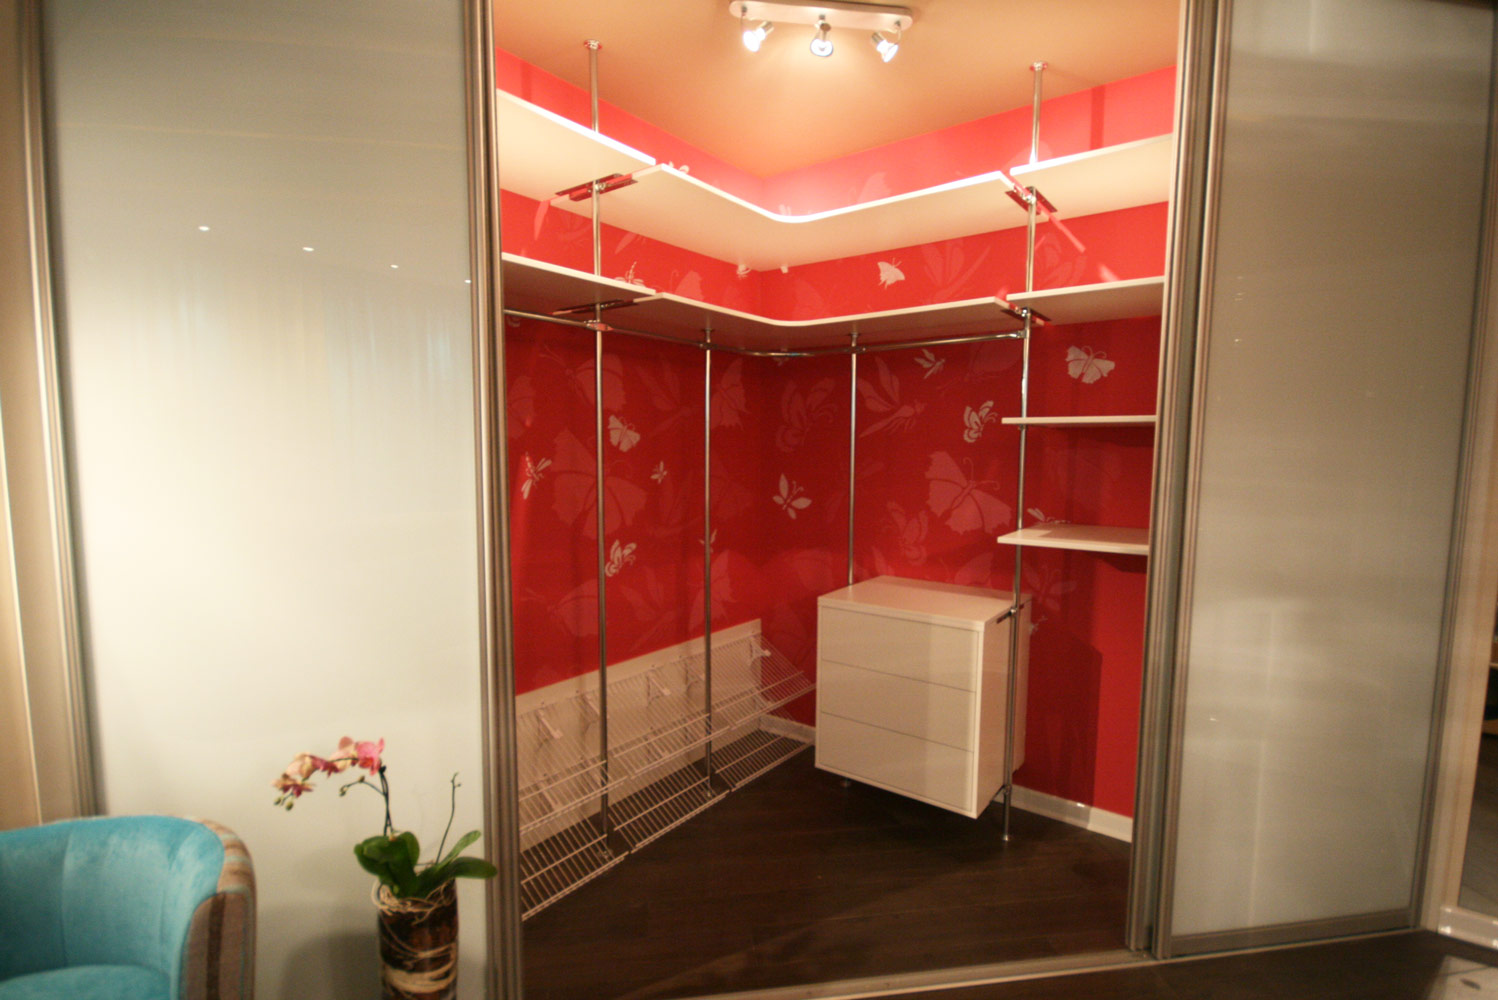
In more spacious models of cabinets - in the entire wall of the bedroom or large corner can make several rows of shelves, separate horizontal bars for summer and winter clothing, a compartment for trousers and open shelves in full height. You can even find a place for an internal mirror and try on outfits in front of it. Then the built-in wardrobe can turn into a full-fledged insulated dressing room.
Cost of work
Prices of materials depend on the specific region and suppliers. The most expensive raw material for the manufacture of wardrobes is natural wood, especially elite varieties, aged for several years and treated with reinforcing compositions. Below are the cost of laminated MDF and chipboard, then high-quality polished lining. Moisture-resistant drywall is considered the cheapest, but it must be borne in mind that it needs metal profiles in sufficient quantity, and the door has to be made of other materials. In addition, you need to take into account the cost of fasteners, aluminum guides, rollers and stoppers.

The cost of the tool for self-assembly will be negligible. In most cases, tools are required for mechanical manual installation. But if you make all the components yourself, then you may need a power tool, linseed oil and varnishes for surface treatment, finishing materials for decoration.
Lighting devices based on LED lamps are not very expensive. Halogen and fluorescent lamps have a high price.The costs should include wires, automation, switches and sensors, if they will be used to illuminate the wardrobe.
Interesting solutions in interior design
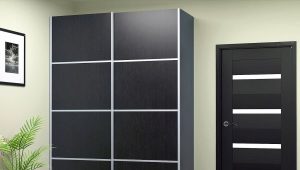
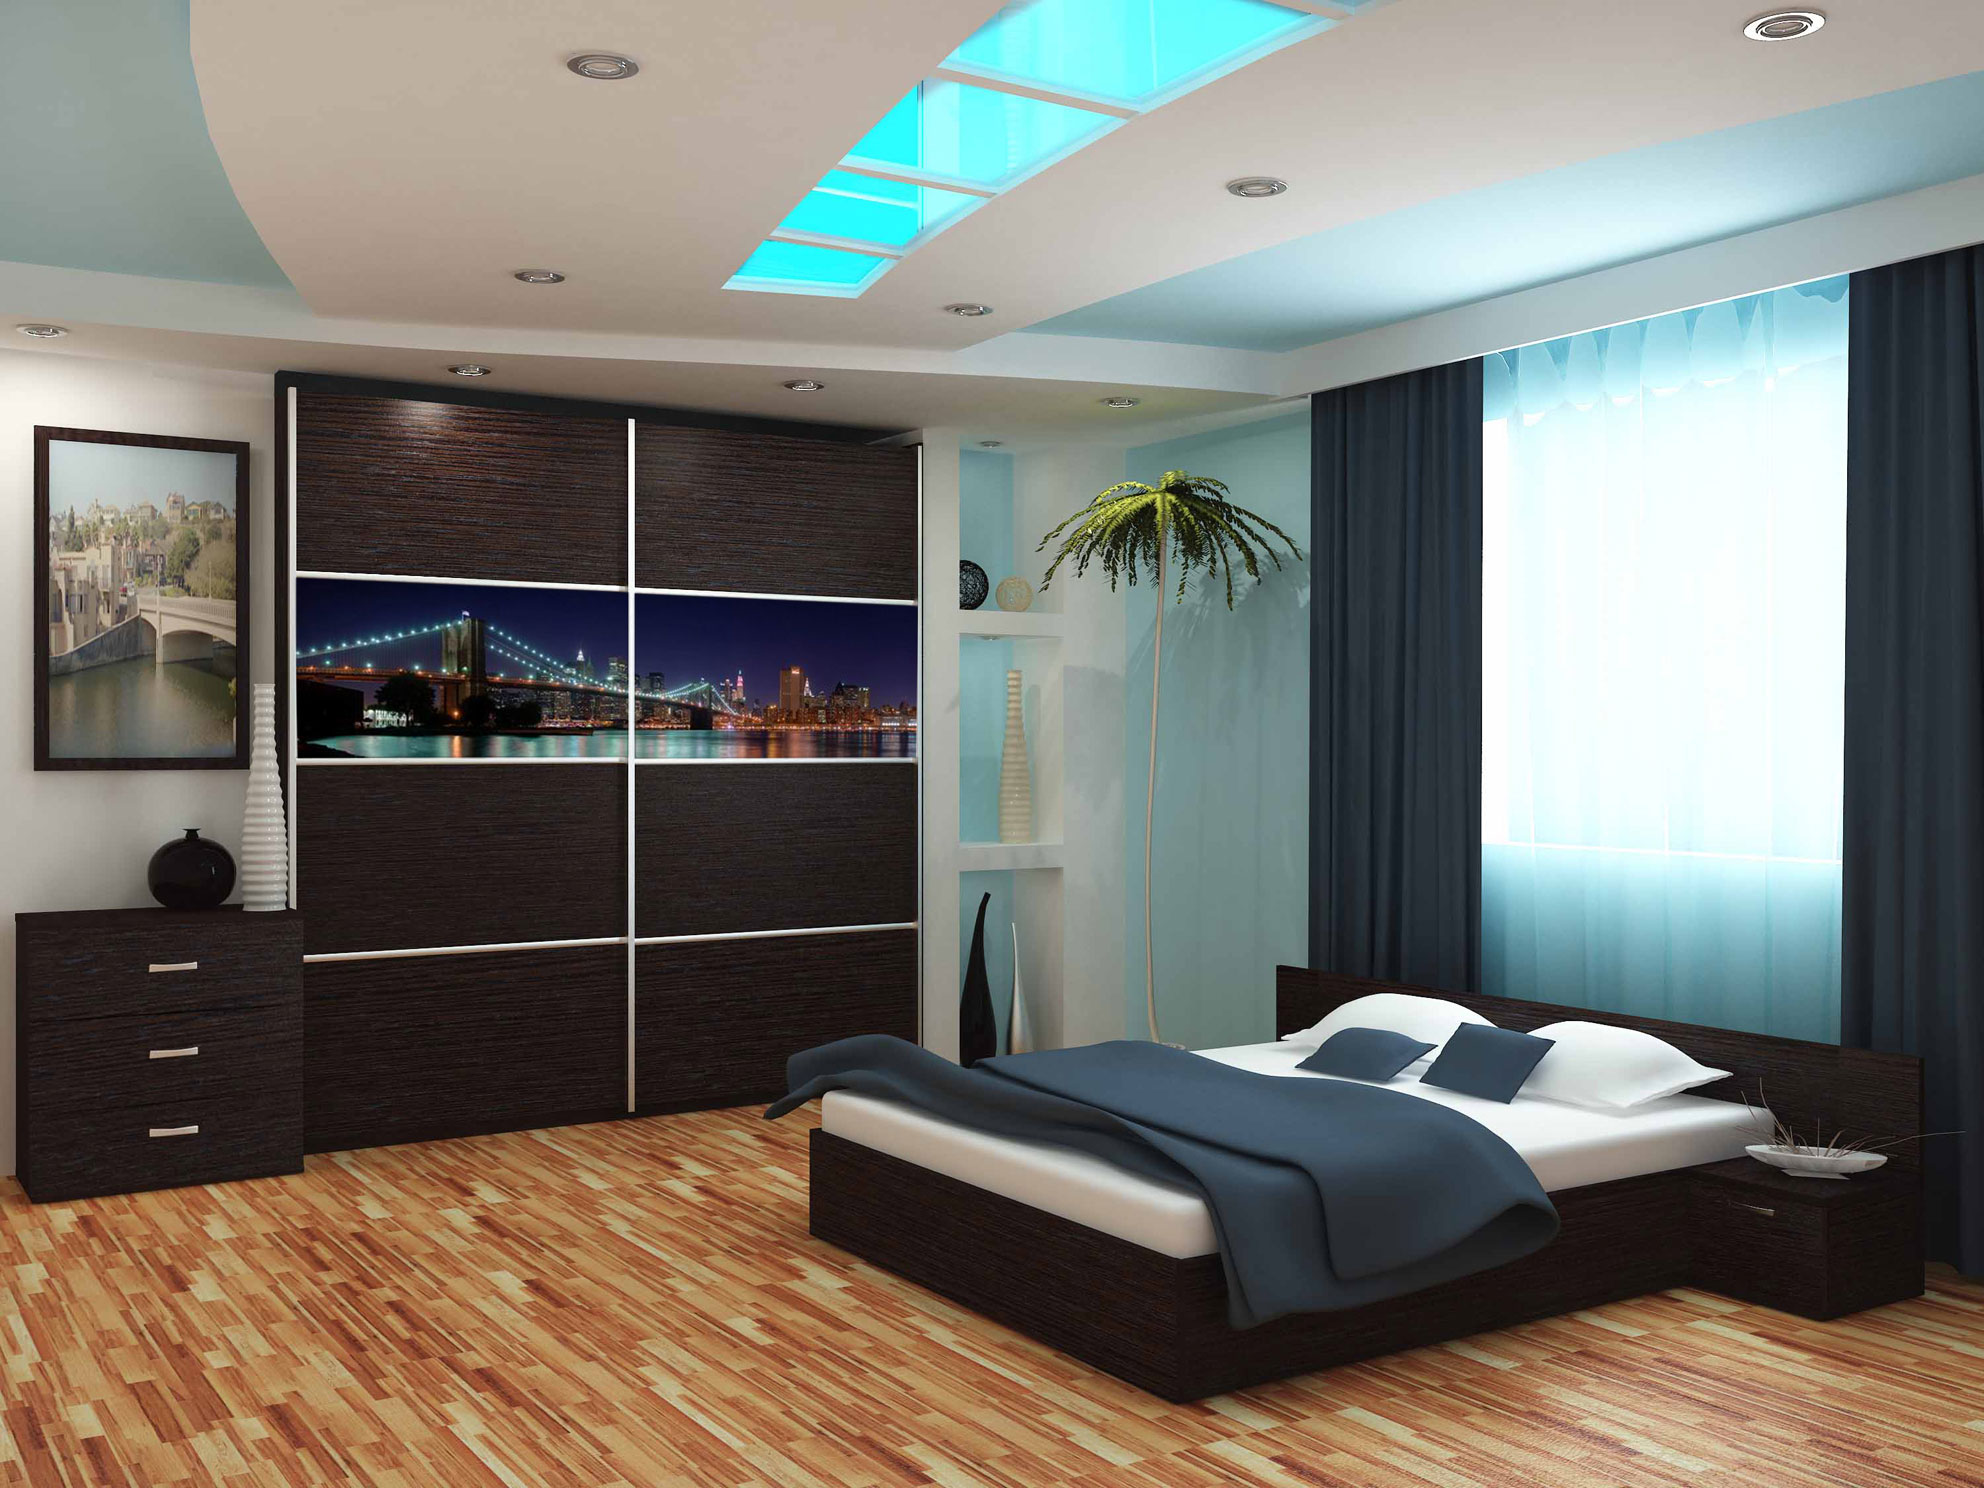
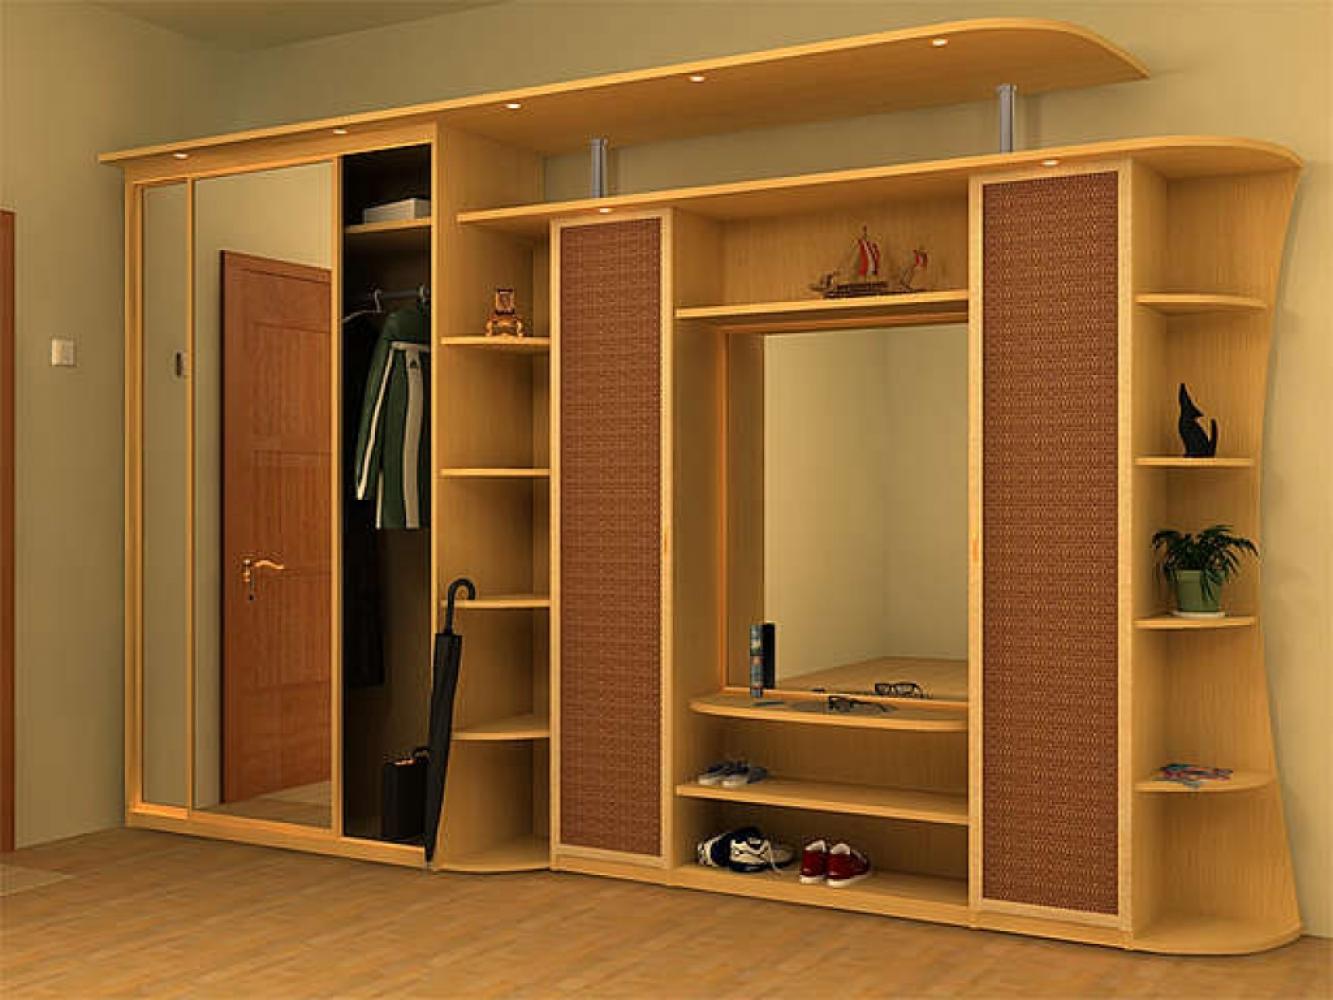
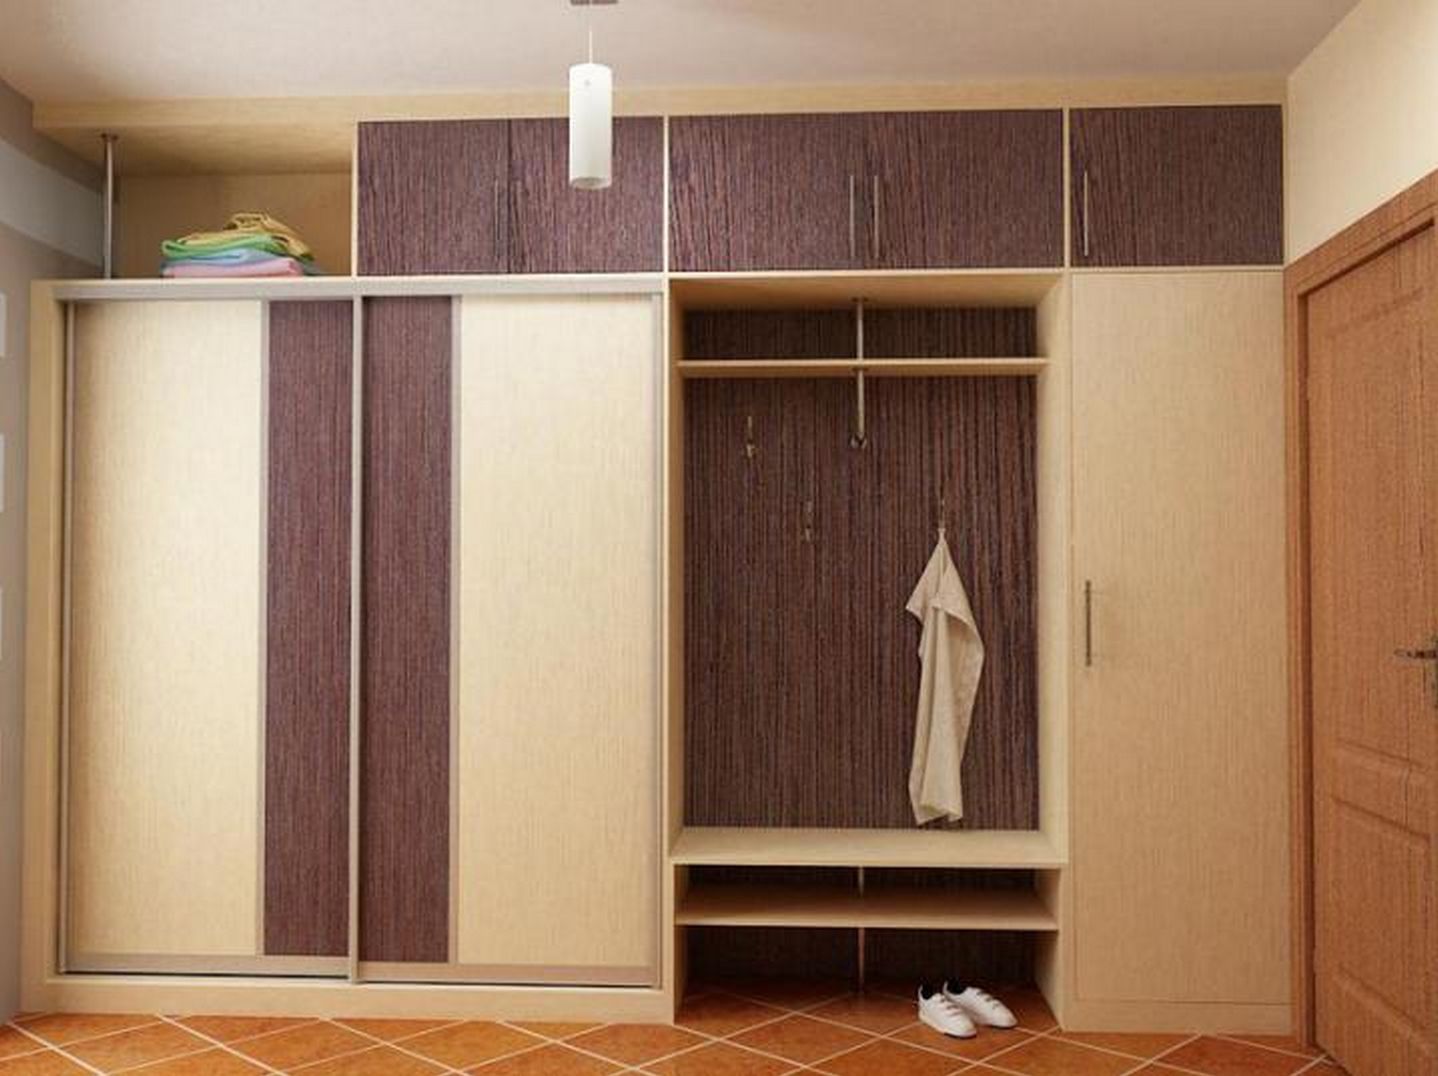
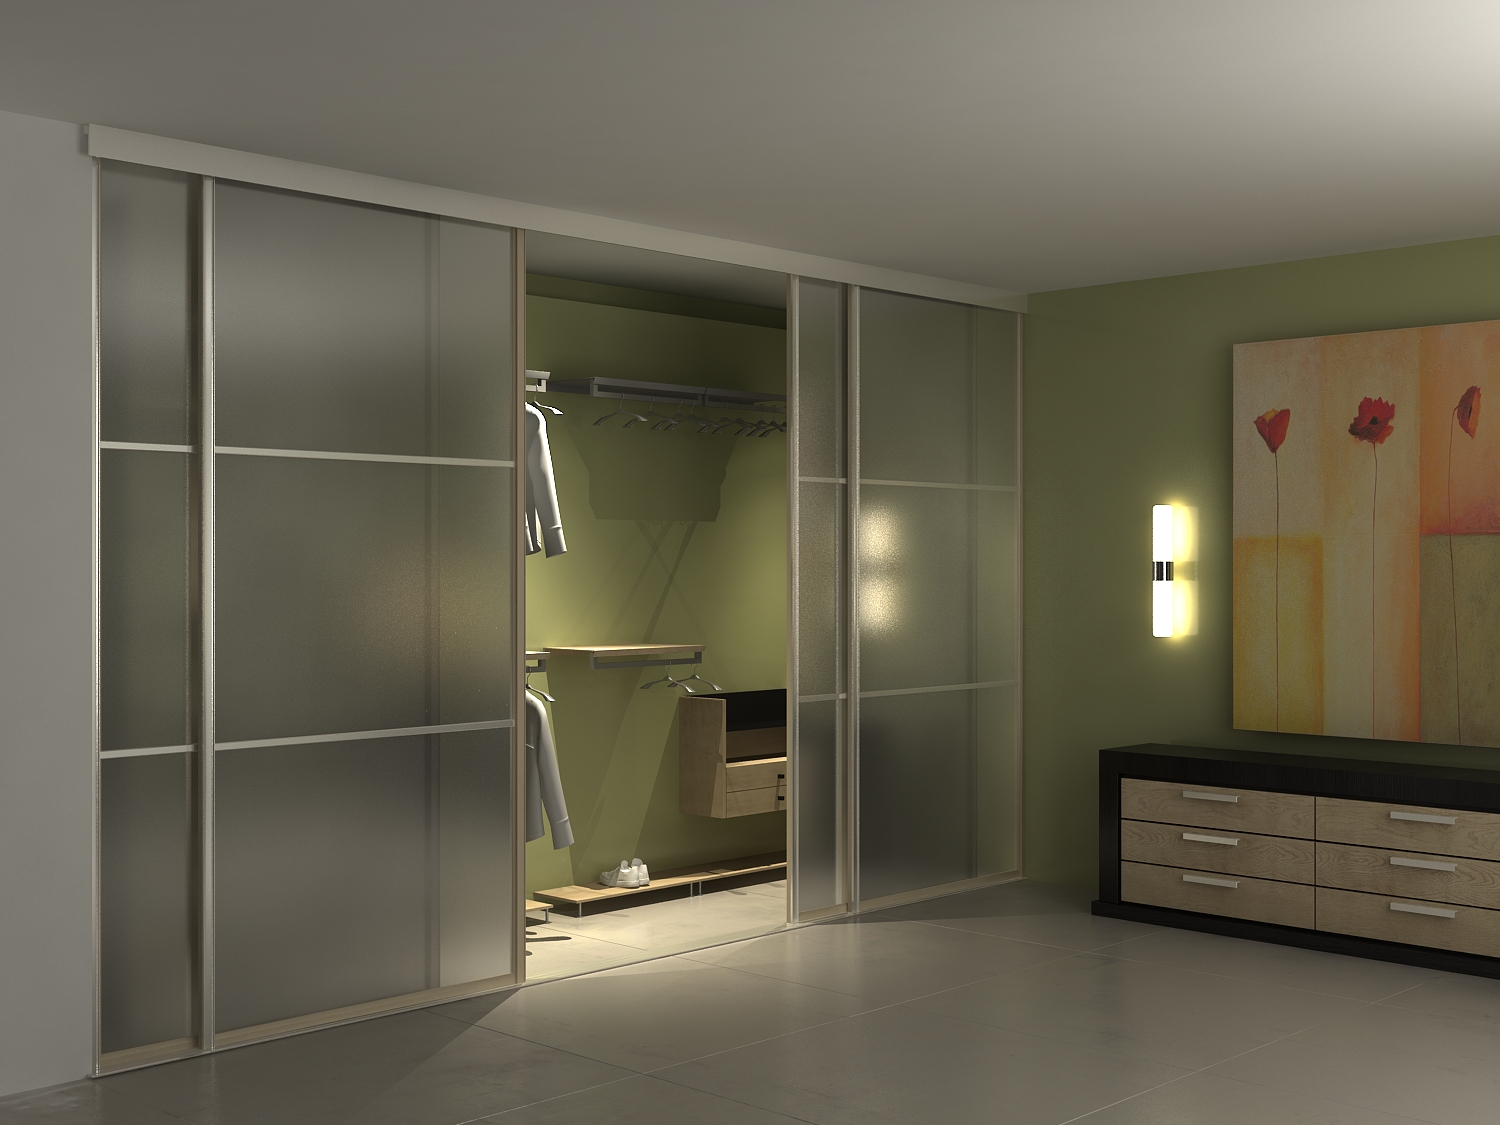
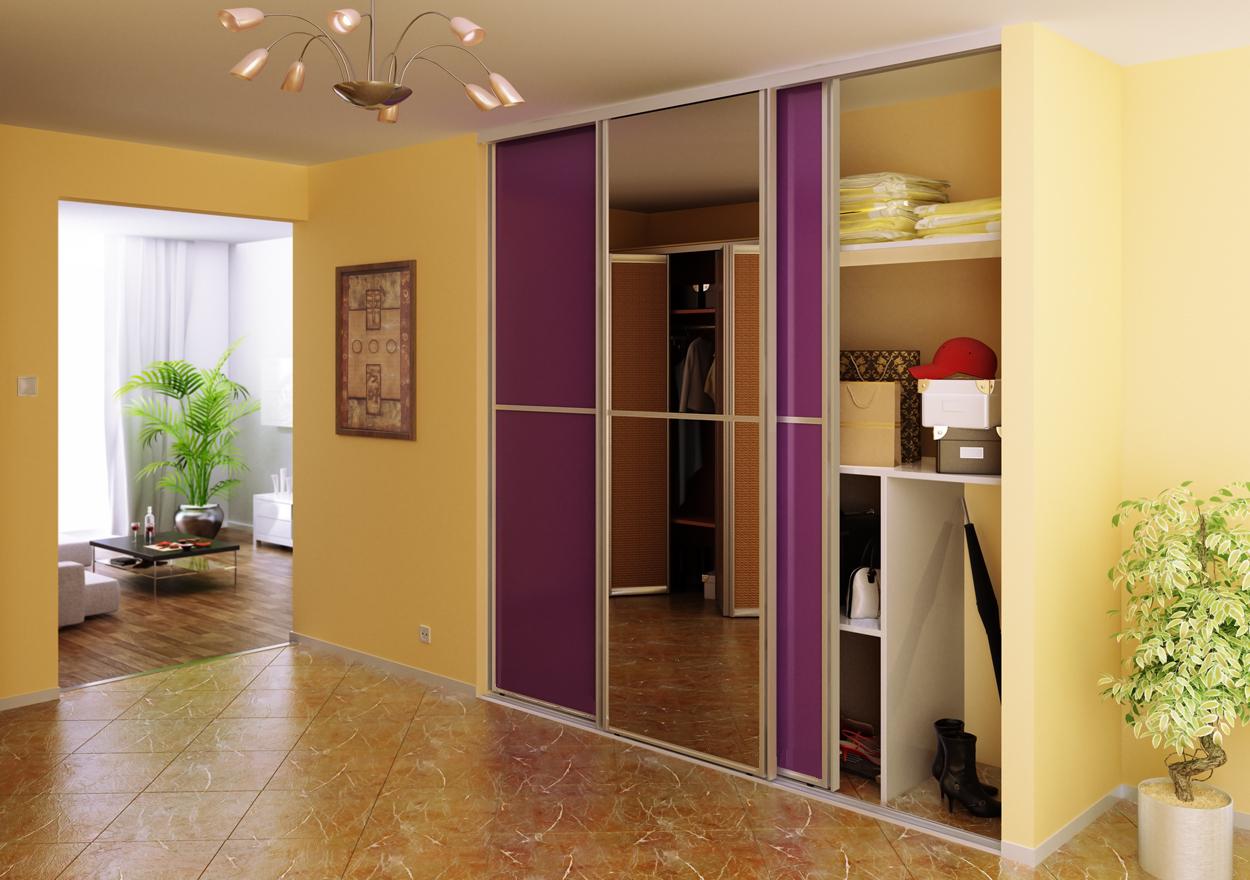
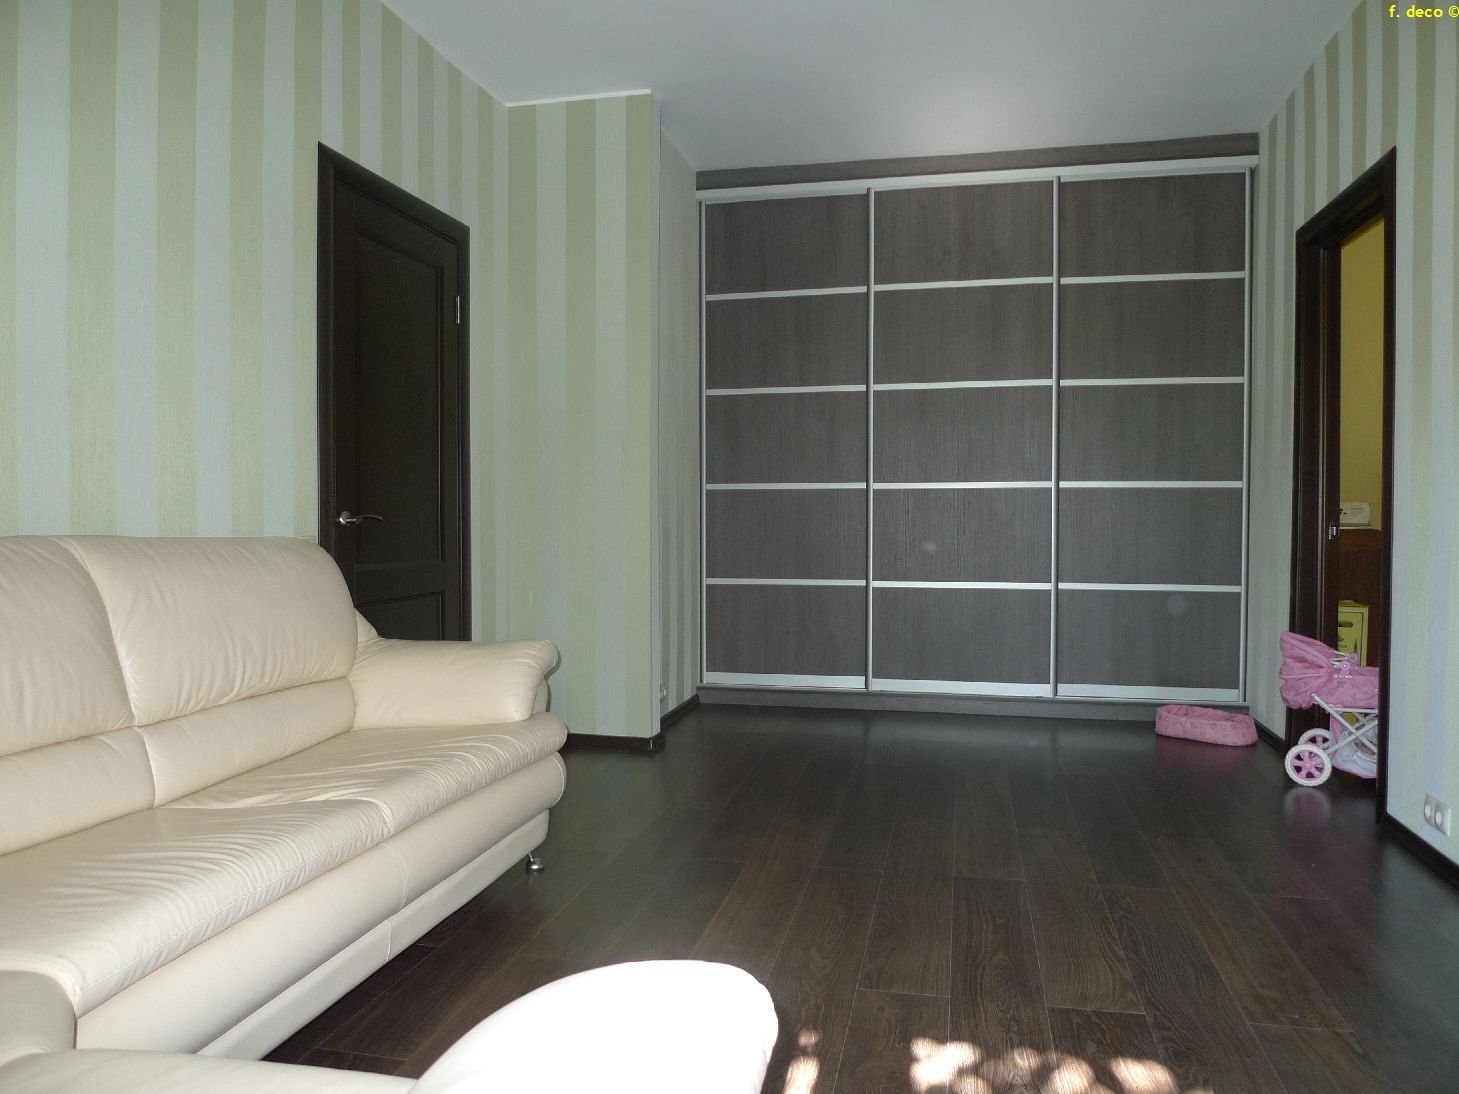
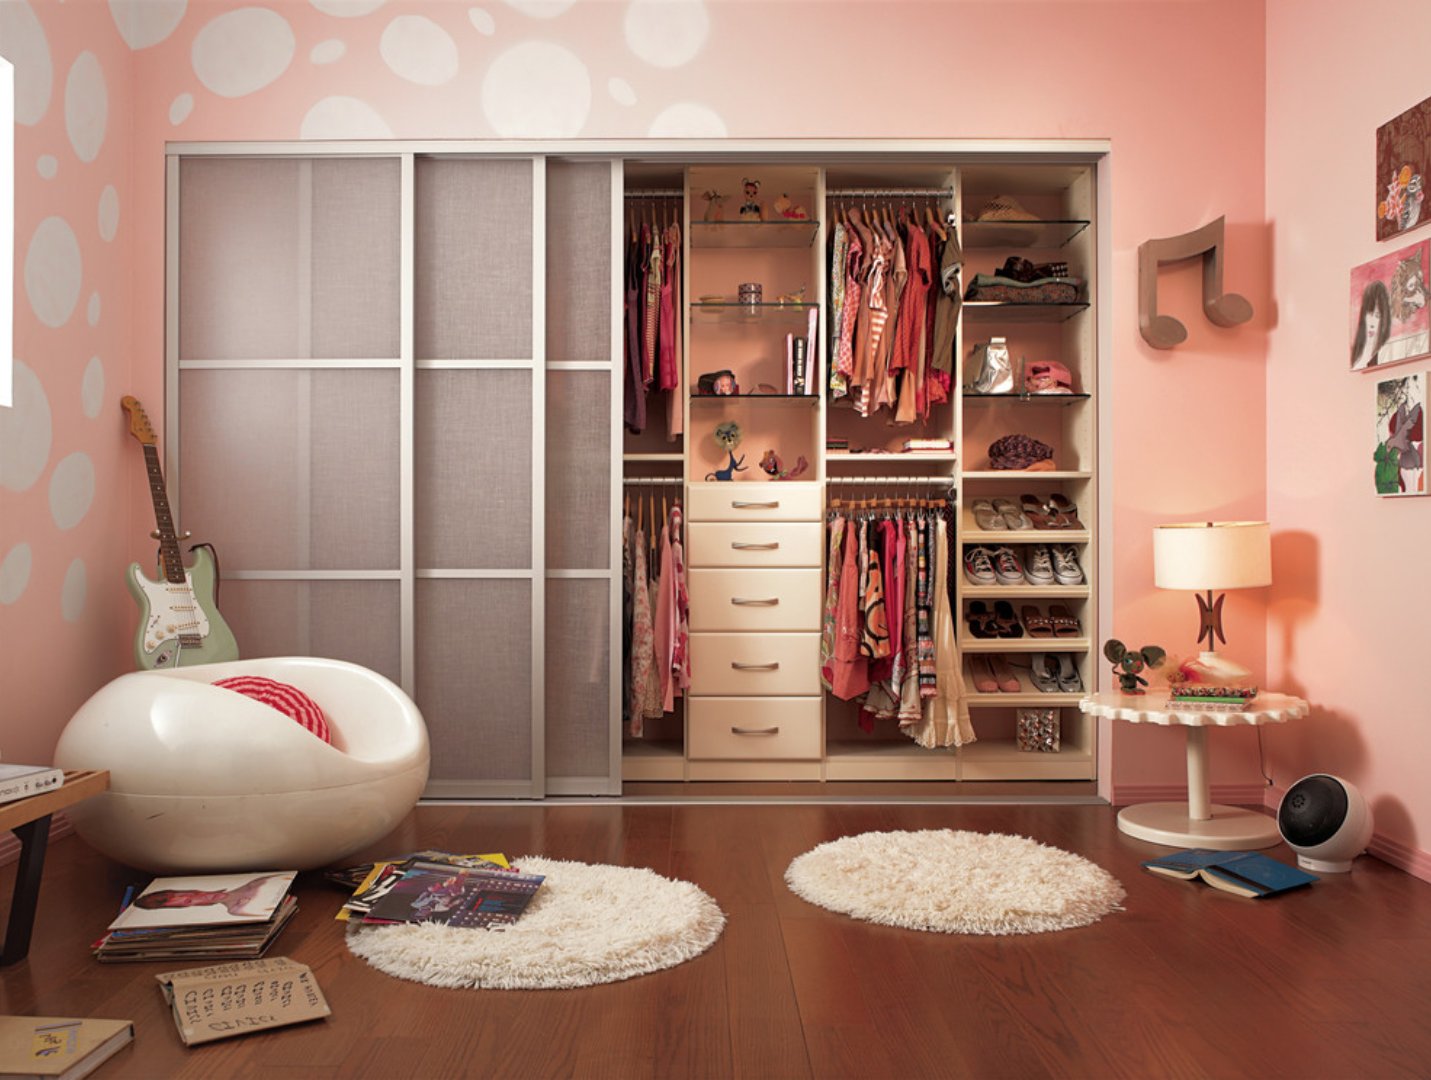
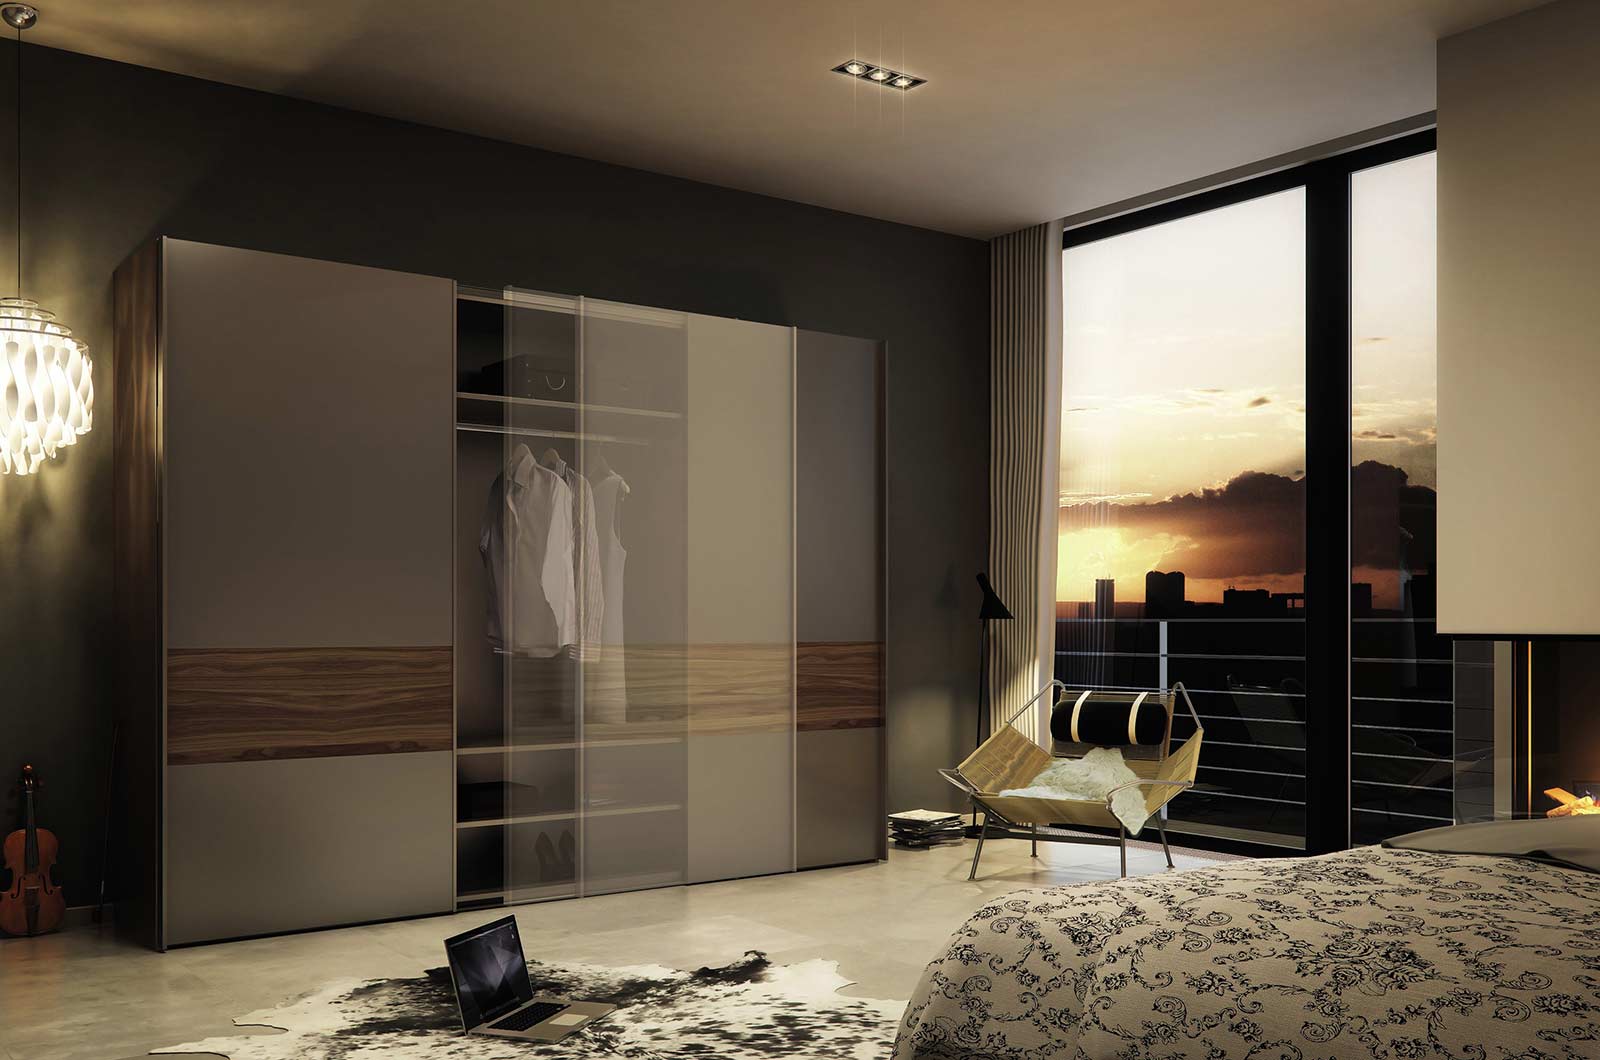
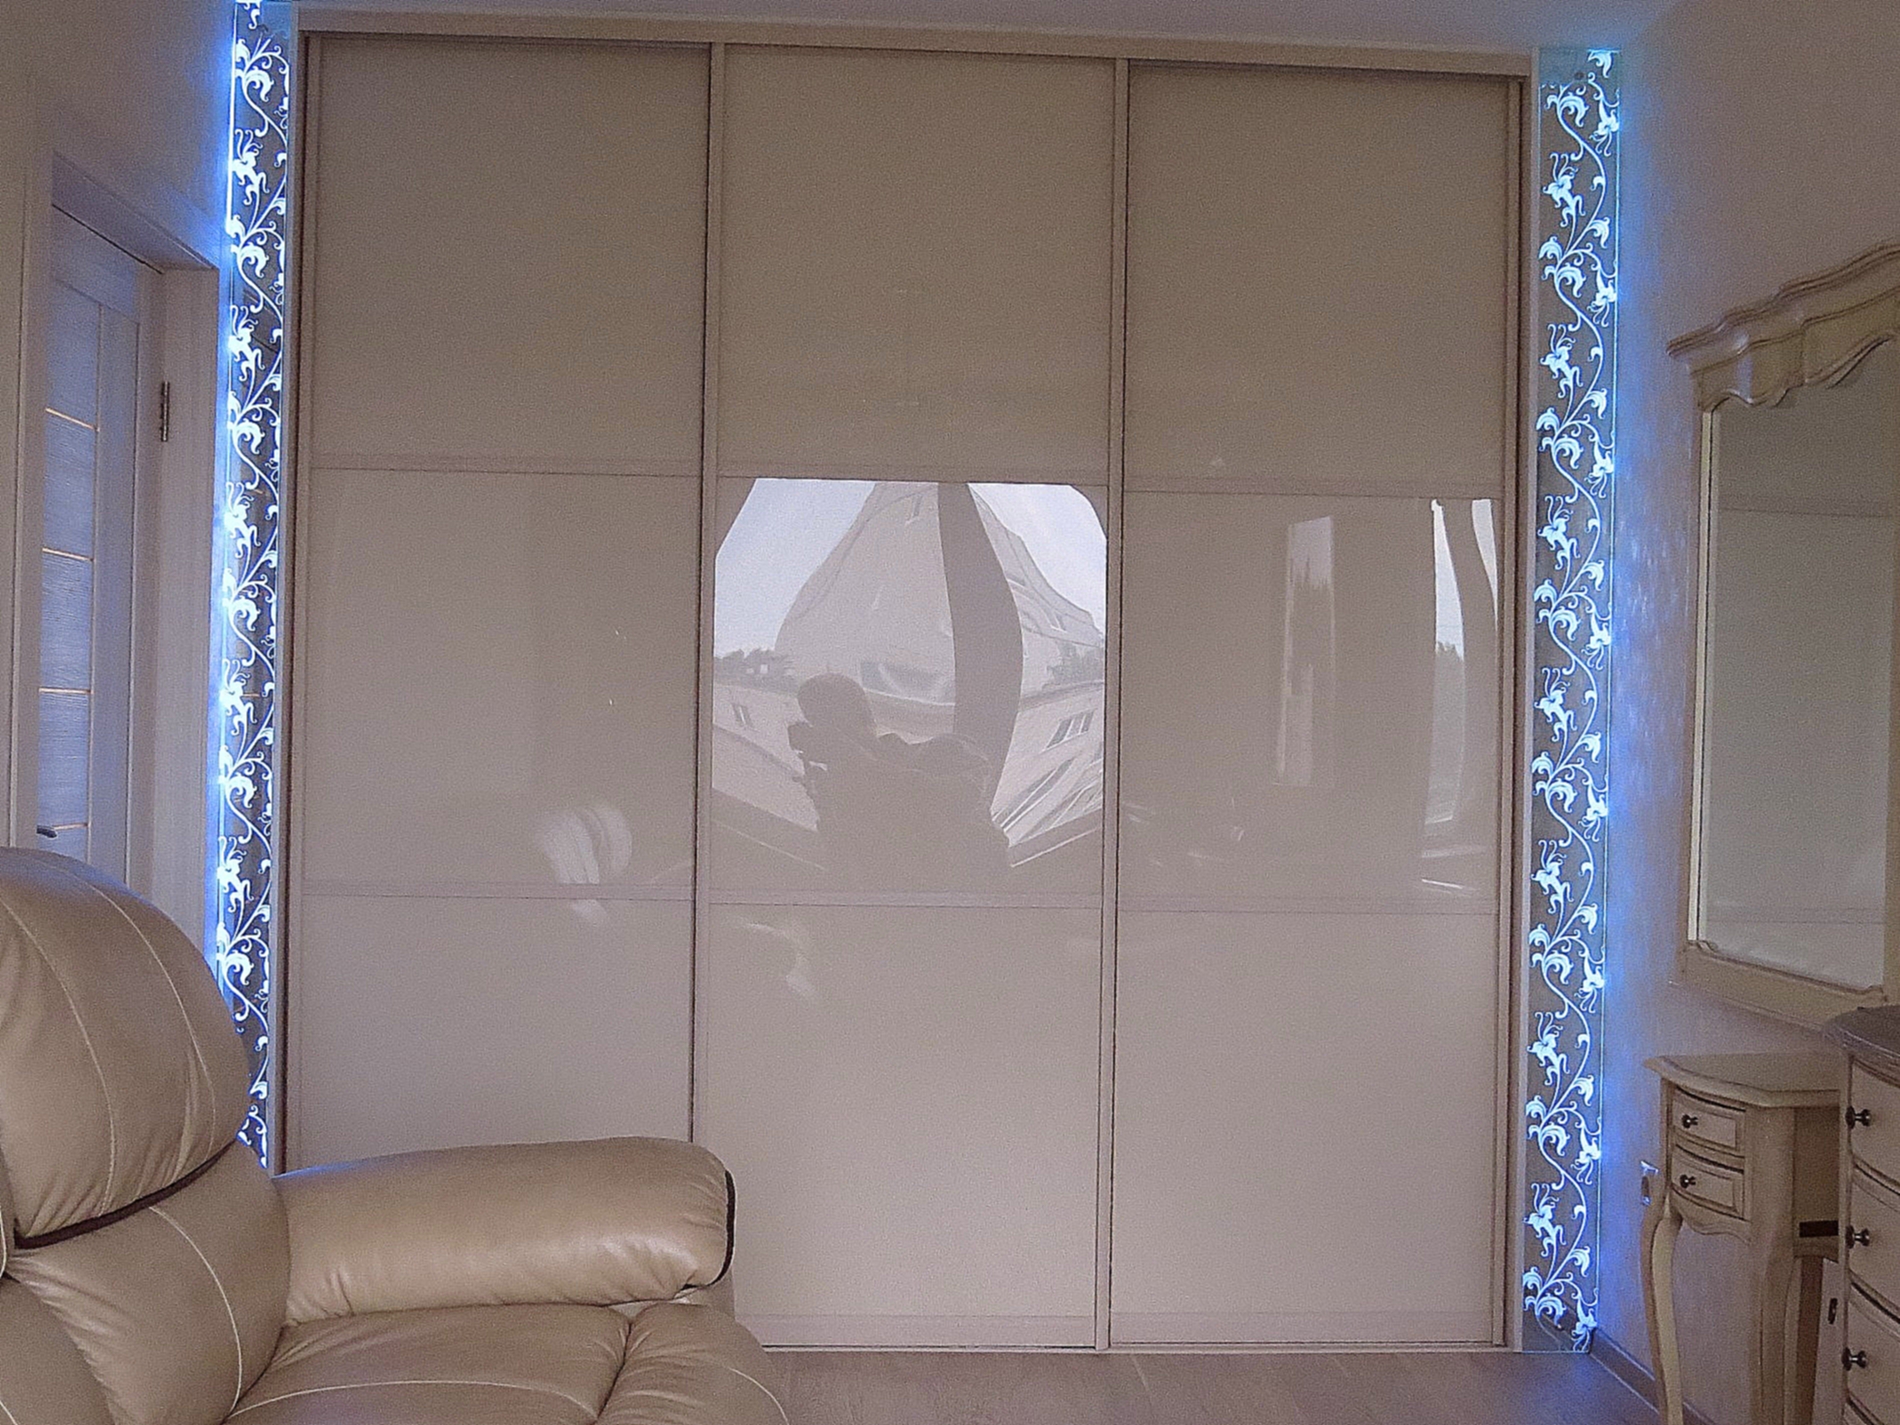
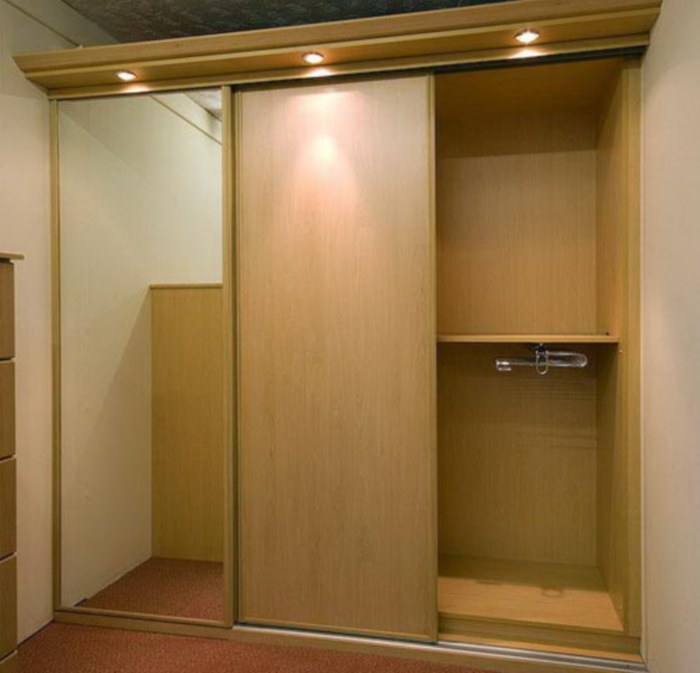
It is worth noting a simple wardrobe with three doors and external lighting with point lights. Such a project does not take up much space and is easy to install.
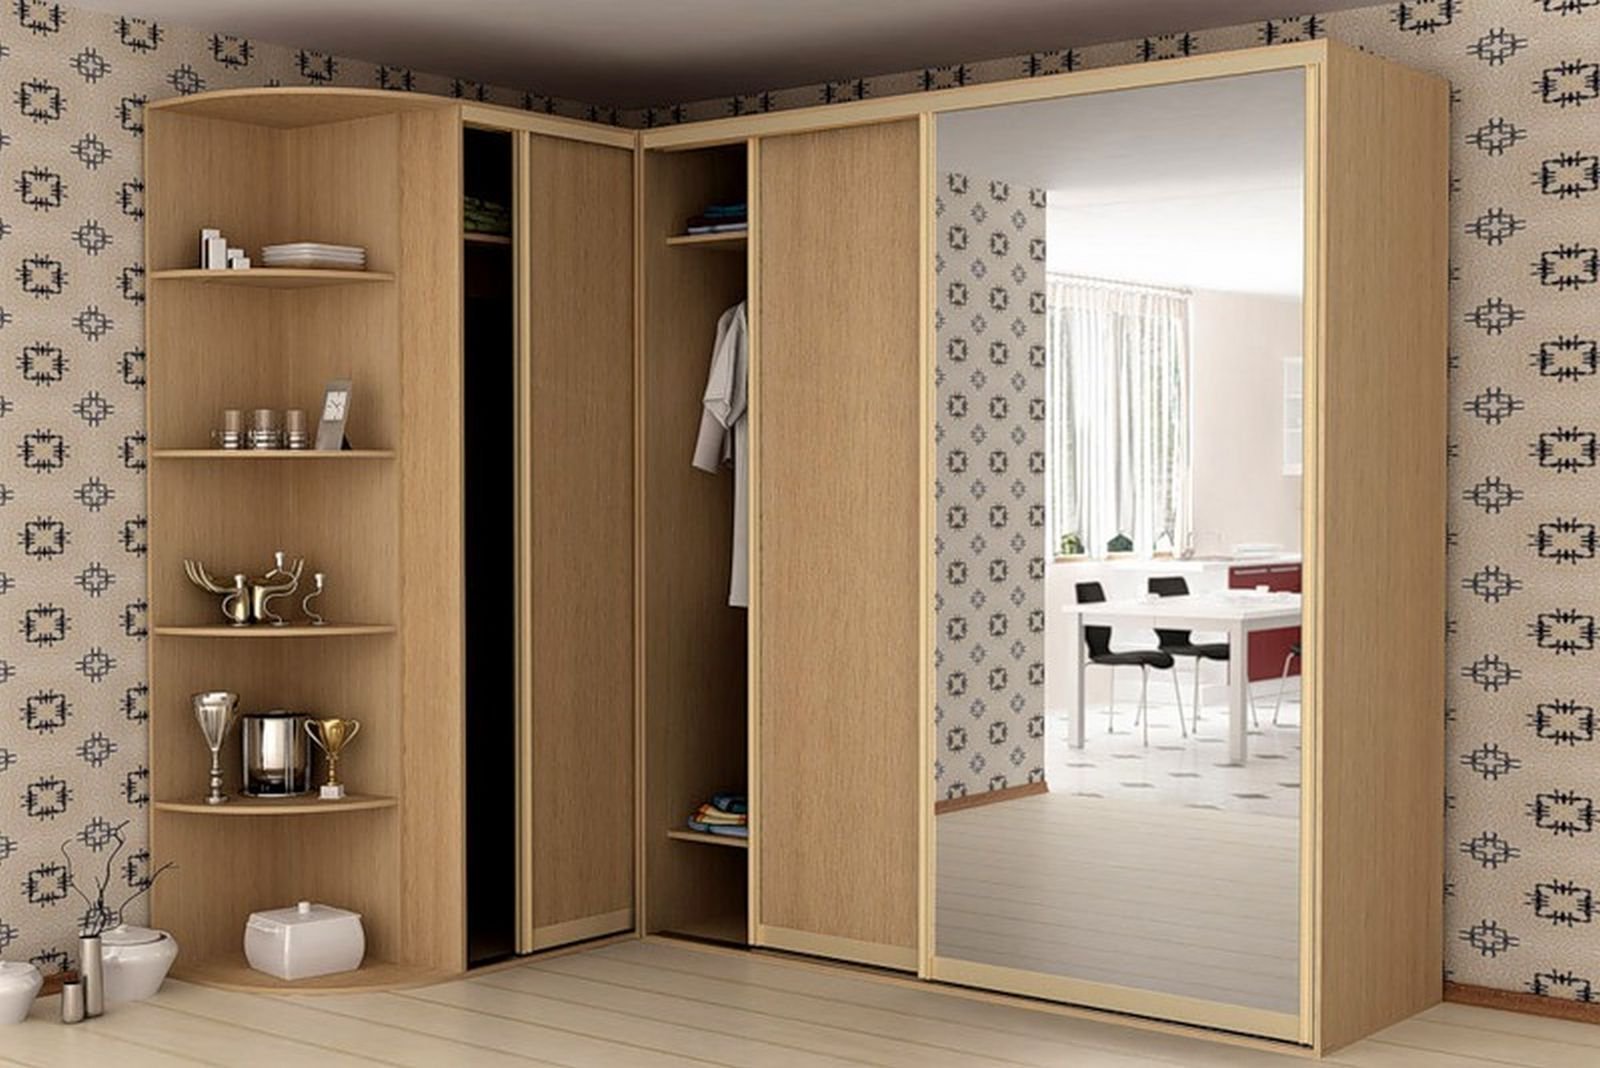
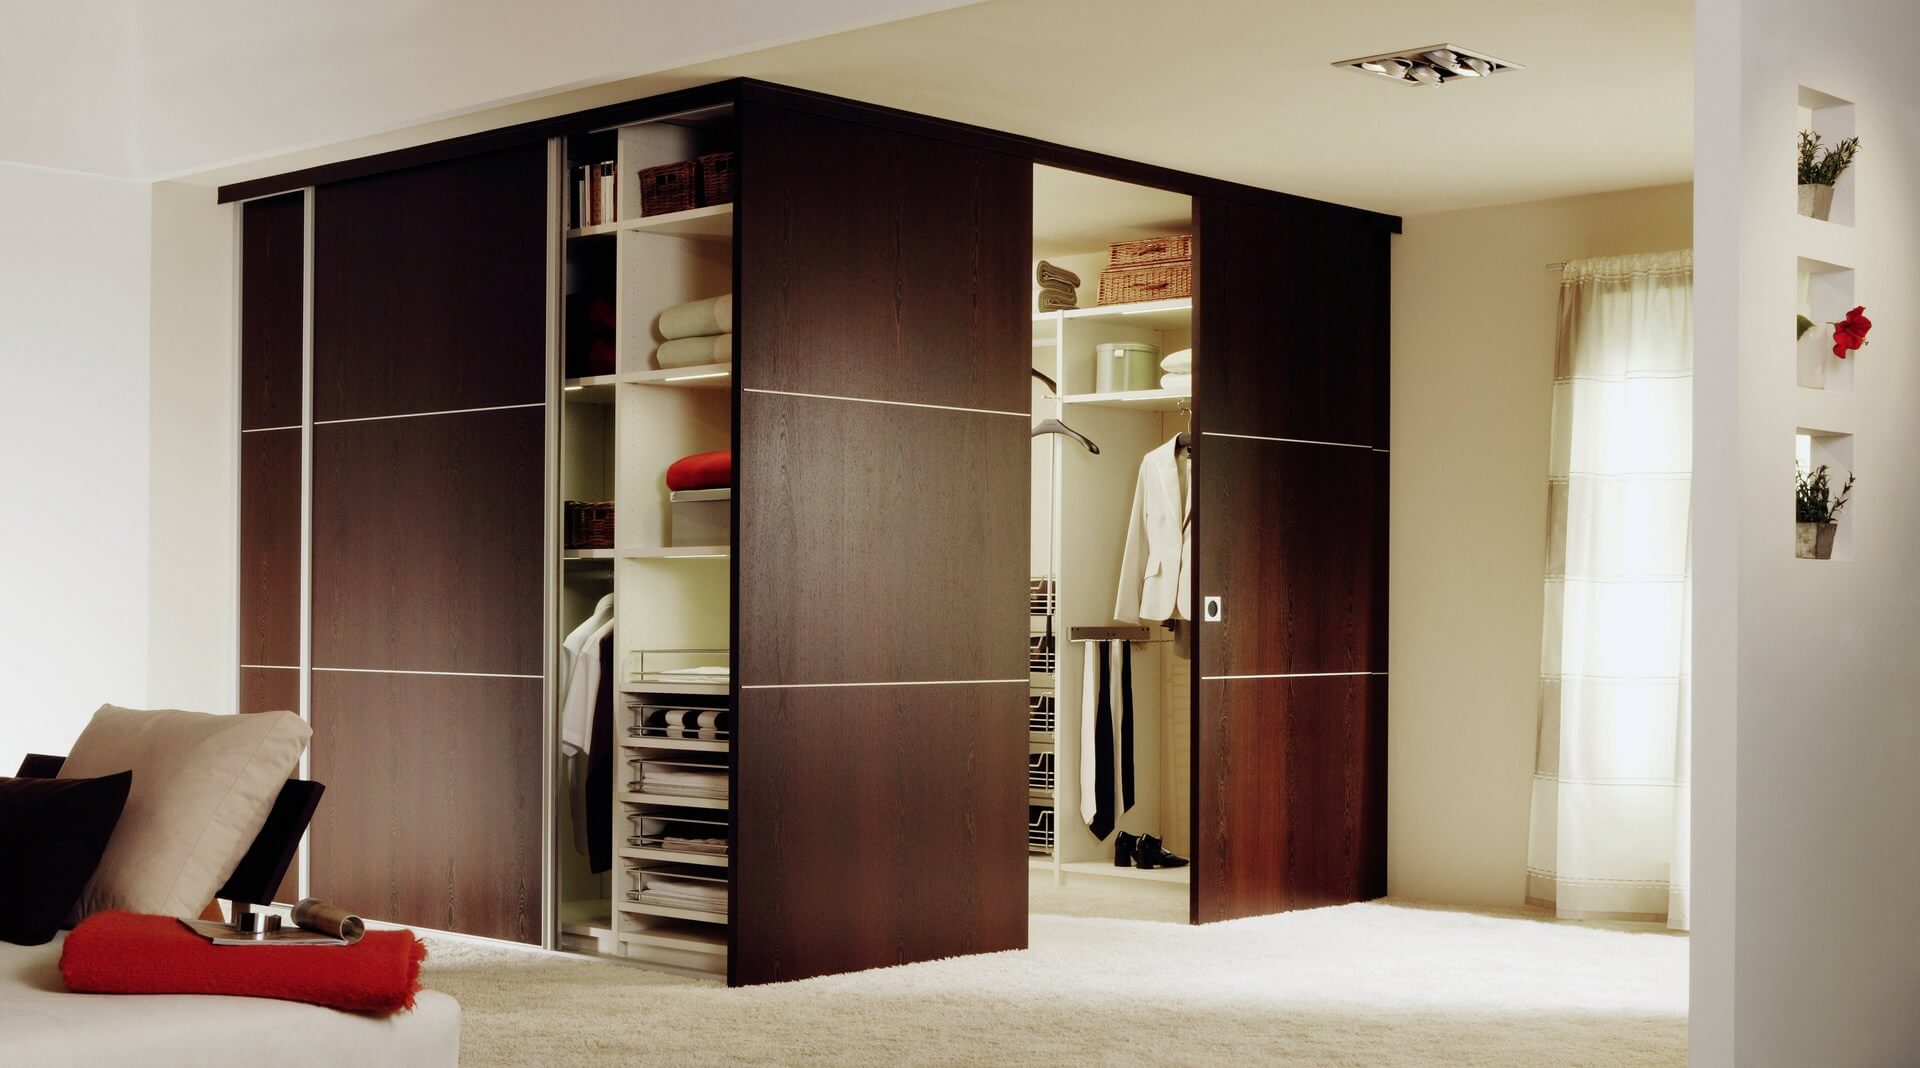
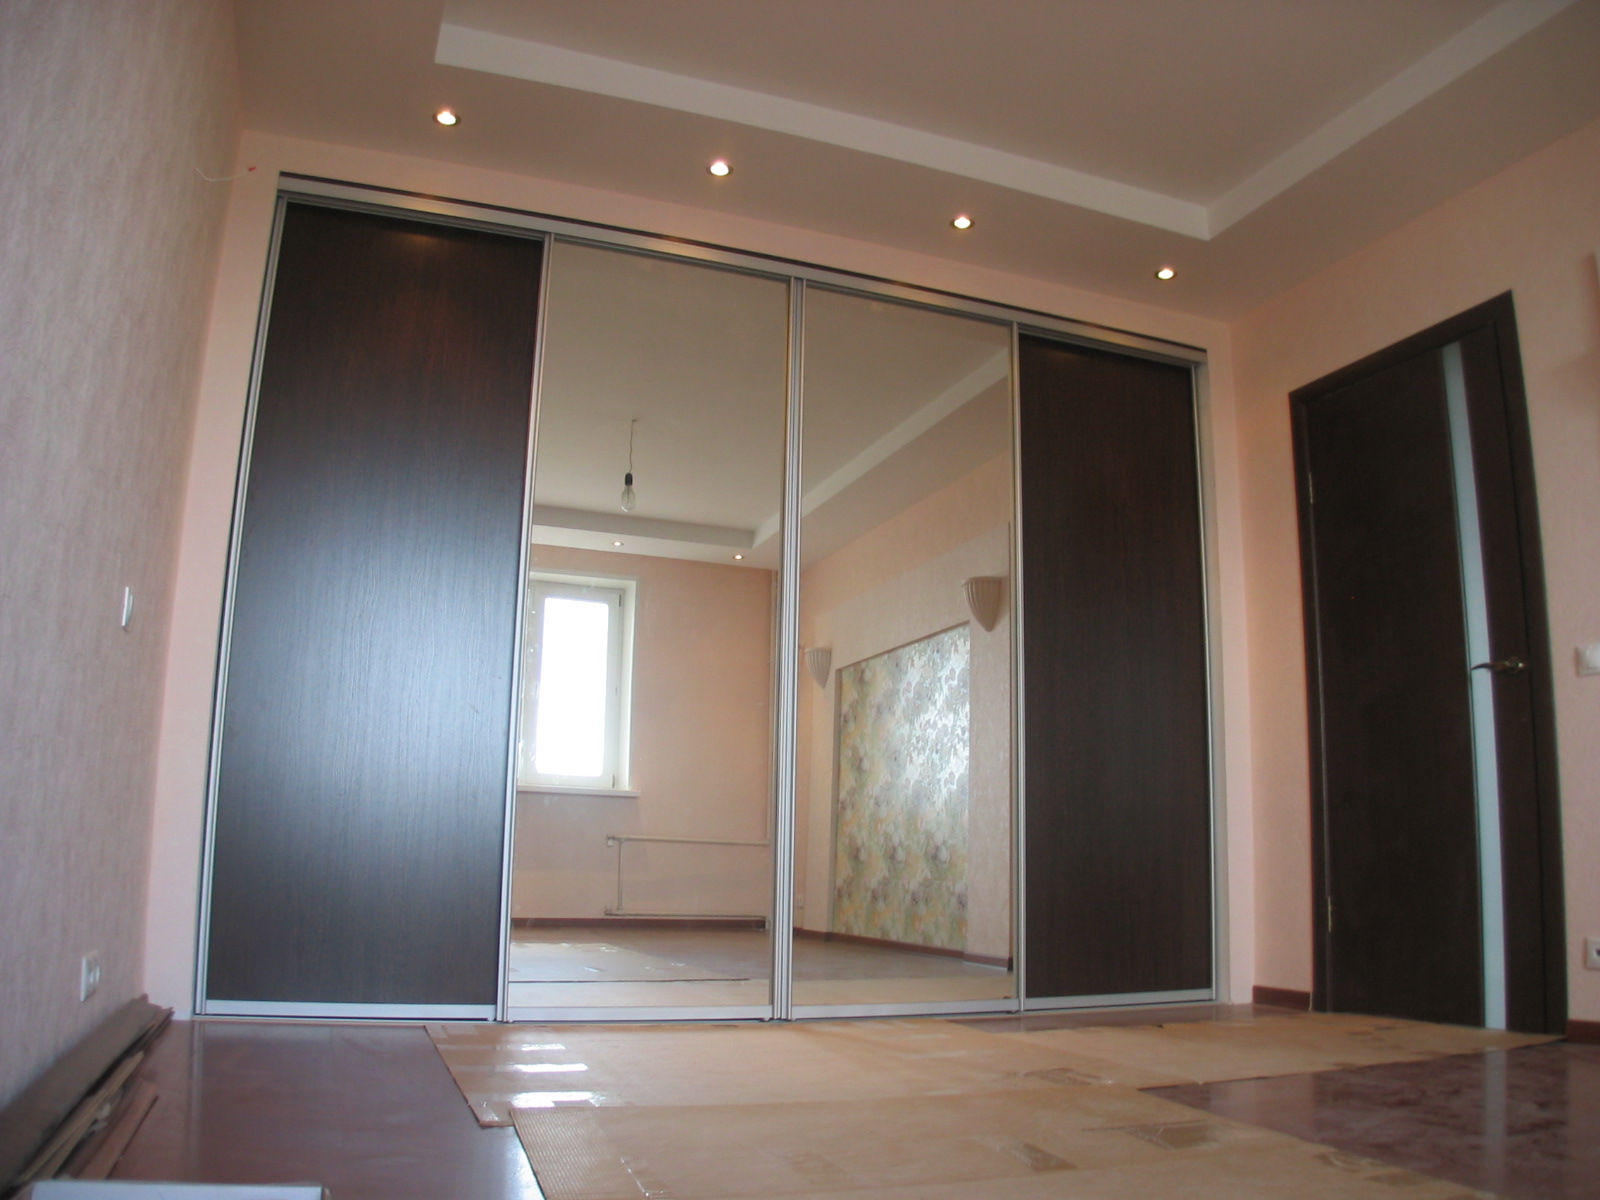
Elegant homemade corner cabinet. This model will allow you to store the entire family wardrobe in one place.
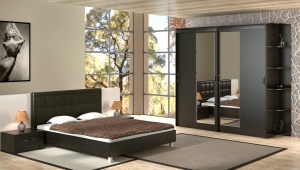
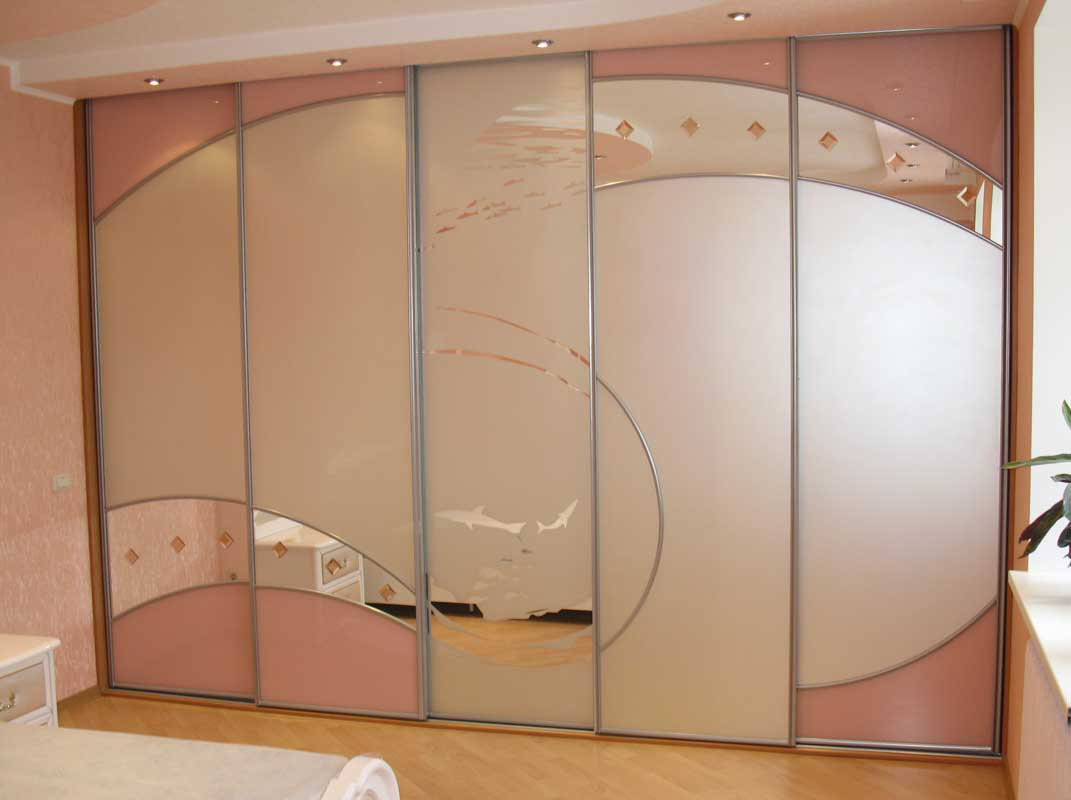
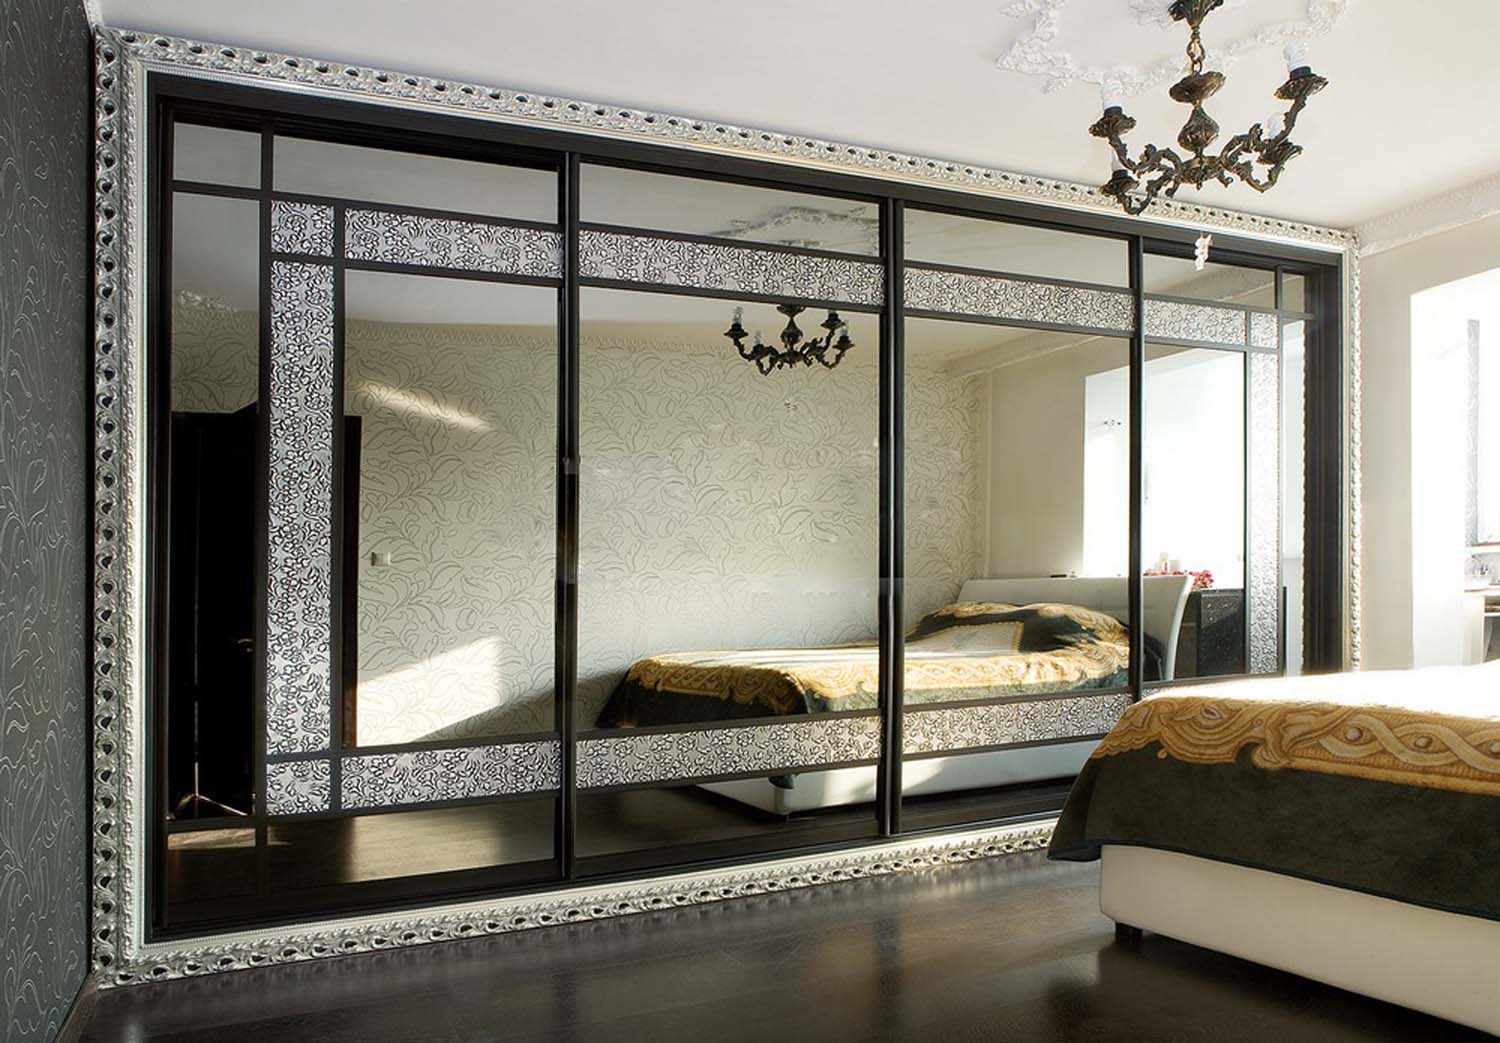
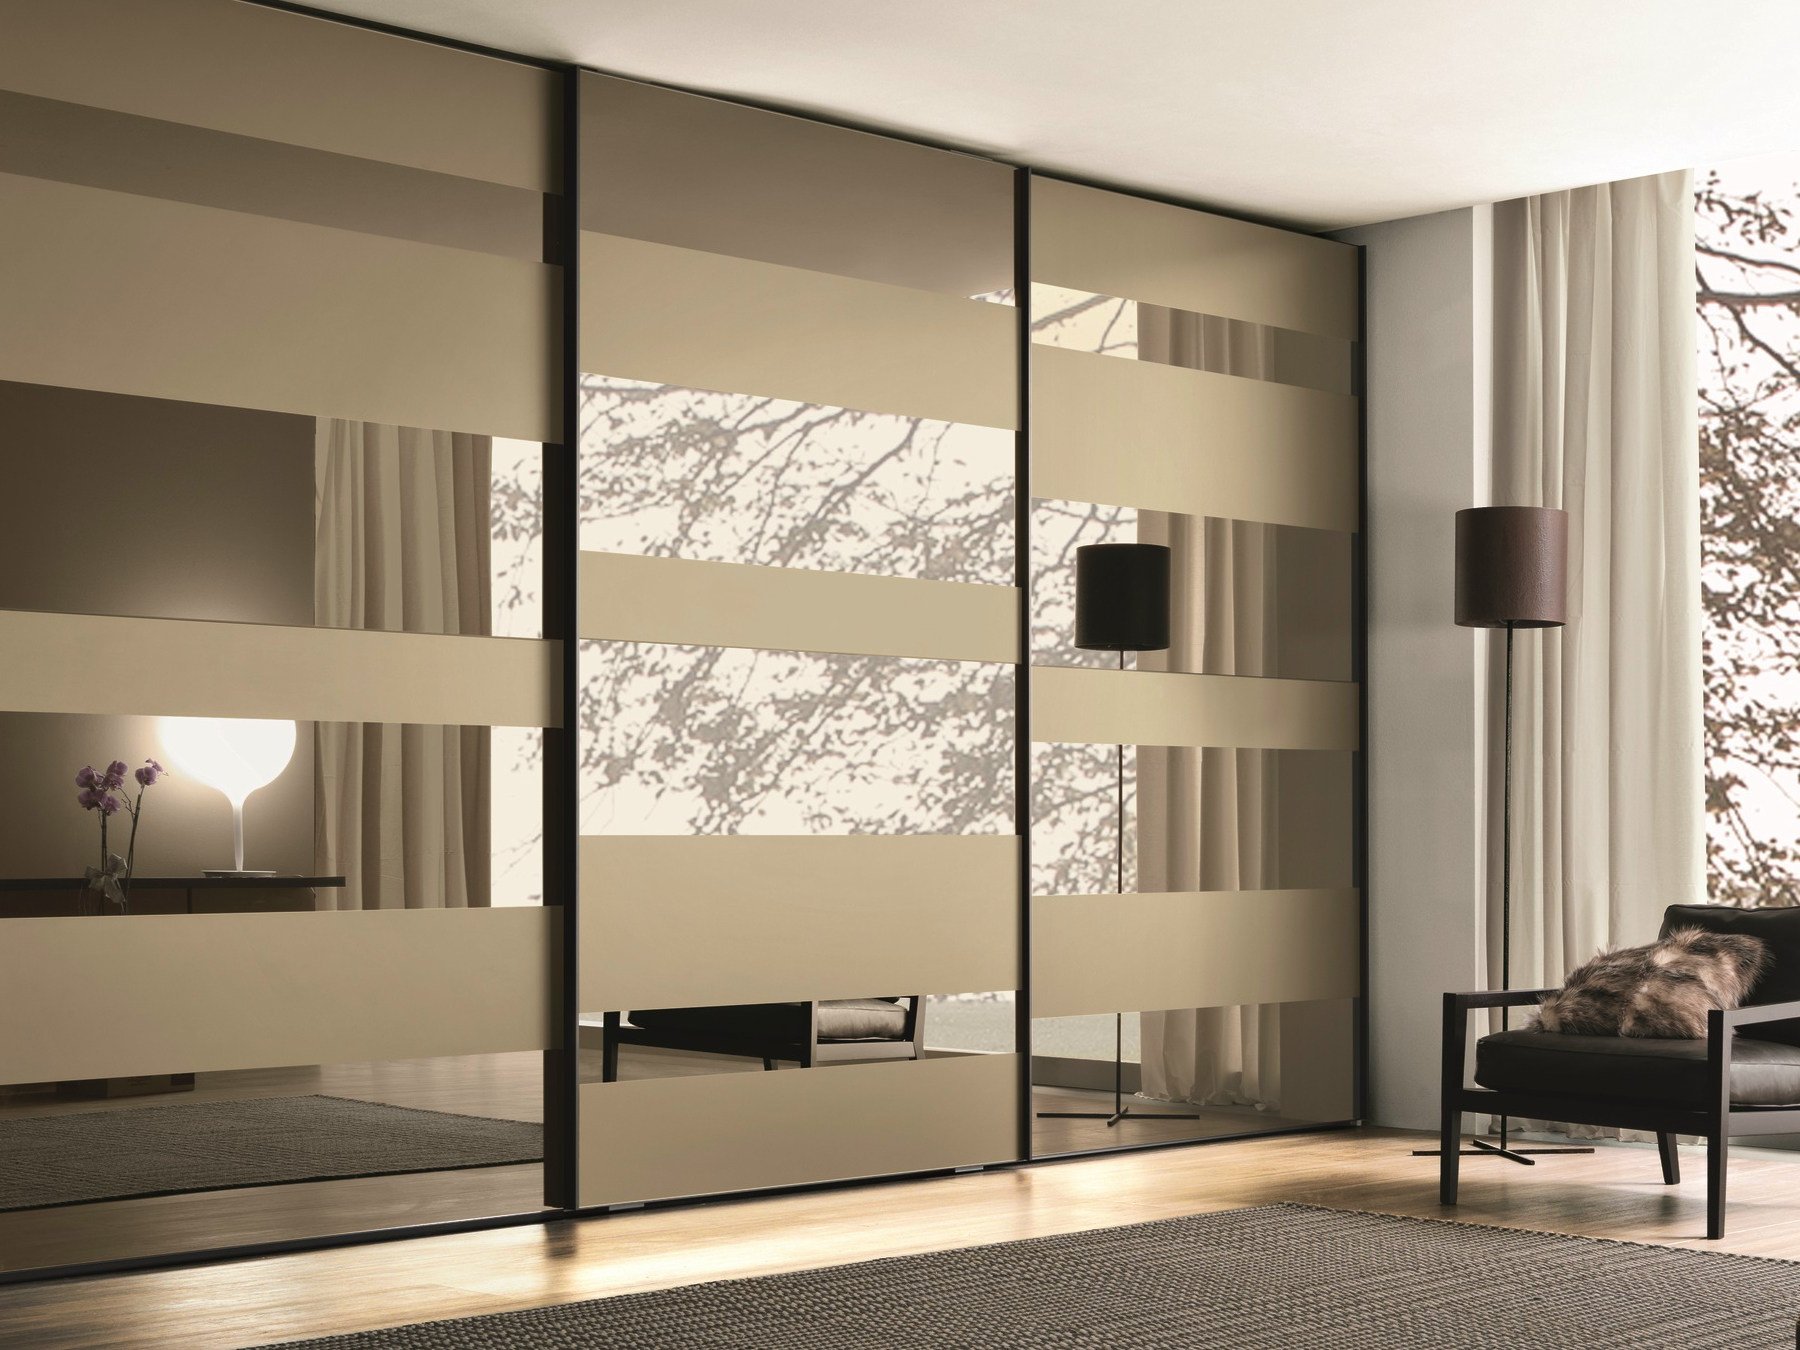
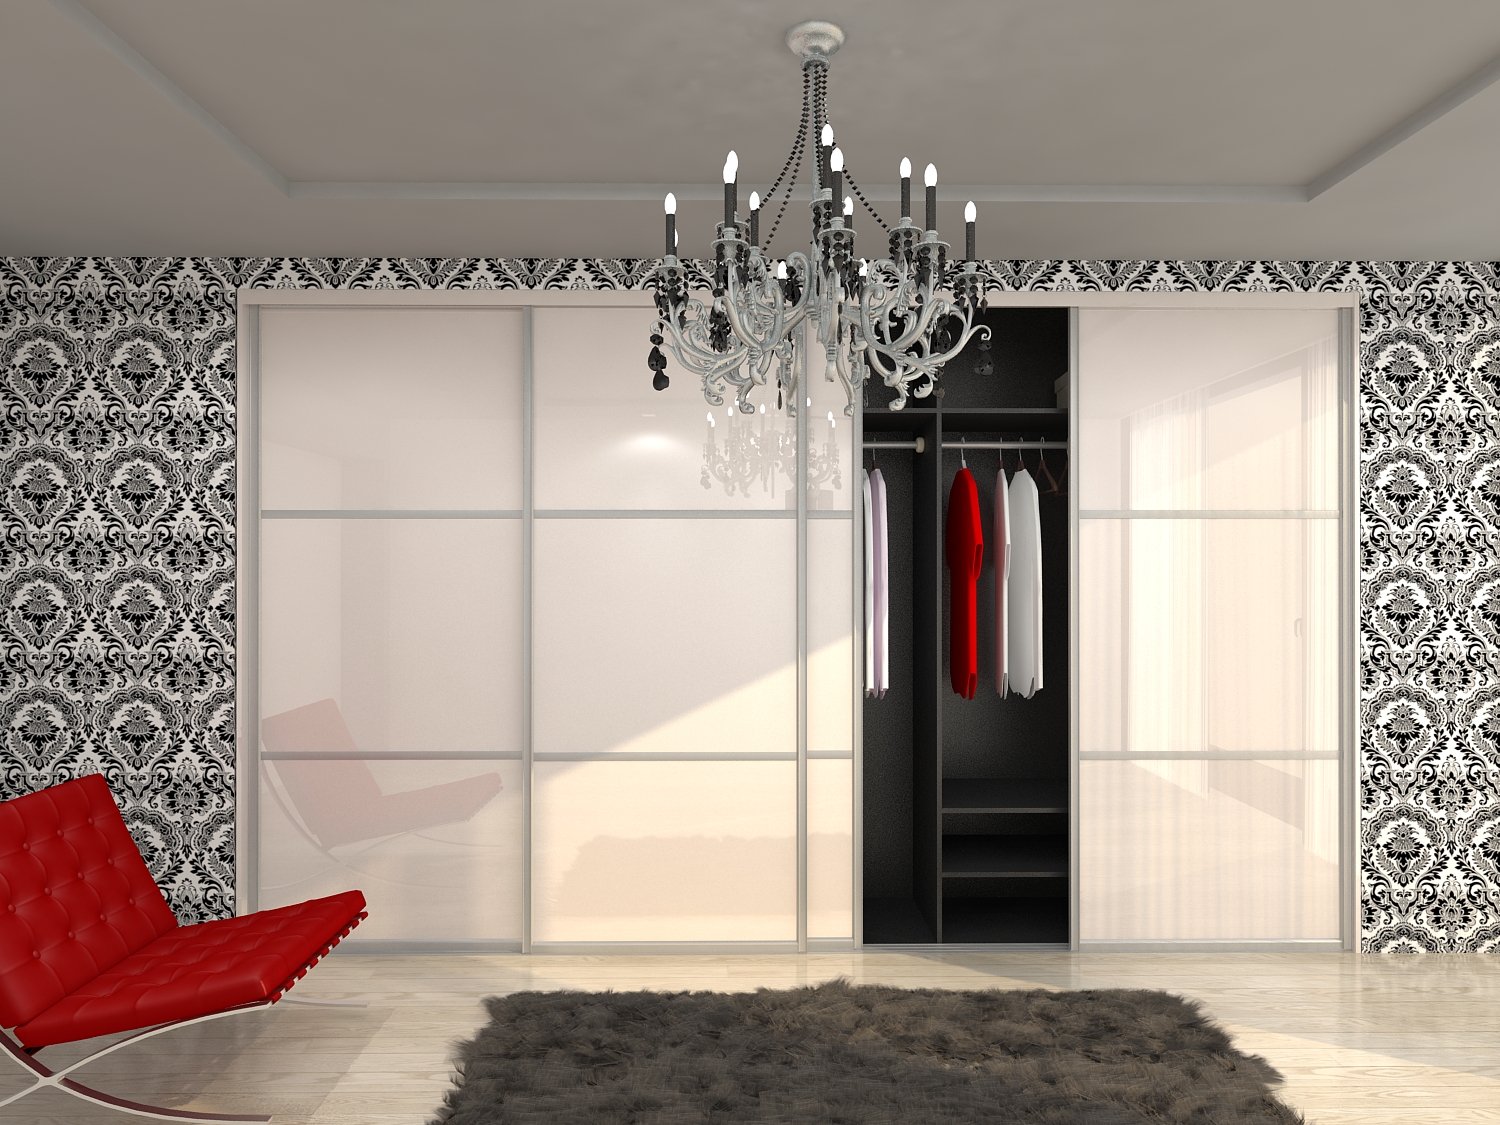
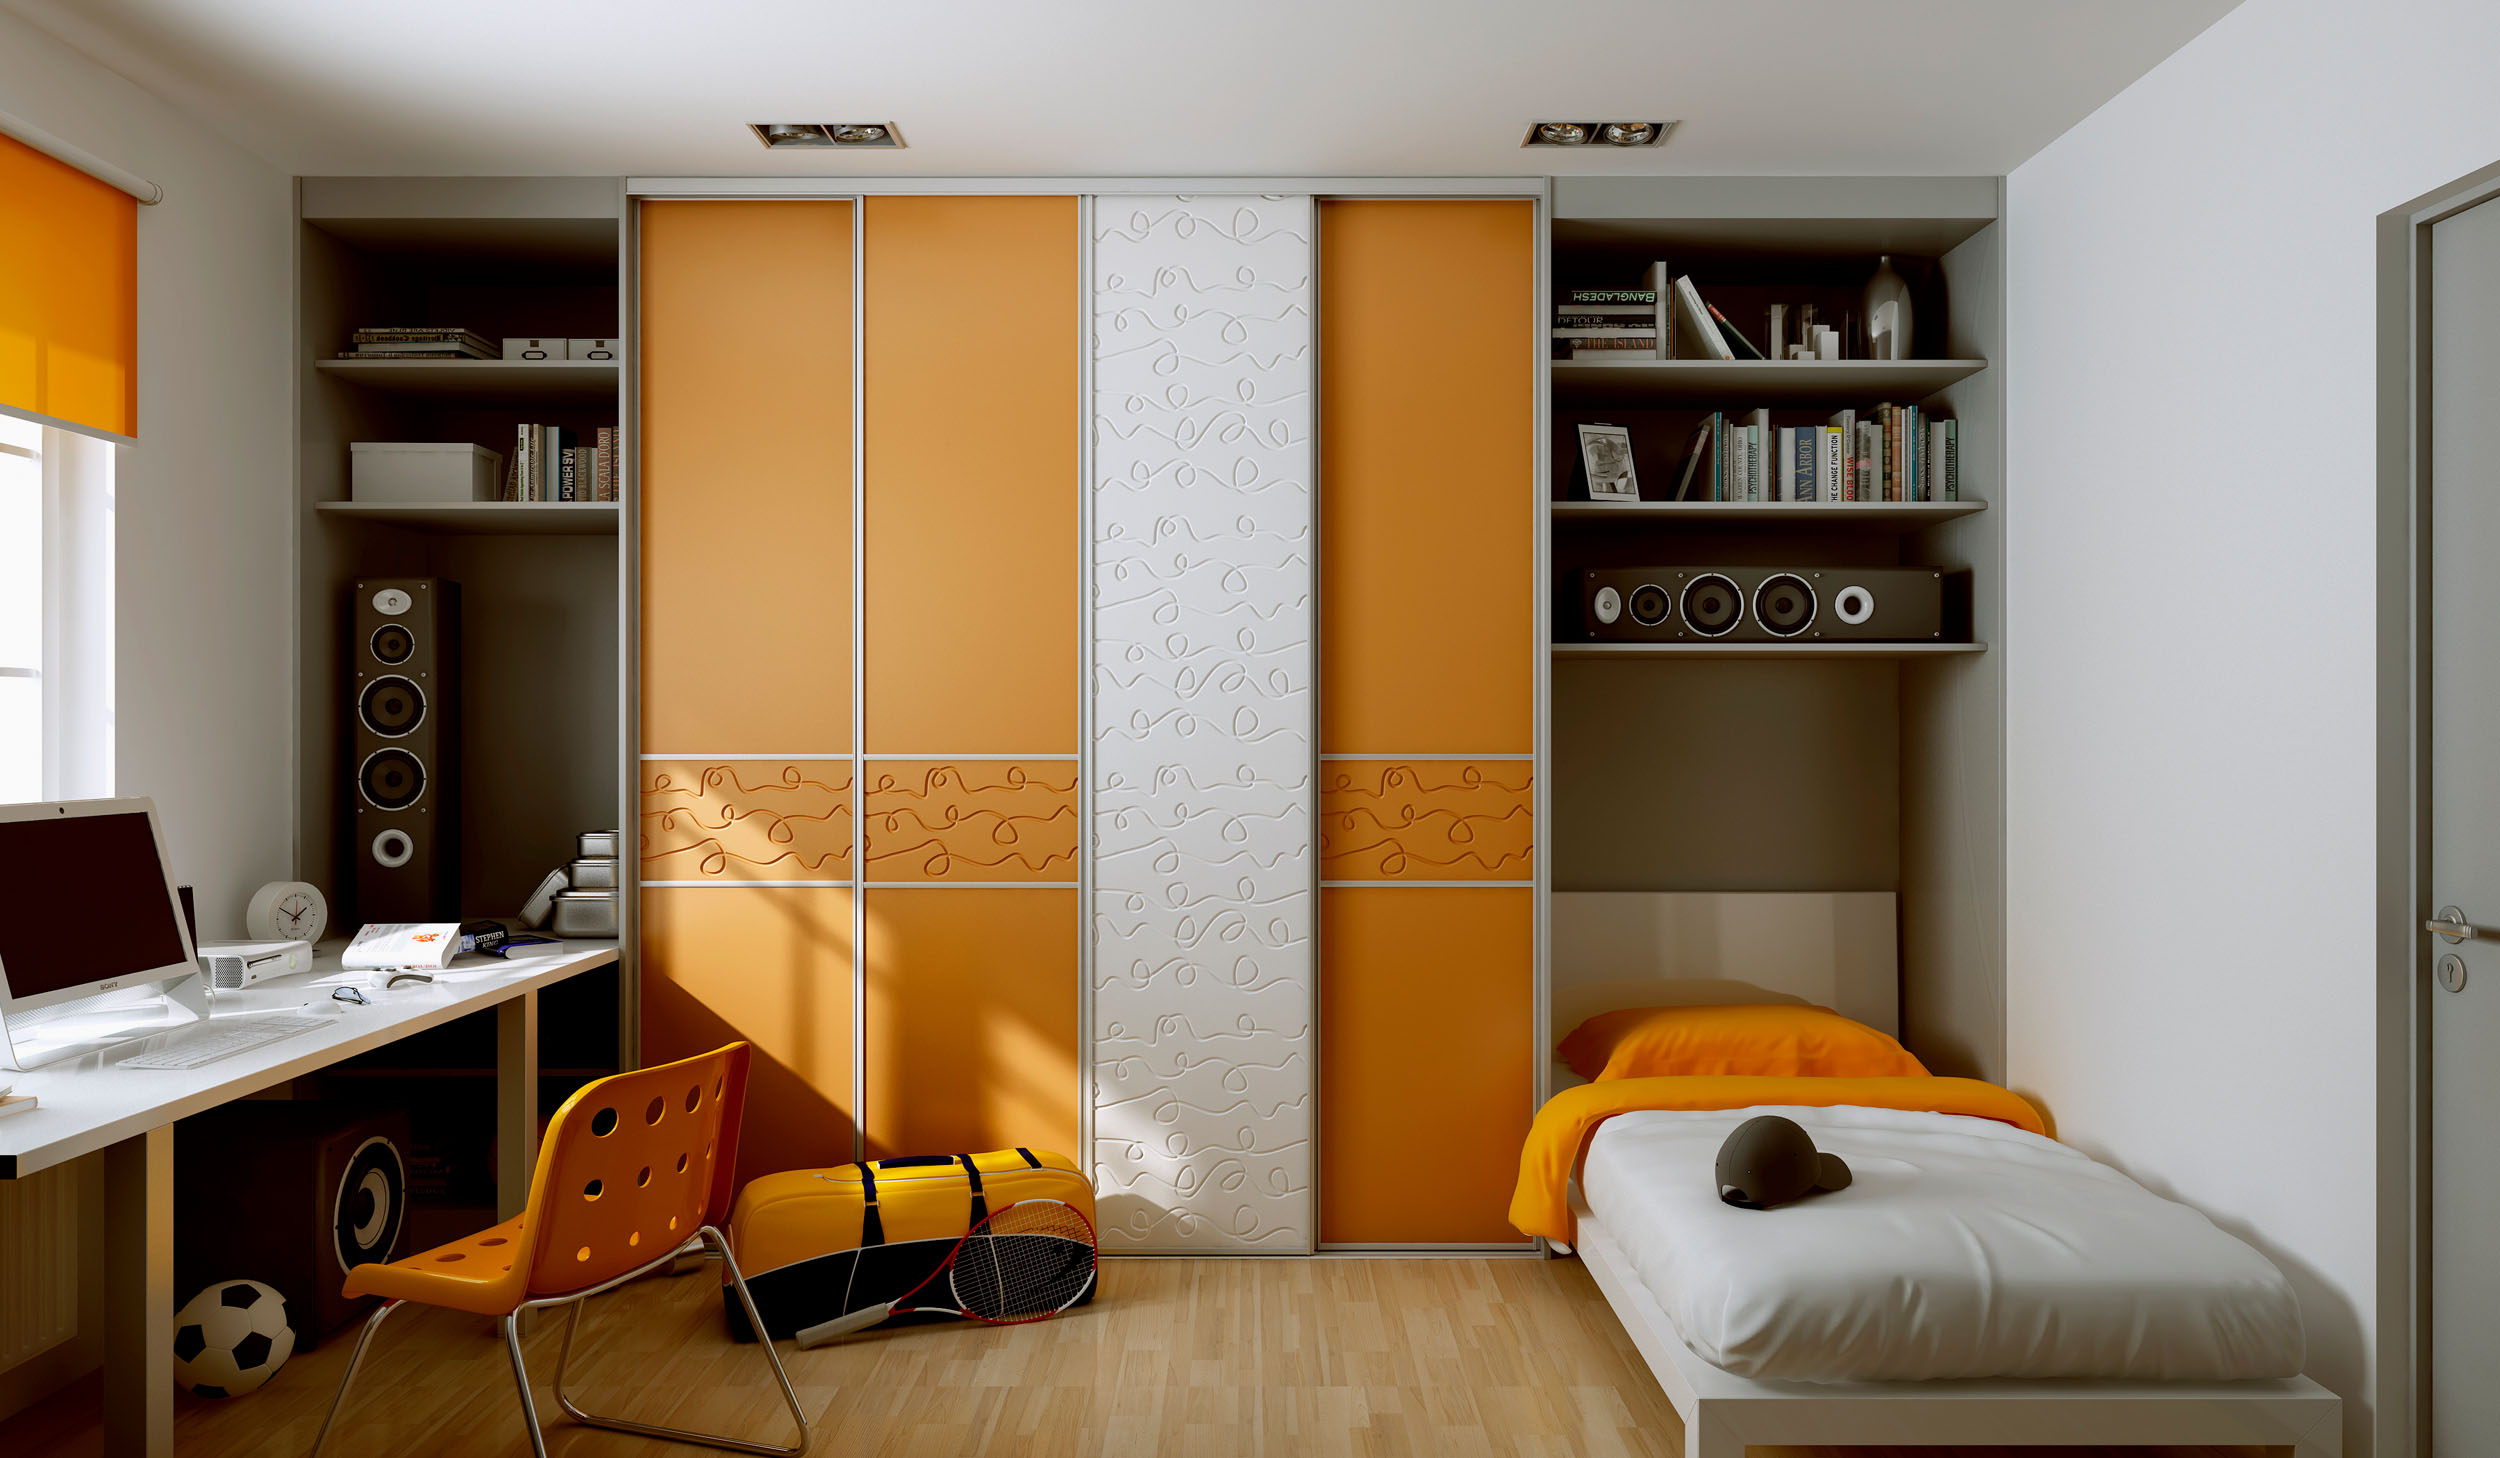
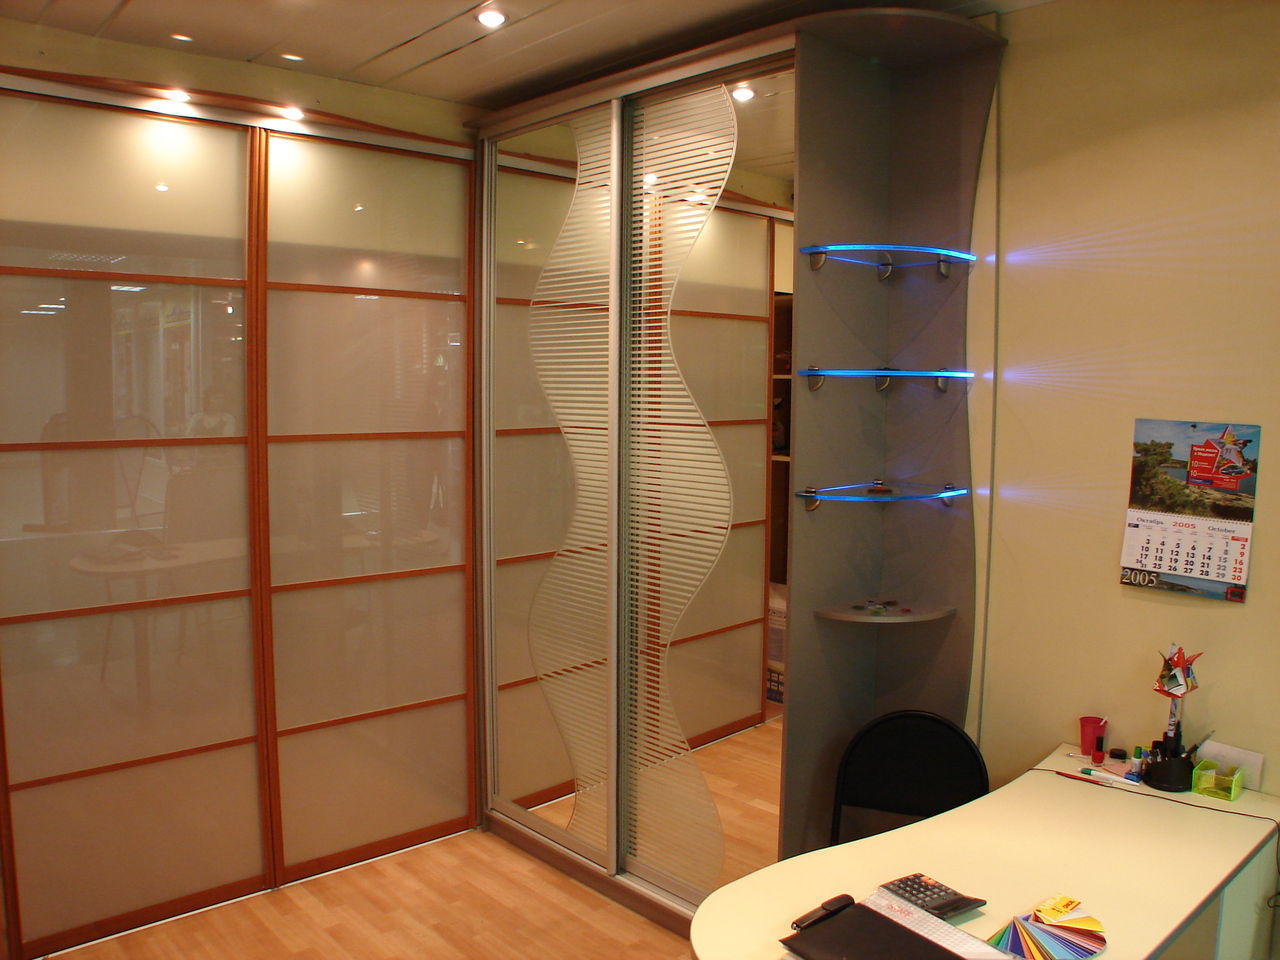
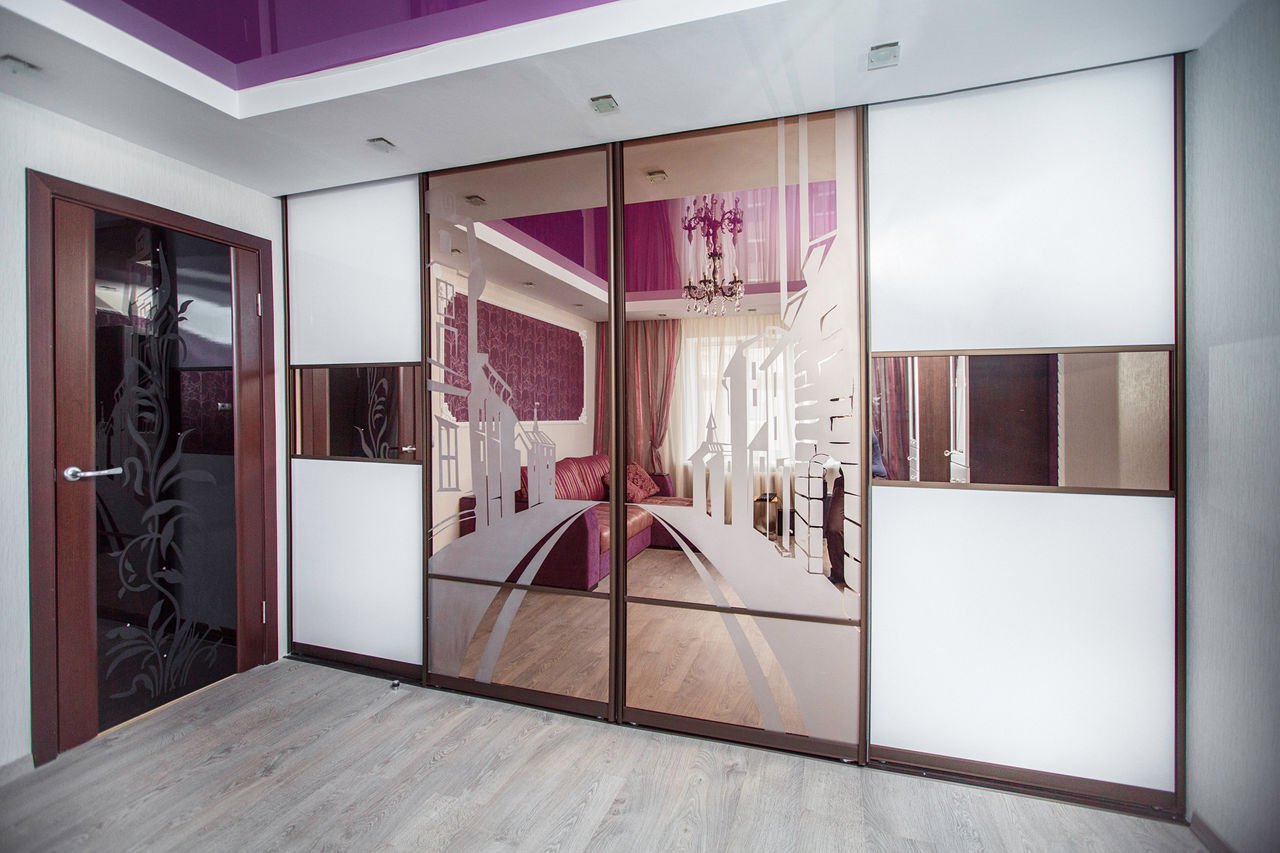
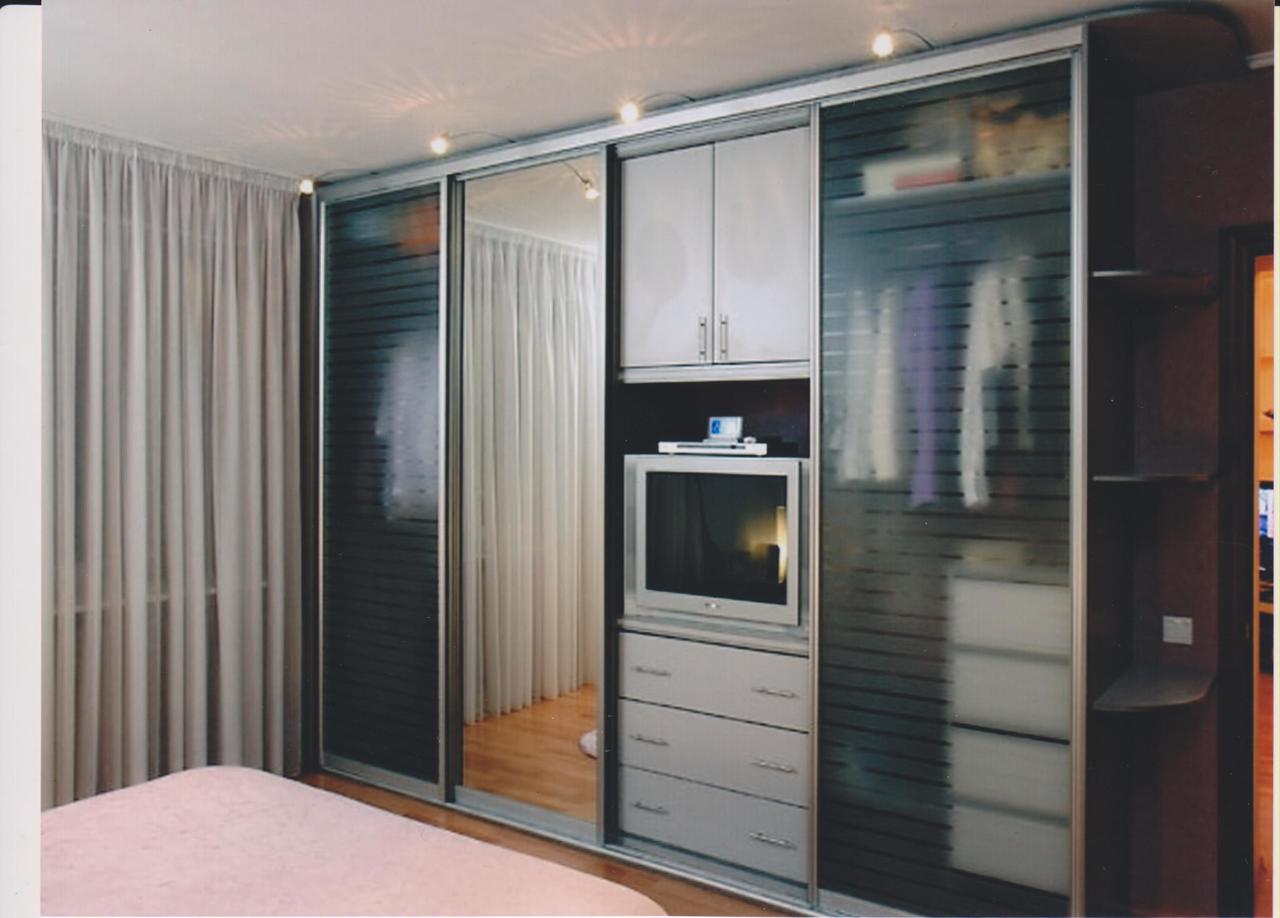
A more sophisticated option is a multi-door wardrobe with external shelves, a cabinet and a figured mirror. They have external lights and looks very elegant.
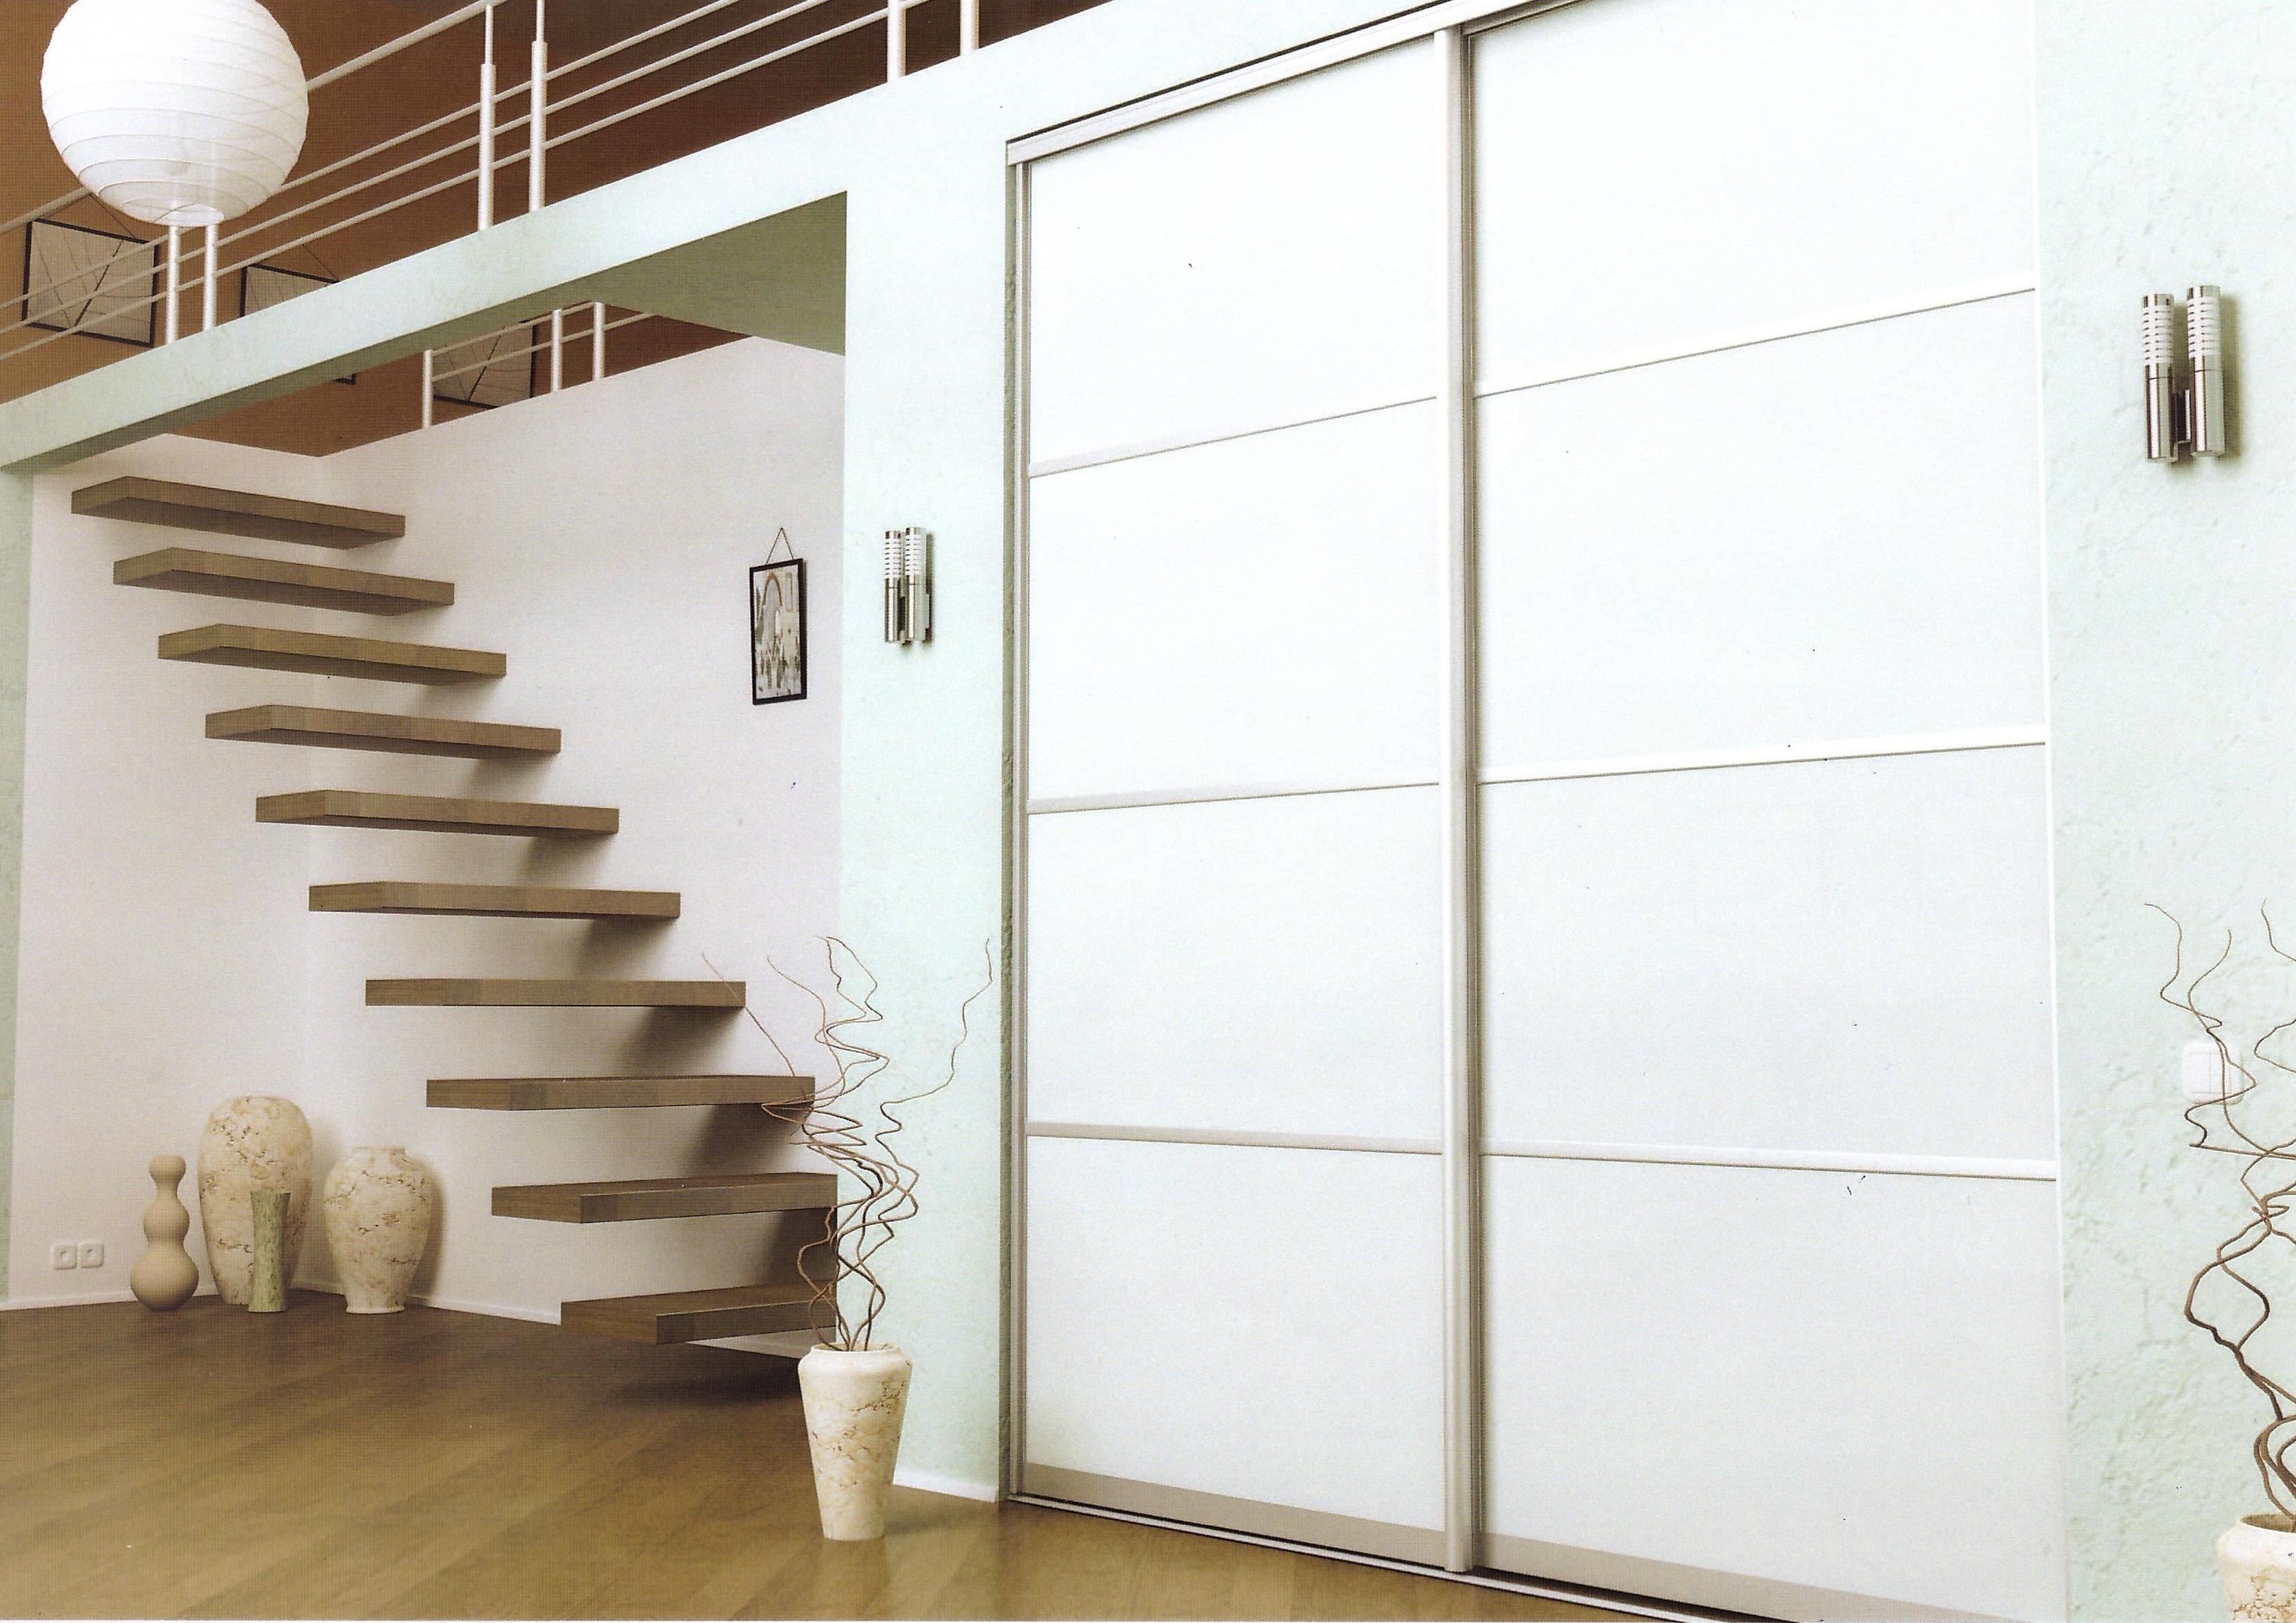
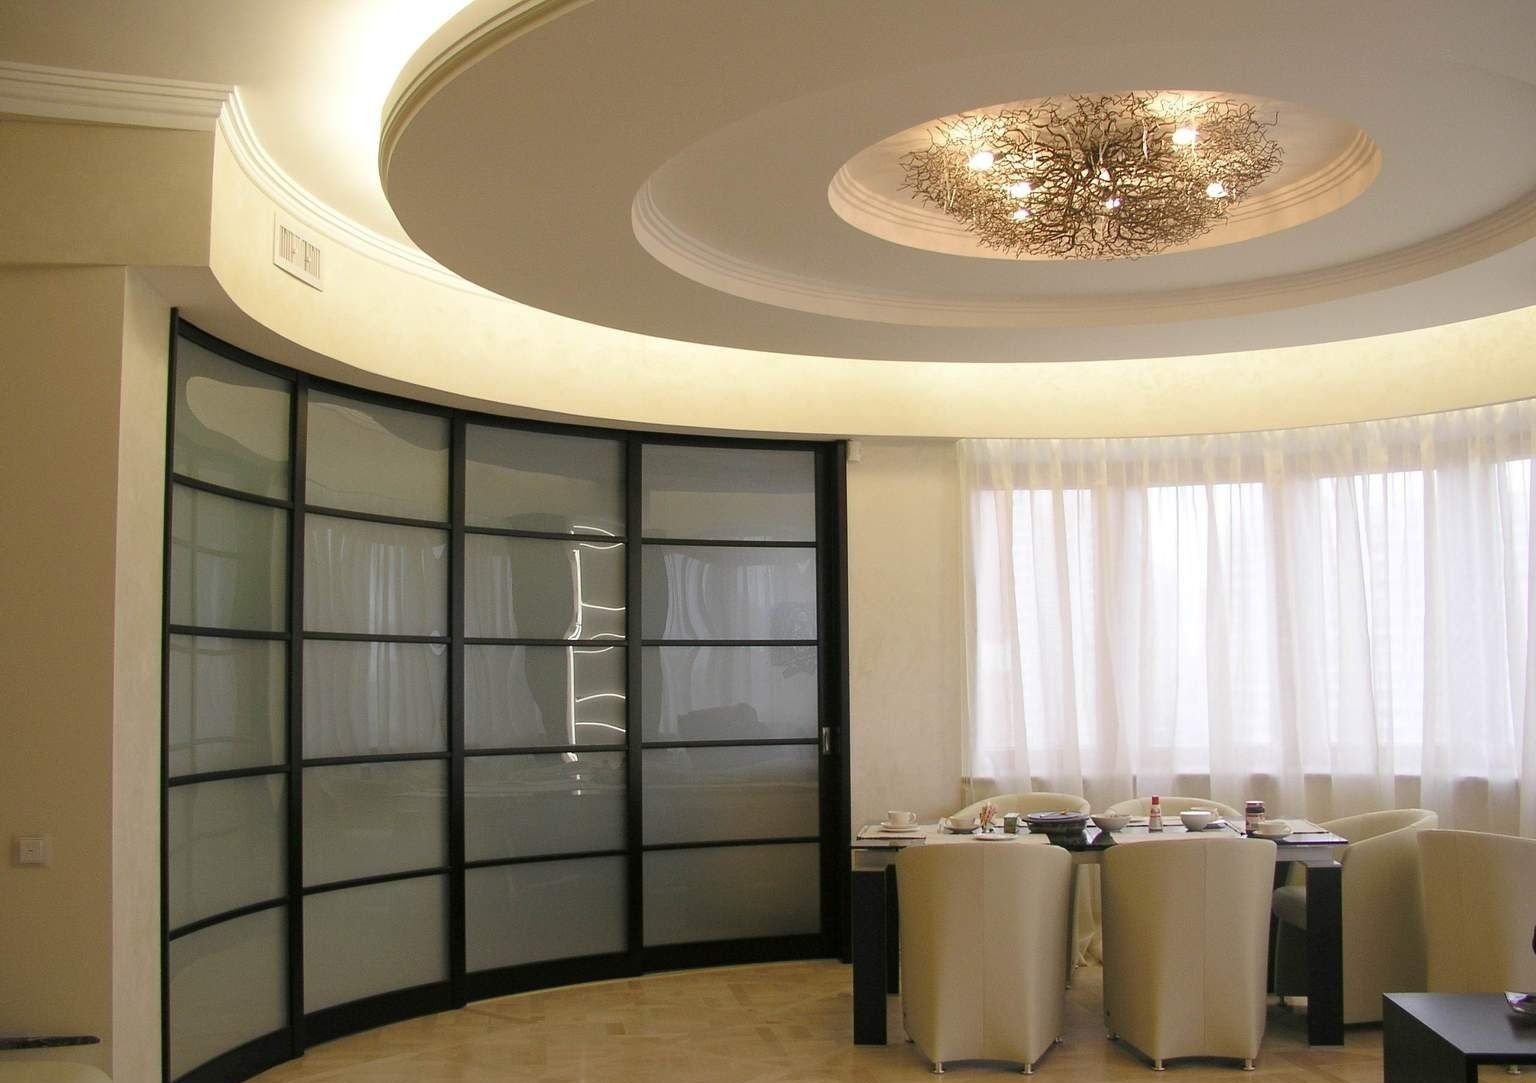
Sliding wardrobe from gypsum cardboard with a difficult design in all wall.
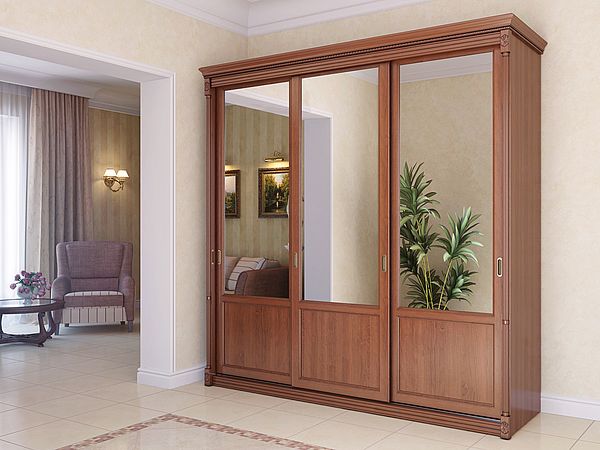
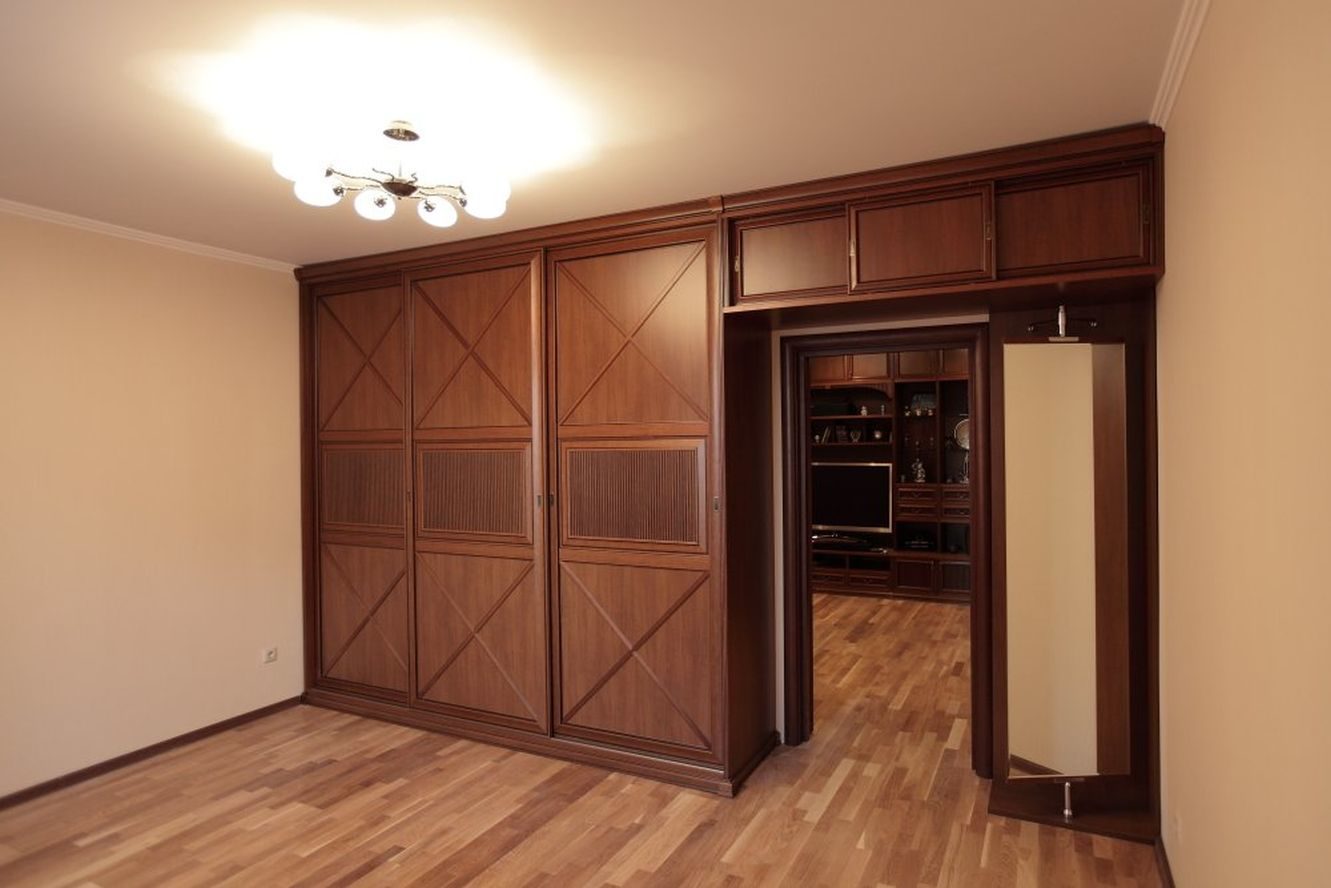
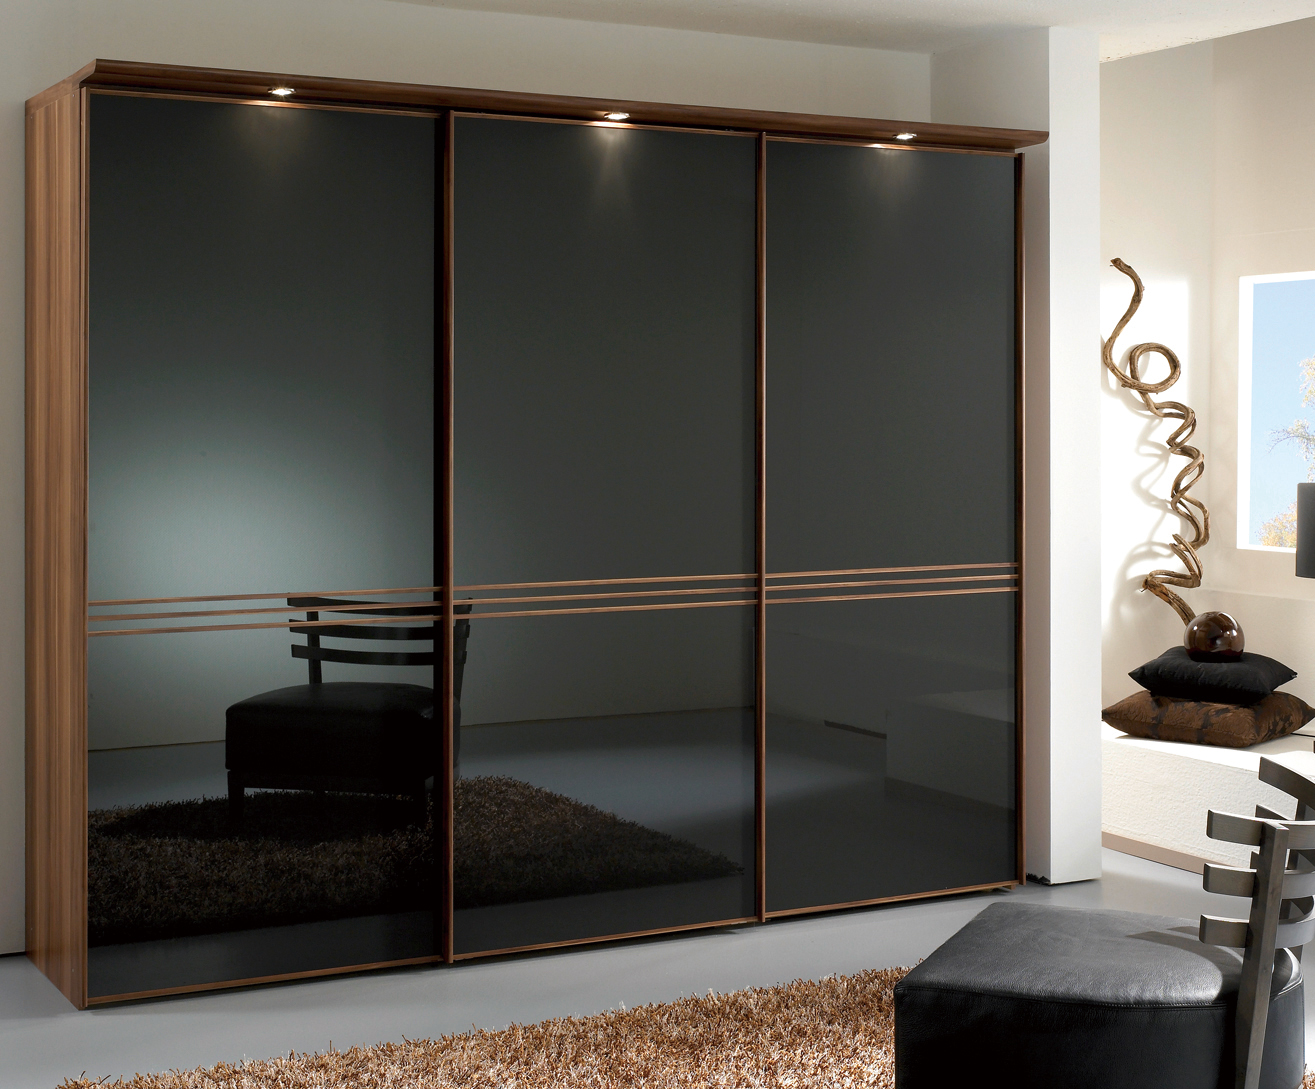
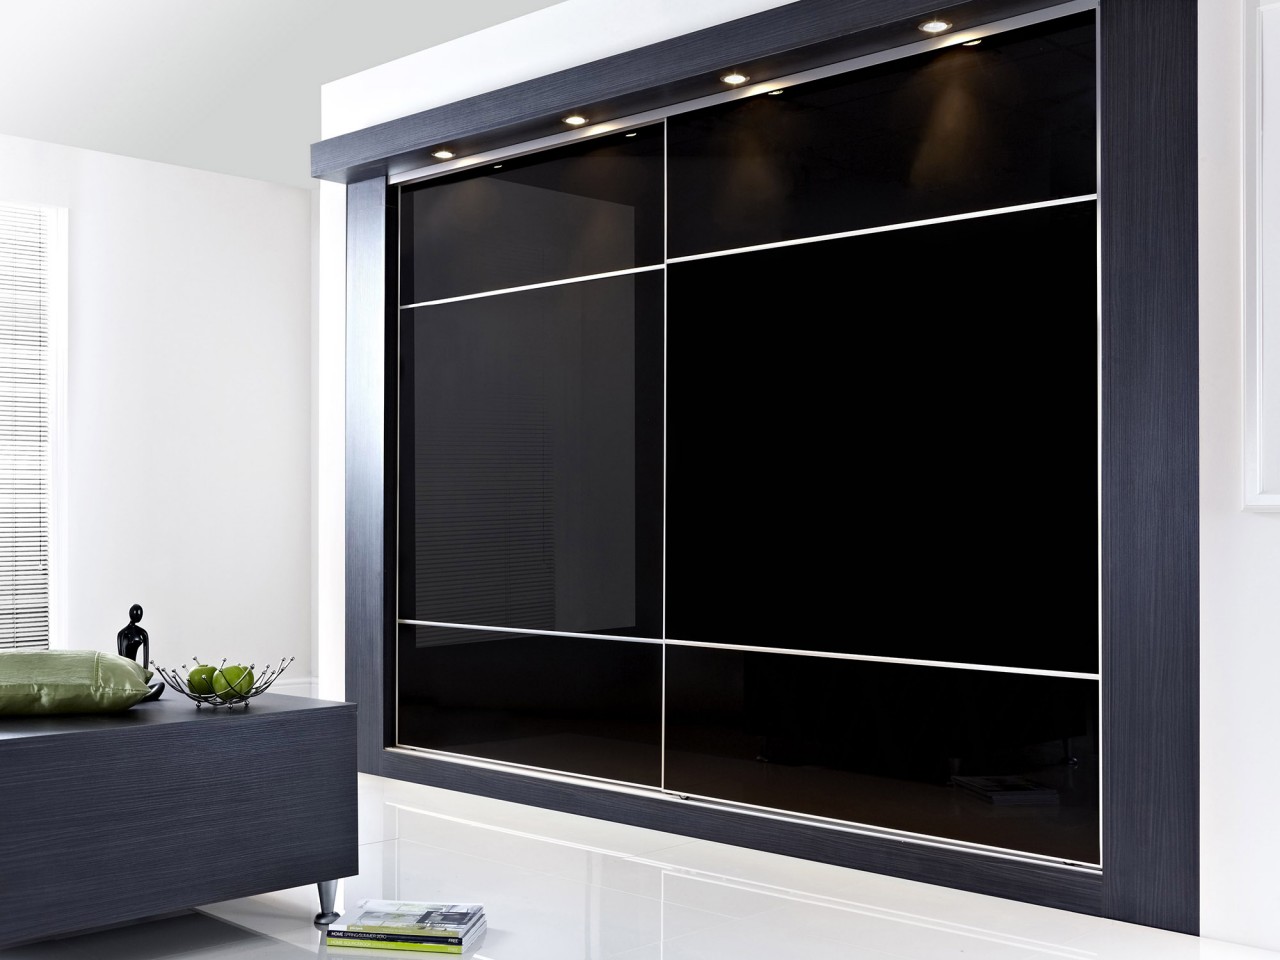
Cabinet sliding wardrobe from a natural tree. Despite the high cost, it looks amazingly prestigious.