How to make a greenhouse from polypropylene pipes?
Today, greenhouse has long ceased to be something unusual at the summer cottage, since it can be found in almost every gardener near the country house. They are built today of various materials, which was not previously. And we are talking about different materials, ranging from wood and polycarbonate and ending with polypropylene pipes. And it is about this design, made of polypropylene pipes, and will be discussed today.
Special features
PVC greenhouse used to be something fantastic for most people. Today, this is an absolutely normal phenomenon that does not surprise anyone. Previously, only timber and planks were used for the frame, after which the openings between them were glazed or covered with a thick film.This design, although it was reliable, but from the point of view of the effort expended, turned out to be too unprofitable. And this is in the context of the fact that it was necessary to carry out the selection of parts and their processing right at the dacha. Wood itself as a material is too susceptible to aging and rotting, and even with poor-quality fixing of the film, this type of frame could simply break.
Summer residents believe that a greenhouse made of polypropylene pipes is a more interesting solution, both in terms of technical features and finances. When such a structure is assembled from PPR materials, simple, easy-to-work and convenient components are used.
Plastic is generally not susceptible to corrosion. In addition, it does not collapse due to contact with wet soil and does not even age. That is, having collected such a greenhouse structure, it can be used for its intended purpose for a long time. And, by the way, it's not less easy to disassemble it. This is a mobile design that can be easily improved or modified. You can assemble it in about a day, which is why the summer residents also like this solution.
Types of designs
Note that there are many types of buildings under consideration. They may differ from each other in seasonality, type, category of heating and its presence, used shelter material, as well as the frame. For the formation of greenhouses from plastic pipes, the most simple solutions are suitable, the reliability of which is proven by time:
- gable, made in the form of a house;
- polygonal, where the shape of the slopes refers to the type of complex;
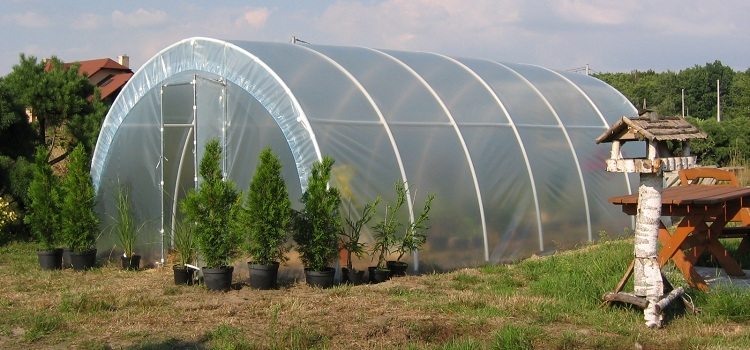
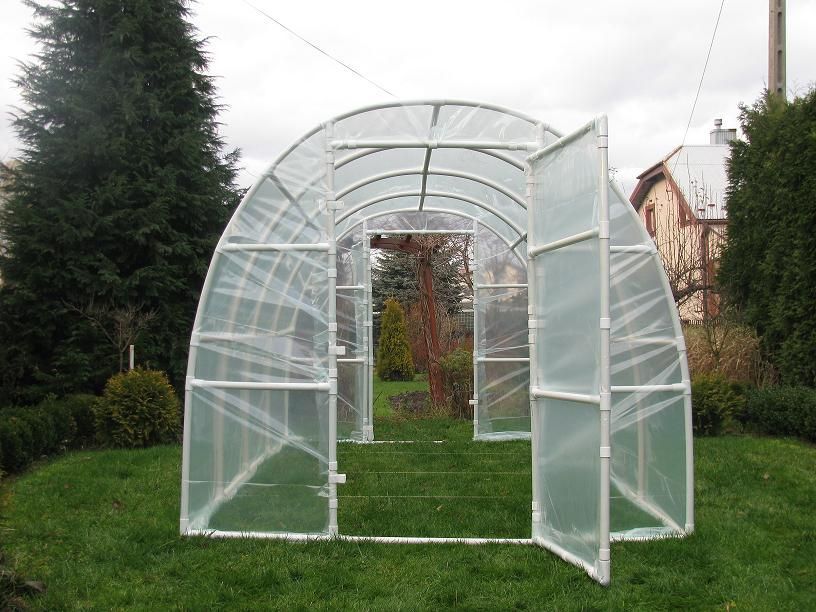
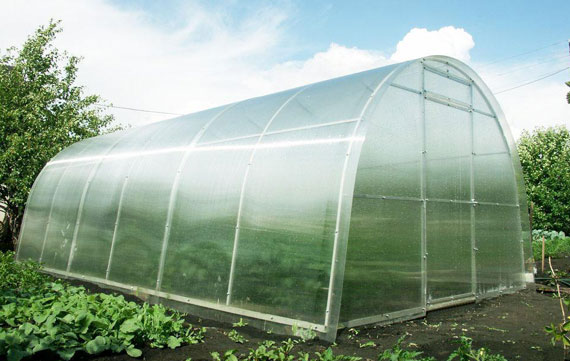
- arched, in which the frame is made in a semicircular version;
- wall mount

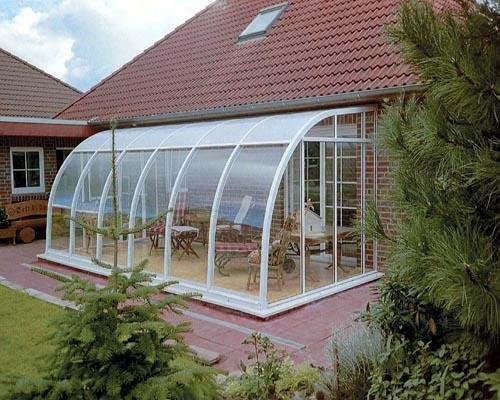
Now consider the named types in somewhat more detail. Wall solutions are usually completed at the south or south-west wall of a house or any other room. In this case, the wall will be a kind of thermal mass. During the day, it heats up, and at night it gives off heat, which makes it possible to significantly reduce average daily temperature drops, and also protect plants in the greenhouse from winds from the north. In such plastic greenhouses for the plant creates an extremely favorable microclimate, and their price will be quite low.
The main disadvantage of this design will be that the wall will be constantly affected by moisture.In addition, there will not be good ventilation, which can cause deformation and subsequent destruction of the wall.

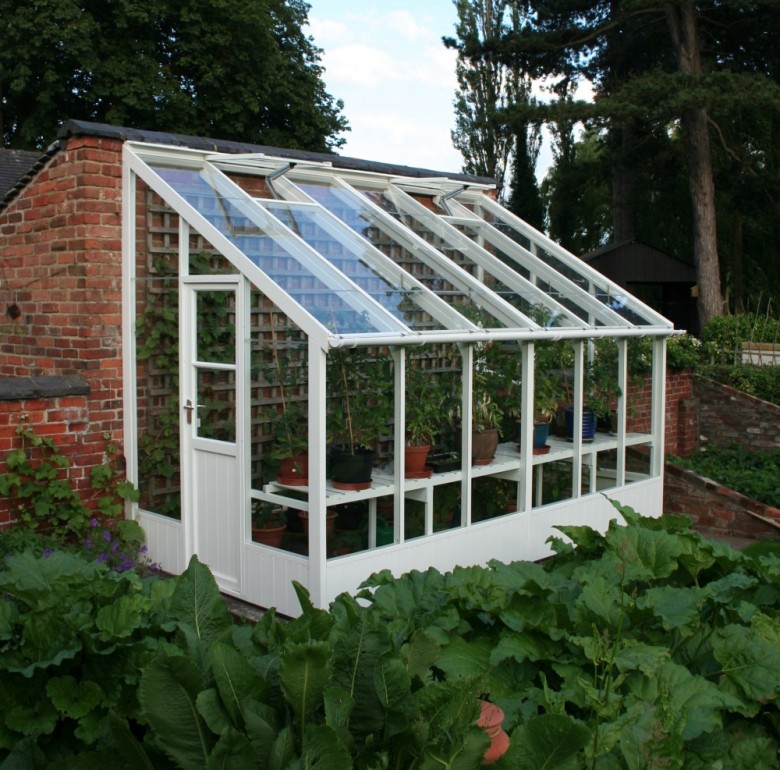
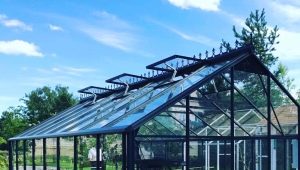
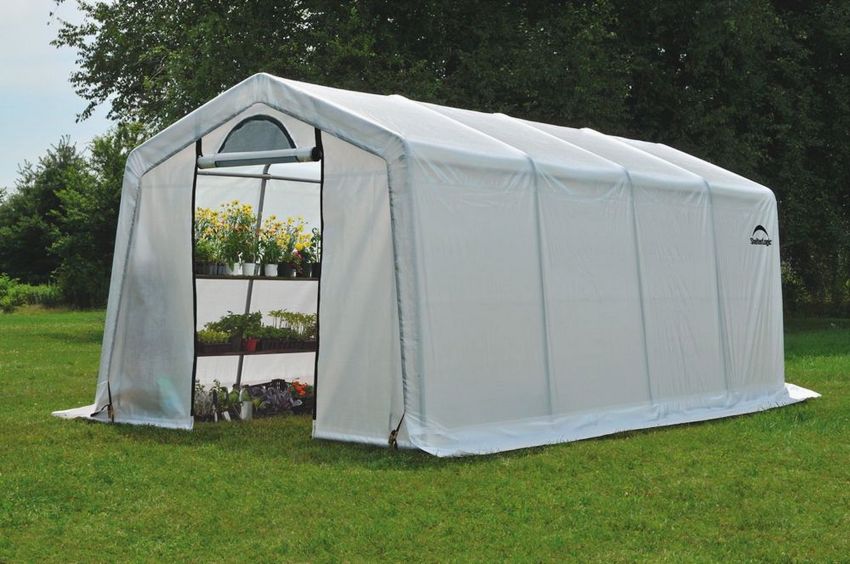
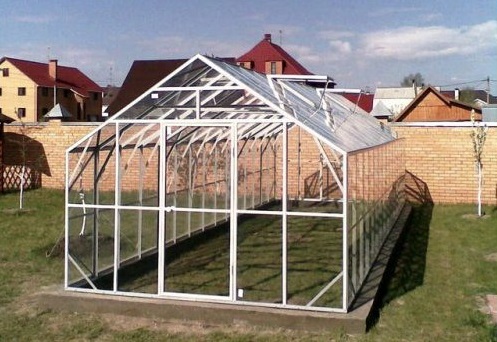
The gable option is considered to be one of the most convenient and sought after. The explanation for this is very simple: in this case, the frame will be extremely durable and will withstand loads from wind and snow. Such greenhouses have a fairly small reflection coefficient, which allows more sunlight to get inside the greenhouse, thereby making it as efficient as possible.
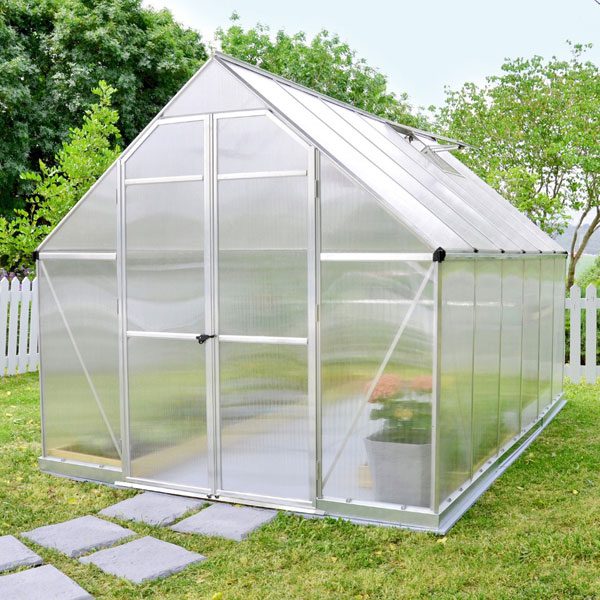
If you raise the slope angle, you can achieve the convergence of snow cover from the roof in winter. These greenhouses are usually equipped with 1 or 2 doors and ventilation windows. The walls on the sides of such a greenhouse can be not only completely vertical, but also somewhat inclined. This will increase the illumination in the morning and evening, which for buildings in the latitudes of the moderate type will be extremely important.
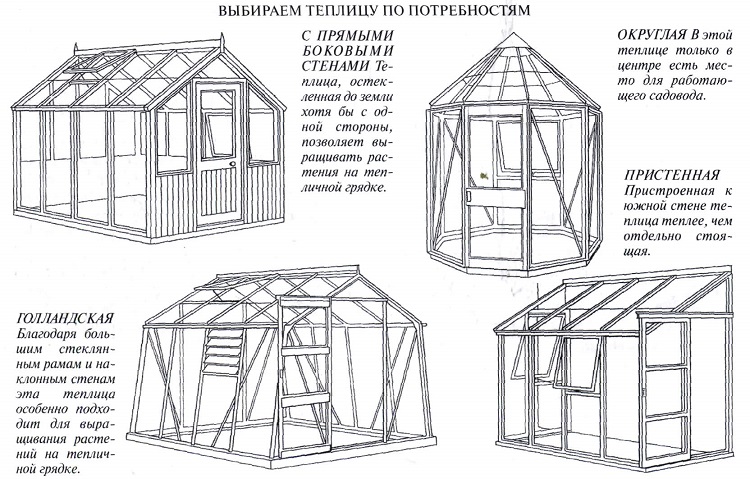
If we talk about a polygonal design, it almost repeats the arched shape due to the presence of several planes that form walls and slopes.This allows you to increase the space inside and avoid too much reflection of the sun's rays. The disadvantage of such a greenhouse will be that it will not be easy to make it with your own hands due to too many joints. For this reason, it is usually created not from a plastic profile, but from metal pipes. Well, or from the profile for drywall, collecting the frame on the hinges.
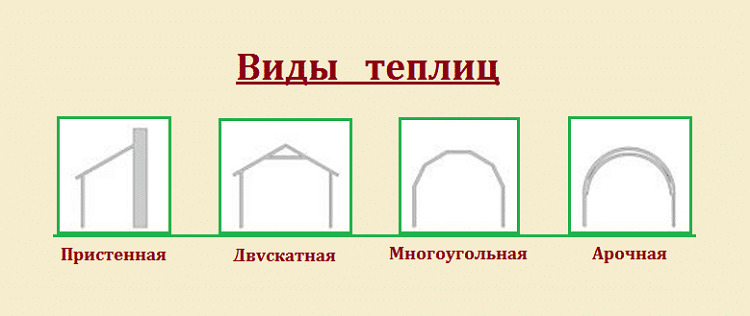
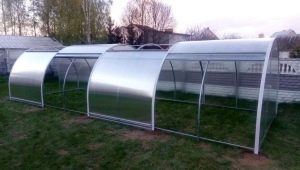
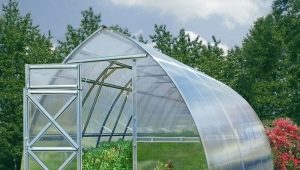
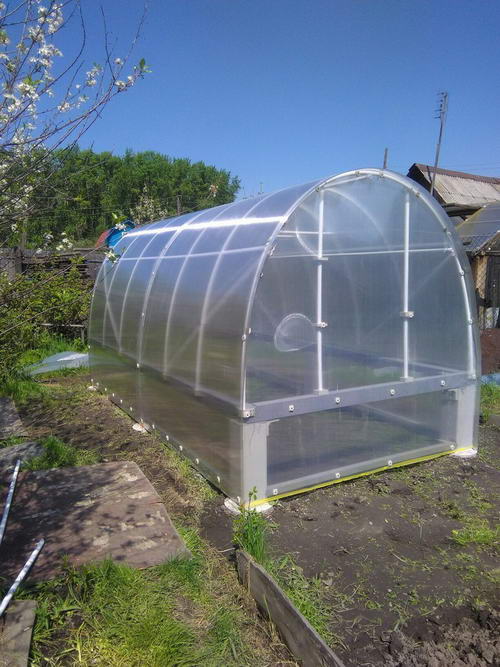
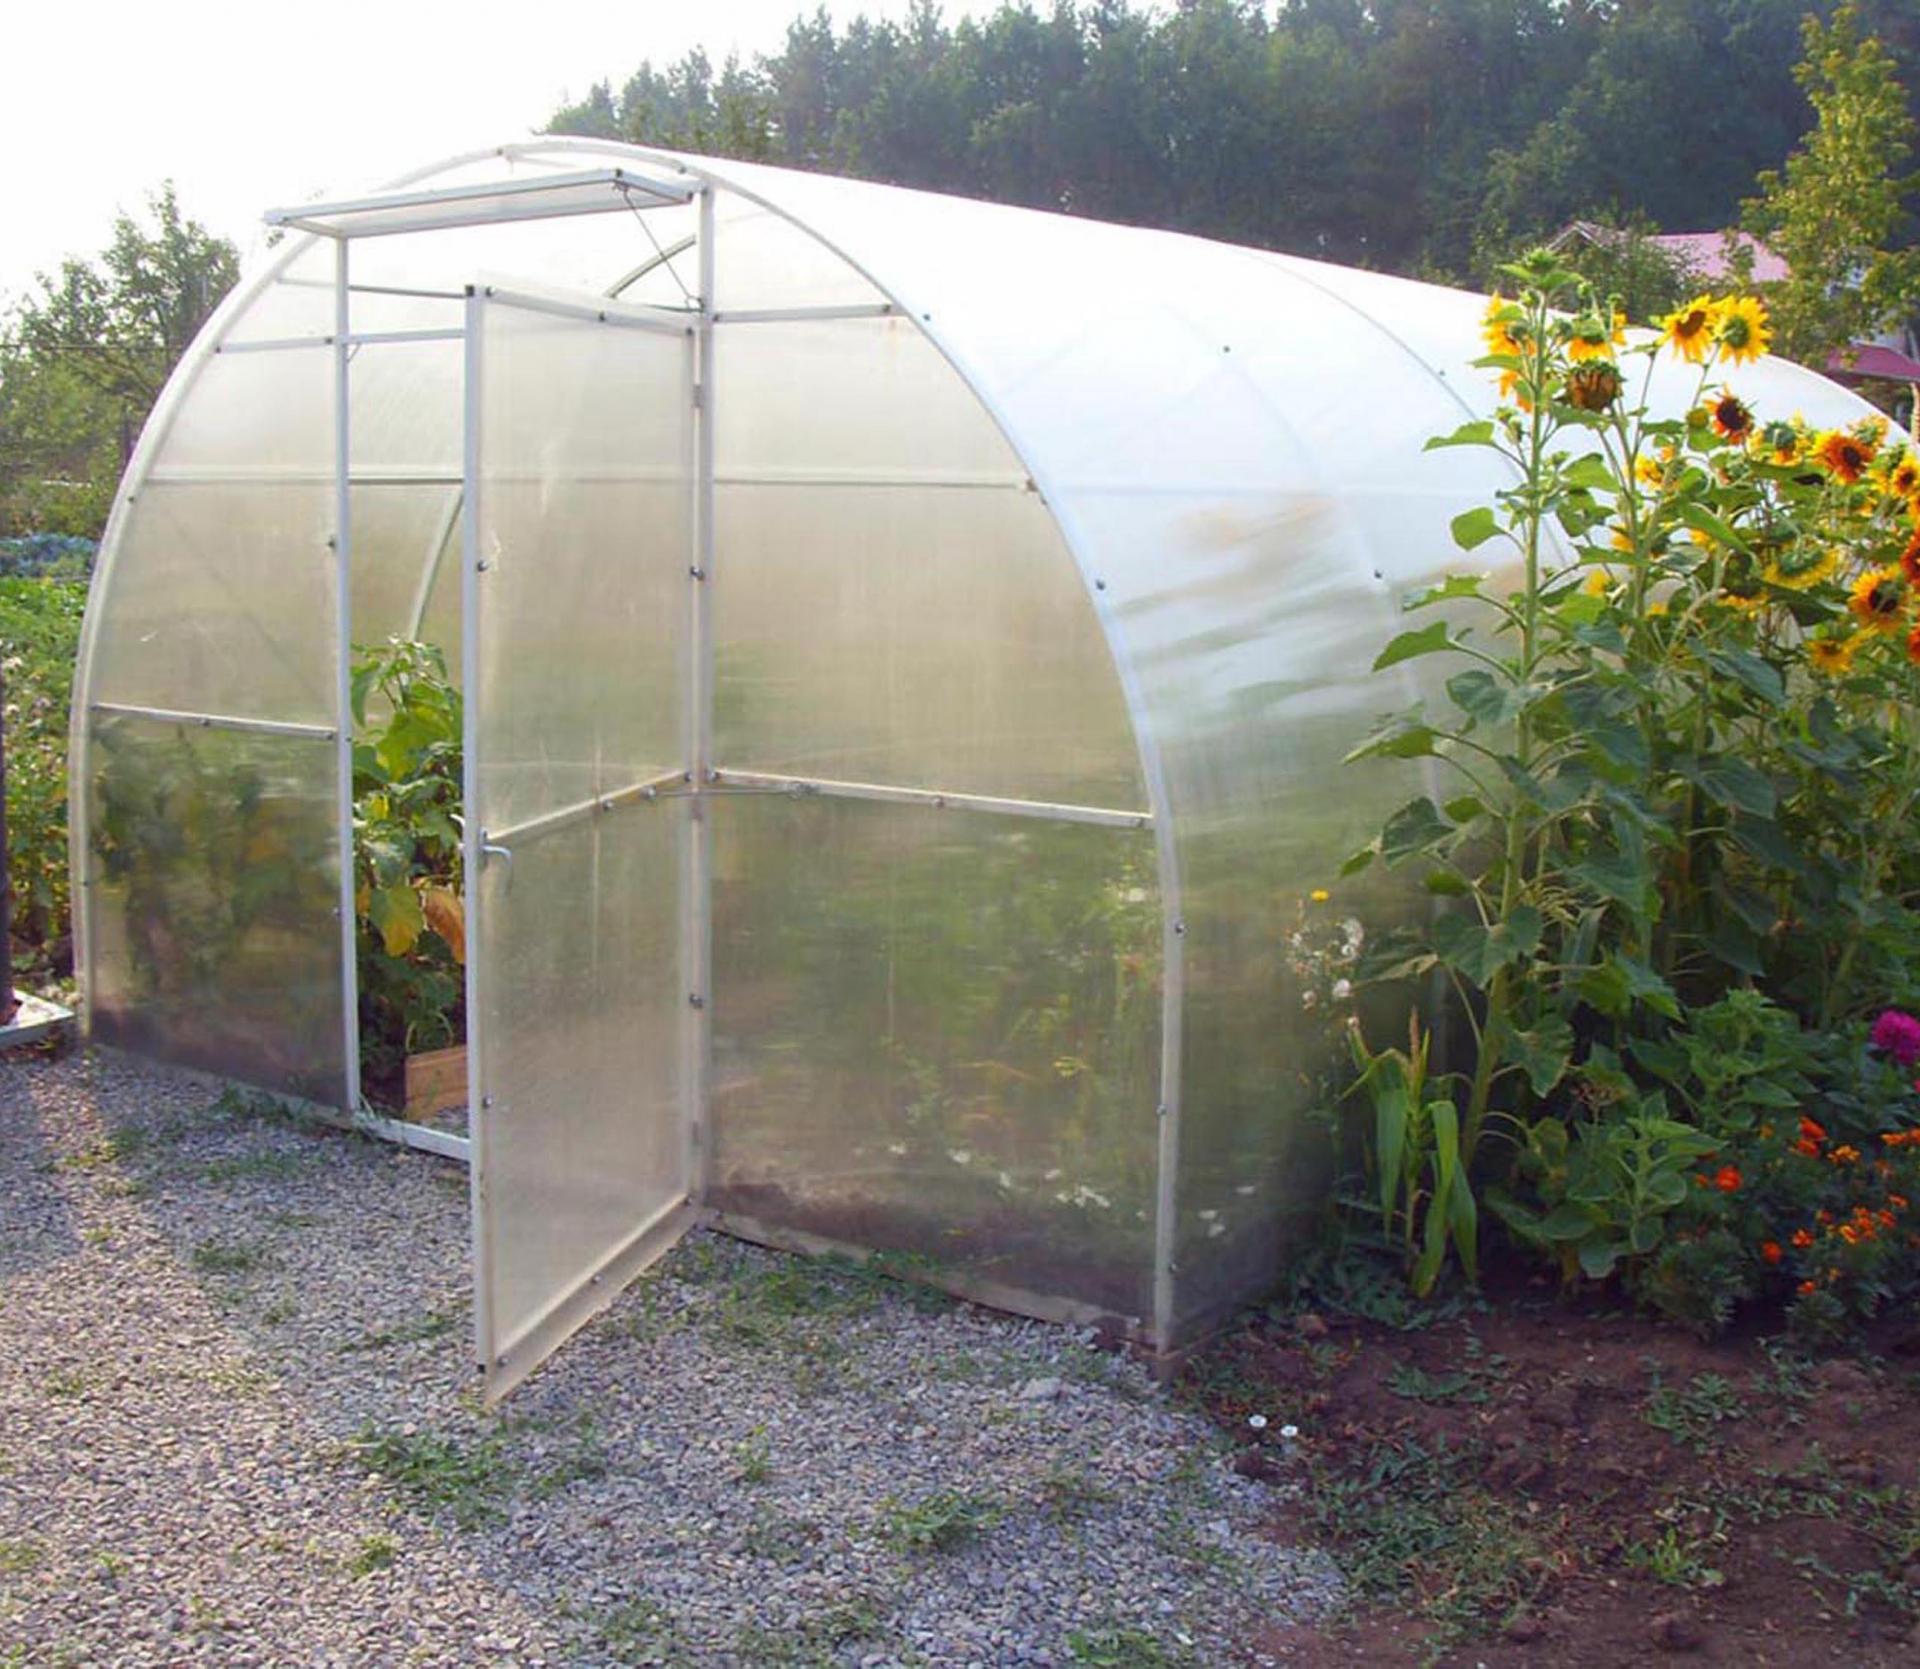
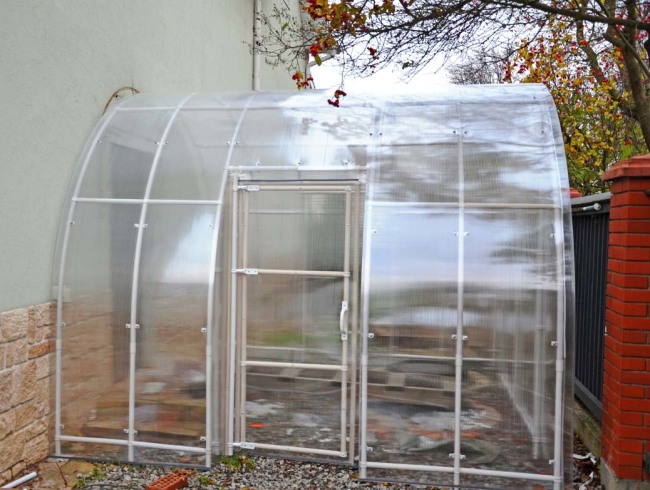
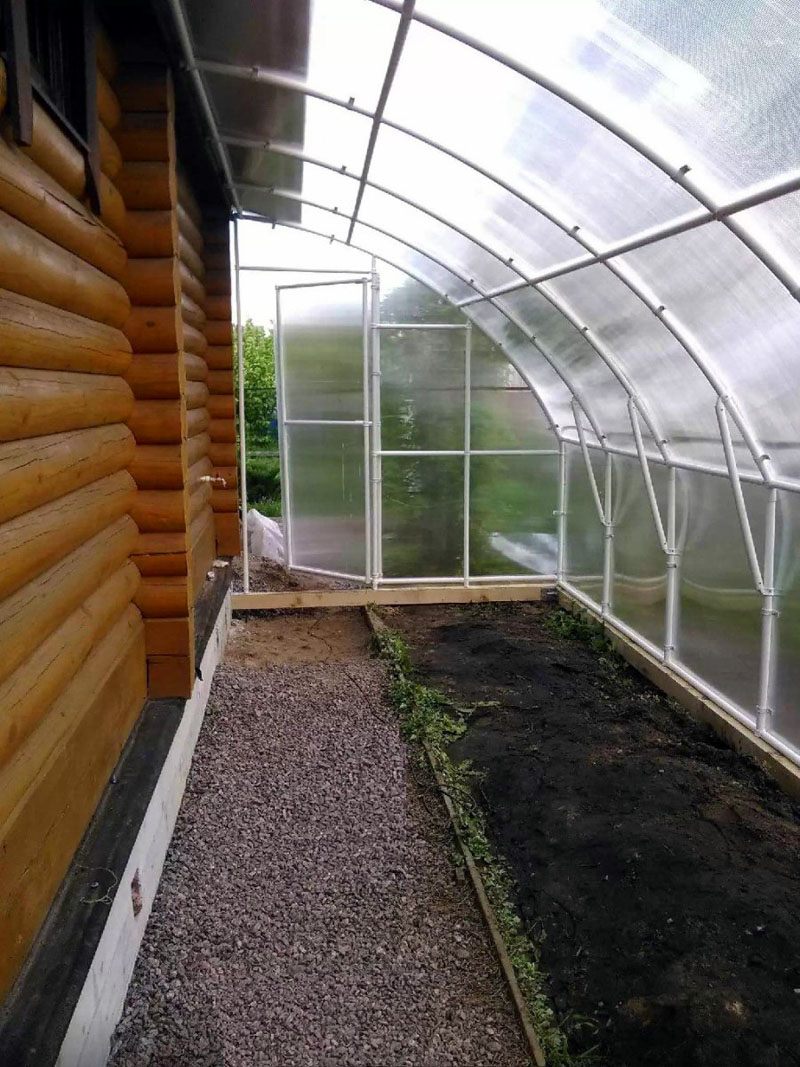
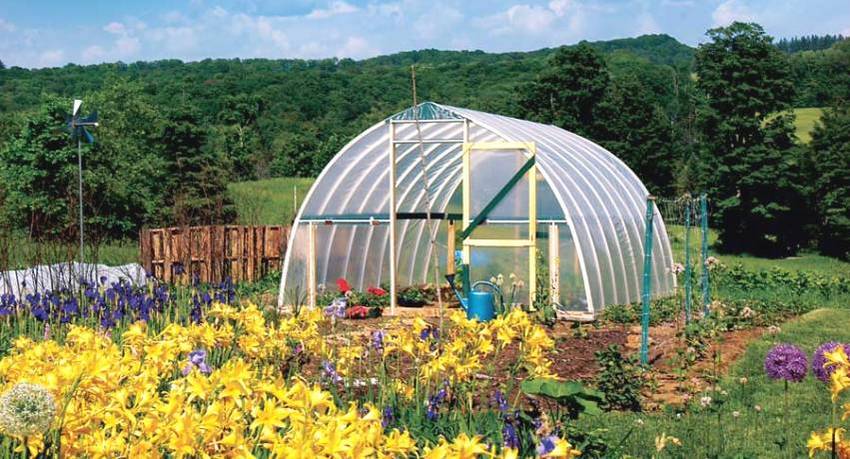
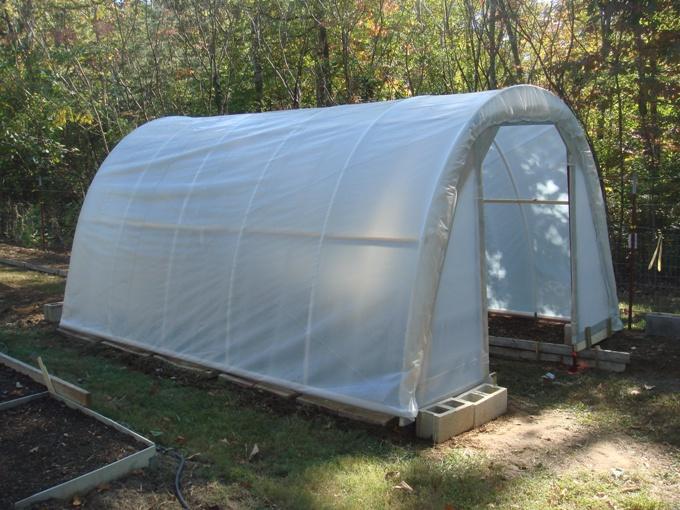
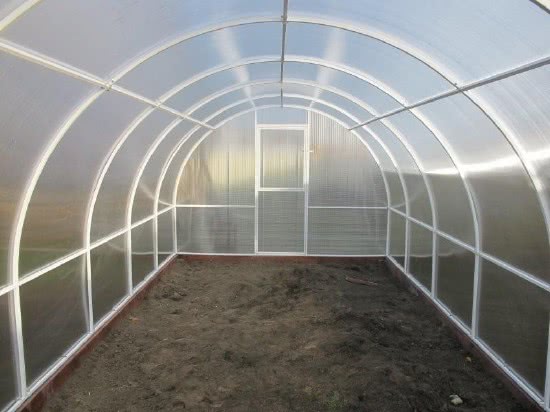
Arched solutions are also quite common due to the fact that they are easy to maintain, durable and quite stable. They also have a small number of connection nodes, and inside them is spacious and there is indeed a lot of space for plants. It is possible to create such a construction not only from plastic, but in general from any kind of pipes, having chosen the necessary dimensions and height. The disadvantage of this type of solution will be an increased accumulation of snow in the winter and a rather large reflecting coefficient for the best sun.
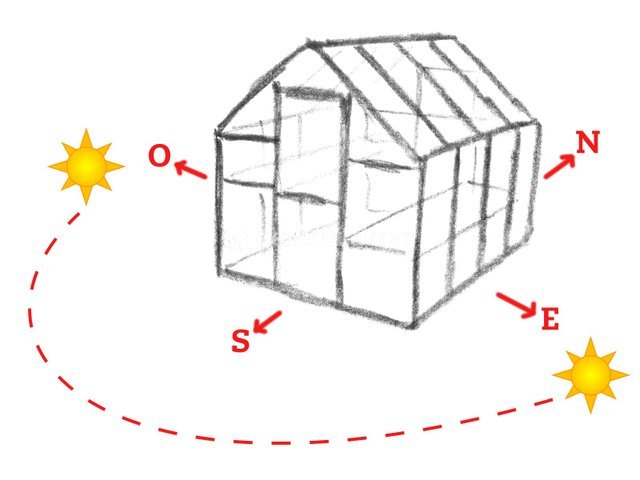
It can be partially reduced if the building is positioned correctly - from north to south. In this case, the walls on the sides are illuminated in the morning and evening. And in the afternoon the sun will illuminate the roof, where the refraction of the rays is small, as well as the southern pediment.

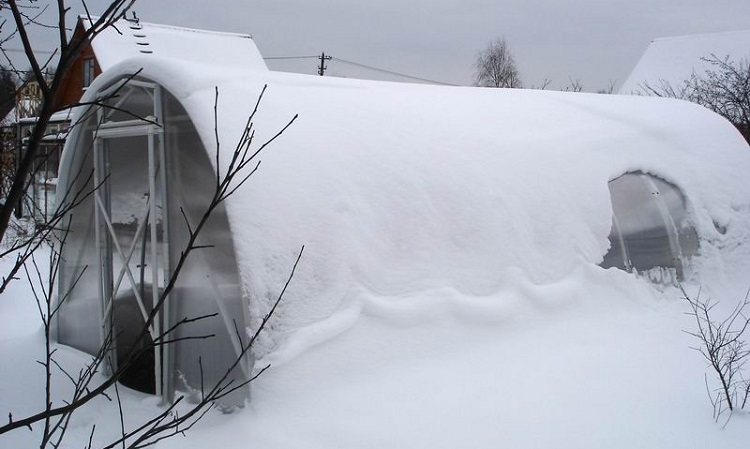
And with the accumulation of snow can be fought in three ways:
- continuous cleaning;
- dismantling of the greenhouse for the winter or film;
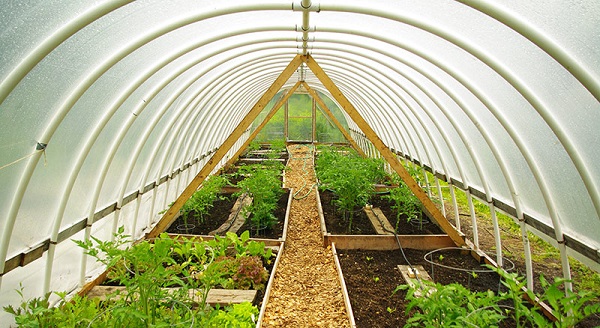
- change its shape to lancet.
In the latter case, the greenhouse will be even more stable, and the change in its height in the direction of increasing will significantly improve the microclimate in the greenhouse.
Dimensions and location
Carrying out the selection of the location for the installation of such a greenhouse, it should be understood that the desired area should be as smooth as possible and the sun should light it well. In addition, it should immediately be understood exactly how the greenhouse will function. If, for example, we are talking about growing plants in the winter, then we should immediately consider the structure of the heating system.
Typically, the size of this design will be determined based on the following parameters:
- what will be the foundation for the greenhouse;
- what will be its shape;
- seasonality, that is, whether the room will be used in winter;
- species, as well as the number of crops to be planted.
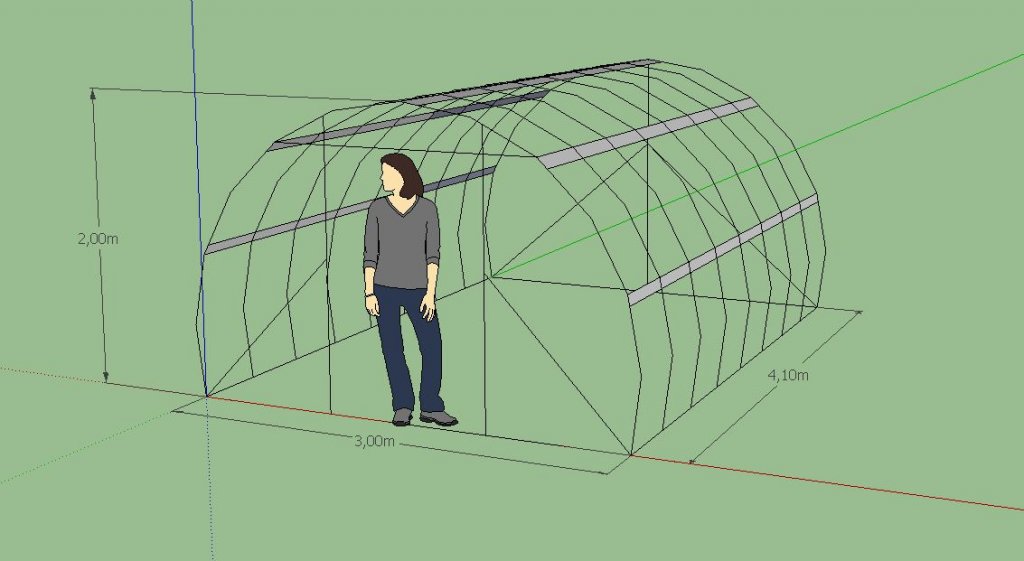
Too large greenhouse should not be done, since the larger it is, the greater the cost will be to maintain the desired microclimate in the greenhouse.Usually the height of the greenhouse is about two meters. If we talk about the width, it is usually determined after calculating how many plants will be planted, whether there will be paths between the beds, as well as calculating the necessary distance for the arrangement of the door. Usually at least 60 centimeters are taken for it.
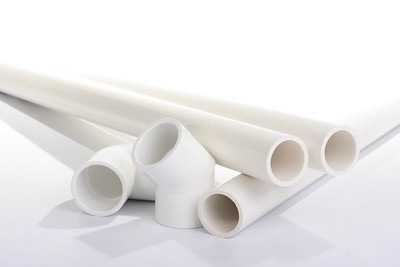
If we talk about length, then the standard figure of such a building is usually 8 m. The diameter will depend on the wishes of the gardener, since there is no generally accepted standard. There are models whose area is 100 square meters. m, but there the costs will be appropriate. By the way, it should be said that it is best to build the structure on pipes having a diameter of 16 to 110 millimeters.
Drawings and diagrams
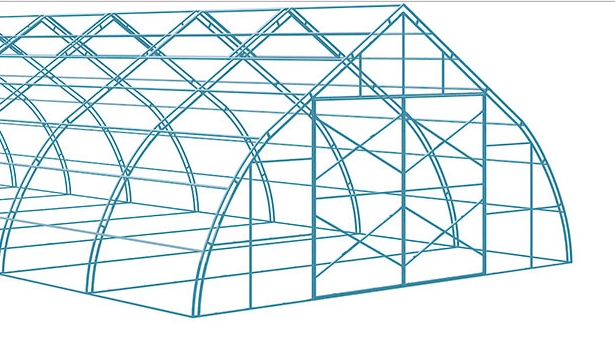
To build such a structure, you will need to have a drawing or project of a greenhouse made of propylene pipes. In general, to make such a sketch simply and independently. It will be enough to think over the form of the framework, where the dimensions will be indicated, as well as important nodal structures and arcs. There are many ready-made solutions that are also easy to adapt for your own needs yourself.
If the drawing is written with your own hands, then the following points should be taken into account:
- what will be the basis;
- structural details and what material will be used for gables;
- the shape, placement of the main node connections, as well as the distance between the carrier parts;
- what will be docking, as well as fasteners parts.
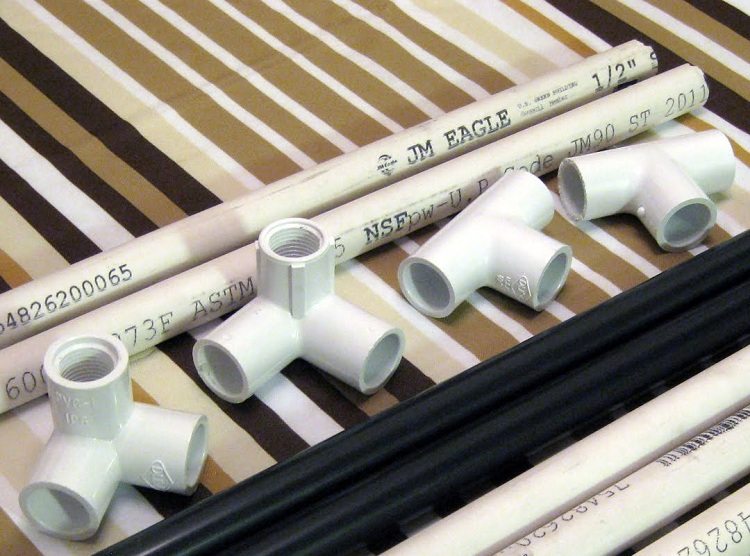
Note that the pipes made of PP-plastic can be glued together, put on screws or screws, soldered to each other using a special installation, and so on.
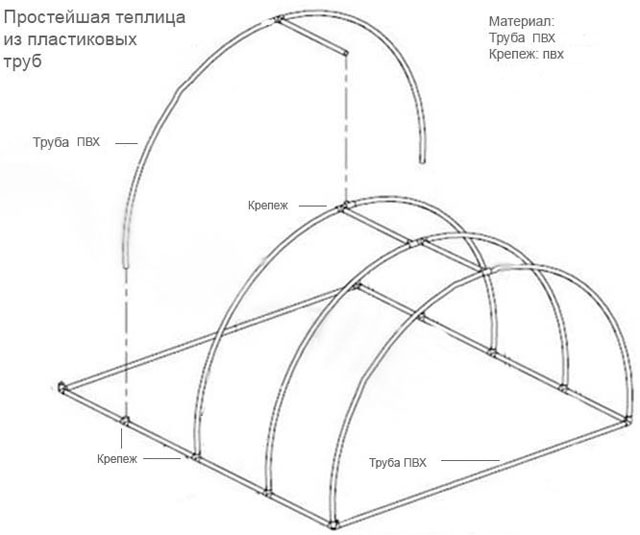
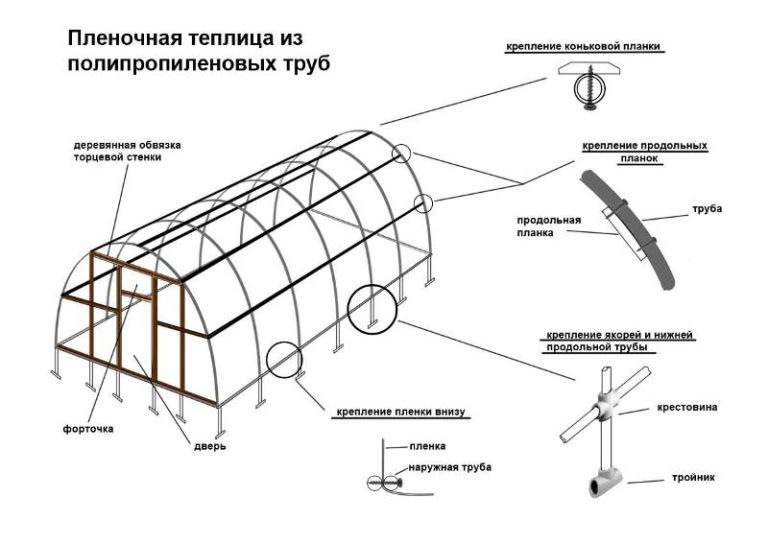
The simplest solution would be to make the scheme of an arched frame of a polypropylene greenhouse, and then cover it with a film. Rectangular structures are somewhat more difficult to build because of the need for additional calculations and the installation of additional stiffeners. Yes, and in such structures too many nodes and docks, which can significantly weaken the structure.
In addition, in the explanatory note to the scheme should indicate the size of the greenhouse, as well as its shape. Usually also indicates the number of materials that will be needed for the construction, as well as the way in which the structure will be fixed. The greenhouse project, in addition to the text explanation, will also contain the necessary drawings, where it will be necessary to indicate the width, length and height of the building, as well as the number of windows and doors and their location.It is important to understand that it is necessary to prepare separately the layout drawings and the physical features of the foundation, doors, air vents and end walls. If there are any other features, for example, the model will be reinforced with composite reinforcement, then this should also be indicated in the project documentation.

Step-by-step instruction manual: master class
Now we will try to figure out how to make the greenhouse from polypropylene pipes. All the described actions will be relevant not only for large greenhouses, but also for mini-type buildings.
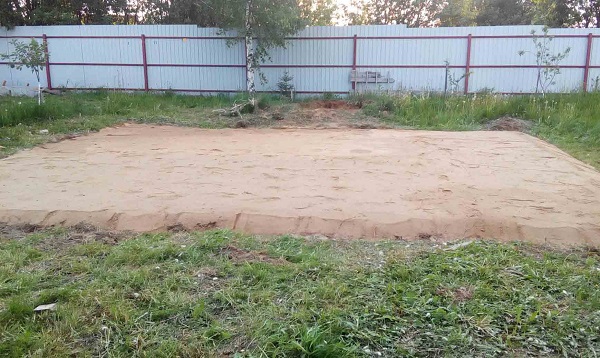
Base
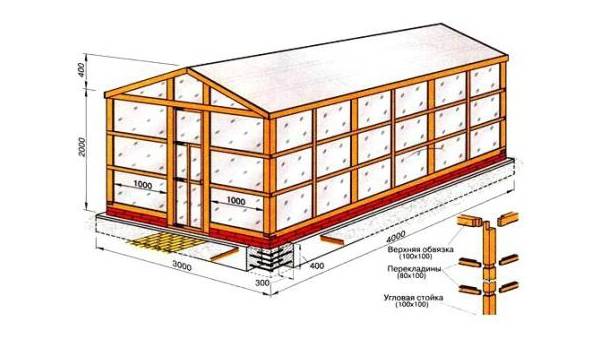
If the greenhouse is film-based, that is, it belongs to the category of light, then for such solutions a foundation made of wood will be enough: timber or boards. If the greenhouse is located on a permanent place and will be heavy, then for such a construction it will be necessary to build a foundation of brick, concrete, stones or cinder blocks.
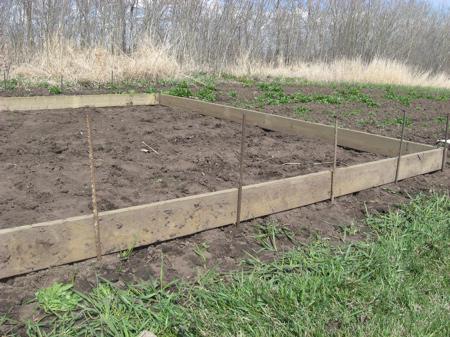
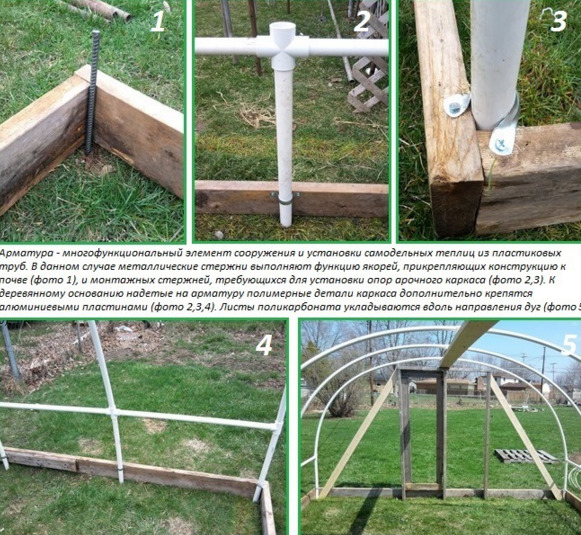
To make a wooden base, you must prepare boards with a thickness of 2.5 cm and 20 cm wide. Now they need to be processed in order to protect the wood from rotting. After this, cutting of the bars of the reinforcement with a length of 90-100 centimeters is carried out.Their cross section should be 1.2 centimeters. After that, the contours of the future construction are marked on the ground and a ditch is created, the depth of which will be 10-15 centimeters. A sand layer is laid on its bottom, after which the material for insulation is mounted. As a rule, we are talking about roofing felt.
Now the pre-made box is placed on this base, after which it is carefully covered with waterproofing on all sides. After that, check the corners of the box and its sides.
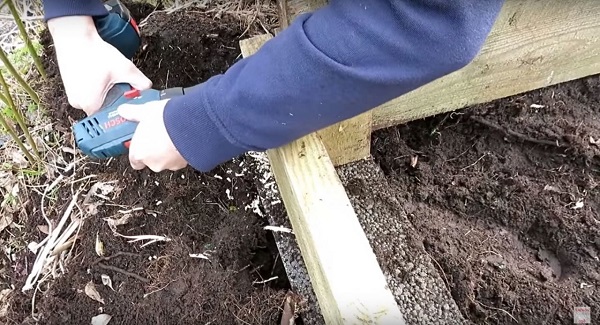
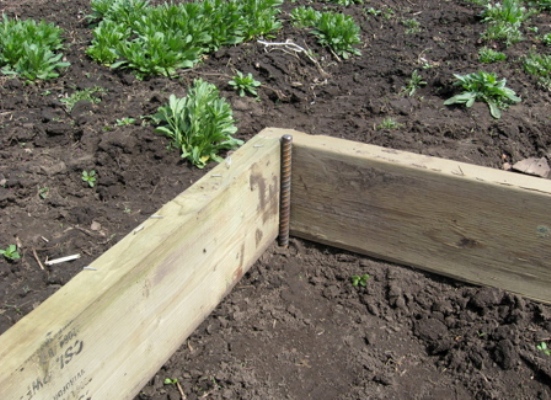
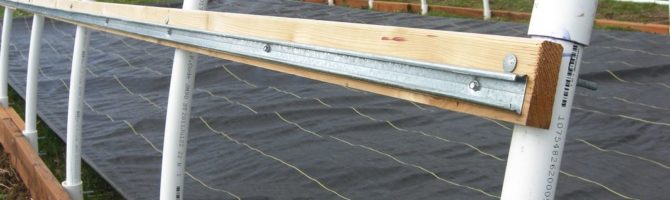
Now the foundation is strengthened. To do this, it is required to drive metal rods made of reinforcing rods in the four corners from the inside. It is they who will not allow the box to deform and will keep its shape strictly rectangular.
From the outer part, through the distances specified in the project, rods are driven in, which are made of reinforcing bars of the mentioned section. Polypropylene pipes with a cross section of 1.3 to 2 centimeters are mounted on them. The meter armature is hammered into the ground in such a way that a piece of a rod measuring 40 to 50 centimeters in size remains above the surface.By the way, you should take into account that such a foundation of lightweight boards can last a maximum of 3-5 years. The fact is that even despite the processing of wood and the presence of insulation, it will still sooner or later begin to rot. The same algorithm can be used to make a foundation from a bar.
If the design of the greenhouse is constant, then it is necessary to consider the instructions for creating the foundation of artificial materials. Let's do it on the example of concrete. To make it, first around the perimeter of the future greenhouse premises a trench is dug from 30 to 40 centimeters deep. But the depth may be different - this indicator does not have any fundamental significance. After this, the bottom is leveled and compacted with a part of a log or a bar that has a T-handle on top.
After that, waterproofing is made of roofing material or other high-density material. Now it is necessary to fill, then rammed sand layer thickness of 5-7 centimeters. A layer of rubble with a thickness of 10 to 15 centimeters is placed on it, which should also be leveled and compacted.
To make the maximum weatherability, concrete tape is required,on the side where the building will be located, lay out a layer of foam, whose thickness will be from 30 to 50 millimeters.
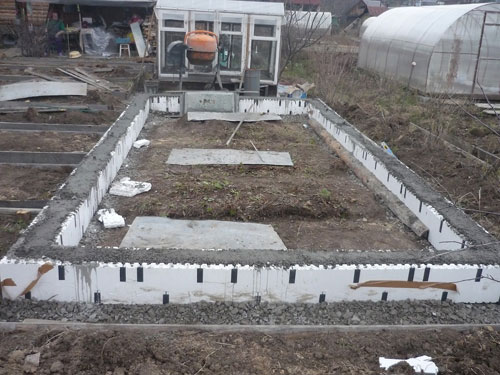
To the height of the foundation that remains, it is required to make a frame of the reinforcing type of reinforcement elements that are interconnected by welding or at least wire. On the trench perimeter, formwork is made of planks in such a way that it is above ground level after pouring concrete by 200-300 millimeters.
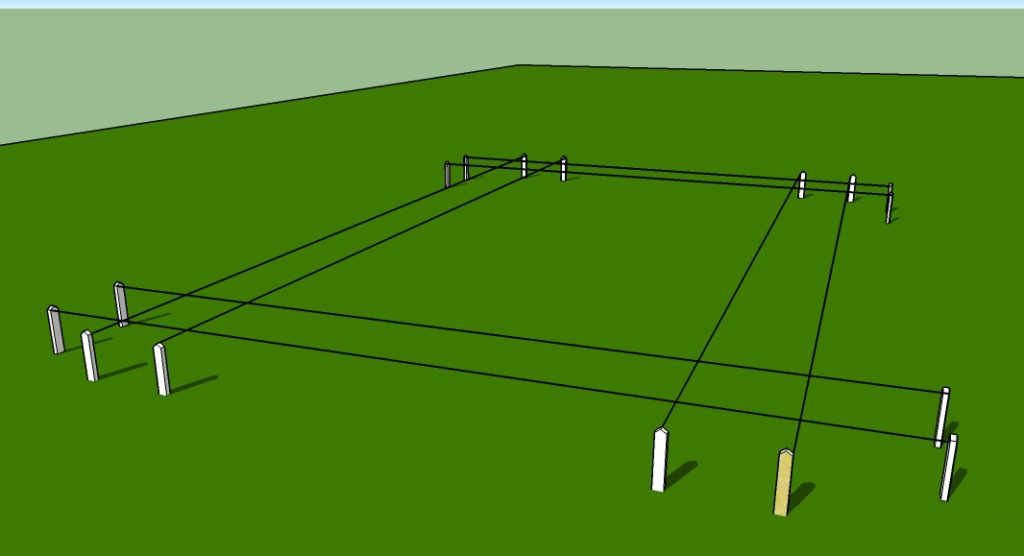
It remains to carefully measure the distances on both sides of the building in such a way that the rods located vertically are opposite each other. The distance between them can vary between 60-100 centimeters. Frame pipes made of polyethylene will be attached to these rods.
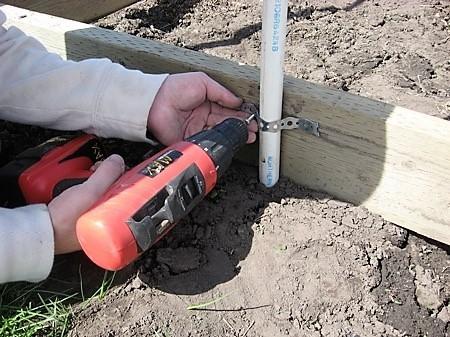
Typically, rods with a cross section of 1.2-1.5 centimeters are used with a tube section from 1.3 to 2 centimeters. The large length of the structure causes a reduction in pitch between the pipes. Rods required to hammer on the edge of the trench. After this, you should again check the opposite position and lay down the already made reinforced belt. Now it remains only to carry out pouring sand-cement mortar.When pouring a solution of all the layers and the process of their tamping should be careful to ensure that the vertical rods are not displaced.
If such an offset is present, it should be immediately corrected. Those concrete layers, so that they were already poured, should be sealed with any rod of their own, so that a layer of air escapes from the solution. When the top layer is already filled, it remains to be leveled, after which let it dry. The important point is that this process should go as naturally as possible. If it is raining outside and the foundation has not dried yet, it should be covered with a film. If the weather is too hot and dry, then it needs to be wetted, then cover with a wet sacking.
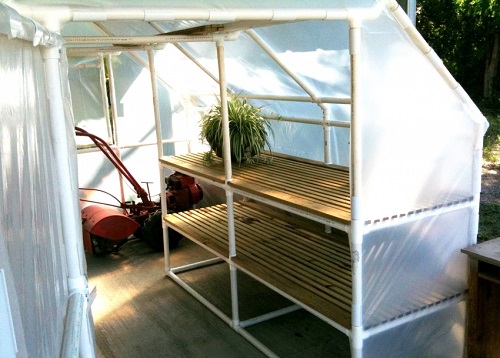
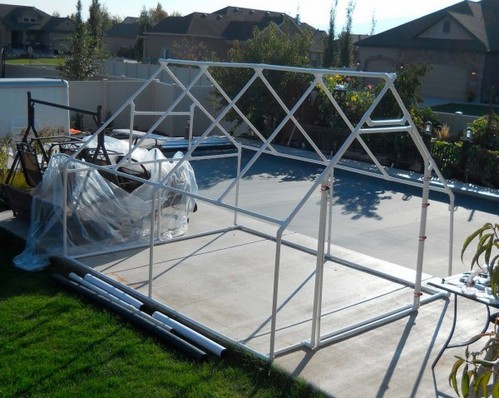
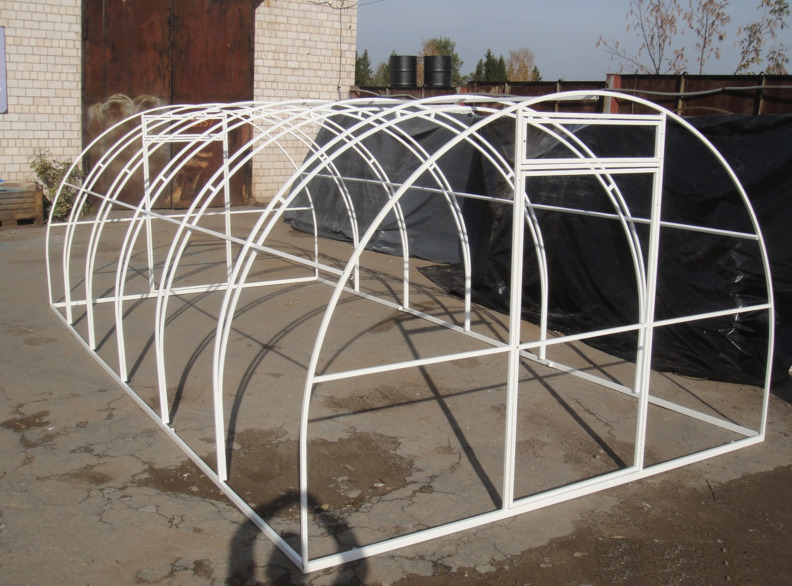
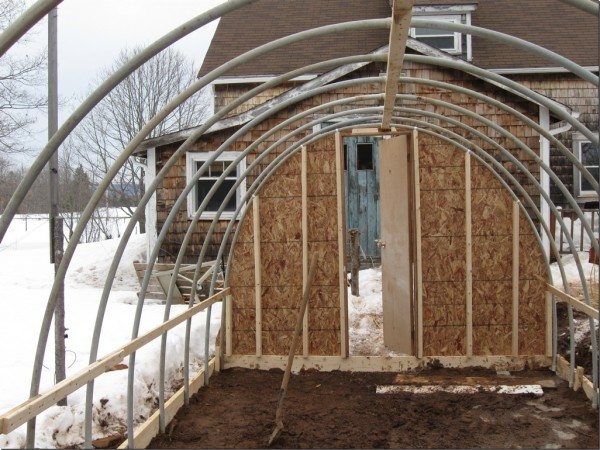
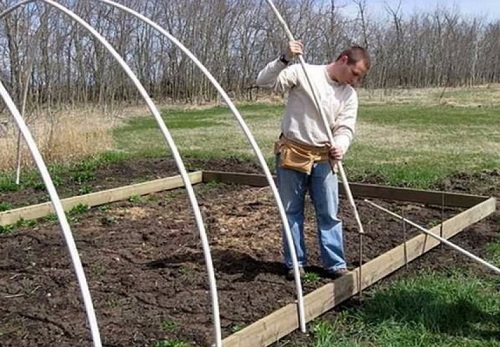
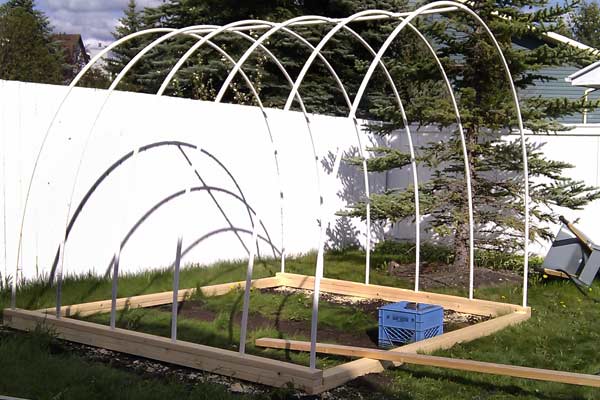
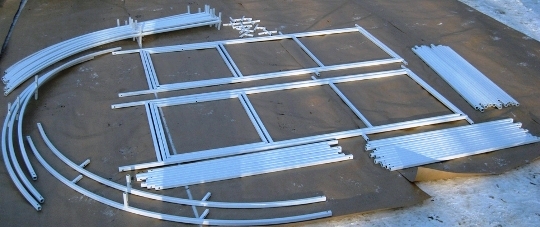
Frame
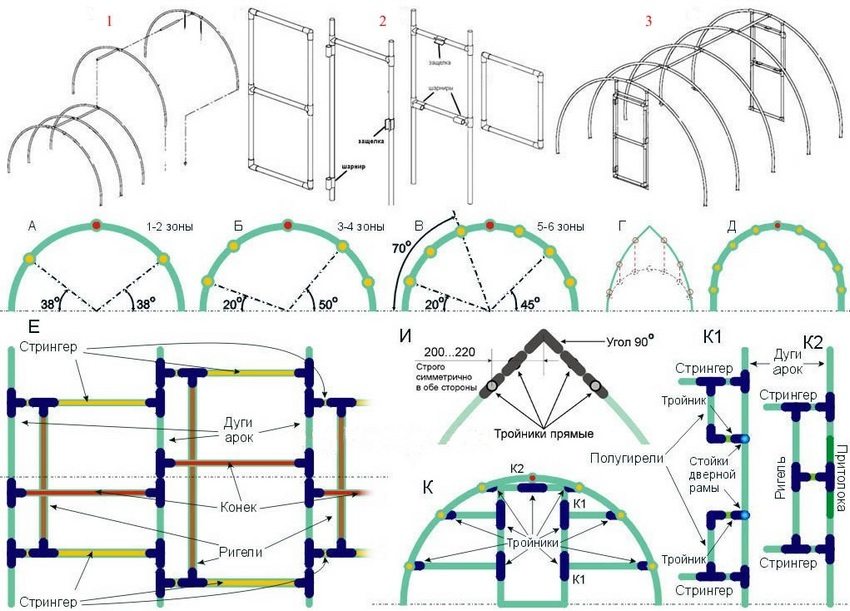
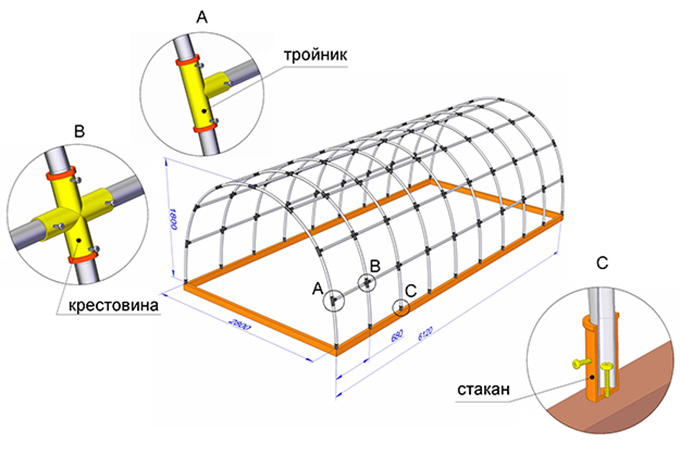
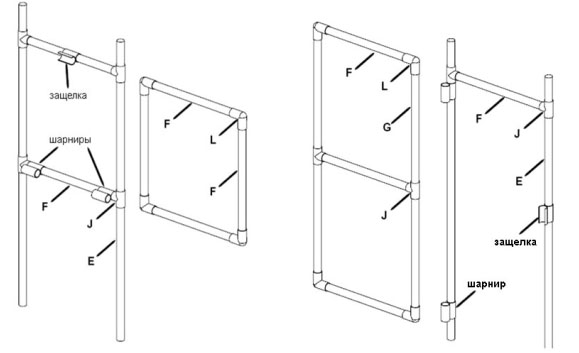
Now let's talk about the assembly of the greenhouse frame. Typically, this process begins with the fact that the required sections of plastic pipes are harvested. After they are cut, the size is better to sign, so as not to confuse. Now the build process starts. First, pipes for 5 arches of the intermediate category are taken, which are glued together in pairs using crosses. Now the arches of the end type are connected according to the variant of 3 tees and 4 pieces of pipes.Two pieces should form side arcs that are attached to tees having an angle of 45 degrees so that when bending the arch into an arc, the tee nozzles that are free look down. Subsequently, they will need to attach the rack that will be used to form a doorway.
Now you need to connect the other pieces of pipe with a 90-degree tee, and then combine all the parts into one common structure. It is important that the lateral tee socket should be perpendicular to the tee-axis with a 45 degree angle.

Two lateral-type lower screeds are assembled from 6 parts of pipes and 5 tees for each screed. The tee terminals are clearly directed to the side, because the arcs should be attached to them.
The next step consists of taking 2 end-type ties made of three pipe pieces and 2 1-plane type tees for each tie. After that, according to the previously described scheme, it is necessary to assemble the door openings. For this, pipe segments are fixed in the lower tees, and then they are connected using tees and a special jumper.Then they are glued to the pipe parts, which will act as a continuation of the racks. After a time, they will need to be cut to size when connecting to the arch.
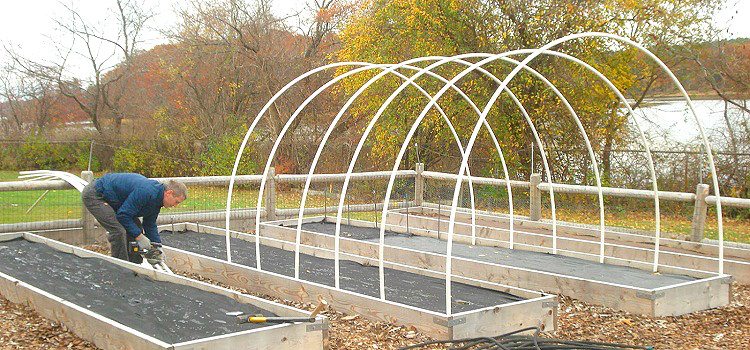
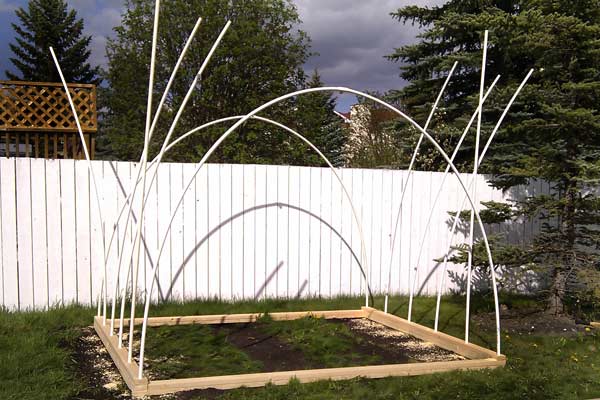
Now assemble the walls of the end type. To do this, you need to take the tie-rods of the end variant and the arches and connect them using racks, tees and 2-plane solutions from the bottom. Top of the pipe must be cut to size. After that, proceed to the frame assembly on a foundation basis. First, the installation of the arch of the end version is carried out and the subsequent connection with the lower ties. After mounting this arch to the tees, located on the bottom of the screeds, it is fastened to the end with a special jumper. According to this principle, there is a consistent consolidation of all the arches of the intermediate type. Then installation of the second wall of the end type is carried out, which also needs to be soldered to the lower and upper screed.
This is followed by checking the frame diagonals. If there are any problems, it is leveled, after which it is fastened to the timber using self-tapping screws and two-flap clamps made of metal.
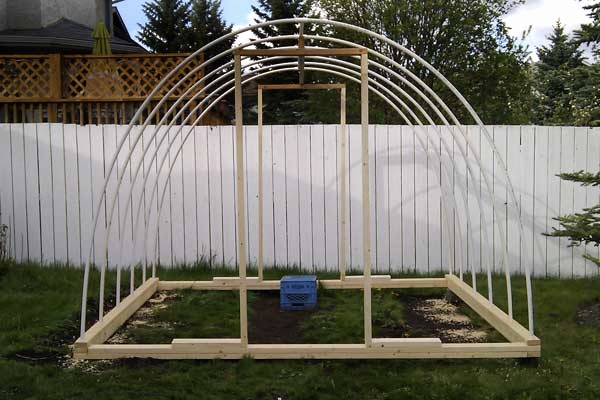
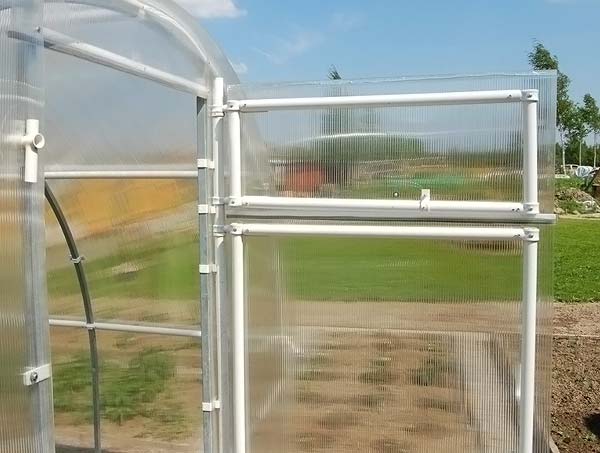
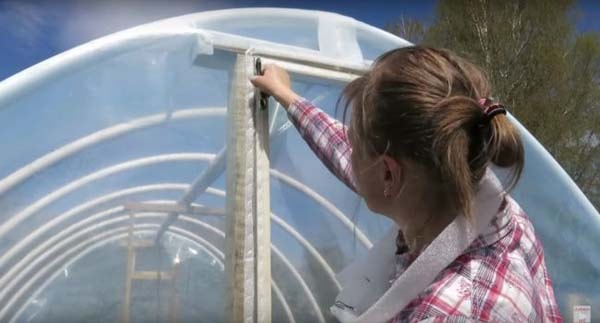
We carry out the installation of side screeds, which are attached to the special bolts of the furniture variant at a height of one and a half meters on both parts from inside the greenhouse. To give the structure greater rigidity, it is necessary to attach long-side grip. After this, the process of forming the frame enters the finish line. First, the window vents and doors are assembled from pieces of pipes, angles and tees according to the scheme, and window panes are attached to the door frames on hinges using self-tapping screws. Hinges on the door frame are also attached.
After that, the doors are attached to the doorways with the help of hinges and the installation of the screeds from the pipes with the help of special bolts for furniture is carried out.
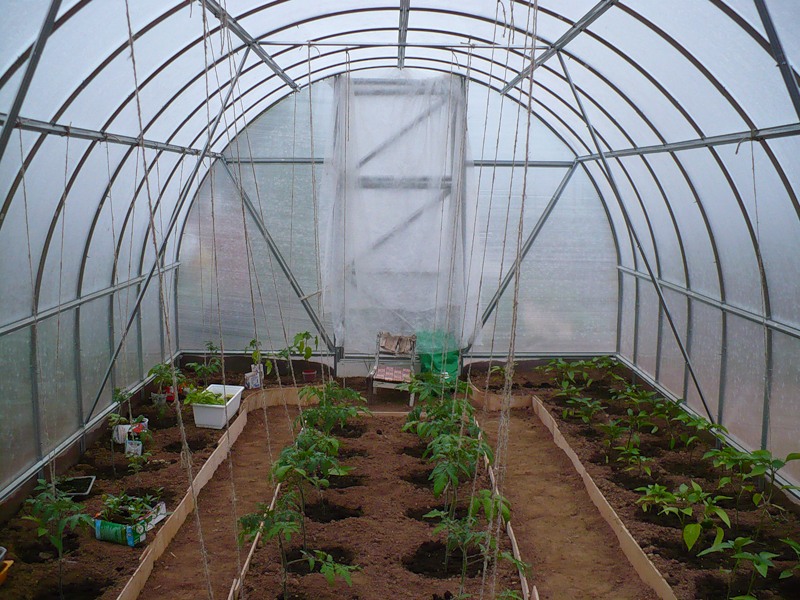
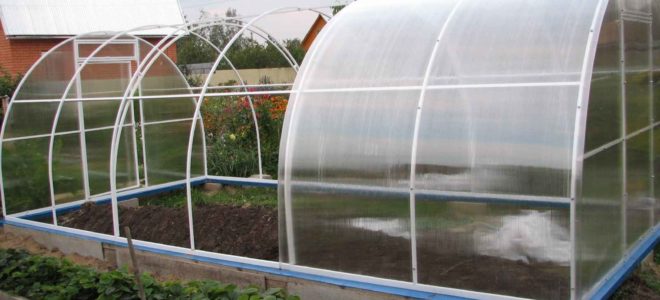
Sheathing
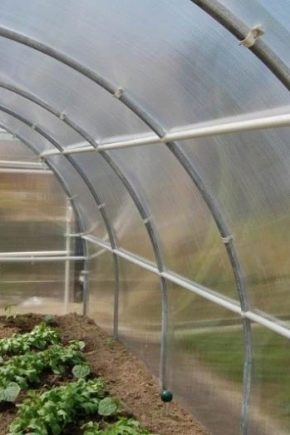
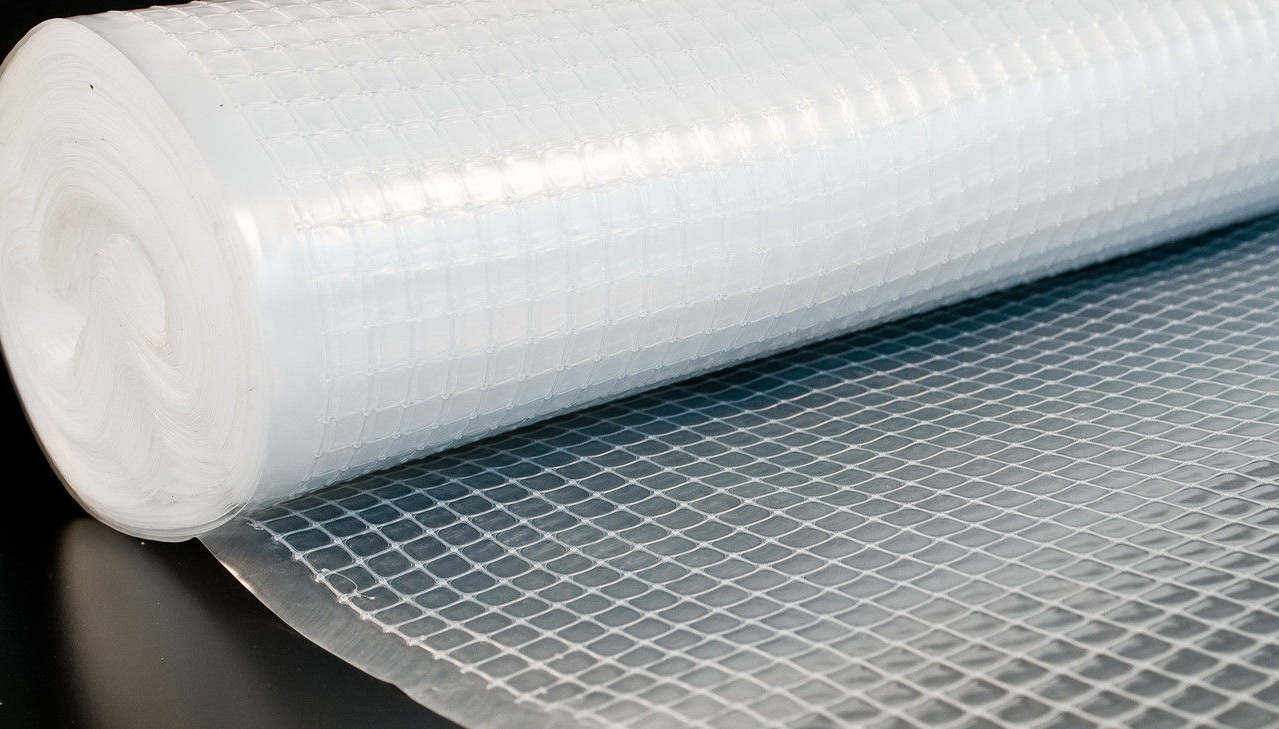
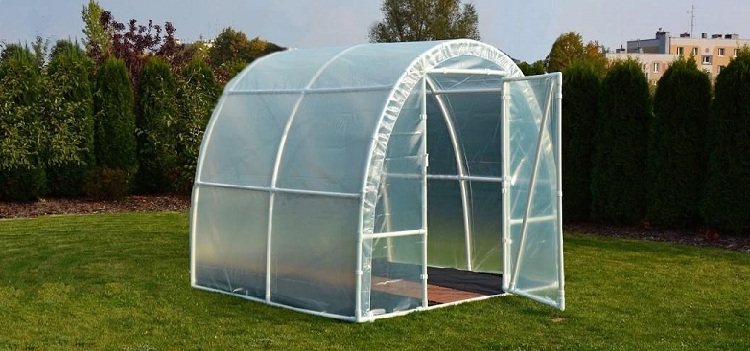
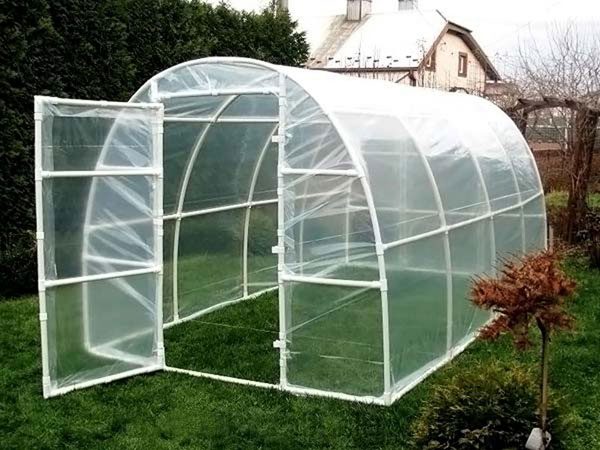
Once the frame has been completed, it remains to proceed to the lining of the structure. Consider how to do this on the example of polyethylene. It is best to do this at a temperature of about 20 degrees Celsius, so that the material does not sag in the future. Polyethylene is attached with clips, which makes it possible, if necessary, to tighten the film and eliminate sagging. Where the film is in contact with the ground, you can sprinkle it and put some weighting on top.
To make it last longer, it is better to use reinforced or a material with a large number of layers, which has excellent indicators of wear resistance, strength and tightness. The disadvantage of using such material is that it is short-lived. This film is usually used one or two seasons, after which it must be replaced. And the film coating usually can not provide adequate thermal insulation.
Care Tips
To extend the life of this type of greenhouse, you should follow certain tips. The first point to be aware of is that it is better to make the PVC construction collapsible so that it can be removed during the cold season. This will significantly extend its use. Typically, such designs are solutions for screws, which are easy to clean in the fall in the barn. The second point to be aware of is that if the greenhouse does not understand, then it will be necessary to constantly clear the snow from it. It is possible, however, for the winter period to simply dismantle the film and carefully fold it in a dry place. Then it will not be deformed ahead of time, but it should also be dismantled carefully.
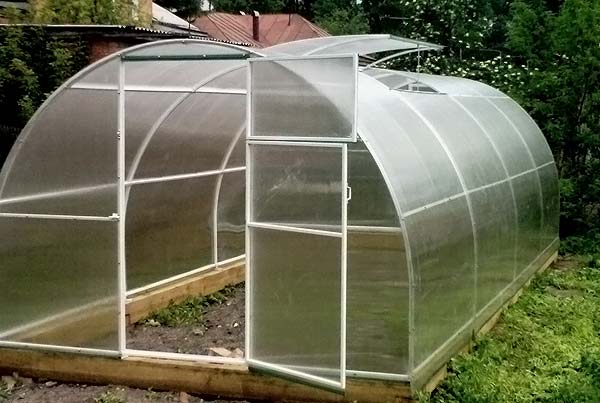
The third point will be relevant if the homemade greenhouse is covered with polycarbonate. In this case, in the autumn and spring, it should be washed to exterminate the spores of fungi and various pests. By the way, if polycarbonate was used for plating, the thickness of which is small, then it would not be superfluous to install special vertical supports for the winter so that when a large mass of snow accumulates on the roof, the roof simply does not collapse.
Examples of finished buildings
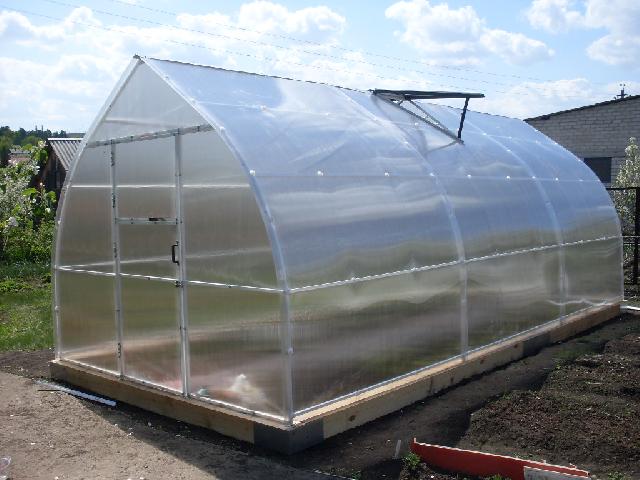
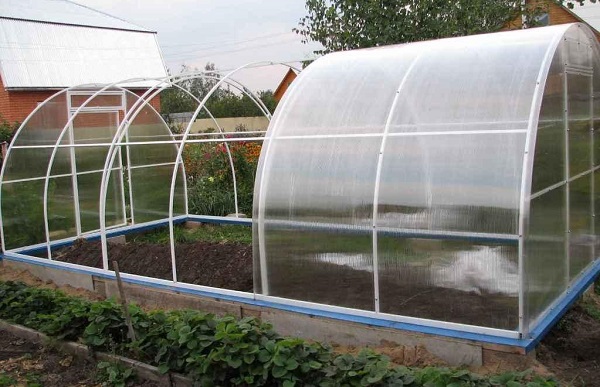
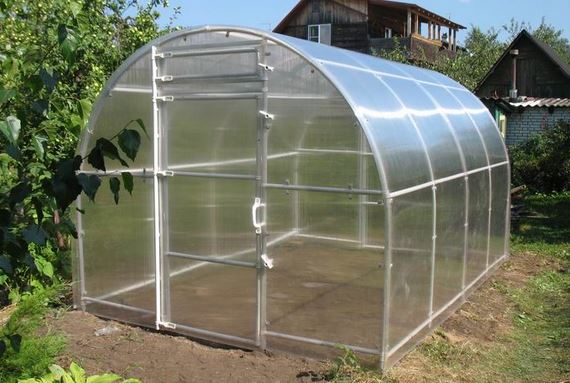
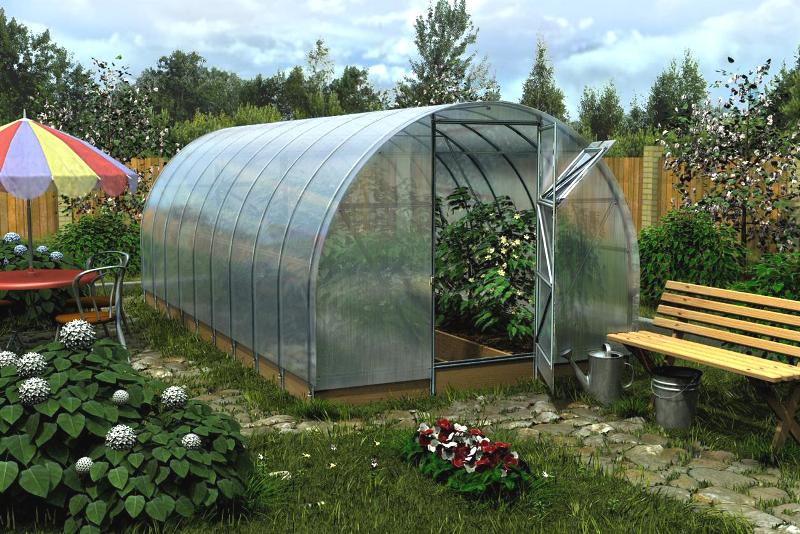
An interesting type of such a structure would be a greenhouse called “Birch”. It is considered one of the most popular today and is intended for polycarbonate coating with a thickness of up to 4 millimeters. This model has a very thoughtful configuration with a wide base and a large area for landing. This means that it can be used for planting various crops: cucumbers, tomatoes, peppers, and so on.
At the same time, the greenhouse has a decrease in volume, which means that the space will warm up faster. Such a solution is usually installed on a foundation. Moreover, it is enough even a bar-shaped variant that will be impregnated with an antiseptic.If you wish, you can dismantle it for the winter, and you can easily change the location of such a greenhouse.
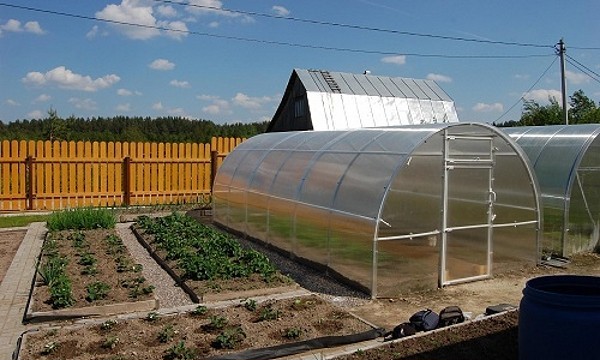
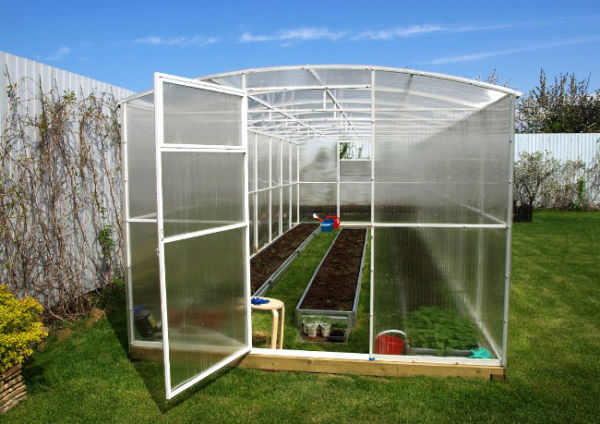
Another option that will also be interesting is the “Dachnaya-2DUM” model. This model of the greenhouse is designed for cellular polycarbonate, thanks to which the arched design makes it possible to minimize the number of joints and moisture ingress into the cells. On top of this greenhouse is covered with solid six-meter sheets, which have a thickness of 4 millimeters. There are two modifications of this model - with a base length of 4.5 and 8 meters. Due to its design, this greenhouse warms up perfectly at any time of the year, which allows even in cold latitudes to grow crops from March to October.
By the way, this model has a small mass, for which reason it is simply fixed on the ground.
How to make a greenhouse of polypropylene pipes, see the following video.